Flesh Eaters Space Marine Kill Team

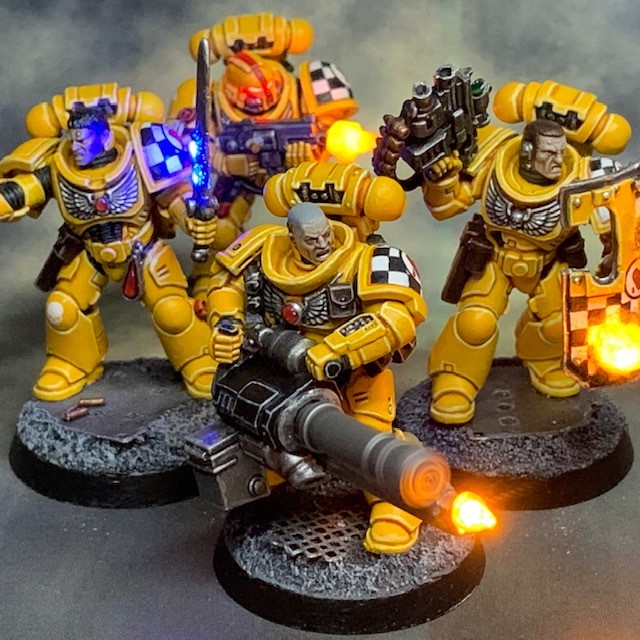
Kill Team Caro’s modus operandi is simple. Steal in, explode out.

Chaplain Urias

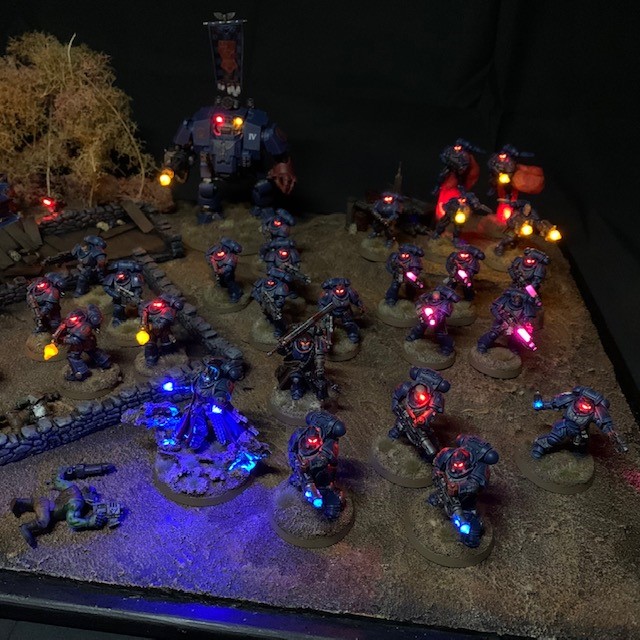
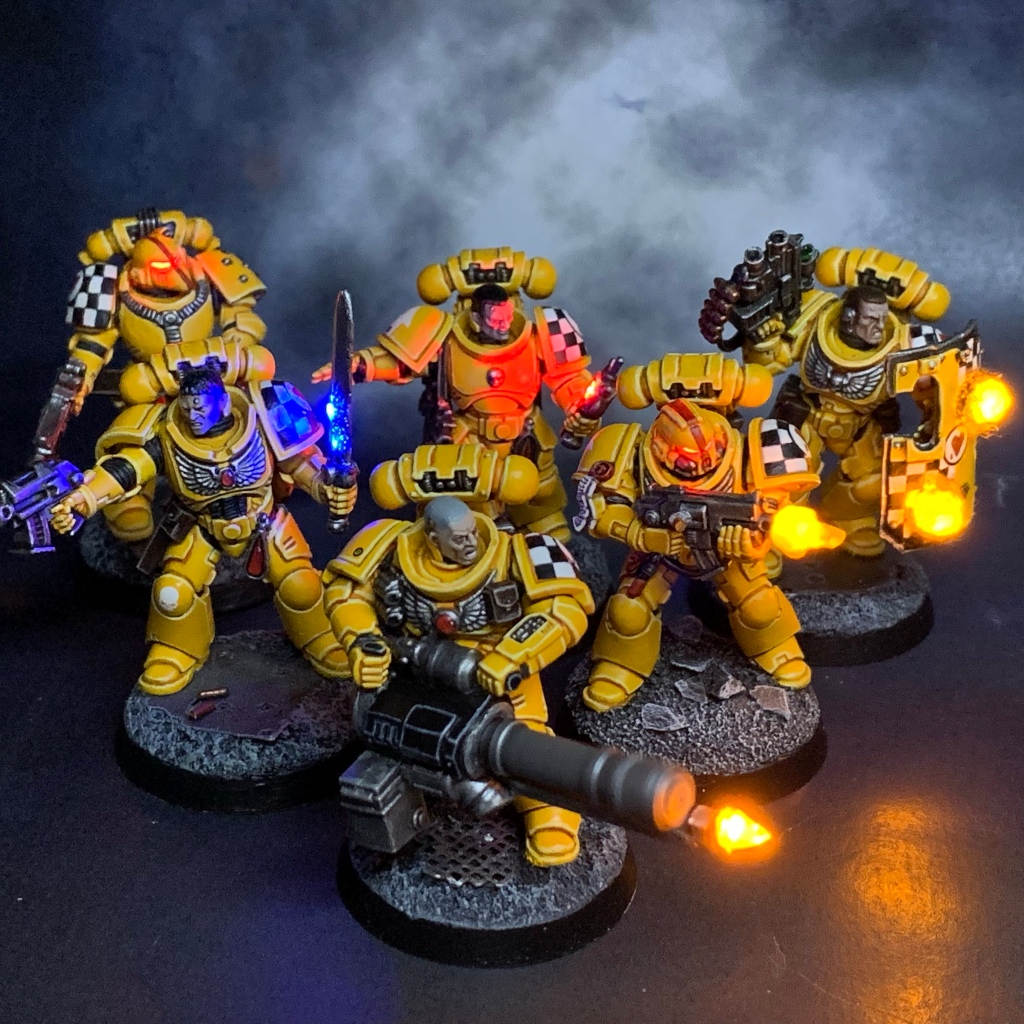
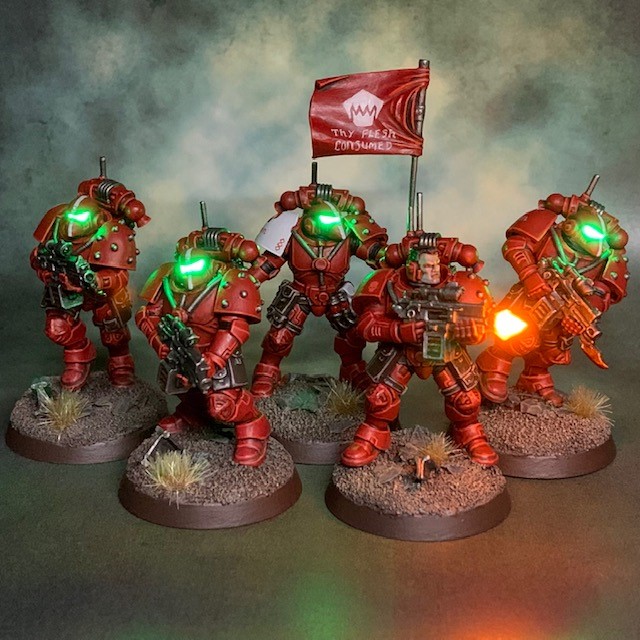
Allow me to introduce ‘Kill Team Caro’, a Flesh Eaters Infiltrator kill team and my latest LED Space Marine project. This kill team was built with two things in mind; firstly, the new edition of the Kill Team game. Secondly, Apologist’s ‘War of the False Primarch’ community project. If you’ve never heard of the ‘War of the False Primarch’, then you’re not alone. This little-known piece of Imperial history takes place in the 34th Millennium, and is described in very few official sources.

The War of the False Primarch was a dark and bloody episode of the Imperium’s history, now largely lost to myth and purged from all records, that plunged the Segmentum Pacificus into anarchy from 780.M33 to 860.M33. The conflict was finally ended when the High Lords of Terra convened the Pentarchy of Blood and tasked five loyal Chapters to destroy eleven others that had been declared Traitoris Perdita for their actions during the war.

Imperial Armour Volume Two – Second Edition pg. 17

As Apologist was already building Silver Stars, a chapter linked with the False Primarch, I decided to join the so-called ‘Pentarchy of Blood’, those chapters who enacted the will of the High Lords of Terra on the wayward Partisan chapters. Of the five chapters who form the Pentarchy, the Flesh Eaters were the ones that appealed to me the most (and we know I already have a thing for off-beat Blood Angels successors). If you’d like to read more about the ‘War of the False Primarch’ community project, then check out the ‘Some Things Are Best Left Forgotten’ blog. You can read a battle report involving Kill Team Caro here, although you may notice their paint job was still a little “WIP” during that game!

Design & Building

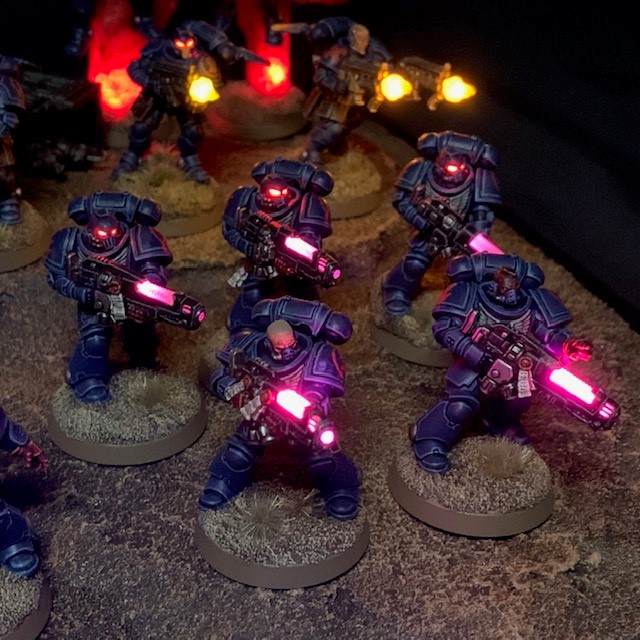
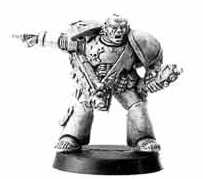
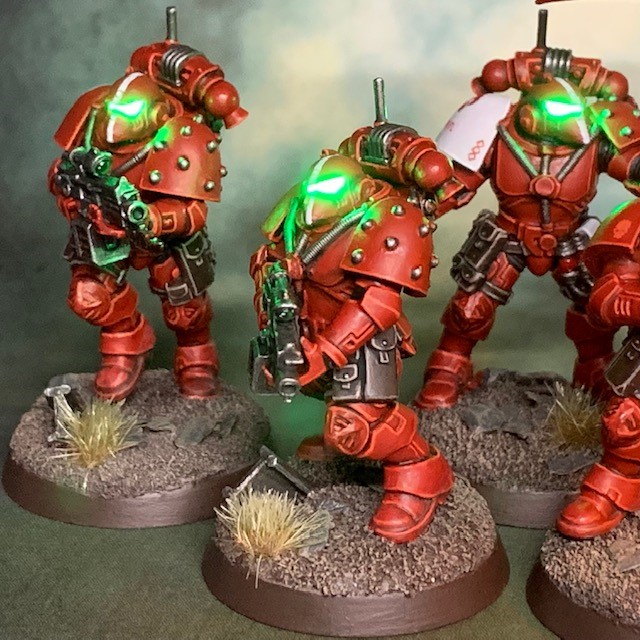
From the start my intent was to alter the MkX Phobos armour type of the Infiltrators to more closely reflect the retro look of the so-called ‘Imperial Marine’. This was the very first Space Marine model produced by Games Workshop, pre-dating even the venerable RTB01 plastic Space Marine kit. The ‘Imperial Marine’ received an update in 2016 with a special anniversary plastic remake by Games Workshop. I adopted this aesthetic for my kill team to help them fit in with the early-Imperial period setting, and also to satisfy my love of “Beakie” Space Marines. To get the correct look, I made the changes listed below.

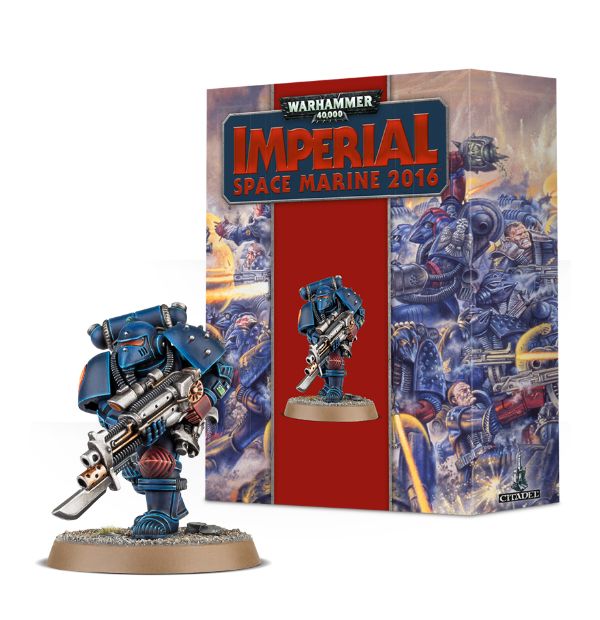
  • Swapped the helmet for a resin cast of the 2016 ‘Imperial Space Marine’ helmet
  • Swapped the shoulder pads and backpacks for the Forgeworld MkV/MkVI equivalents
  • Added 1mm wire antenna to MkVI backpacks (since Infiltrators have antenna on their backpacks)
  • Swapped the bolt carbines for Forgeworld Umbra Ferrox pattern bolt guns
  • Added power cables to the chest armour made from guitar strings
  • Re-sculpted the kneepads using modelling putty to match the distinctive ‘Imperial Space Marine’ angular kneepads
  • Removed the circular ankle stabilisers

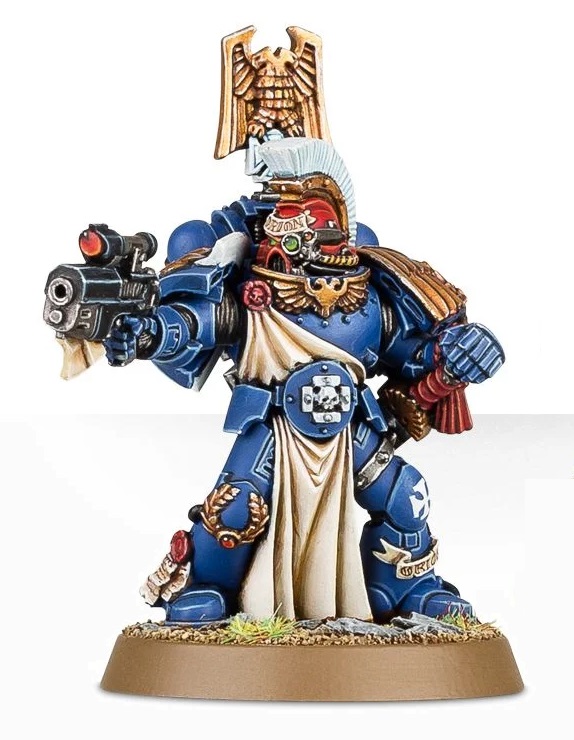
You can also see my earlier take on this armour type with my Ultramarine Veteran. I was amused to see references to the ‘Imperial’ armour variant coincidently appear in a recent White Dwarf article about Space Marine armour types. My head-canon is that ‘Imperial’ armour is just a variant of MKVI armour, perhaps a lighter recon version.

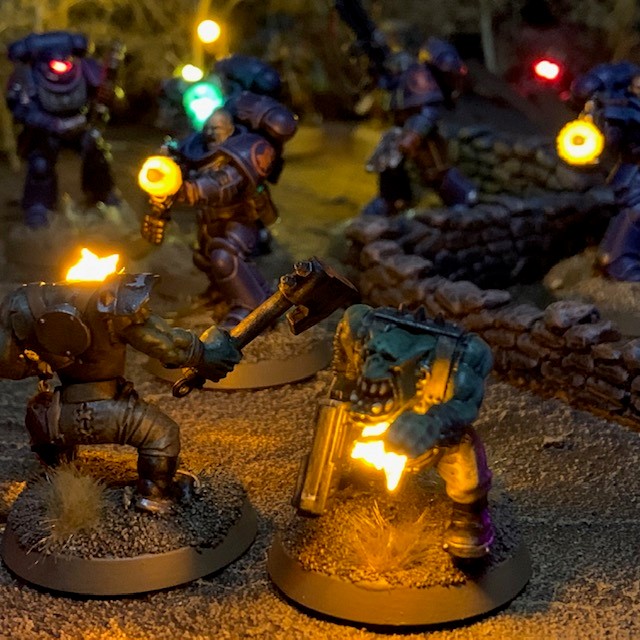
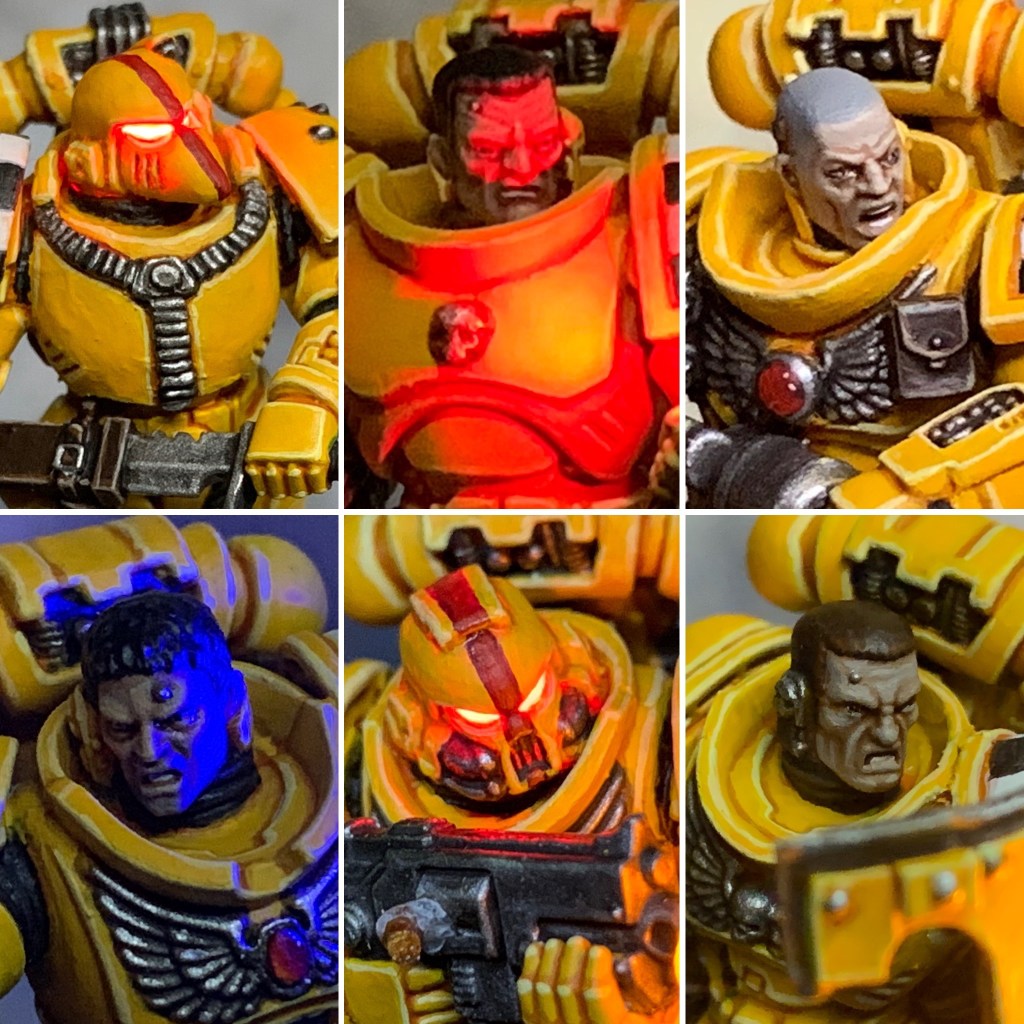
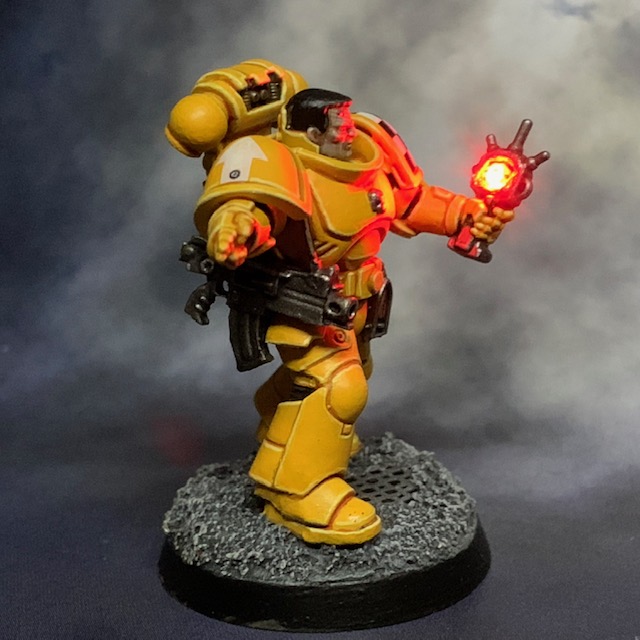
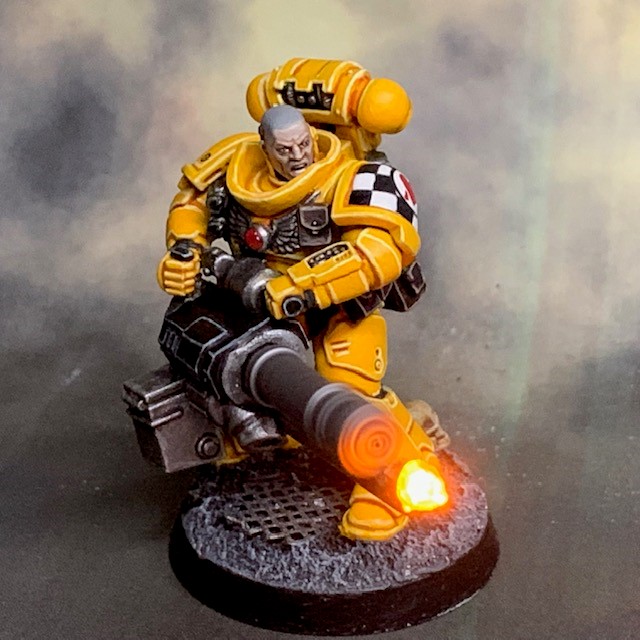
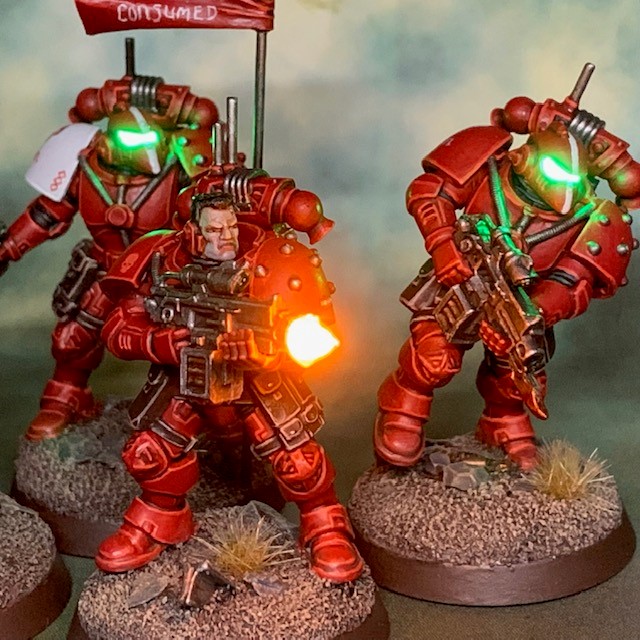
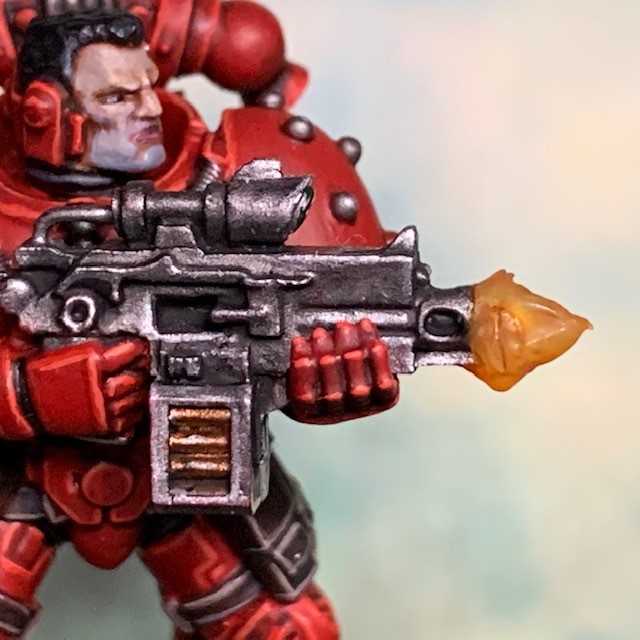
For the LED effects, the helmet eye lenses followed the technique described in my LED Eye Lens tutorial, except using a  TruOpto 1.8mm Green LED instead of the red one used in the tutorial. Sergeant Caro’s muzzle flare used the methods described in my recent Simple LED Muzzle Flare tutorial. If you’re going to give this a go yourself then please don’t forget that you can buy electronic supplies and consumables here.

I also made an effort to make the helmets and muzzle flare still look acceptable when the LEDs were switched off. I applied two thin coats of Citadel Biel-Tan Green shade to the helmet eye lenses. This gives them some colour and definition without detracting from the brightness of the LED. The muzzle flare was painted using used the techniques mentioned in the tutorial, which is basically a Citadel Fuegan Orange shade and a Lamenters Yellow glaze.

Painting

As ever, when I list my painting recipes on this blog, I’m not only recording them for those of you who are interested, but also as a reminder for myself! All paints listed are from the Citadel range.

  • Red Armour Recipe
  • Chaos Black undercoat
  • Mephiston Red base coat
  • Agrax Earthshade wash in recesses
  • Evil Sunz Scarlet edge highlight
  • Wild Rider Red fine edge highlight
  • Chapter Symbol, Helmet Stripe & Insignia Recipe
  • ‘Sketched’ in with Administratum Grey
  • Filled in with Corax White
  • Basing Recipe
  • Sand, slate and PVA glue
  • Chaos Black undercoat
  • Rhinox Hide base coat on sand
  • Skavenblight Dinge base coat on slate
  • 50:50 Rhinox Hide:Zandri Dust drybrush on sand
  • 50:50 Skavenblight Dinge:Zandri Dust drybrush on slate
  • Zandri Dust drybrush on sand and slate
  • Middenland Tufts added
  • Rhinox Hide on base rims

Personalities & Insignia

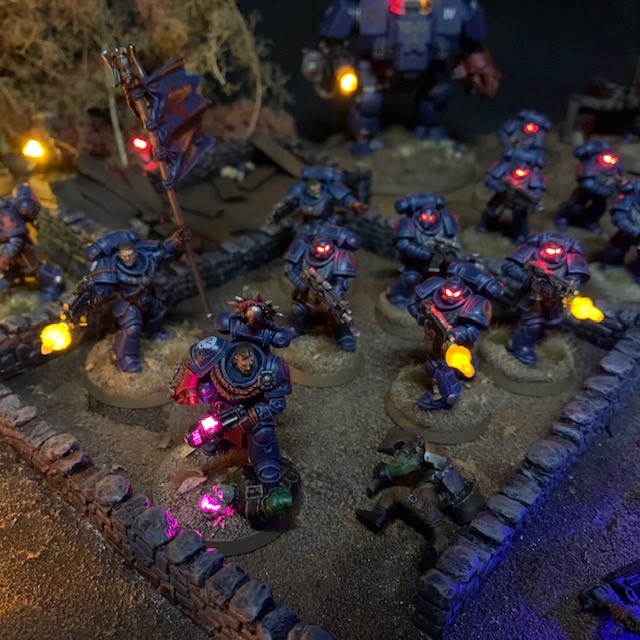
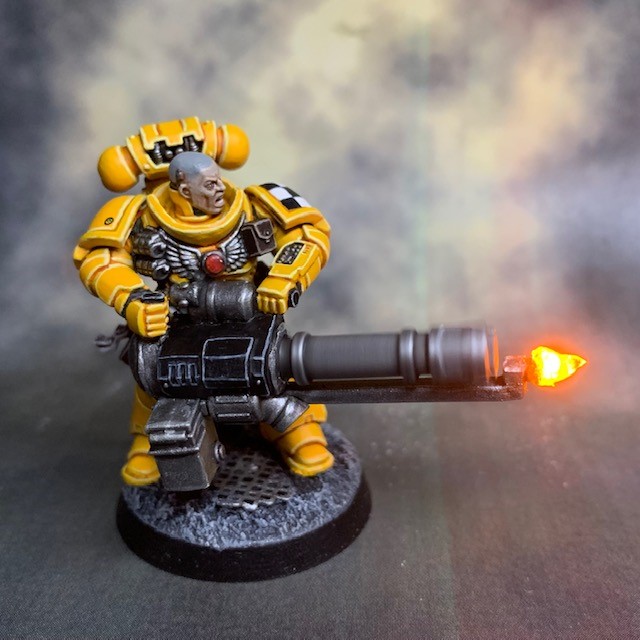
Attempting to stick the the ‘retro’ aesthetic, I went ‘old-school’ with the insignia. Every Marine has their name on their shoulder pad, as well as the Rogue Trader-era black and white ‘bolter’ symbol. Space Marines used to have a symbol on their shoulder pad denoting which weapon they were equipped with! You may also notice the honour markings on Sergeant Caro’s helmet, which indicate he is a veteran of the famous ‘Jaws of Doom’ assault squad.

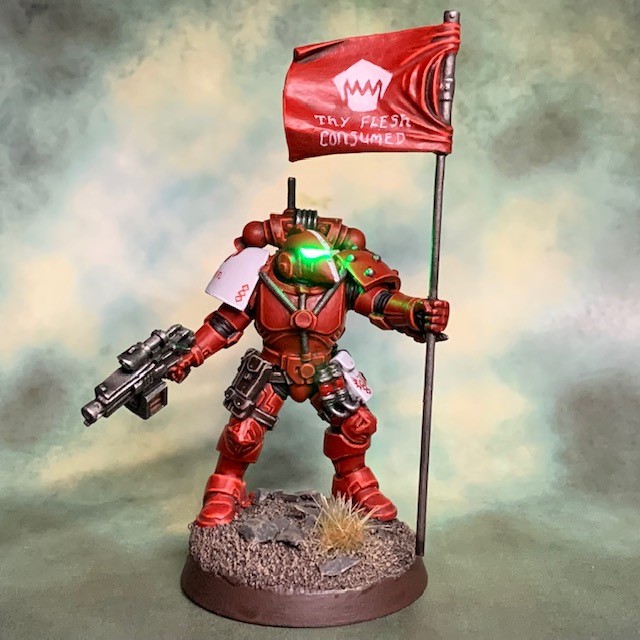
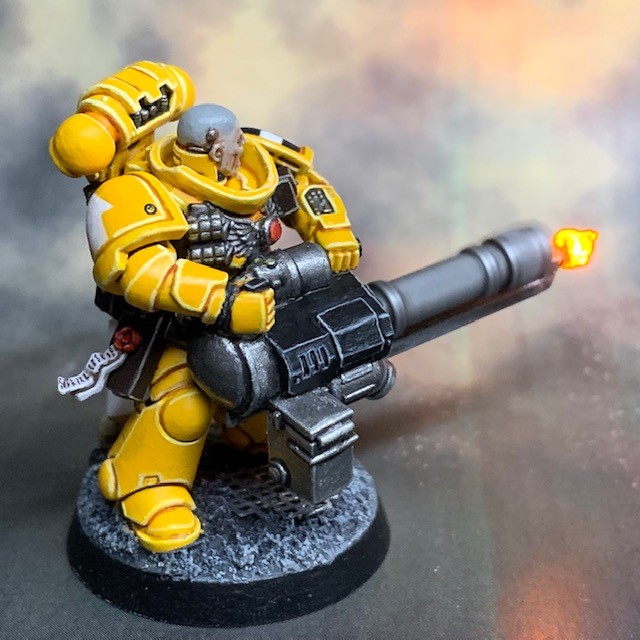
Brother Holman is a Helix Adept, basically an apothecary in training. I gave him a “Terror Banner” that he can unfurl once the Infiltrators have revealed themselves and the shooting begins. The Partisans shouldn’t be in any doubt about exactly who it is that has come for them! This is also a nod to the classic Blood Angel apothecary who carried a large banner in one hand. The banner is made from a Tactical Marine back banner turned on its side.

That’s all for today, I hope you enjoyed it. I’m really pleased with this unit, and think I may have caught the Flesh Eaters bug (metaphorically, not the actual one)! I’ll probably be posting more individual pictures of these models throughout the week on my Twitter and Instagram. I’ve had to stare at these guys for hours and hours, so now so does everyone else, haha!

“Revenge at the Farm” Crimson Fists ‘Armies on Parade’ 2021

Thirty-four years after the Warhammer 40,000 Rogue Trader introductory scenario “Battle at the Farm”, the Crimson Fists are back at the site of their infamous retreat for revenge – Primaris style! “Revenge at the Farm” is my entry for Games Workshop’s ‘Armies on Parade’ 2021 event. My entry to ‘Armies on Parade’ 2020 was quite simple, basically just a tiered hill to display the LED Crimson Fists that I’d completed so far. This time, I wanted to tell a bit more of a story!

Captain Grimstone of the Fourth Company oversees the purging of the ruined farmstead. Epistolary Gabriel, Crimson Fists Geokinetic, leads the Eradicators to secure the left flank.

“Purge the xenos! No survivors!” The Crimson Fists don’t have it all their own way though – kunnin’ kommandoes counter-attack from the treeline!

Hellblaster Squad Ordonéz provides covering fire from Bultha’s Rise. The Reivers home in on the red signal flares to secure the ruined generator.

Ancient Santec strides past the overgrown orchard and the ruins of the farmhouse. It looks like Thrugg Bullneck didn’t escape the original battle with his stolen loot. Perhaps the grot kommando will have more luck?

The farm – then and now. This is the map of the farm as shown in the Warhammer 40,000 first edition rulebook. I had to take some slight artistic license with the layout to accommodate the models in a pleasing way. For example, if the stone walls or ruined farmhouse were too tall then it would have obscured models behind. Similarly, I changed the contours of the hills to better display the units on that flank. I also “zoomed in” slightly on the map so I didn’t have a lot of ‘dead space’ behind the orchard. But overall I think it’s still recognisable as the same location.

That’s it for today, I hope you’ve enjoyed the pictures of my Crimson Fists and the display board. I’ll be back later in the week to take a closer look at some of the Orks who are not having a good day at the farm! As ever, please don’t forget that if you want to have a go at LED miniatures yourself then my tutorials are here and you can shop for the required tools and consumables here.

Lamenters Kill Team Lugeo

The strong are strongest in the kill zone.

Sergeant Lugeo

So, almost two years after starting this Badab Kill Team project, how are things looking for Kill Team Lugeo? Quite good I think! I had originally planned seven members for the squad, and the seventh is already on the workbench. But I’d like to see the upcoming new Kill Team rules and find out exactly how many models are in an Adeptus Astartes fire team and what specialists they can have before finalising the squad. Once I’ve read and understood the new rules, I might even get a game in with them!

If you’d like to read any of the previous articles about individual members of the Kill Team and how their LED effects were made, you can either search my blog for articles tagged “Lamenters” or click the links below.

Brother Haemis | Brother Ardito | Brother Salvio

Sgt. Lugeo | Brother Quartus | Brother Achillus

That’s all for this week. See you again soon, and best of luck to anyone trying to pre-order the new edition of Kill Team this weekend!

Lamenter Comms Specialist

Enemy contacts are inside the perimeter. Unfortunately for them, so are we.

– Brother Ardito, Comms Specialist

Another Lamenter joins my long running Badab War era Kill Team. Brother Ardito is a Comms Specialist, so let’s hope that’s still an option for Adeptus Astartes Kill Teams in the new edition of the game!

Influence

For this model I was strongly influenced by the classic metal sergeant from the old Space Marine command squad box (sorry, this was the best reference image I could find). I didn’t set out to copy it exactly, just to capture the general energy and atmosphere of the model. Brother Ardito is made from the ‘Easy to Build’ Primaris Marine with auspex, although as you can see he’s been heavily altered to change the pose, details and make it appear that he’s wearing MkVII power armour, in keeping with the Badab-era setting.

Effects

The LED effects were achieved using the principles set out in my LED Hololith tutorial, although instead of a wrist-mounted hololith, the LED is mounted in the auspex screen. The LED is a 3V Red Ultra Nano SMD Chip LEDs available from Small Scale Lights, in series with the supplied 100Ω resistor. Although green is often traditional for scanner screens, I decided to go with red to match many of the other LEDs in the team and avoid having a mixture of too many colours.

The wire to the LED runs through the arm, torso and leg to the battery and switch in the base. A more detailed description can be found in my LED Hololith tutorial, as mentioned above. If you want to have a go yourself and you need tools and supplies, you can find them here.

First I painted the auspex screen Citadel Khorne Red, trying my best not to get any paint on the LED. Once the paint was dried I filled the screen area with the ever-useful Water Splash Effect Gel, available from Green Stuff World. This goes on white but is transparent when dried. You will need to apply it slowly and patiently, and use a flat tool to flatten it down. Otherwise you may have a lumpy screen!

Once the ‘screen’ was dry I painted it with two coats of Citadel Blood Angels Red Contrast, allowing the paint to dry between each application. Finally, I painted a pattern of ‘contacts’ on the ‘screen’ with Citadel Wild Rider red. This was more for visual interest when the LED is off as the LED is so bright it has little effect when it was on.

That’s all for today, I hope you found that interesting. Come back soon for more Lamenter action as the Kill Team slowly comes together!

Lamenter Heavy with LED Motorised Assault Cannon

Debate the Tyrant’s cause if you like, but it’s hard to argue with 1200 rounds a minute.

Brother Salvio, Lamenter heavy weapons specialist

This is another model that has been living in my head as a nebulous idea for well over a year. In fact, I’d say my failure to settle on a way to execute this concept for my ‘Heavy’ specialist is why my seven-man Lamenters Kill Team project has currently been running for a year and a half! But now he’s done, so let’s have a big round of applause to welcome Brother Salvio!

Influence

There are a number of sources that I’m ‘riffing’ off with this member of the Kill Team, many of them from video games. The Team Fortress 2 Heavy is an obvious one, as are Halo Spartans carrying turrets (particularly Jorge-052) and even the Call of Duty Juggernaut. What is boils down to is a heavily armoured soldier carrying a large gun that you might normally expect to find on a vehicle! To help sell the theme of heavy armour, I decided on MkVIII ‘Errant’ armour for this marine, particularly as this has the enhanced face and neck protection seen in many of the characters linked above.

If you haven’t been following along with my Lamenters Kill Team project, then I should explain that it is intended to be Badab War era, so these are ‘true scale’ Marines rather than Primaris Marines. Every member of the team so far has been wearing armour appropriate to the era, which so far means MkVI, MkVII and MKVIII. So how did I go about turning MkX armour into MkVIII to match the reference images shown above?

  • Used modelling putty to increase the height of the neck gorget.
  • Selected up-armoured shoulder pads with elbow joint protection.
  • Replaced the skull on the chest with a jewel.
  • Filled in the detail on the wrist bracers to create a smoother armoured feel.
  • Removed the additional protection from the top of the MkX knee pads.
  • Left the MkX ankle joints intact – this was the first time I noticed MkVIII armour also uses them!
  • Replaced the Primaris backpack with a Tactical backpack.

I also added extra ammo pouches and grenades to enhance the impression of bulkiness.

Effects

I’ve just published a full LED Motorised Assault Cannon tutorial on my website here, so I won’t go into too much detail in this post on how the assault cannon effects were achieved. The short version is that I used a 3V miniature motor, a Small Scale Miniatures 3V yellow 0805 chip LED and my Nighthaunt Candle technique to creature the muzzle flare.

That’s it for this week, I hope you found that interesting. Come back again soon to find out if I ever finish this bloody Lamenters Kill Team, haha! Hopefully I will be able to finish them soon, as it looks like we might possibly be in for a new edition of Kill Team.