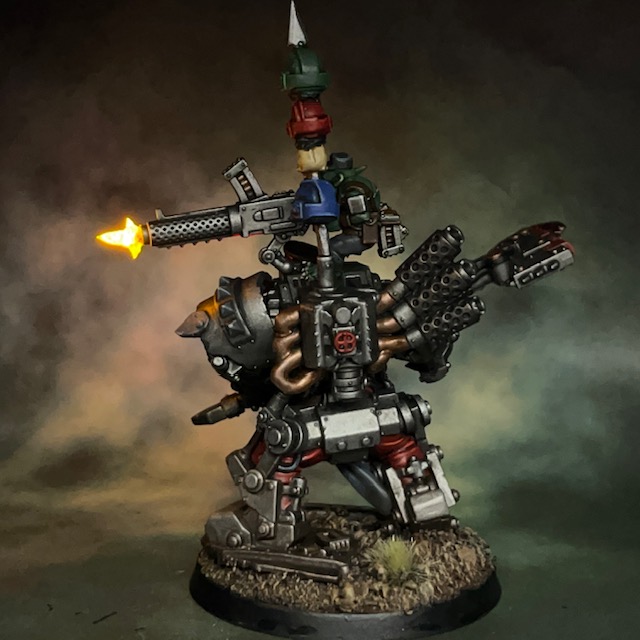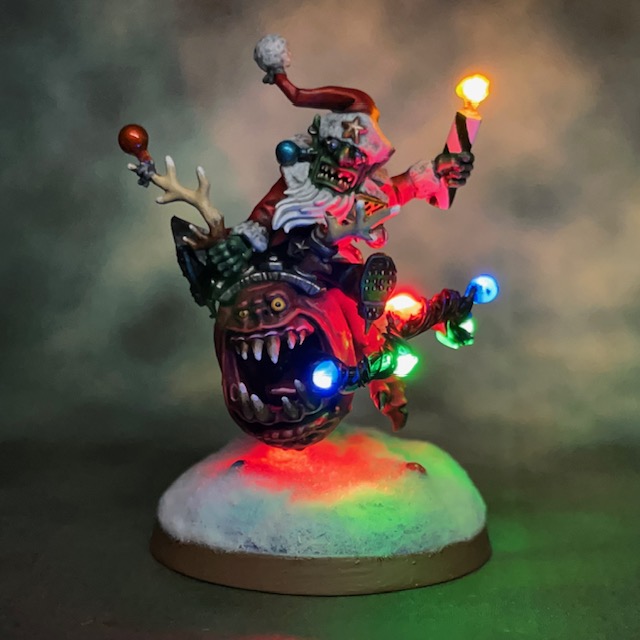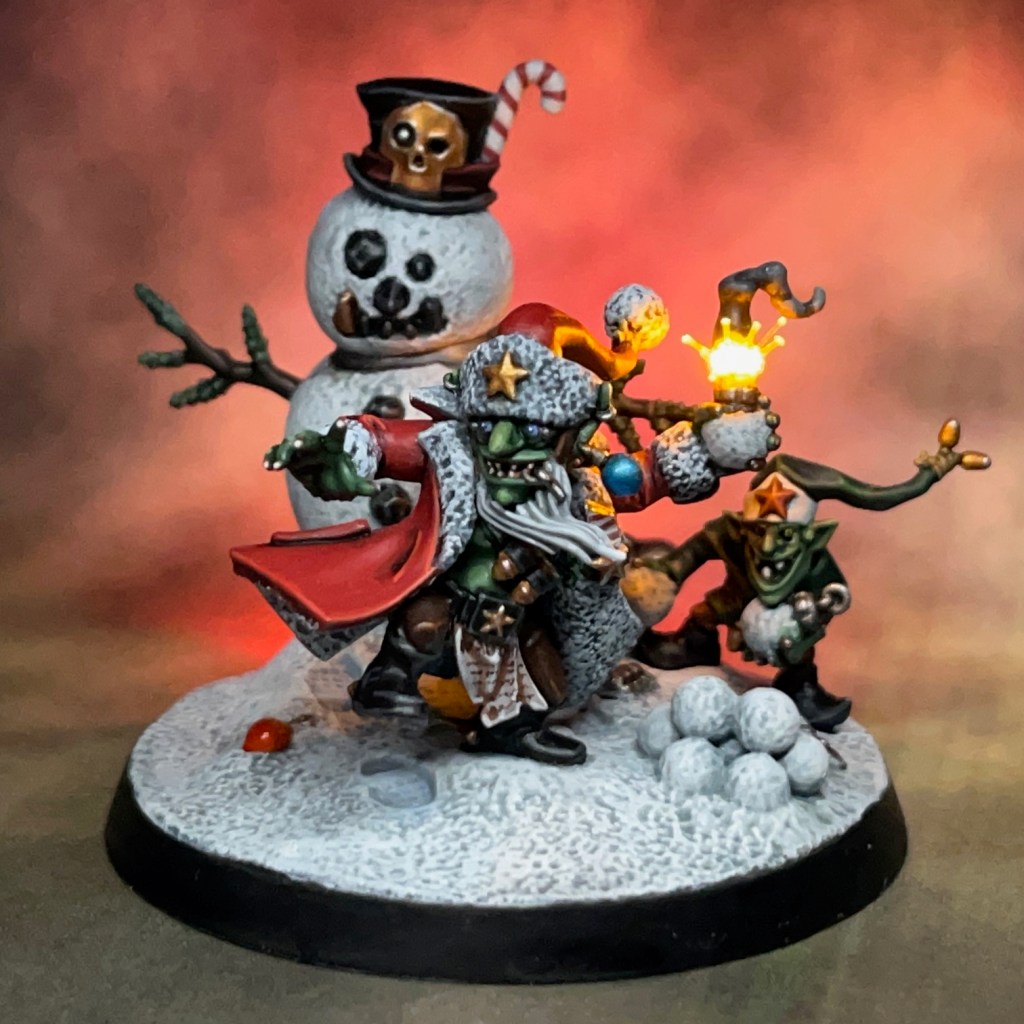
It just wouldn’t be Christmas without the Red Gobbo, so here’s my take on Games Workshop’s 2024 Christmas miniature, ‘Da Red Gobbo’s A-Bomb-Inamble Snowman’! Most of my LED miniature projects are meant for gaming so it’s always a nice change to paint a display model at this time of year. You may remember my take on Da Red Gobbo’s Surprise and Da Red Gobb & Bounca from previous years.

Modelling
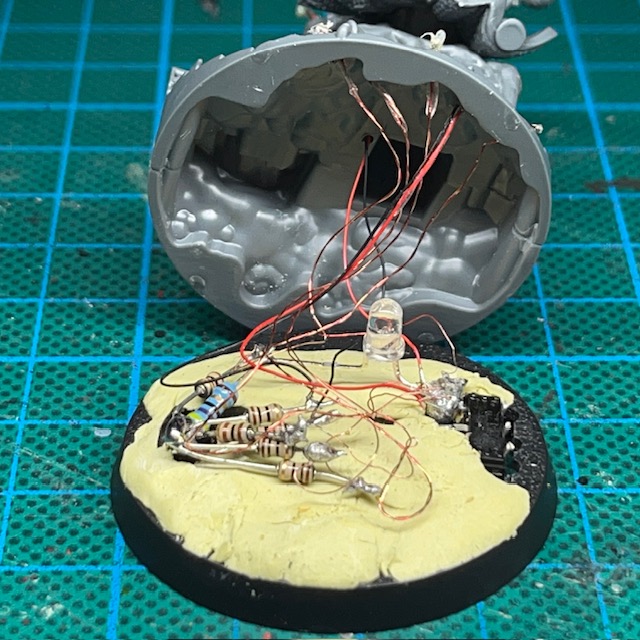
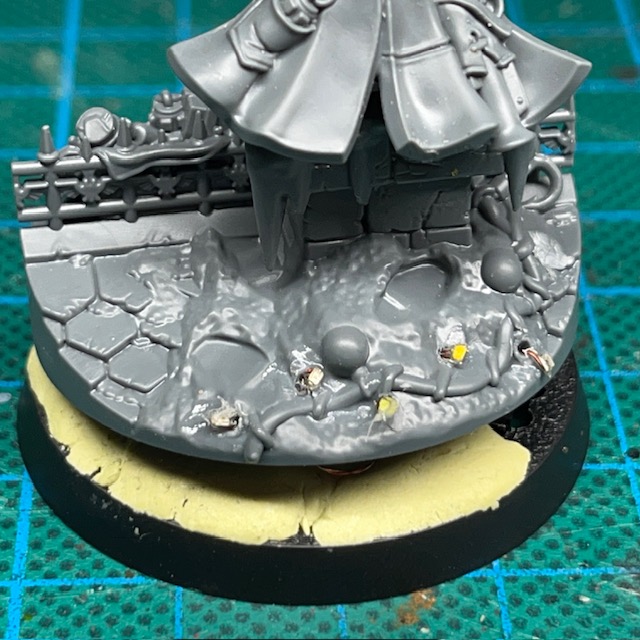
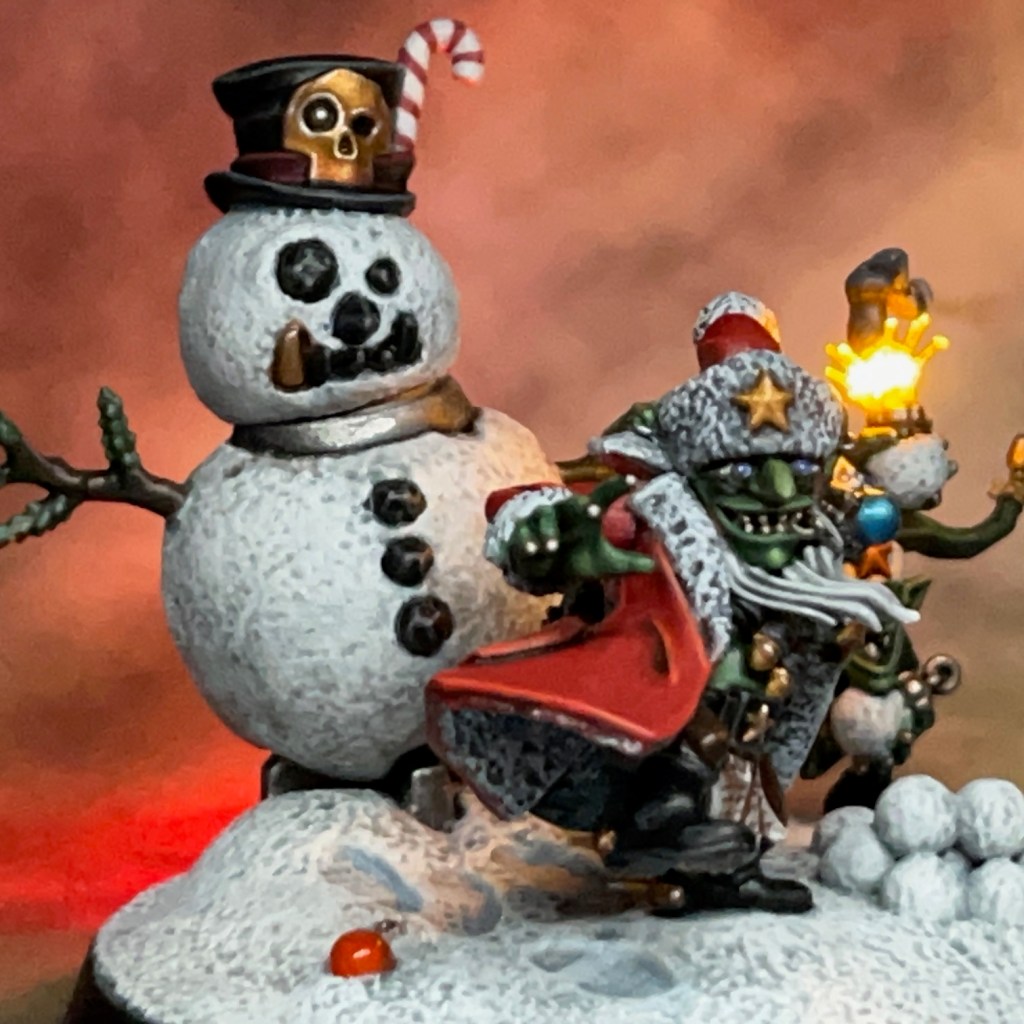
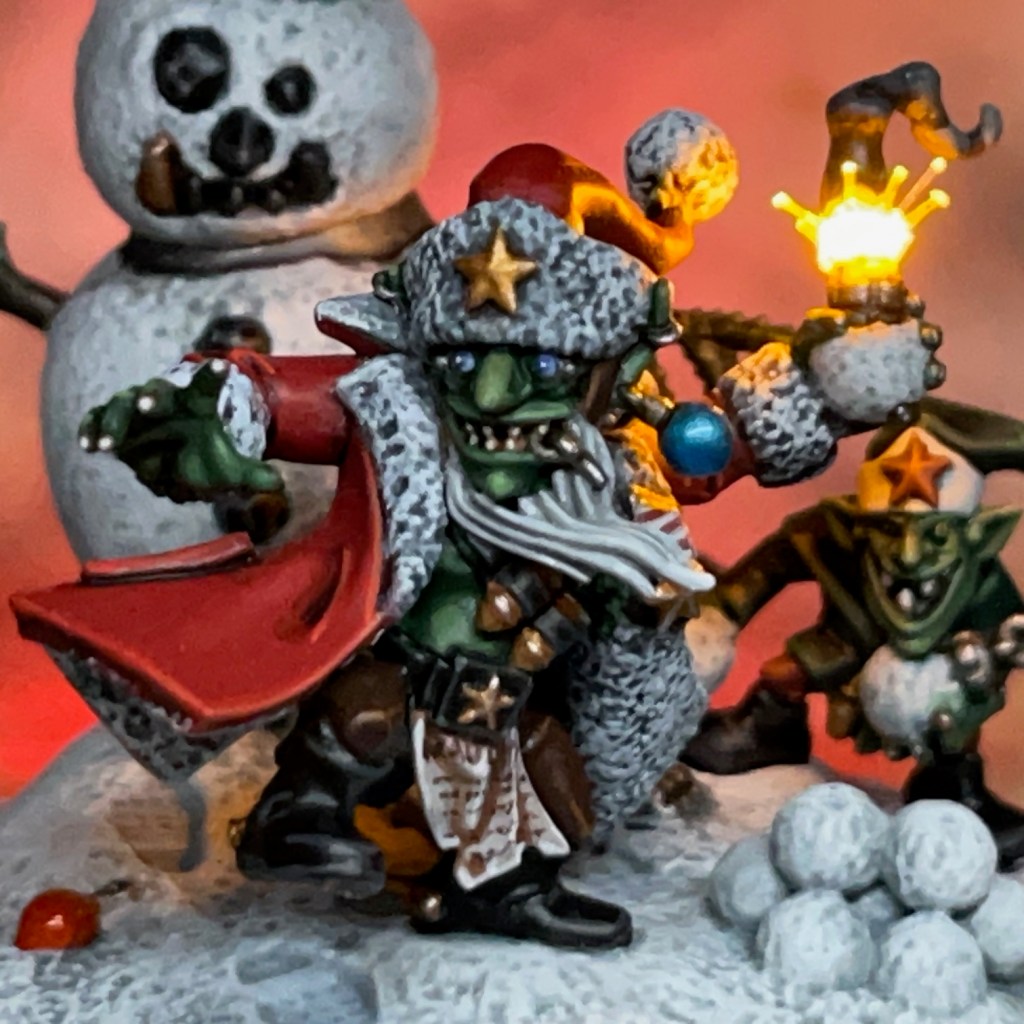
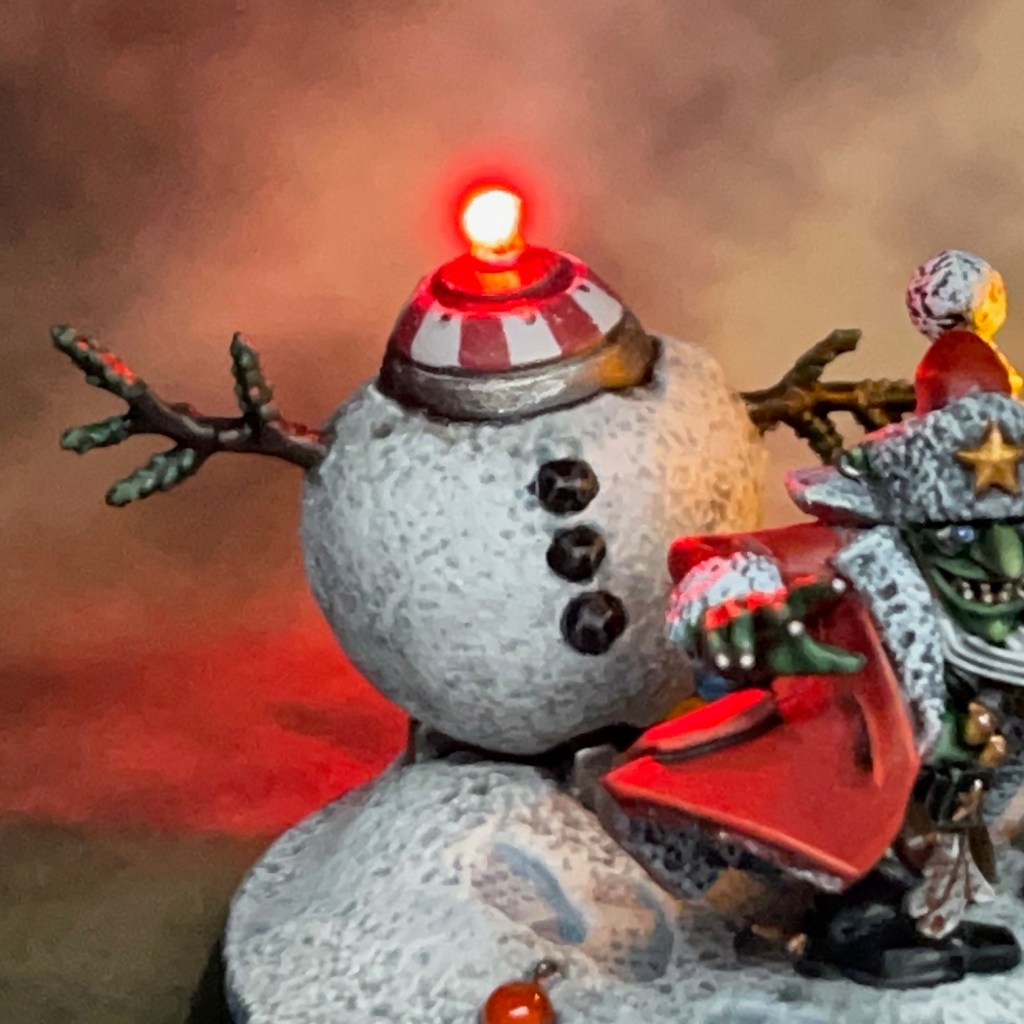
Each year when the new Red Gobbo is announced I’ve check the preview images for signs of sculpted Christmas lights and other light sources to work out how many LEDs I’m going to need to order. This year had fewer than normal. The grenade fuse was an obvious one, but there were also lights on the wire connecting the bomb timer to the snowman. As these are partially hidden, I thought it might be fun to compliment them with an additional light on top of the bomb.
The object on the end of the grot assistant’s hat are open to interpretation. They could be lights, but I decided that making them lights would draw focus away from the Red Gobbo himself, so I painted them as sleigh bells instead!


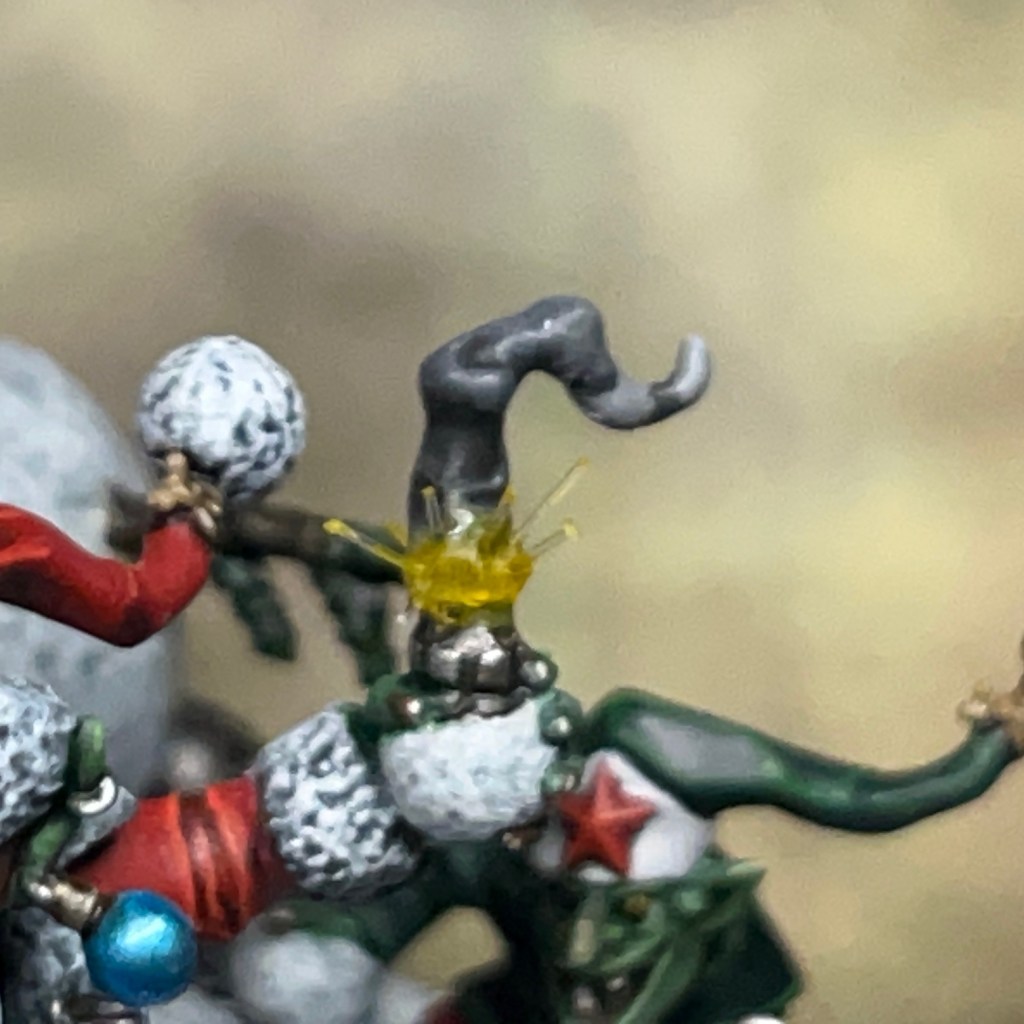
The grenade fuse effect has been created from a Yellow/Amber 0805 Chip LED (3V) coated in acrylic gel, as per my Simple Muzzle Flare tutorial. To give the impression of sparks flying out of the fuse, I also added some very small lengths of fibre optic cable to the gel before it hardened. If you don’t want to purchase a full reel of fibre optic cable for this, you can simply cut small sections from a child’s toy using a sharp hobby knife.

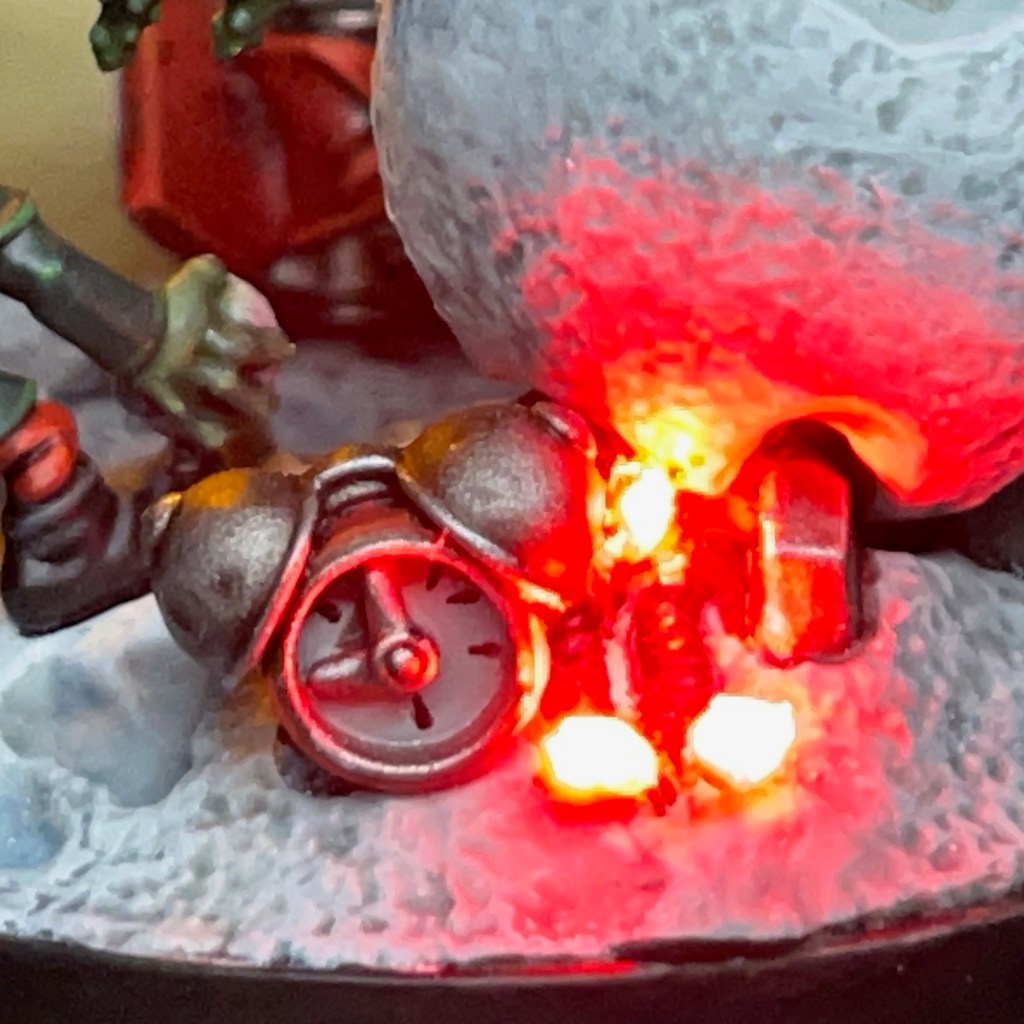
I thought it might be fun if the LEDs connected to the bomb wiring were flashing, to help sell the idea it was counting down to detonation. The LEDs used were Red 0805 Flashing Chip LEDs (3V), flashing at approximately 1.5Hz. Each LED has its own inbuilt timer, and interestingly you can see minor variations in the manufacturing process mean that the frequency of each LED is very slightly different, so they slowly move out of sync. This was unintentional, but I don’t mind as I think it adds to the countdown effect – it reminds me of the lights on the Predator’s wrist-mounted self destruct mechanism!
Painting
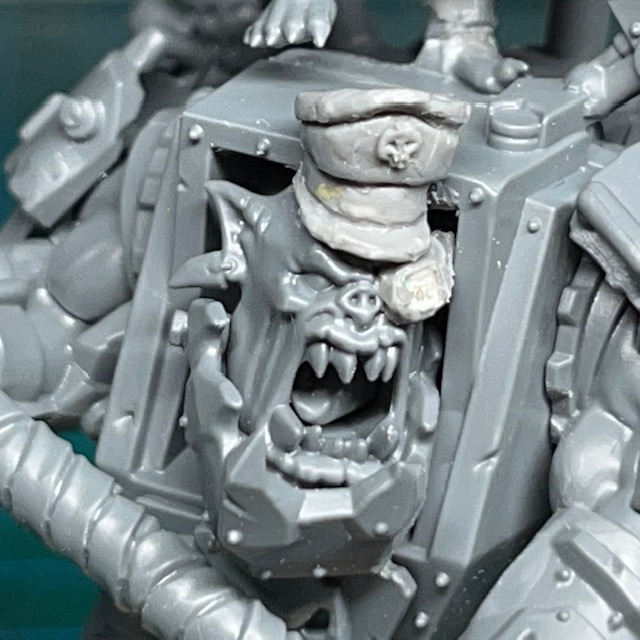
Painting this miniature took longer than I expected. It felt like a relatively small miniature, but there were a lot of different colours used and areas of high detail. I mostly followed my own Ork-related paint recipes found in this article and the suggestions for previous Red Gobbos in the Citadel Colour App. I did consider using snow flock or texture again, as I had previously with Red Gobbo & Bounca, but I decided against it as I didn’t want to risk obscuring the details on the base.


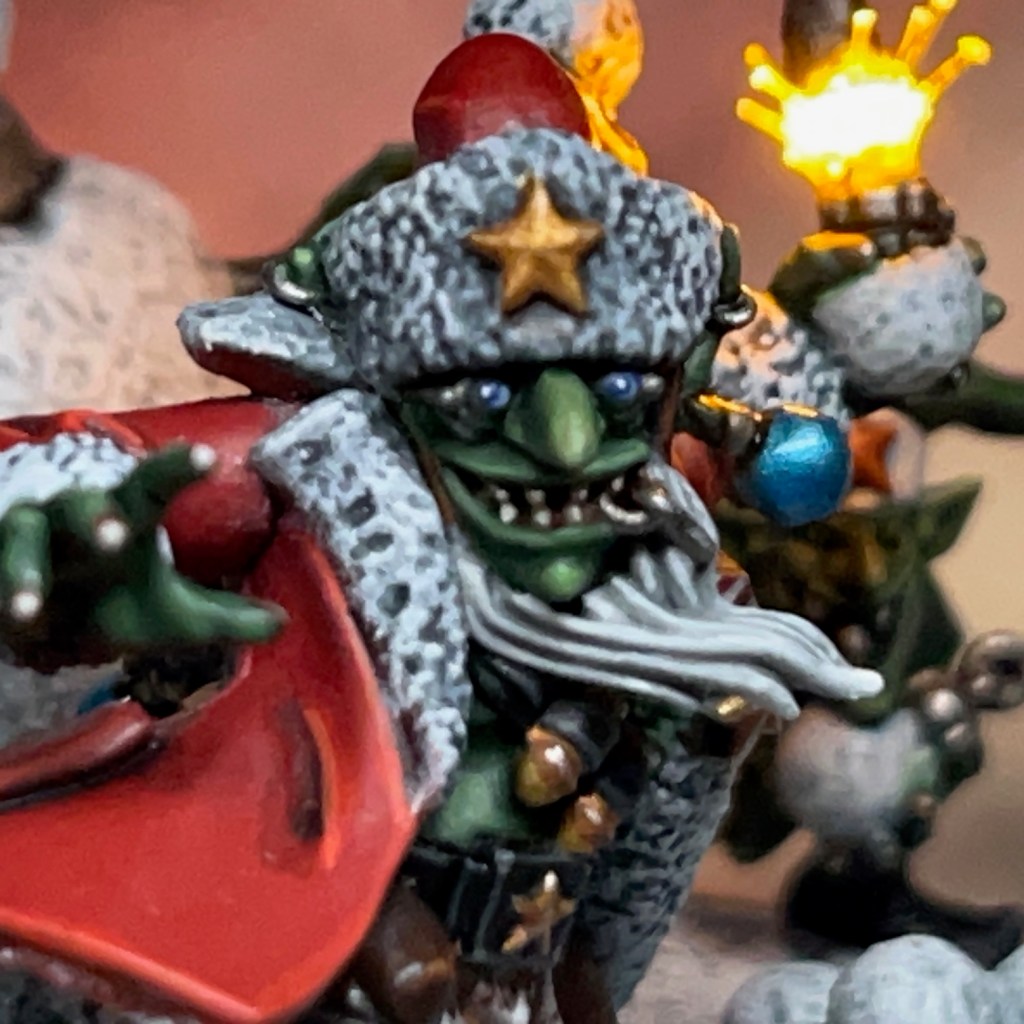
I repainted the snow on this miniature because I wasn’t happy with my first attempt, and to be honest I’m not sure I’m 100% happy with the final version. But ‘perfect’ is the enemy of ‘done’, as they say! The snow recipe I settled on is shown below. All paints are Citadel Colour unless specified otherwise.
- White Snow
- Corax White base coat
- Apothecary White shade
- Skull White heavy drybrush
- Fenrisian Grey thin glaze in areas of compacted snow (e.g. footprints)
I shared this tip for painting miniature Christmas baubles with last year’s Red Gobbo, but I’d like to share it again. base coat the bauble in a light silver like Runefang Steel, and then apply two coats of either Spiritstone Red, Soulstone Blue or Waystone Green. This gives a lovely glossy, metallic festive finish!
That’s all for today, I hope you’ve enjoyed my latest take on the Red Gobbo. I wasn’t the only one to make an LED Red Gobbo this year – check out these other versions from warhamster_king_of_leds and therealmcrafter.
I still have a few more miniatures that I want to get finished before the end of the year, so please stay tuned over the Christmas holidays. As ever, thanks very much for reading, and please remember you can also find me sharing my work on Instagram, Threads, Bluesky, Mastodon, and Twitter/X.