
Today I want to share the answer to a question that nobody has asked me – explaining the design philosophy behind my LED miniatures. Actually that’s not entirely accurate. It’s not a question I’m asked directly, but it often comes up tangentially when people want to know why I made a particular choice when constructing my miniatures. If have written about it in brief here as part of my ‘Designing & Ordering’ tutorial, but I thought it was a topic that was worth delving into a little more. Once I sat down and thought about it, I realised there were six clear principles that govern my approach to LED miniature design.
Before I lay out these rules I’ll add the caveat I’m certainly not saying these are the only rules, or that this is some sort of “correct” or “true” way to use LEDs in miniatures. There isn’t a “correct” way to make these models, and even if there was it’s not up to me to decide what that is. This is simply my own personal approach. Hopefully you’ll find it interesting.
1. Follow the art


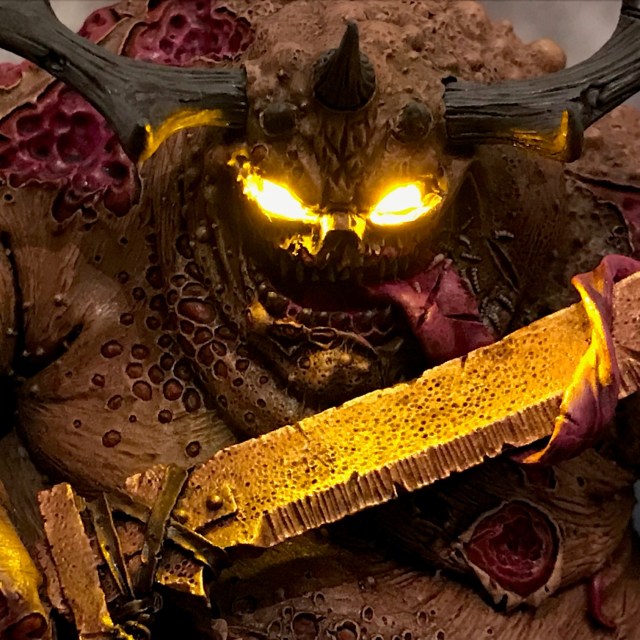
My first question is always “does this model need an LED?” That may sound a bit rich coming from me, but I don’t put LEDs in a model unless there’s a cool effect from artwork of other GW media that I want to replicate on the table top. Glowing power armour eye lenses, muzzle flares, power weapons, plasma energy, and psychic powers are all good candidates.
2. Hide how its done


I find the best LED effects are almost like ‘sleight of hand’ magic tricks – people are left wondering how you’ve done it! If you have visible wires and giant batteries concealed in oversized bases, then it’s really obvious how it’s done and is less impressive. But if you can hide the electronics in such a way that at first glance the model still looks like the original miniature, only with awesome glowing eyes, guns, or whatever, then that is what will capture people’s attention!
This is also the reason why I often don’t go all-out in converting the pose and equipment on miniatures. If it’s recognisably still the original miniature that people are familiar with then that gives them a point of reference and makes the added LEDs all the more surprising.
3. Be consistent


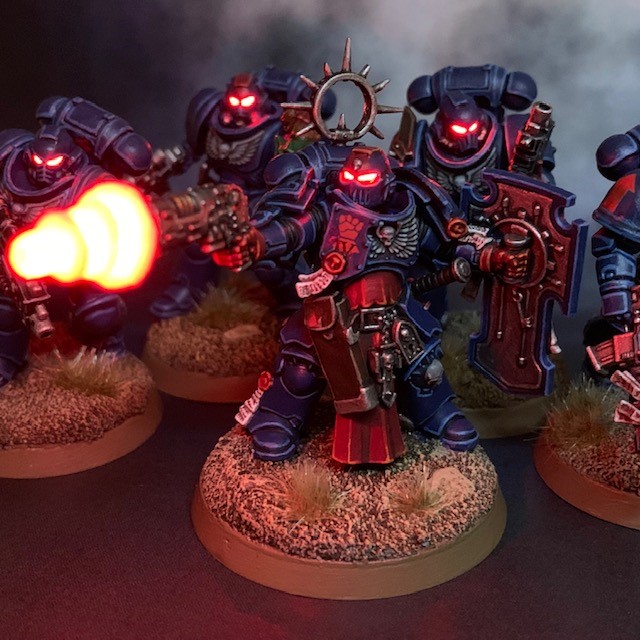
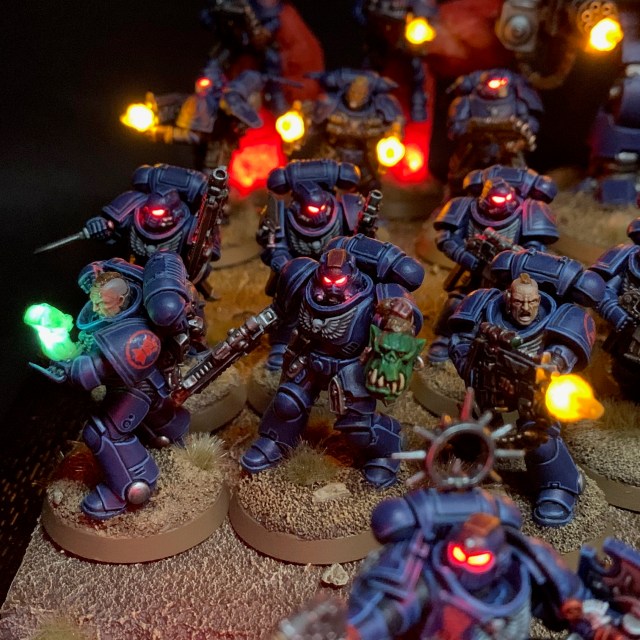
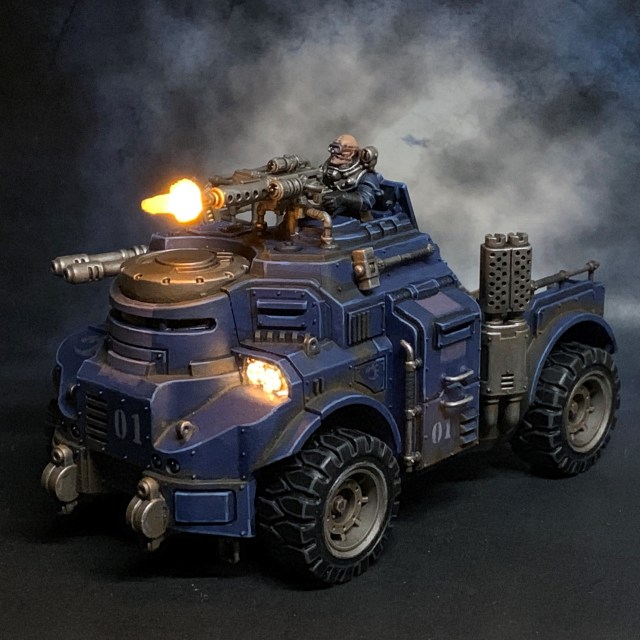
Once I start applying LEDs to an army, I like to be consistent. What I mean by this is that if one plasma weapon in the army glows – for example – then all the others must glow as well (see images above). Similarly, if one vehicle has LED headlights, you need to think about LED headlights on the other vehicles as well.
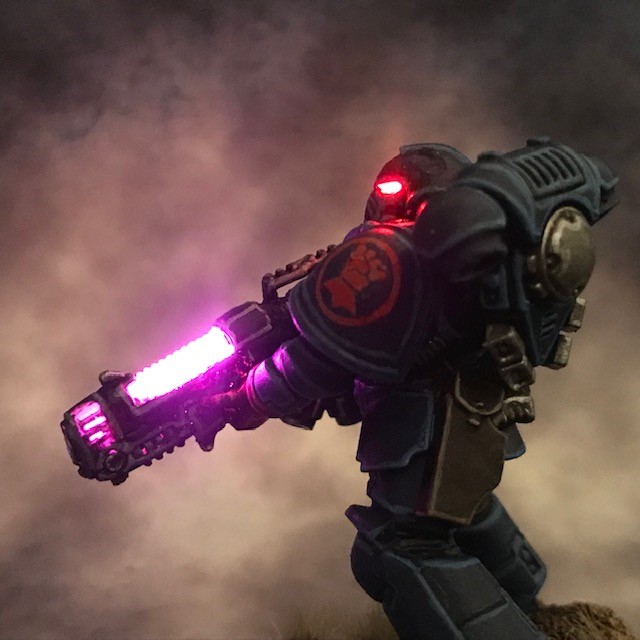
Consistency is also about colour choice. Once I’ve picked a colour for a particular weapon or effect in a project, I apply that colour consistently across the whole army. For example, every plasma weapon glow in my Crimson Fists glowed the same shade of pink (again, see image above).
I also try and avoid mixing LEDs with painted OSL effects on the same model as it breaks the ‘illusion’ for the viewer. If I ever find myself with too many lights on a single model and I don’t want to put LEDs in them all, then I always have the option to “cheat” and simply paint the extra lights as though they’re switched off!
4. Consider the passage of time


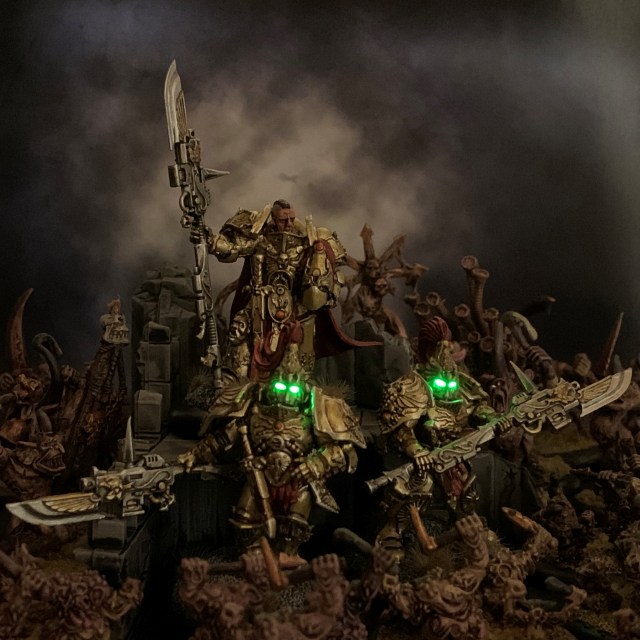
If your LEDs are flashing or fading in and out then this shows the passage of time. However if the model itself is stationary then this creates a cognitive dissonance in the viewer – time appears to be passing for some parts of the model but not others. This is particularly exacerbated if the model is in an action pose, mid-charge or leaping from a rock, for example. It can be mitigated if they are in a stationary position, such as a heroic command pose or a stoic firing position. This is why I prefer to have consistently on LEDs in my models to represent a ‘frozen’ moment in time. The rotary assault cannon Dreadnought and the colour-change Harlequin shown above are the obvious exceptions of course! In those cases I broke my normal rule as there were specific effects that I wanted to demonstrate.
I should stress that I’m definitely not saying all flashing LEDs are bad, it’s very much a matter of personal taste. If you like them on your models – and I know many of you do – then crack on!
5. Pay attention to your colour palette
Consider the colour palette of your models and also the LEDs. When selecting LEDs for a particular effect, think about whether they will compliment the rest of the colours you plan to use in your paintjob (although your choice may be limited by the colours of LEDs available). I must admit that colour theory isn’t one of my strong points, but when I’ve needed help determining what colours are complimentary with each other I’ve found this website (thanks to Apologist for the link) to be really useful. This helped me pick the colours for my Seraphon, for example.
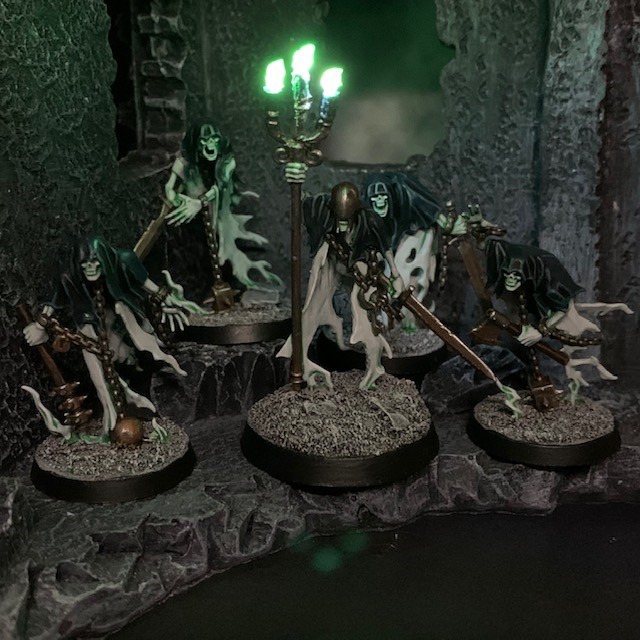
If a single miniatures has multiple LEDs of different colours then it’s also worth thinking about how these colours will look together. As a rule of thumb I try to limit a single miniature to two different colours at most (again, the Harlequin excluded of course!). You may find that too many colours are complicated by current limitations from a single battery anyway. It is also worth considering the LED colour palette across the whole army. Too many different colours and your army may start to look like its getting ready for Christmas!
6. Make it convenient to use

Although I’ve listed it sixth, one of my most important rules is that my LED miniatures should still be gaming pieces. They’re not designed to sit on the shelf but to be used on the table top. This is why I’ve taken great pains in the past to make sure things like batteries, etc, fit inside the normal sized bases. This also links back to the second rule.
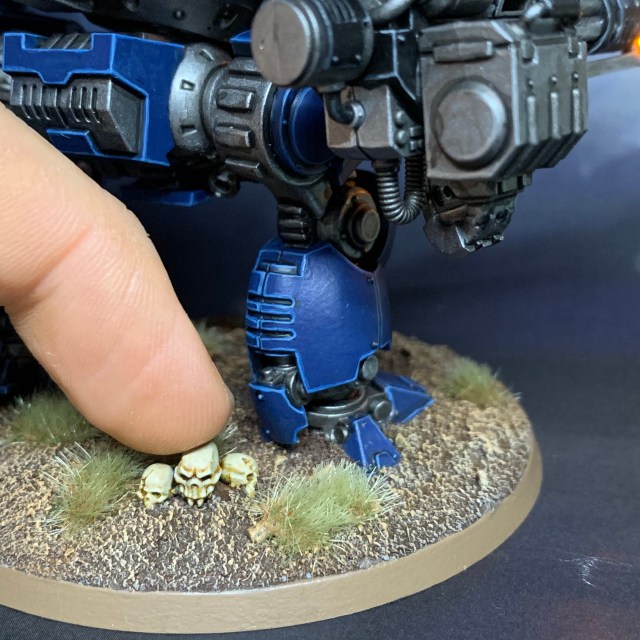
It’s useful to consider how you will turn the LED on and off before and after each game, and also how you will change the battery mid game if it happens to run out. This is why I have all my batteries accessible under the base rather than inside the models (large vehicles excluded). This isn’t so much a concern if it is a display piece, but you don’t want to keep an opponent waiting while you fiddle around with batteries and switches mid-game! It’s also worth considering the convenience of switch placement, particularly if you need to operate it mid-game. For the rotary assault cannon on the Dreadnought, the push switch to activate the effect was hidden under an ork skull on the base so it could quickly and easily be operated mid-game (see picture above).
That’s it for today. I’ll be back with more new models soon. In the meantime, if this has inspired you to create LED miniatures of your own then my tutorials are here. If you need LEDs, tools and other electronics consumables then you can find some recommended items here.

Wow! Fenomenal stuff!
LikeLiked by 1 person
Pingback: Goff Rocker, Ork Musician – Chris Buxey Paints
Pingback: Helios Pho, Custodian Shadowkeeper – Chris Buxey Paints
Pingback: Terminator Teleport Homer – Chris Buxey Paints
Pingback: Da Red Gobbo’s Surprise – Chris Buxey Paints
Pingback: Hive Fleet Cerberus & New Year, New Army – Chris Buxey Paints