
This is my tutorial for LED effect gun muzzle flares combined with LED eyes. The photos show this technique applied to a Horus Heresy Marine with bolt gun, but it can equally be applied to any other weapons that’s likely to have a muzzle flare. This is the updated February 2023 version of this tutorial. If you would like to read the original version from June 2019, it is archived here. If you do not wish to include LED eyes in your miniature and only want the muzzle flare, you may want to try my Simple LED Muzzle Flare tutorial instead.
I strongly recommend reading through the entire tutorial before starting work, just to make sure you have the necessary skills and tools required and that you’re not going to run into an unexpected barrier halfway through. If you need to know where to buy tools and consumables for this type of project, I have recommendations here.
I have separate tutorials about designing LED circuits, basic LED soldering, resin casting and LED eye lenses. This tutorial assumes you’ve either read these, or are familiar with the techniques discussed, especially the eye lens tutorial, which is a starting point this tutorial builds from.
1. Prepare Miniature and Base
First, complete steps 1 – 15 of my LED eye lens tutorial to assemble the base, battery holder and head of the miniature. Once you have done this, proceed to step 2 of this tutorial.
2. Drill Gun Barrel
Now you need to drill out the barrel of the gun. You’ll need a very fine drill bit for this. The image below shows a 1mm drill being used in the bolt bolt. The hole needs to be drilled most of the way through the gun. This is to allow the wires of the LED to pass through the gun and into the arm of the model, and then ultimately into the torso and the base. I found the best way to drill the gun was to drill a hole through the barrel and keep going until you are level with the rear hand grip, then cut off the hand and drill a hole up into the the gun until it meets with the first hole. You should also drill a hole through the hand, from the top of the hand down to the wrist.

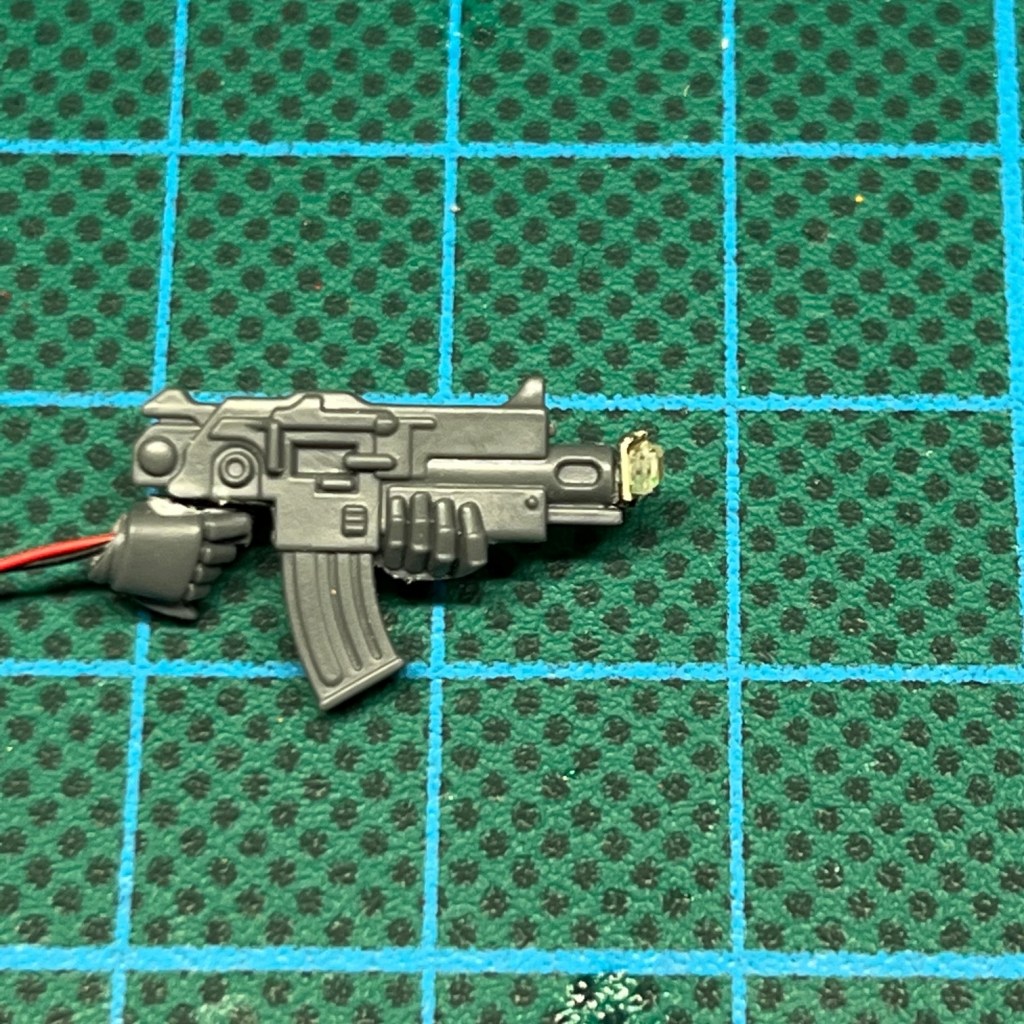
3. Insert Muzzle LED
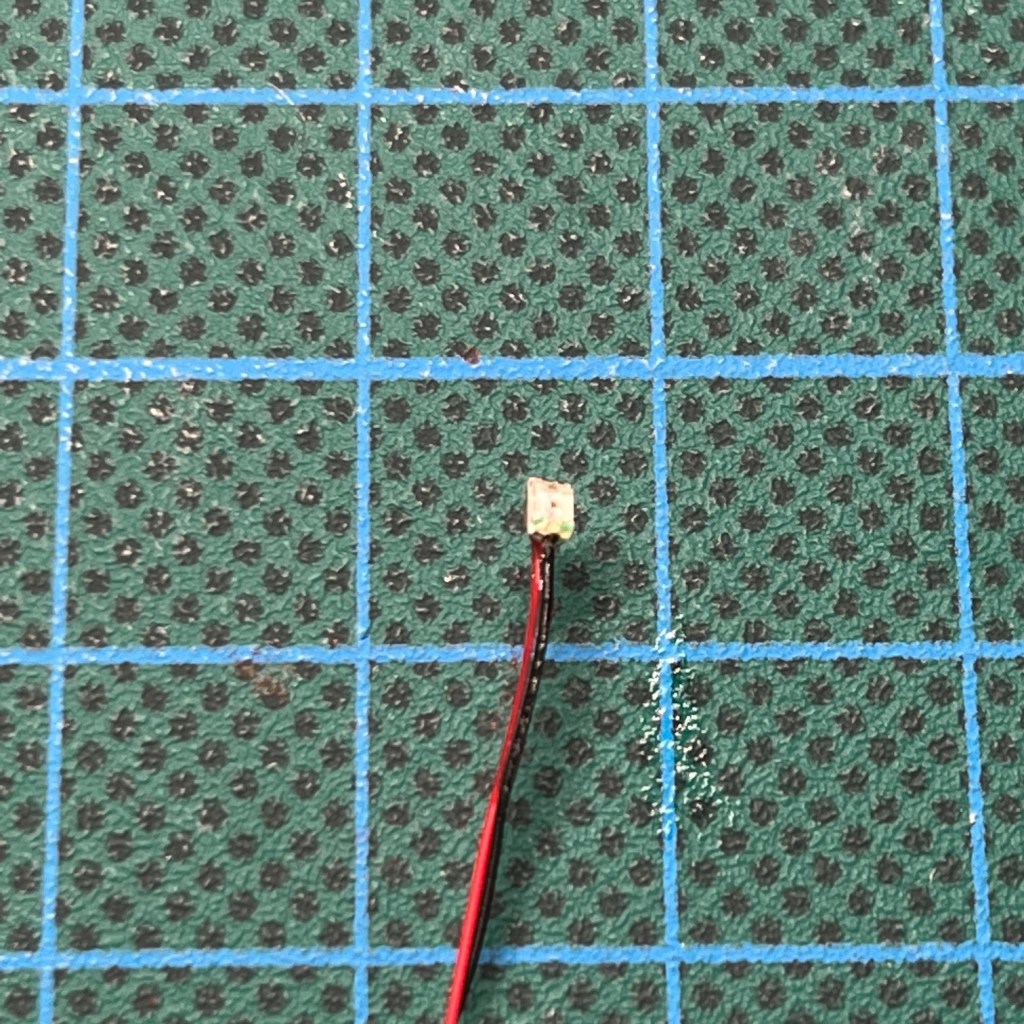
Now you need to prepare the LED. For this model I used a Yellow/Amber 0805 Chip LED (3V) from the website Small Scale Lights. As an aside, I really like this supplier – they have a good range of products and excellent customer service. It is possible to purchase 0805 chips seperately from LED suppliers, but they require very fine soldering to make the connections to the chip, which are only about 1mm tall. Because of this, I prefer to purchase them pre-soldered.
You will need to prepare the LED so it looks like the one in the image below. This is fairly simple – just cut off the larger red and black insulated connecting wires, leaving yourself with only the thinner red and black wires shown below. You will need to strip a small amount of the insulation from the end of the thinner wires once you have done this, again as shown below. The larger wires are removed as the thinner wires are easier to work with.

Below is a close-up of the LED chip itself, for reference. You do not need to do anything to this end of the wires.
Feed the wires through the hole you drilled in the gun during step 2. You may need a pair of fine tweezers to help with this.
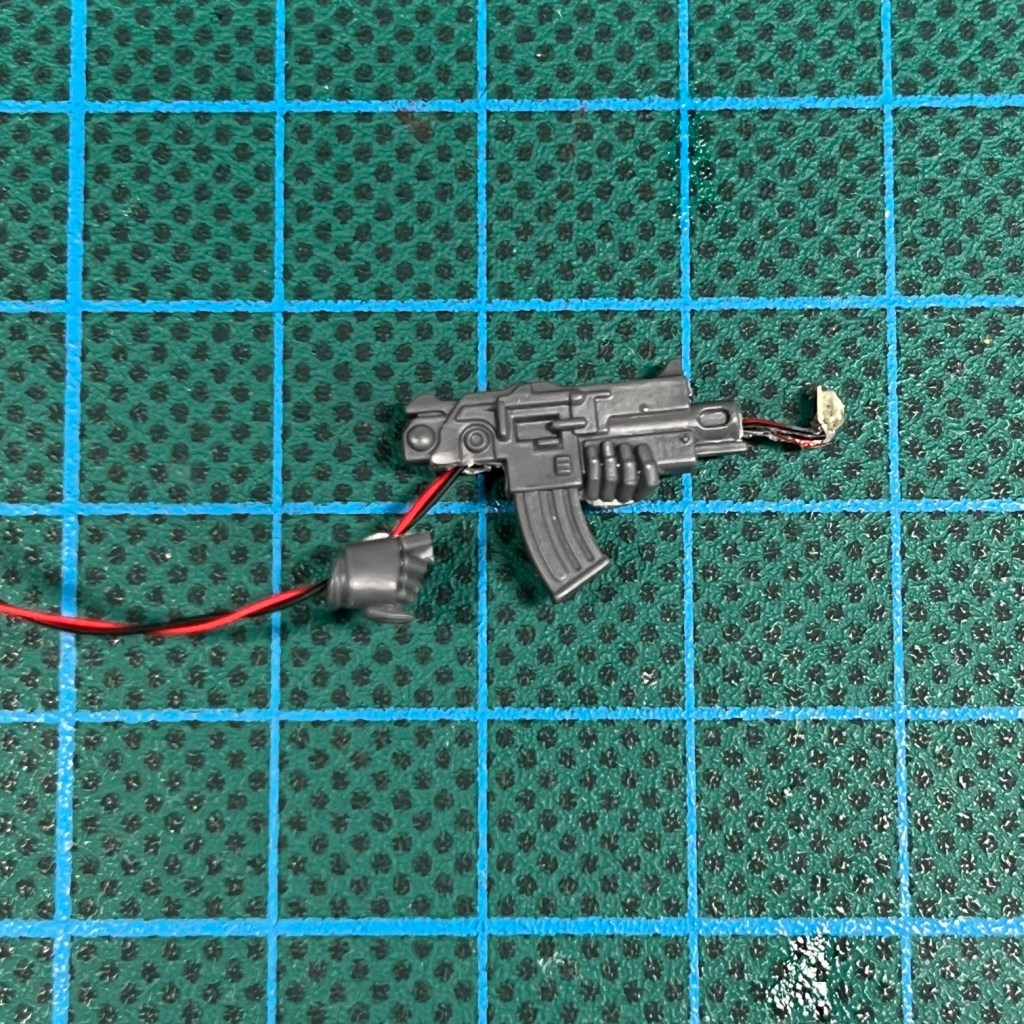
Pull through the wire slack until you the chip LED is sitting flush with the barrel of the gun, as shown below. The light emitting side of the LED is facing outwards, away from the gun.
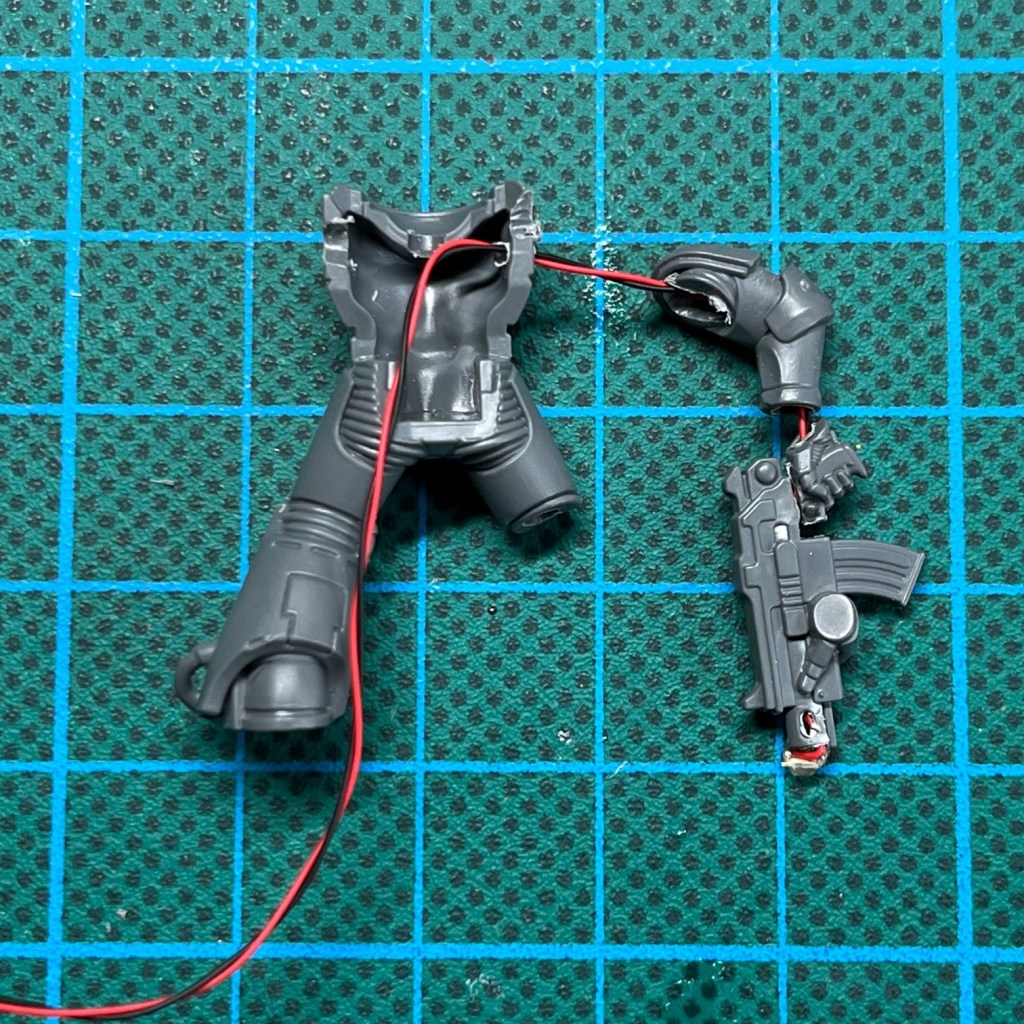
4. Drill Through Arm And Torso
Now drill a hole through the arm and torso of the model and feed the wire through, as shown below. I find the easiest way to drill through arms is to drill two separate holes, one from each end, and meet in the middle.
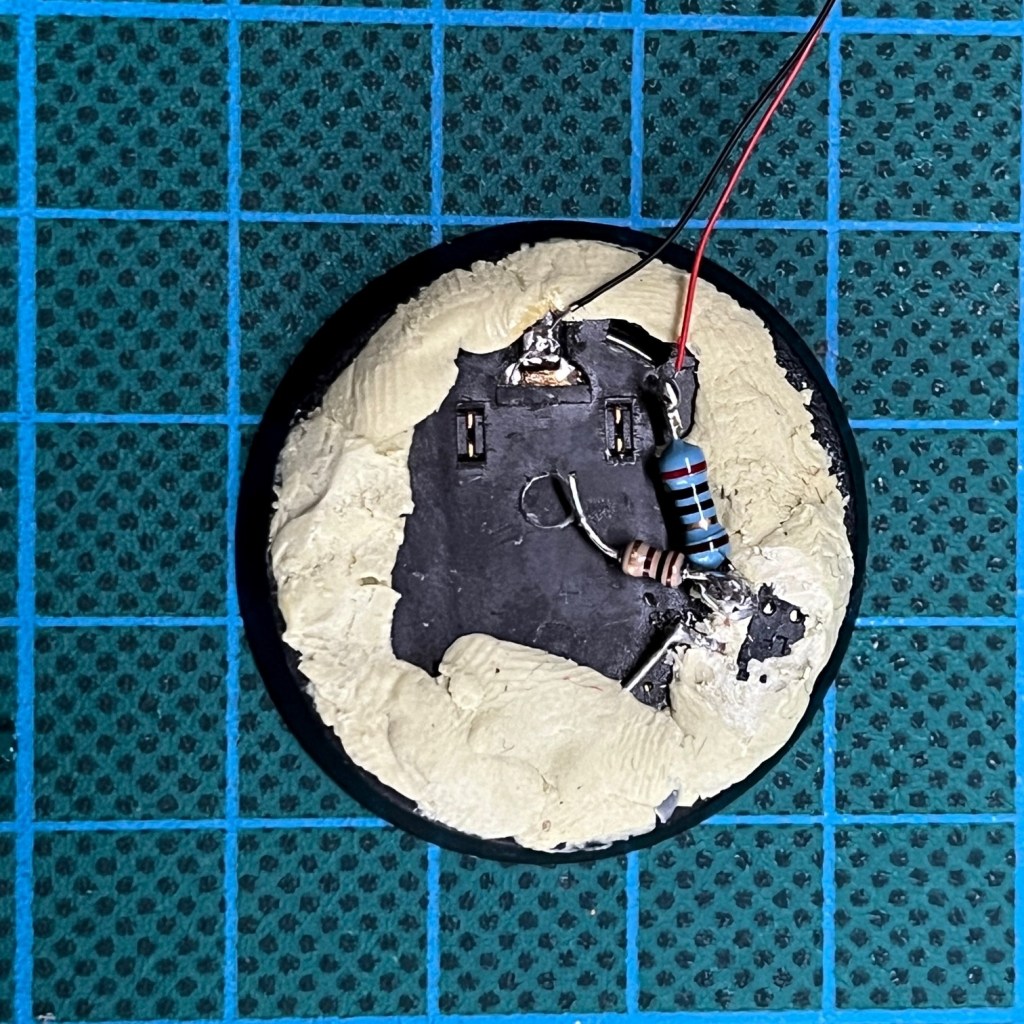
5. Add Additional Resistor
The 0805 chip LED sold by Small Scale Lights will be supplied with a 100 ohm resistor. Solder one end of this resistor to the same terminal on the switch as the other resistor for the helmet LED, as shown below. The opposite end of the resistor can remain unconnected for the moment. If you did not purchase your 0805 chip LED from Small Scale Lights, then either use the one supplied by your manufacturer, or use the LED Calculator website to determine the correct value of resistor you should purchase.
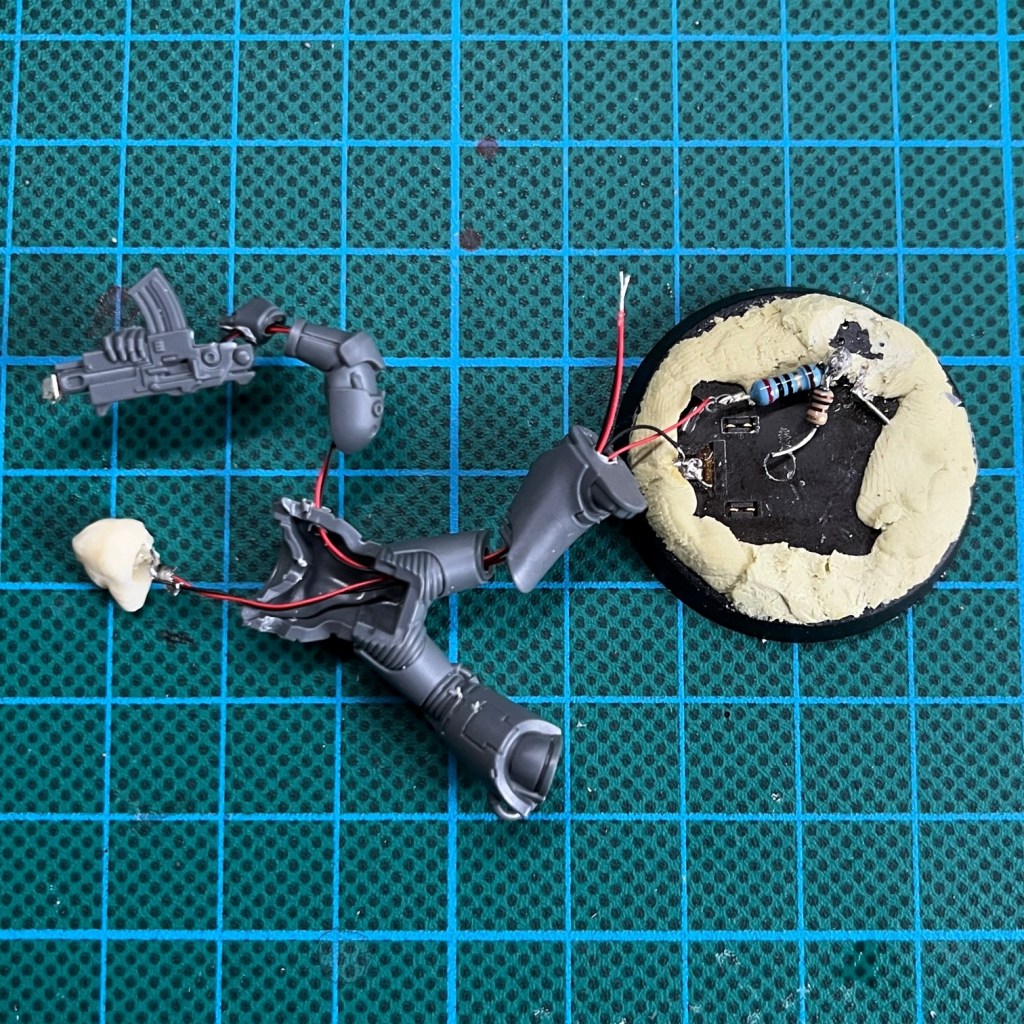
6. Feed Wires Through Leg
Feed the wires from the chip LED down from the torso through the leg. You should already have a hole in the leg from drilling a hole for the helmet LED wires.
7. Connect Muzzle LED And Test
The next stage is to solder the LED chips wires into the circuit. Solder the negative (black) wire to the negative terminal, seen on the left-hand side of the image below. Solder the positive (red) wire to the unconnected end of 100 ohm resistor that you added in step 5, as seen in the centre of the image below.

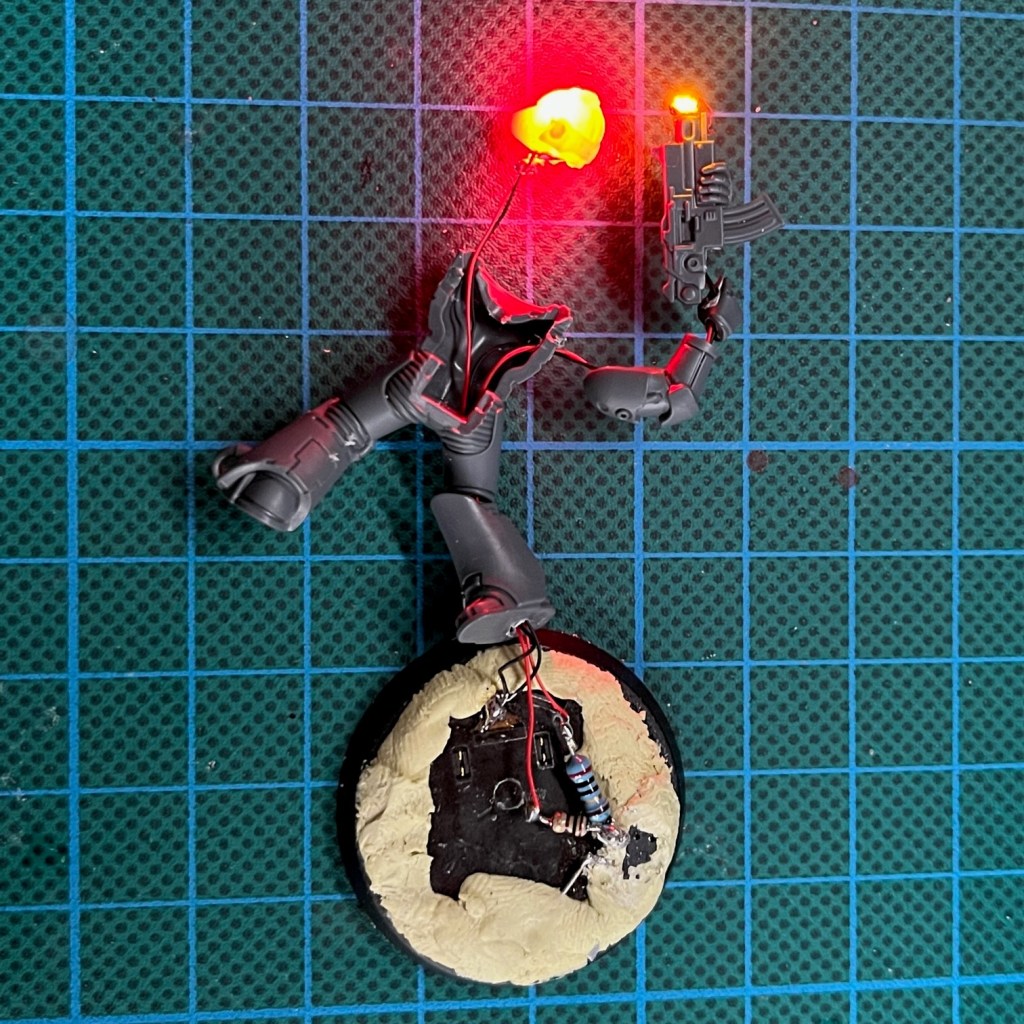
Once you have made the connections, test the circuit by turning on the switch. If the LEDs illuminate, excellent work, you may now proceed to the next step. If it doesn’t work, this is the point to back-track and start fault finding. Check all connections that you have soldered so far. A digital multi-meter with probes is helpful for this.
8. Assemble Model
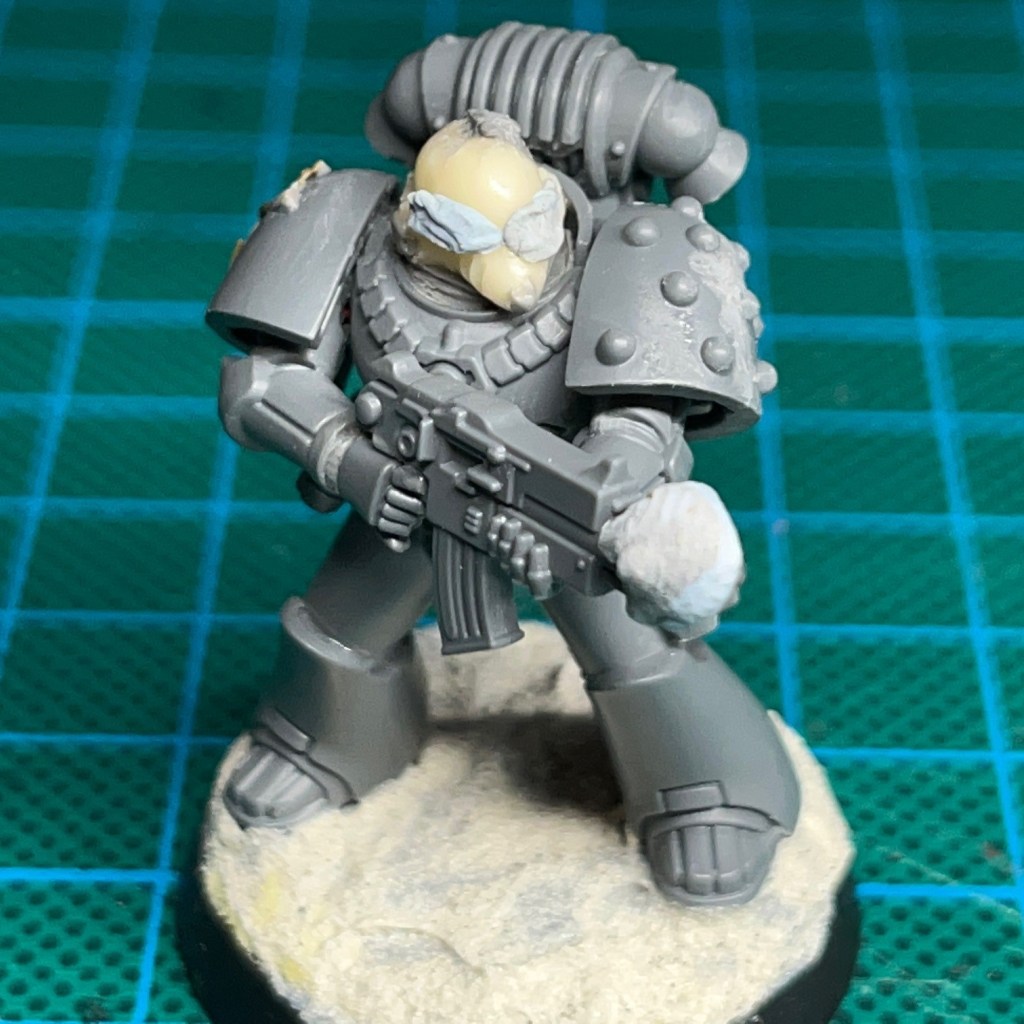
Now you need to glue the model together. Don’t forget to glue the hand back onto the grip of the gun if you cut that off earlier. Now attach the finished model to the base. I find the best way to do this is to put two small balls of modelling putty under the model’s feet, press it into the putty so it’s standing up, then wait for the putty to cure and harden before proceeding further. This helps to make sure the model is attached to the base in the correct pose and position before going on to hide the rest of the wires and connections. Any slack in the connecting wire should be curled up under the model on the base.
Test the circuit again at this stage, just to make sure you haven’t accidentally damaged any of the connections.
9. Conceal Wires In Base
Once the putty and/or glue applied in the previous stage has dried, you can now hide the battery holder and any spare slack wire under a layer of putty or filler. Be sure to not get milliput on the battery itself, and to leave the sliding part of the switch exposed so you can still operate it. Once the putty covering the battery holder is dry, you can add texture to the base if you wish (e.g. PVA and sand).
This is also the point to use fill in any gaps around the neck with modelling putty, as well as any repairing any any casting defects on the helmet or accidental damage to the legs and torso that may have occurred during drilling. It can also be handy to turn the LED on at this point and check for any light escaping any gaps around the edge of the torso, for example.
10. Prepare Miniature For Undercoating
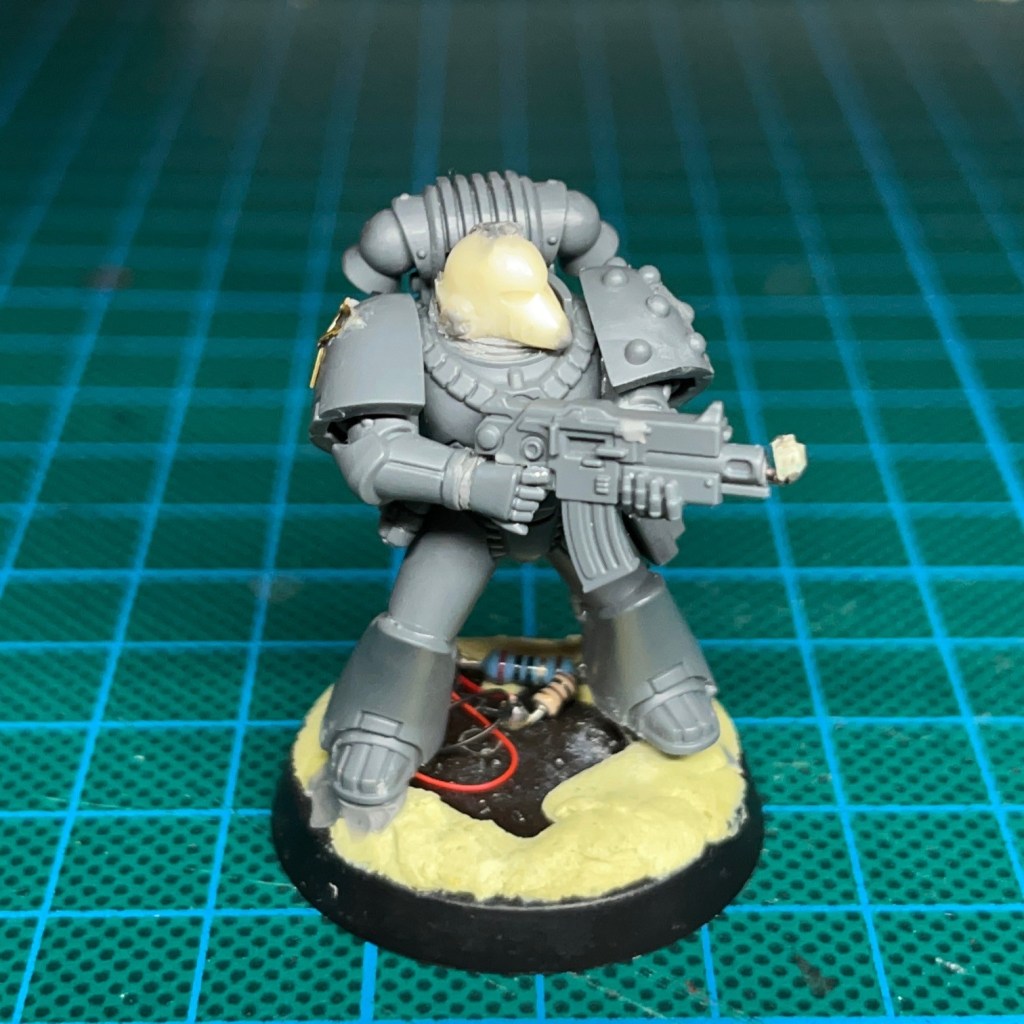
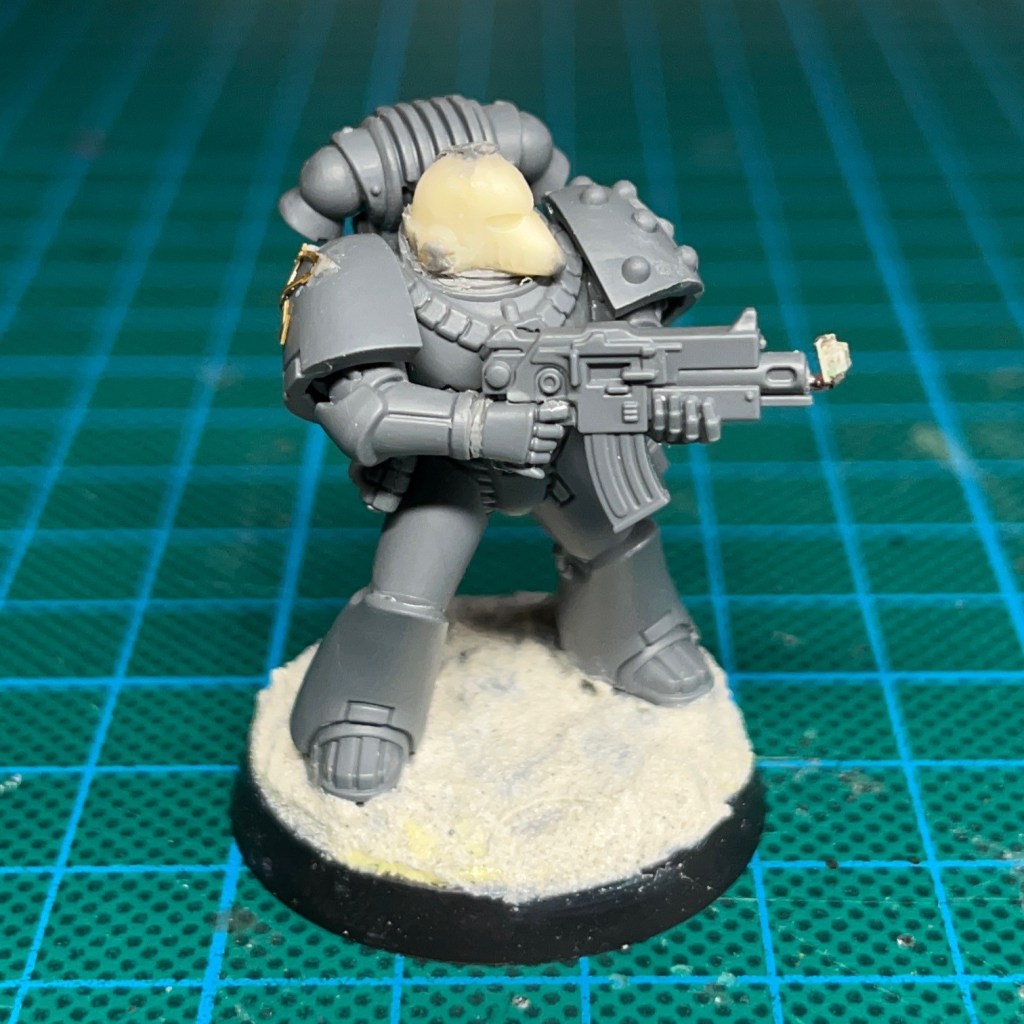
We’re almost there now. The next step is to prepare the miniature for spray undercoating.
During spray undercoating, make sure you cover the helmet eye lenses and muzzle flare LED with blu tack (or similar) so that they don’t get spray paint on them! If you are spraying from underneath then you will also want to cover the battery and switch during the spraying process.
You can see the model prepared for spraying in the image below. Once you have undercoated the model, the blu tack can be removed. You may find this easier with a pair of tweezers. Take care to remove the blue tack from the muzzle flare LED slowly and carefully, as rough handling may damage the solder connections.
11. Apply Acrylic Gel
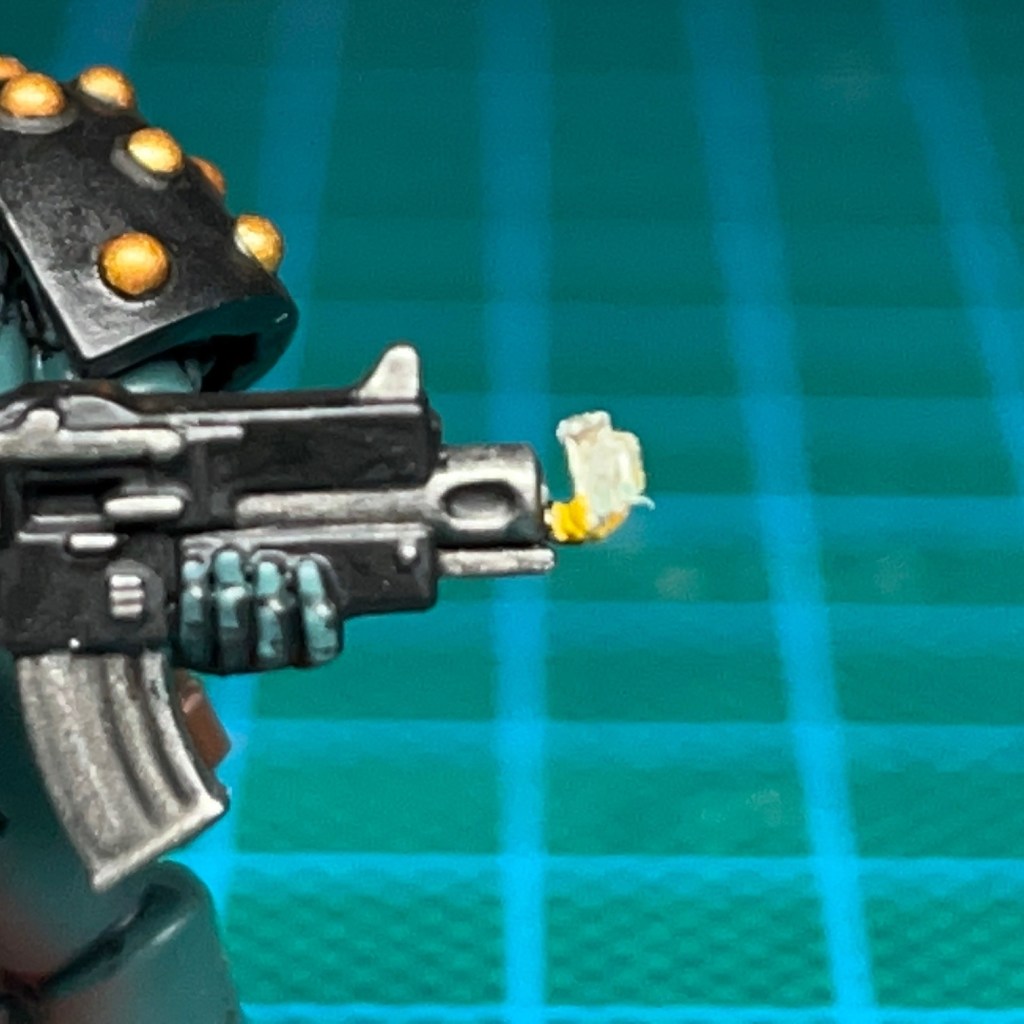
The next stage is to start work on the muzzle flare effect. I prefer to do this simultaneously alongside the painting process for the rest of the model. If you can see any of the red or black wires on the back of the chip, start by painting these yellow. This means they will be less noticable in the finished muzzle flare.
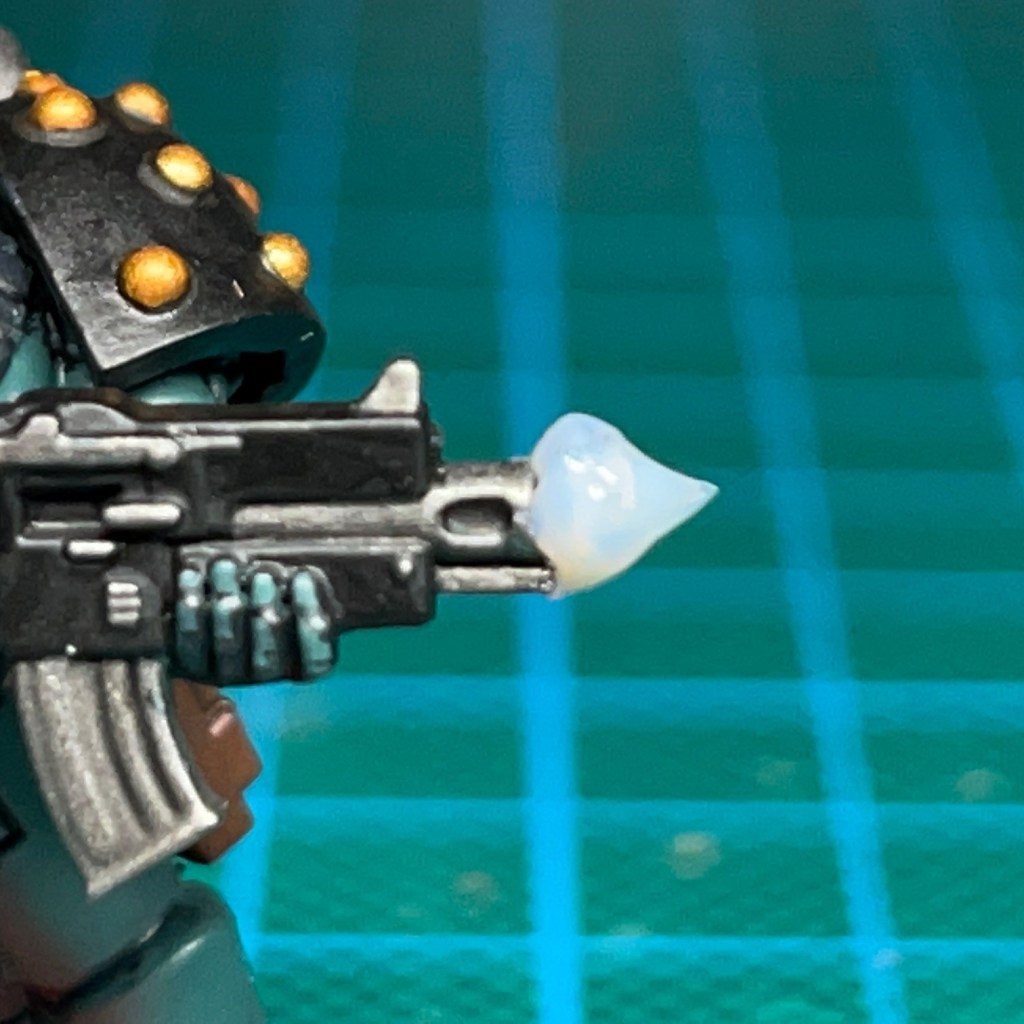
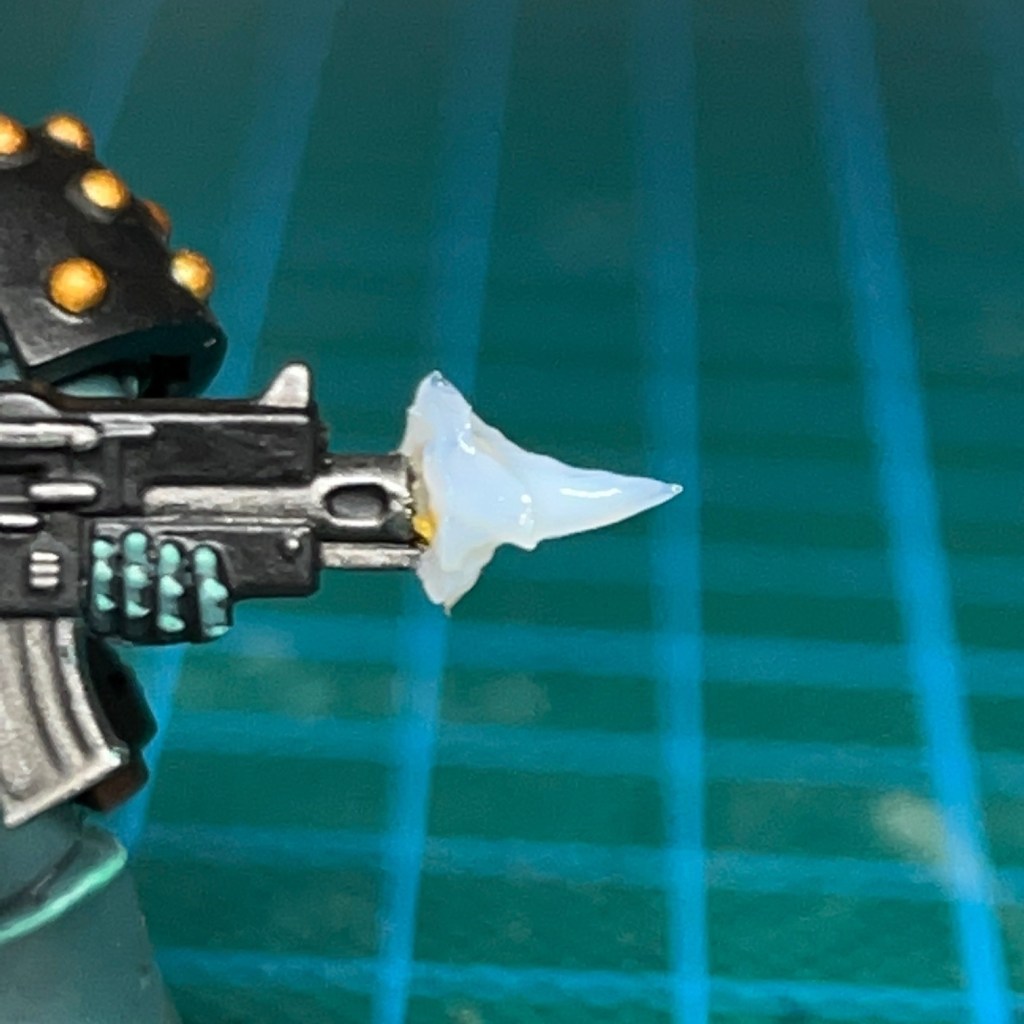
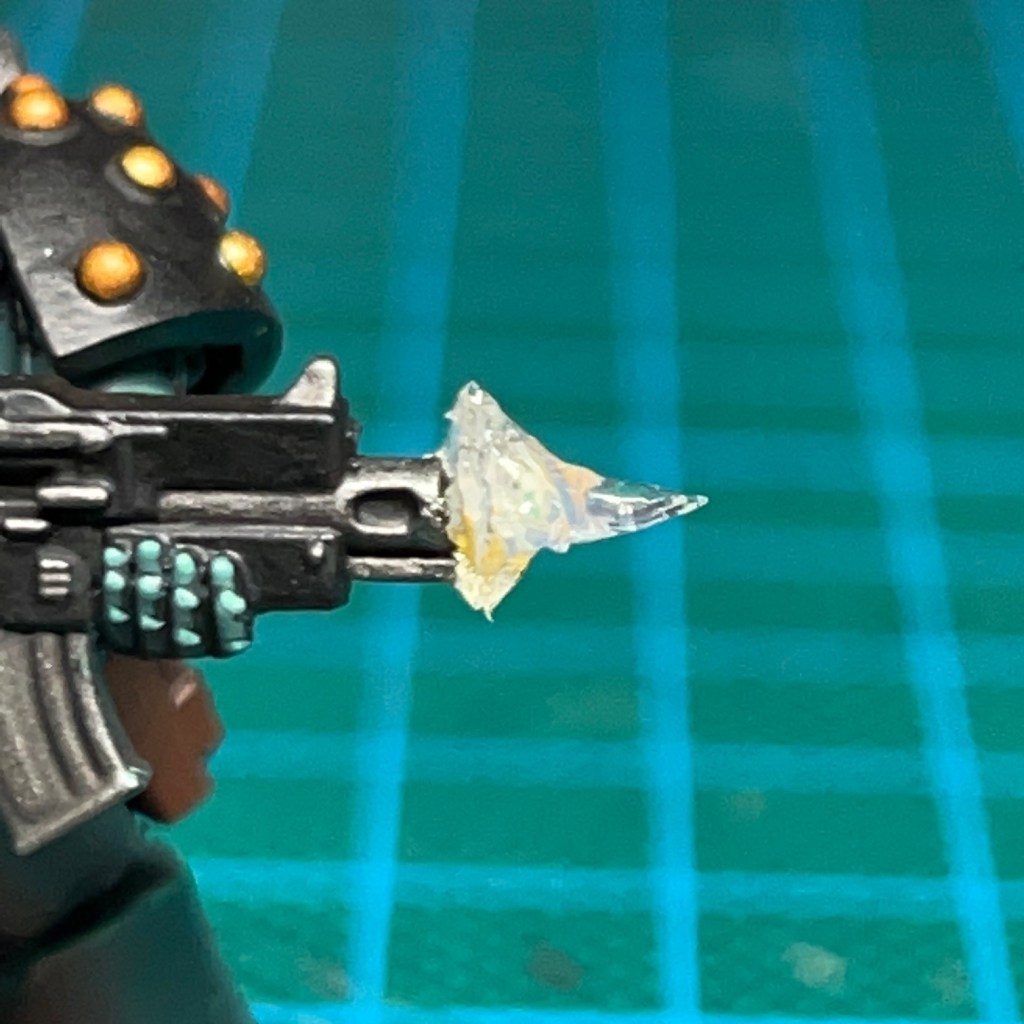
Next, start sculpting the basic shape of the muzzle flare using the Water Splash Effect Gel from Green Stuff World. This is best applied with a metal sculpting tool, thin plastic rod or stiff length of wire. When you apply it, the gel will initially appear milky white (as shown in centre image below), but once it is fully dry it will be transparent (as shown in right-hand image). If you’re not sure what shape to scultp, Google is an excellent source of muzzle flare reference images.
12. Apply Further Acrylic Gel
Wait for the initial application of gel to dry (this can take several hours) and then continue to apply successive layers until you are happy with the shape.
13. Paint Muzzle Flare
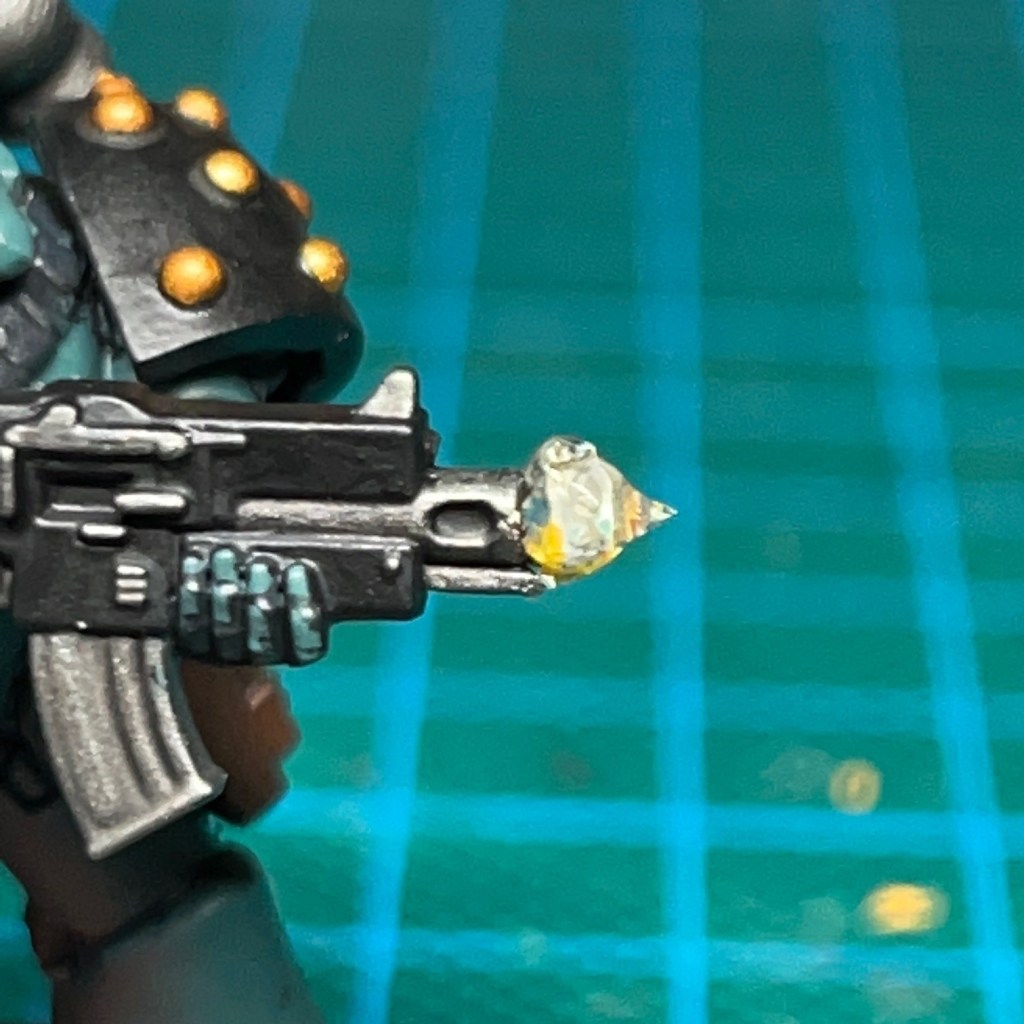
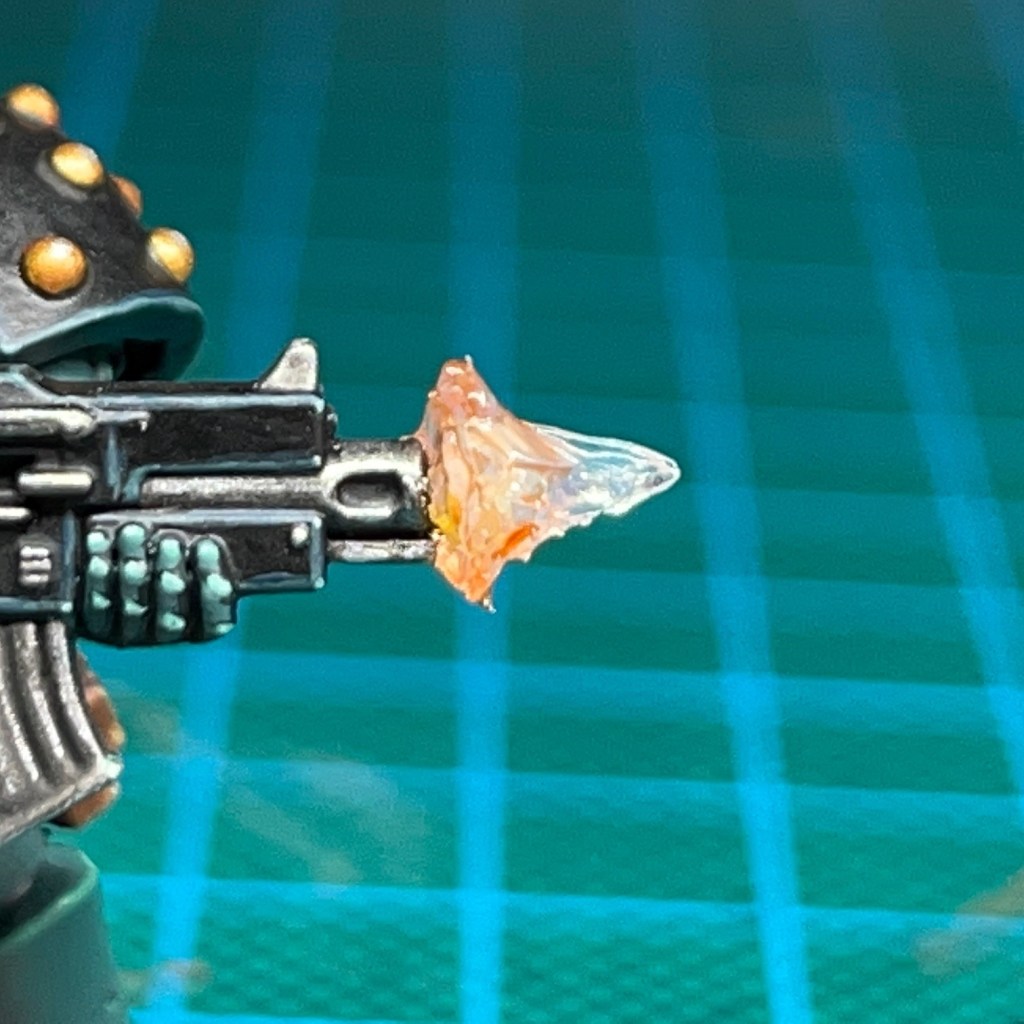
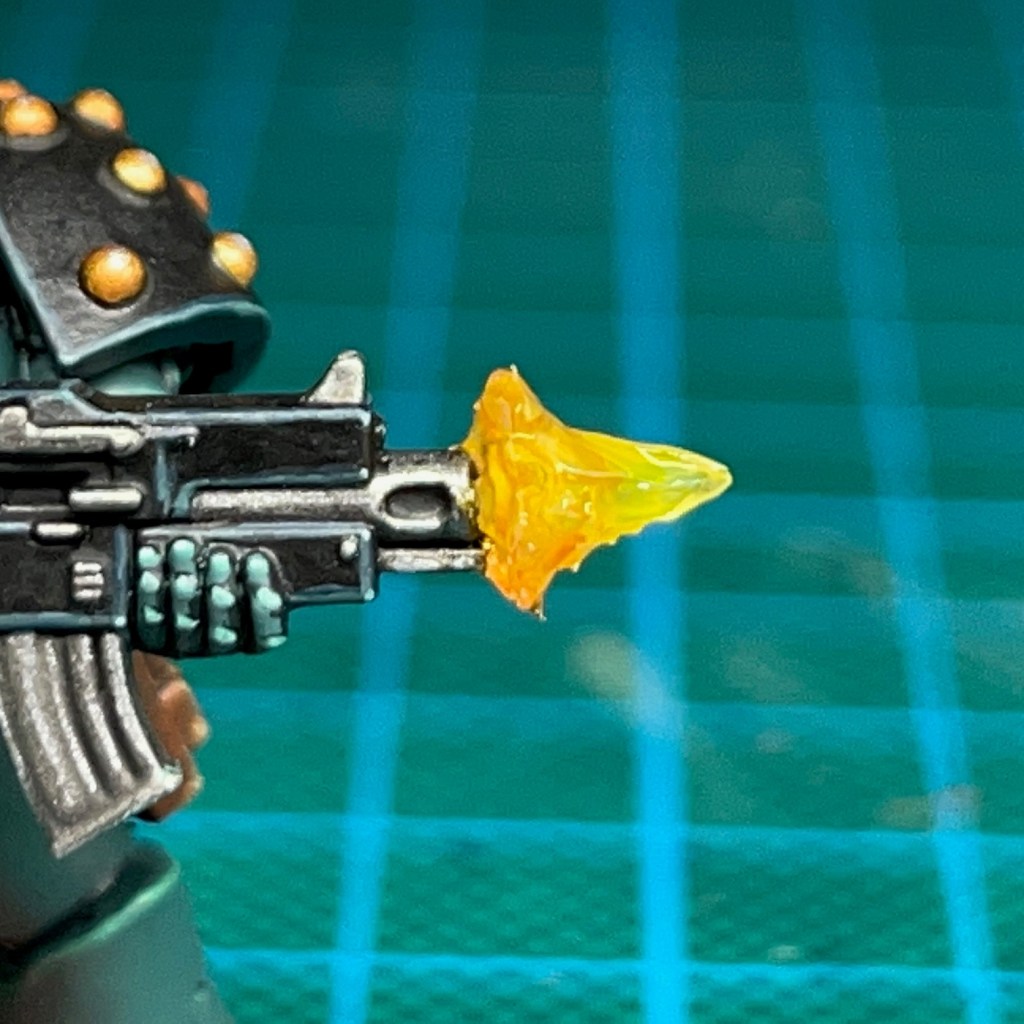
Once you are happy with the shape and the gel has completely dried, you can paint the muzzle flare. You only need to apply a light glaze – this will not inhibit the light of the LED and will also make the model look good when the LED is switched off. First apply a shade of Citadel Fuegan Orange to the widest area of the muzzle flare, closest to the bolt gun (left-hand image below). Once this had dried I applied a layer of Citadel Imperial Fist Contrast thinned down with water to a glaze consistency (right-hand image).
14. Paint The Miniature
Now paint the model to your tastes, taking care to avoid the eye lenses and muzzle flare. And that’s it! If you find the light is leaking through in any area it shouldn’t, especially from the helmet, then an extra coat of paint will normally cover that up. I hope this tutorial was useful! Please do tag me on social media so I can see you finished LED miniatures, or buy me a coffee below!
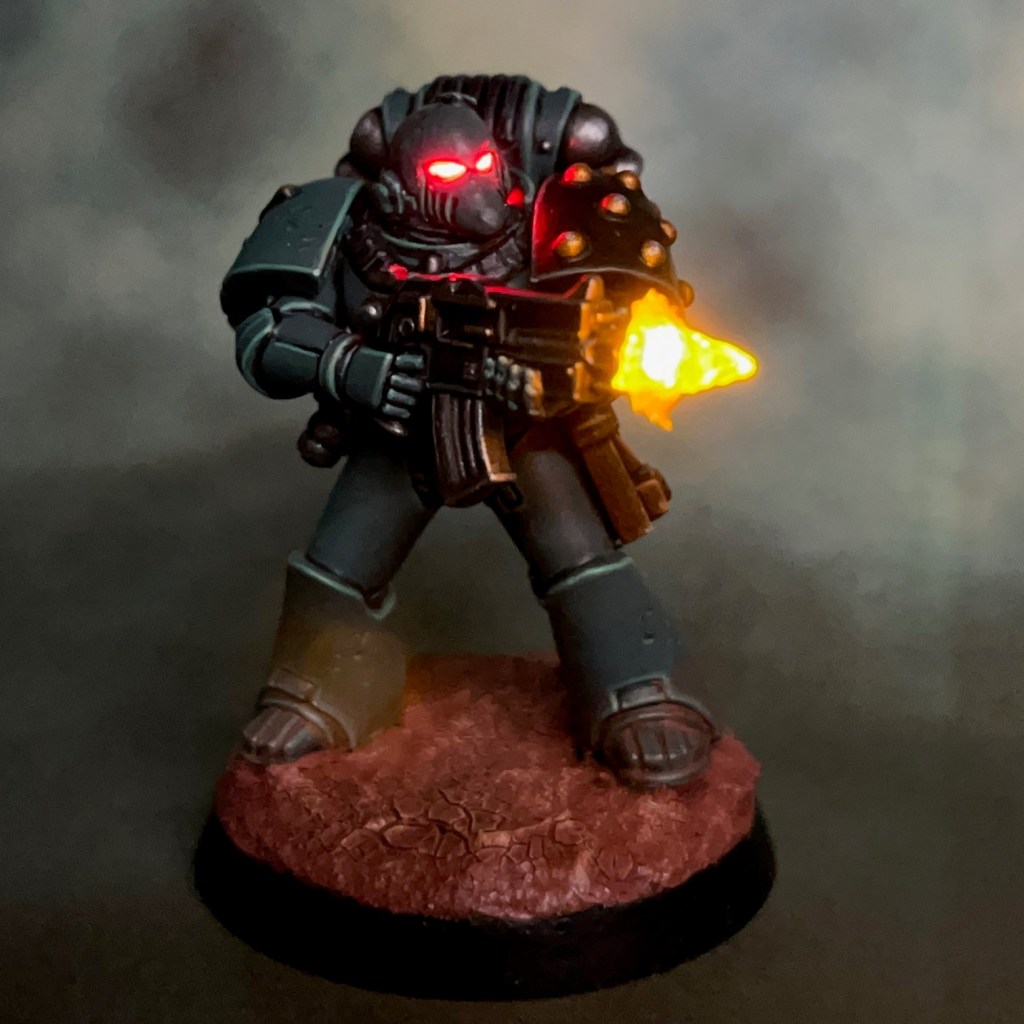
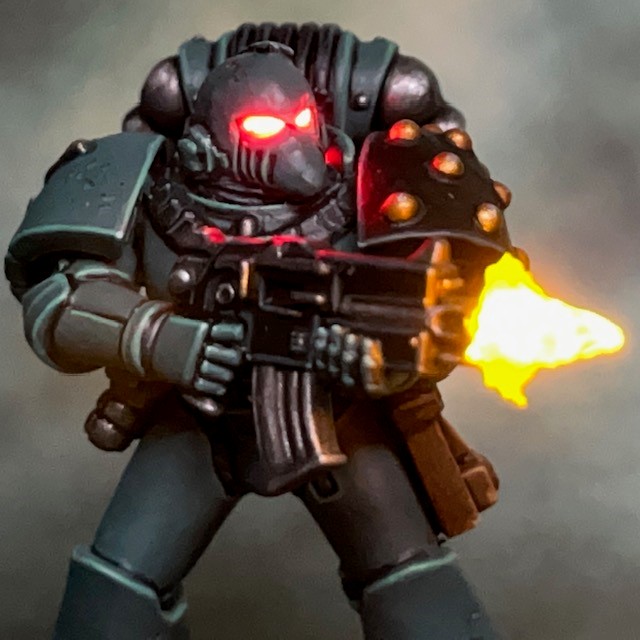
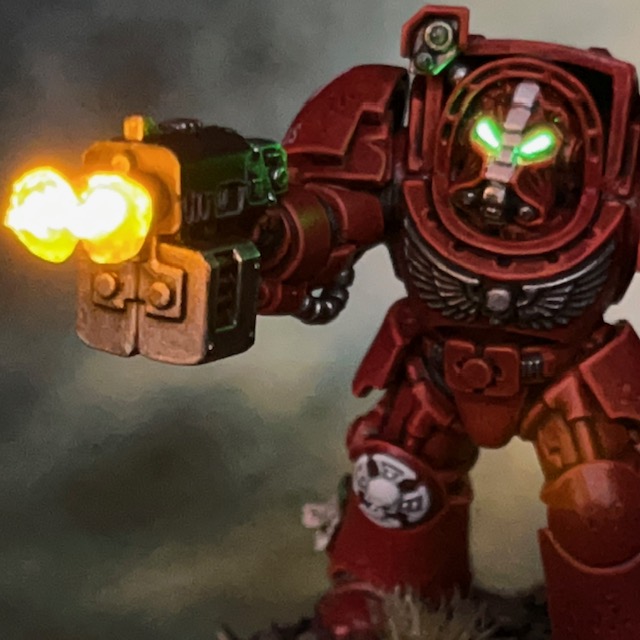
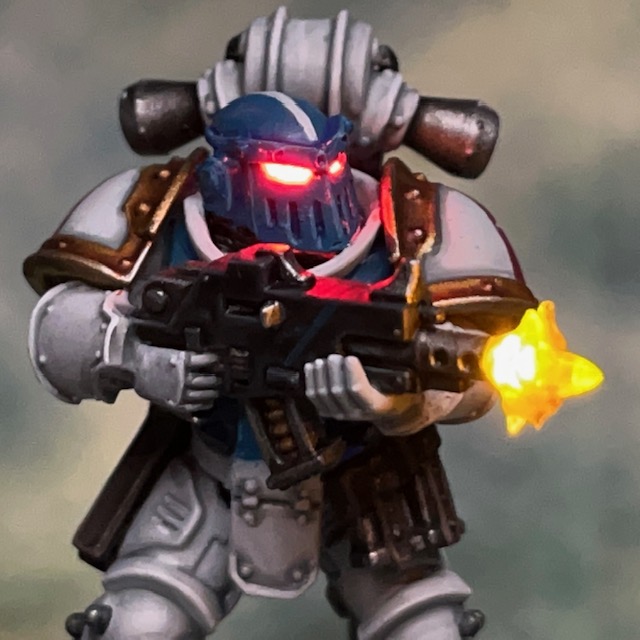
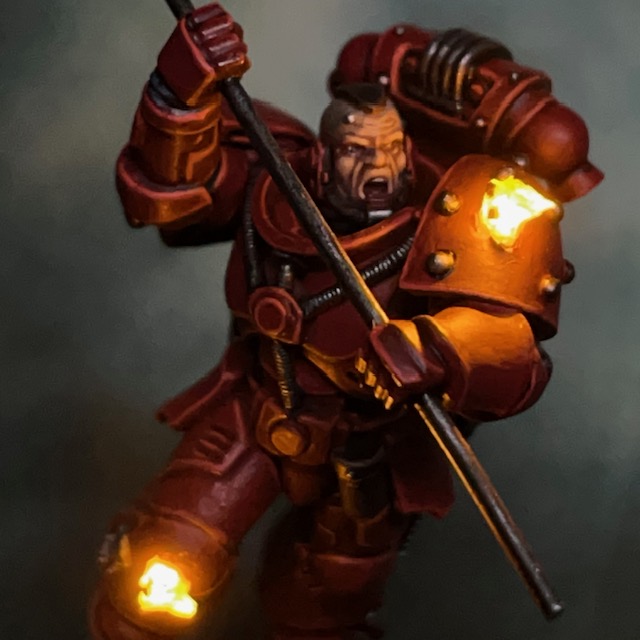
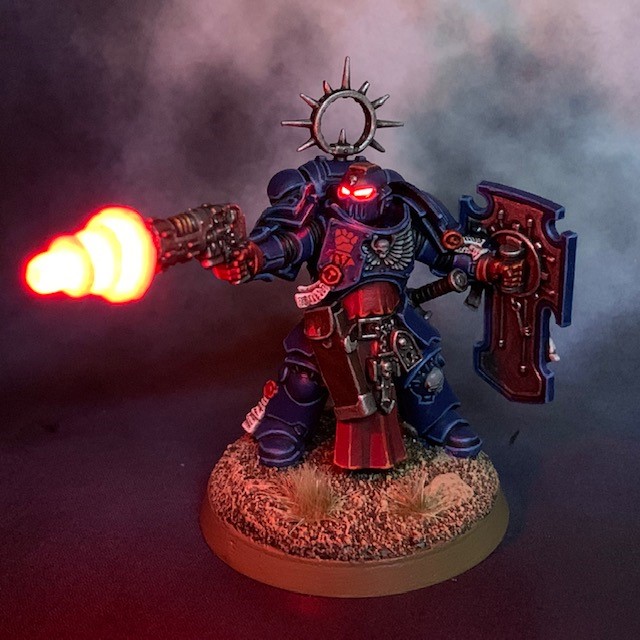
Designer’s Notes: Bullet Impacts, Fire, and Energy Weapons
The technique described above is very versatile and can equally be used to make bullet impacts, fire and muzzle flares for energy weapons. You’ll simply need to pick an appropriately coloured 0805 chip LED and sculpt a different shape for the flare or flames using the acrylic gel. Several examples are shown below. If you require a particularly complex or symmetrical shape, you may wish to sculpt it in modelling putty, and then cast it in resin as an alternative to using the acrylic gel.

Enjoyed this tutorial? Buy me a coffee!

All these tutorials are entirely free; the only payment I really need is seeing everyone’s awesome LED armies on the battlefield! Having said that, if you found these tutorials useful and you’d like to buy me a coffee to say thank you (or donate towards the website fees so I can continue to post tutorials on this ad-free website) then please click the button above. Thanks very much in advance!
