


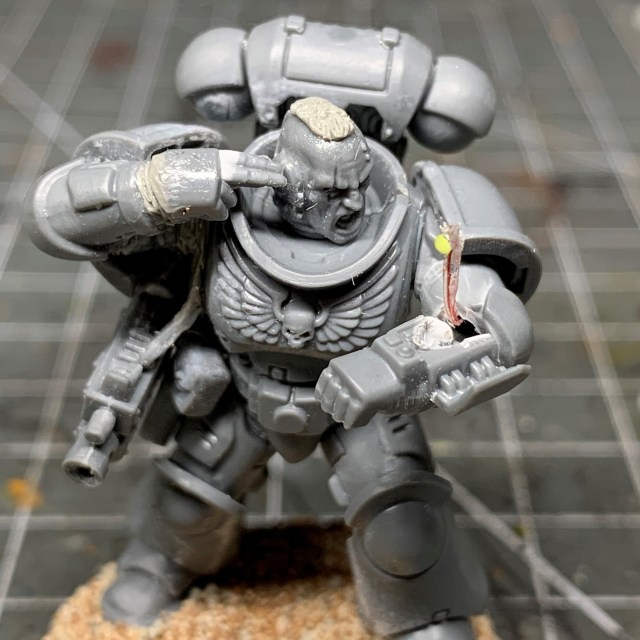
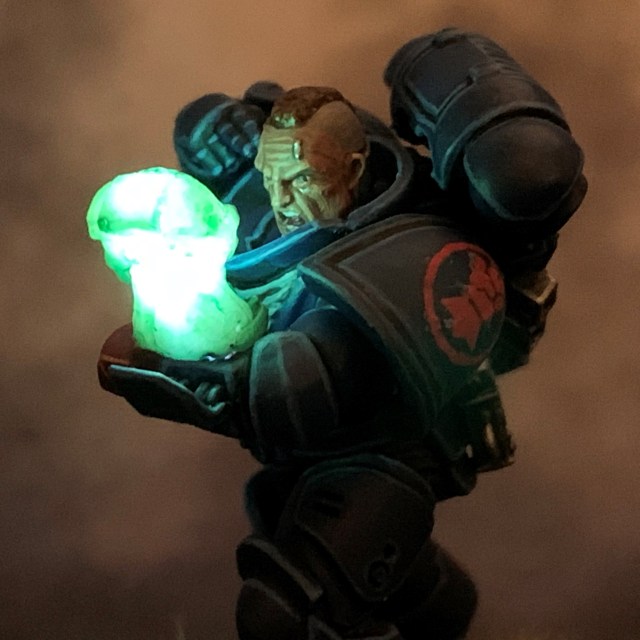
This is my tutorial for LED effect wrist-mounted hololiths (probably one of my most niche tutorials to date). If you’re not familiar with the hololith in Warhammer 40K lore, it is essentially a video call where the participates see each other displayed as holograms in front of them. It is often used for battlefield communication or for communication between warships in the same star system. The holograms can either be life-size, or as in this case, miniature versions of the participants. The photos above show this technique applied to a Primaris Intercessor Marine communicating with a Terminator Captain, but it can equally be applied to any other projector or screen on any other model.
I strongly recommend reading through the entire tutorial before starting work, just to make sure you have the necessary skills and tools required and that you’re not going to run into an unexpected barrier halfway through. If you need to know where to buy tools and consumables for this type of project, I have recommendations here.
I have separate tutorials about designing LED circuits, basic LED soldering, resin casting and LED eye lenses. This tutorial assumes you’ve either read these, or are familiar with the techniques discussed, especially the eye lens tutorial, which is a starting point this tutorial builds from. Casting skills are essential as the hololith effect relies on the availability of resin casts of the image you want to “project”.
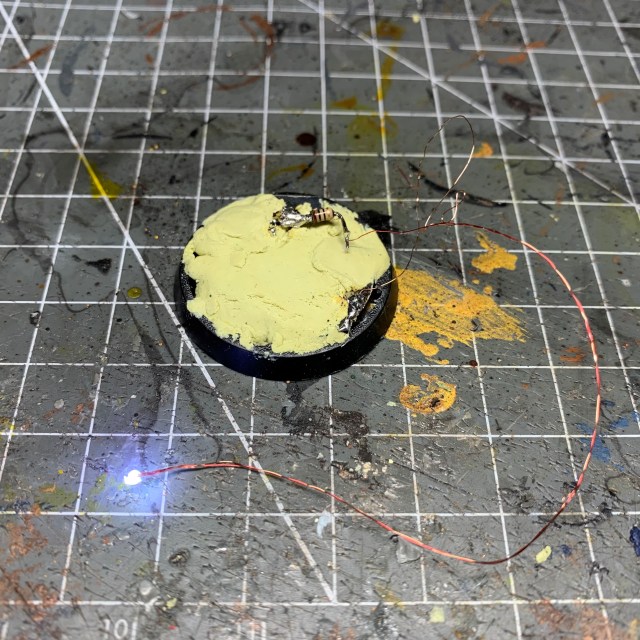
1. First of all, let’s start by preparing the base. Cut out the top of the 32mm base with a modelling knife. I find the easiest way to do this is to drill a series of holes around the outside of the top of the base, then cut between them. You need a large enough gap to fit a battery holder for a CR3032 coin cell. My preferred battery holder is Multicomp Battery Holder SMT, 20mm, CH7410-2032LF (available from Farnell here), since it fits comfortably inside a GW 32mm base (the current standard Space Marine base) without any trimming. This is just personal preference, as long as your battery holder fits inside your base then you should feel free to use any brand. Put a CR2032 battery in the holder and the place it face down in the base, so the battery will be accessible from below in future.
The LED used in this case is the 0603 Nano SMD Chip LED (White, 3V, 15cm wire length) available from Small Scale Lights. This will be supplied with a resistor already connected to one of the LED leads. Solder a switch (like this PCB slide switch) to one terminal on the battery holder, and then solder the resistor to the switch and then solder the other LED lead to the other terminal. Finally, fill in any gaps around the edge of the battery holder with Milliput or another modelling putty, as shown in the image below.
If you’d like a more in-depth discussion of how to create the base, please read my LED Eye Lens tutorial, steps 1-6.
Designer’s Notes: Even more LEDs!
If you want to give the model even more LEDs, e.g. eye lenses or muzzle flares, then it should be pretty simple to add them in parallel to this circuit. If it’s another 0603 nano LED then it should be as simple as adding it directly in parallel. If it’s another type of LED then you may need to add additional resistors to balance the current draw. See step 15 of my LED muzzle flare tutorial for a discussion on how to do that.
2. Next you will need to drill a hole through the leg of the model to pass the nano LED through. A 2mm drill bit should be sufficient, but you may find 1mm too narrow. Don’t worry if your hole breaks through to the surface of the leg, you can always fill in any gaps with putty later.

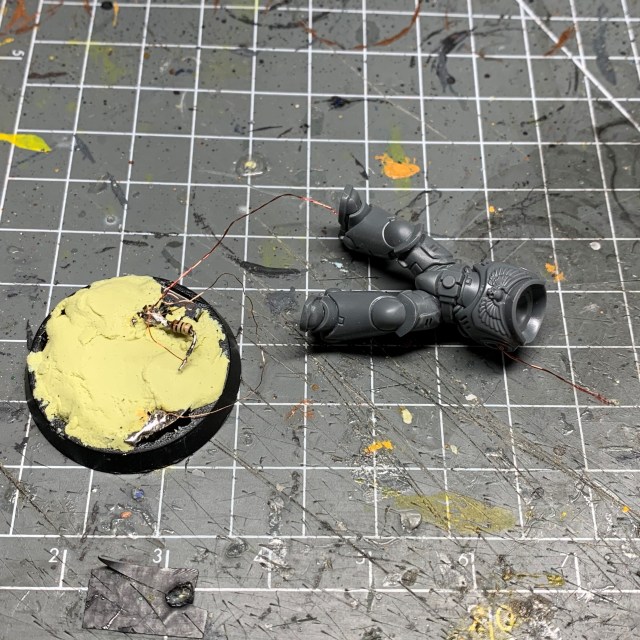
3. Now drill a hole through the hip and also through the joint on the torso for the arm that will be holding the hololith (the one closest to the camera in the picture below).
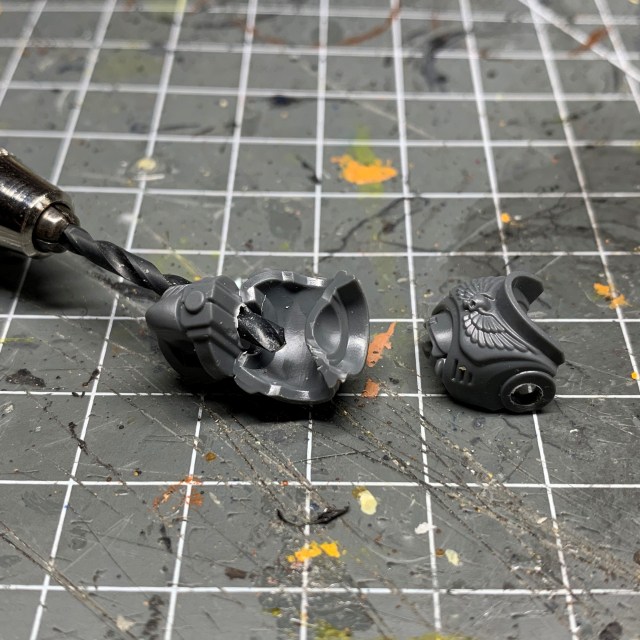
4. Feed the nano LED through the leg and torso so that it comes out of the arm hole. You can then glue the legs and torso together.
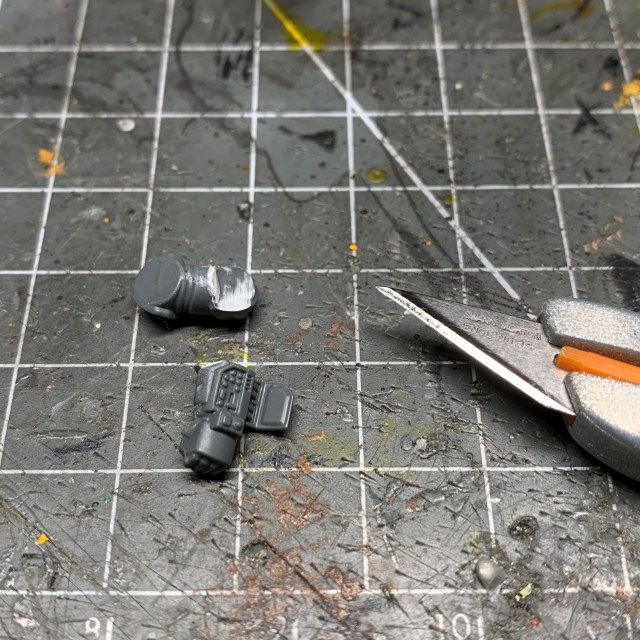
5. Now you will need to drill a hole through the arm for the nano LED to reach where ever the hololith is going to be mounted. In this case I used the Intercessor arm with the wrist-mounted console. The keypad will be re-purposed as the base of the hololith, so the nano LED needs to emerge there. You may find it easier to drill the arm if you cut it into segments, as shown below.
6. Once you have assembled the arm and fed the LED through, test the circuit and the LED by turning on the switch! If the LED illuminates, excellent work, you may now assemble the rest of the model and coil any excess wire under the feet and hide it with more Milliput. Then proceed to step 7. But if the LED test doesn’t work, this is the point to back-track and start fault finding. Check all connections that you have soldered so far. A digital multi-meter with probes is handy for this.
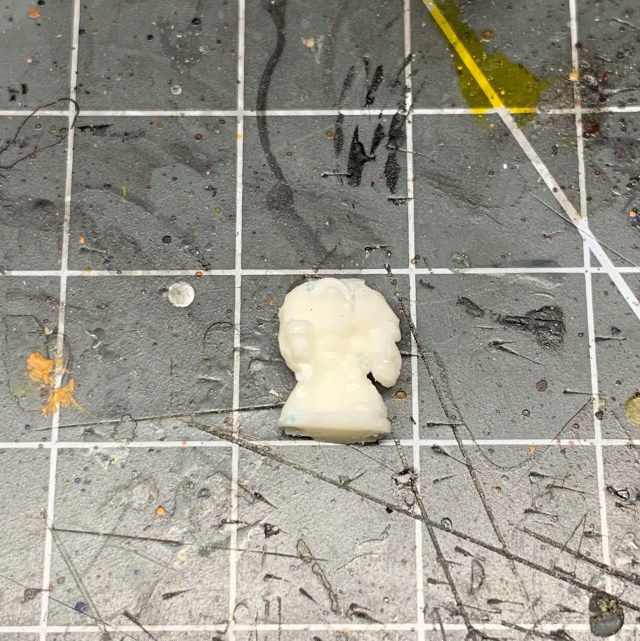
7. Now you need to pick a figure to be the person that your miniature is talking to. I wanted to have a figure that represented a senior Space Marine officer. So I used an old ‘Epic’ scale Space Marine Terminator that I had in my bits box as this was just the right size. To make it look more like a Captain, I sculpted on a cloak before casting. This will also be useful later as it will mean the nano LED can be inserted centrally through the mass of the cloak, rather than via a tiny Epic Terminator leg.
For the casting I recommend TOMPS Polyurethane Fast Cast Resin. If you’re not familiar with resin casting, check out my general resin casting tutorial and also my steps 1-9 of my LED muzzle flare tutorial, which explains the process of casting small scale resin components in great detail.
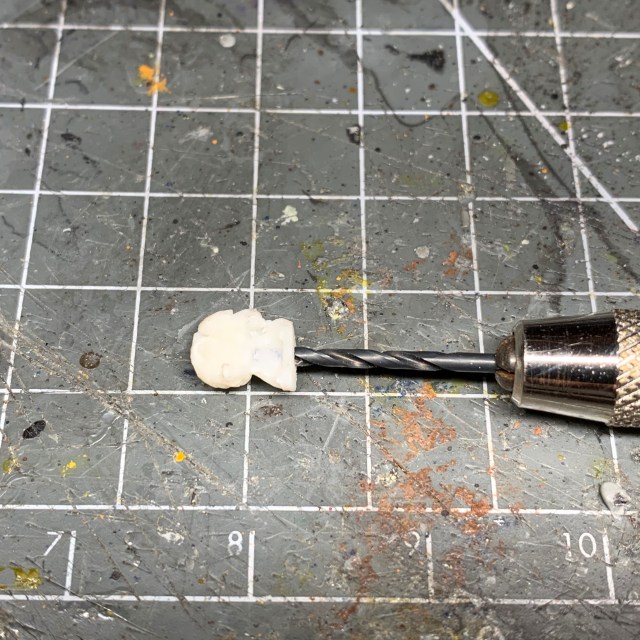
8. Now we need to drill out one of the cast resin hololith figure. First clean off any excess resin. The hololith figure needs to be mostly hollow to allow the light to propagate and be visible from all sides. I recommend drilling a hole in the ‘base’ of the hololith figure that is wide enough to accommodate the nano LED, then drilling a narrower hole further into the rest of the resin. Be very careful at this stage! If you accidentally break the hololith figure or drill through the surface then you’ll have to throw it away, grab another one from the sprue and start drilling again. For this Epic Terminator I first drilled a 1mm hole nearly all the way up to its head, and then widened it with a 1.6mm drill bit.
9. Now it’s time to paint the main model. I kept the hololith figure separate at this point as I didn’t want to risk getting any of the wrong paint on it. Make sure you protect the nano LED during spray undercoating and painting! You can carefully cover the nano LED with a small piece of blu-tack. Just be extra careful you don’t damage the nano LED when removing it. Careful removal of the blu-tack with tweezers is best here.

10. Dry test fit the resin hololith figure to make sure the nano LED fits inside it, and it sits comfortably on the model. You may need to re-drill it if it doesn’t. Do not glue the hololith figure yet!

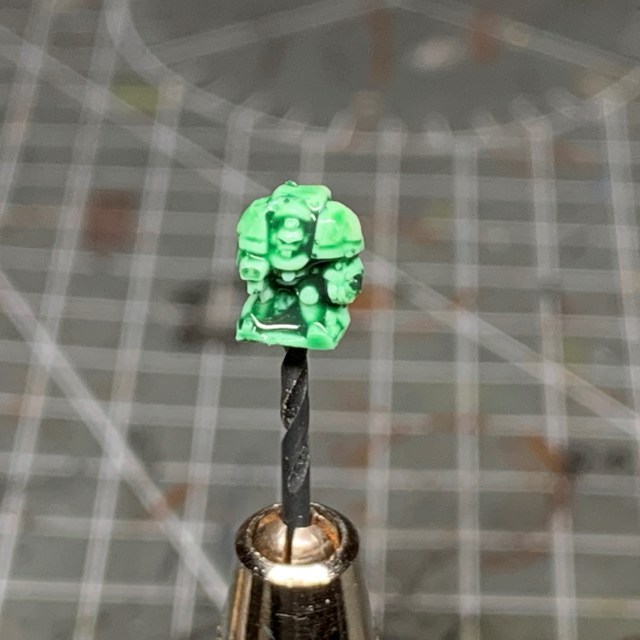
11. Now you need to paint the hololith figure whatever colour you think is best for a sci-fi hologram! For me, that was green. But the point of using a white LED is that you can then use GW shade paints to “filter” the white light to whatever colour you’d prefer. I used the old shade Thraka Green as that’s what I had to hand. The modern equivalent would be Biel-Tan Green. It will need a thick coat, but not too thick! In fact two thin coats is best, as Duncan says!
12. Dry fit the model again to see if you’ve got the right amount of paint. If the hololith figure still looks bright and white then you may not have enough shade and may benefit from another layer. That’s why it’s better to apply thin layers – it’s easier to add another layer than it is to remove a thick layer.

13. Now it’s finally time to glue the hololith figure into place! I found the best way to do this was to gently pull as much slack on the LED wires through the wrists as you need, then apply a small drop of superglue to the hole where the wires exit the arm. This prevents the LED being pushed back inside when you lower the hololith figure into position.
Put a tiny dab of superglue on the base of the hololith figure so it will stick to the wrist unit and lower it over the nano LED. And that’s it, you’re all done! I hope this tutorial was helpful!
Black, No Sugar. Thank you!
![]()
All my tutorials are entirely free; the only payment I really need is seeing everyone’s awesome LED armies on the battlefield! Having said that, if you found these tutorials useful and you’d like to buy me a coffee to say thank you (or help keep my supplied with LEDs and website fees so I can post even more tutorials) then please click the button above. Thanks very much in advance!
