
The Tyrant sends his regards! *BLAM-BLAM-BLAM*
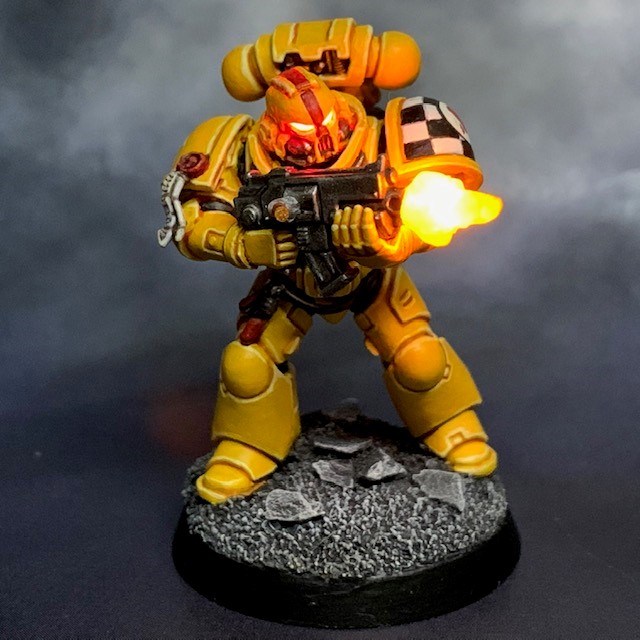
Brother Quartus, Lamenter Marksman

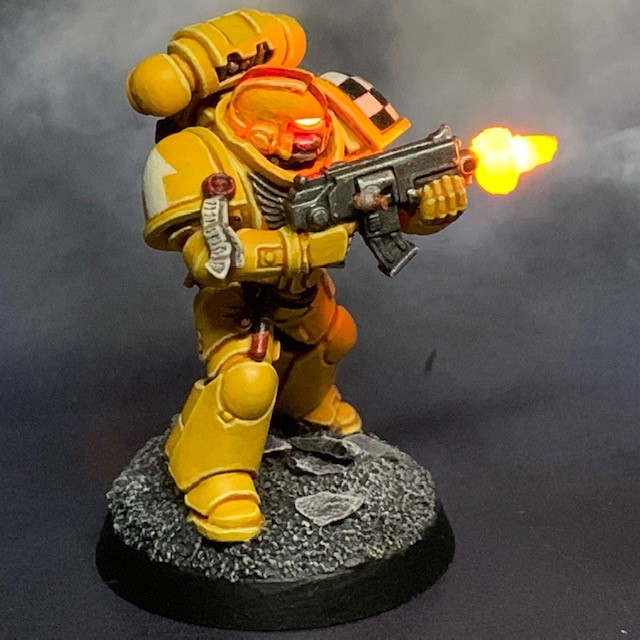
Here is Brother Quartus, the latest addition to my long-running Lamenter Badab War kill team project. If you’d like to look back on this project then you can search for posts tagged with either ‘Lamenters’ or ‘Badab War’.
Influence


When designing this Marine, my question to myself was “how can I make one of the team’s “filler” tactical marines with bolter interesting?”. In the end I hit upon the idea of loosely copying this classic Mark Gibbons art. I haven’t copied it exactly – for one the marine in the art is a Blood Angel – but I hope I’ve captured the feel, both of the art and of that era of Games Workshop history. Of course Brother Quartus has grown on me over the building and painting process so now I think I might promote him to sniper specialist in the kill team.
“Downgrading” Mk X armour to Mk VII
All my Lamenters are ‘true scale’, that is to say they have Primaris stature but wear period-appropriate armour marks. There was no Mk X used during the Badab War (as far as we know), so I wanted to “downgrade” the base Primaris Intercessor model to Mk VII power armour. The most important thing was to remove the elements of the armour that are distinctly Primaris features. For me this is the ankle ‘stabilisers’, the rim above the knee-pad, the armoured stomach, the forearm bracers, the wide backpack and of course the helmet. An argument could be made that the thigh-plates don’t belong on a Mk VII either, but I think I can make my peace with that.
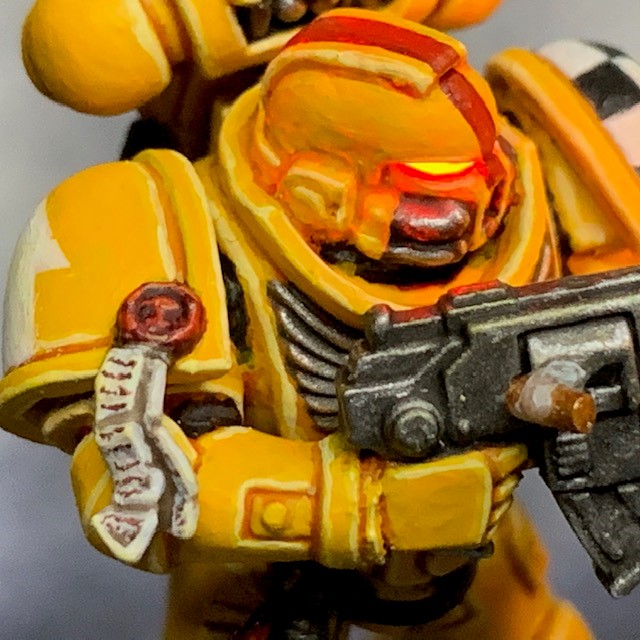


To remove the unwanted leg and stomach detail I simply hacked off anything that I didn’t want with a craft knife and then smoothed over any gaps with modelling putty, sculpting detail in where necessary. The arms are from Primaris Reivers, which are in scale for a marine of Primaris stature but less armoured than the standard Mk X arms. The helmet and the backpack were straight component swaps for their Mk VII equivalents.
Effects
For the LED effects I simply just followed the steps in my own LED Muzzle Flare tutorial to the letter, using the exact LEDs and components listed there. My Lamenters paint recipe can be found in this post if anyone is interested in how the yellow is achieved. As for the mid-ejection bolt shell casing, I think that’s worth talking through as this is a new technique that I was playing around with for this model.
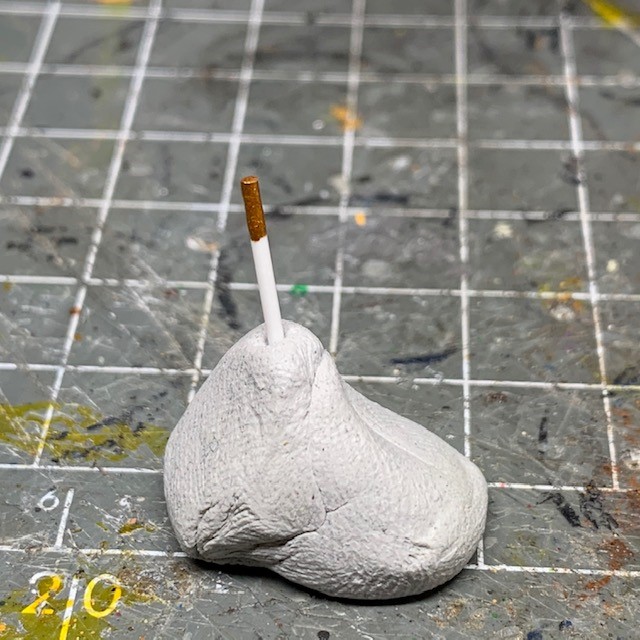


- I started with a 1mm diameter plastic rod, painted the end in Retributor Armour, and then cut off a 2mm length to form the ejected bolt shell casing.
- Next I built up the “smoke” around the ejection port using Water Splash Effect Gel, available from Green Stuff World. This gel is white and opaque when applied (as seen in the picture) but dries transparent.
- Once the splash gel had dried, I used a tiny dab of super glue to attach the shell casing.


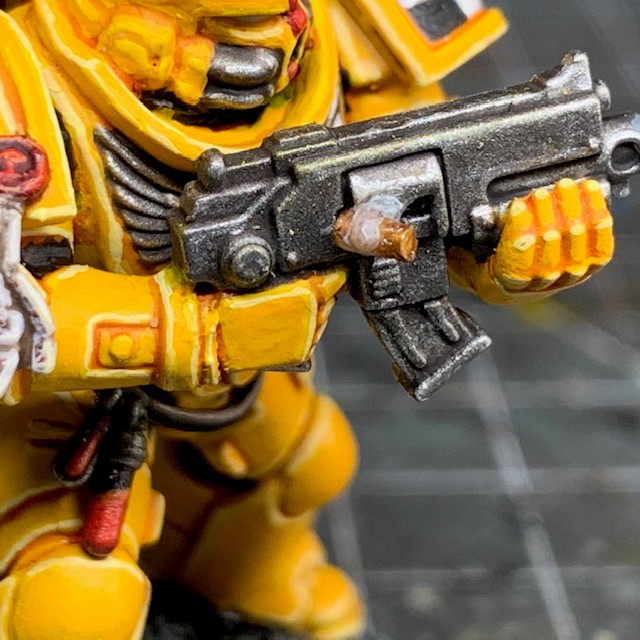
- Next I applied another layer of the splash gel around the shell casing to continue the smoke effect.
- Once the splash gel was dry I gave it a thin watered-down glaze of Ulthuan Grey. This helps it to retain some transparency while also appearing smoke coloured.
- Finally I applied a coat of Lahmian Medium to dull down the shine of the splash gel.
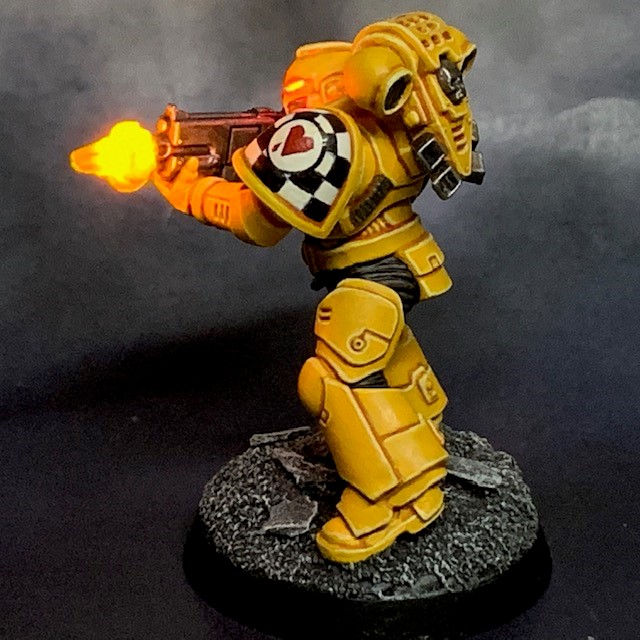
That’s it for this week. I’ll end with a group shot of the kill team so far (minus the Mk VI, who has returned to the chapter forge for modifications). That’s four down, three to go! My aim is to have the team finished by the time face-to-face gaming is allowed again in the UK, so please visit again soon to see how I’m getting on with that!


Pingback: Lamenters Kill Team Lugeo – Chris Buxey Paints