I had a lovely surprise this week when I learnt I had been nominated as a finalist for ‘Best Mini Painter’ at the CRIT Awards 2024! I knew of the CRIT Awards as a way of recognising excellent TTRPG games, players and podcasts, but I didn’t realise they had a best painter category, so that came as a double surprise!
If you feel I’m worthy of a vote then you can find the voting form here (Google Form). If you want to refresh your memory about my painting before you vote then my Miniature Gallery is here. But also please don’t forget to check out the work of the other nominees: Figuratively Speaking Minis, Josh, and Mimicing Nemo.
The CRIT Awards are based on community nominations in the first round of voting, so to have got this far someone out there must have thought of me when the categories were announced. I don’t know who nominated me, but if you’re out there and reading this, then thank you very much! I’m both honoured and flattered that you’d think of me.
Voting closes 7th July, and the winner is announced at GenCon in August. I will of course keep you all updated!
I choose to interpret my title as Shield Captain literally.
Themistius Kalden, Custodes Shield Captain
Allow me to present Themistius Kalden, Shield Captain of the Shadowkeepers Shield Host of the Adeptus Custodes. This miniature and its LED effects have been specially commissioned by the team at Green Stuff World to show off some of their 3D printed accessories and LED kits.
The 3D printed Energy Shields kit was one of several I was commissioned to demonstrate. My first thoughts were a space marine with a storm shield, but after a bit more musing, I thought a Custodian with a shield might be more interesting.
Modelling
As part of the commission I filmed all the stages of the build process, which you can see in the video below.
A full PDF tutorial will be released via Green Stuff World soon. When it is, I’ll add it here and link to it from my tutorial section (EDIT: The full PDF tutorial can now be found here). In the meantime, to get you started here’s a list of all the components and consumables I used. The miniature is from the Custodian Wardens kit.
For the paint scheme, I followed a similar recipe to my previous Custodian Shadowkeeper. The only difference was I used true metallic rather than NMM, just because NMM is very time consuming and I wanted to meet my deadline. For the face, I used my normal Pale Skin recipe. The energy shield was given a red glaze and very watered down highlight to the edges, just to help give it a bit more definition without impacting the transparency.
That’s all for today. I’ll be back again soon with more LED miniatures, including more collaborations with Green Stuff World. Thanks very much for reading, and please remember you can also find me sharing my work on Instagram, Threads, Twitter/X, Bluesky and Mastodon.
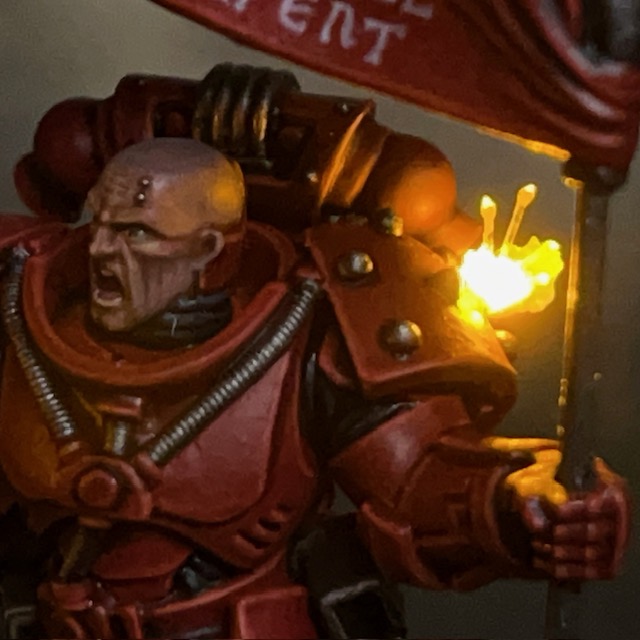
Sometimes you need to look the enemy in the eye, and sometimes you need to trust in your wargear.
Brother Castiar, Flesh Eaters
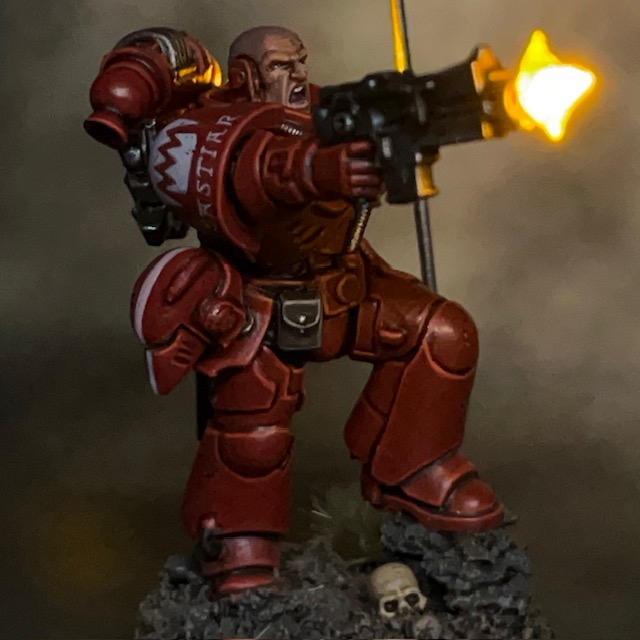
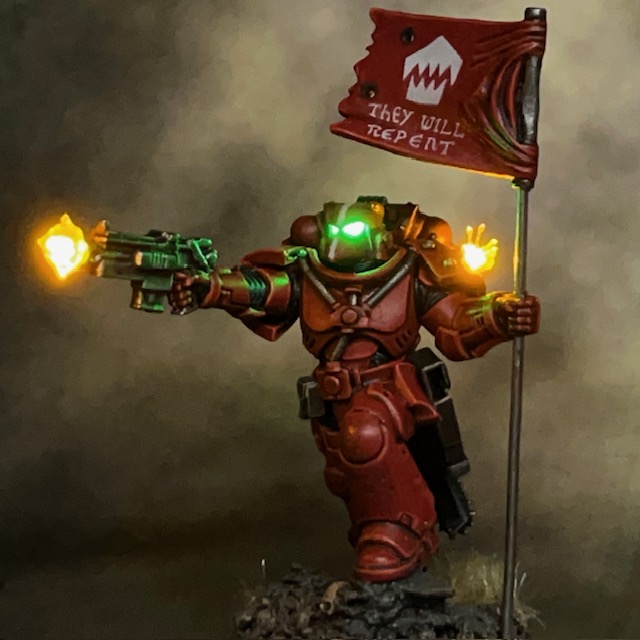
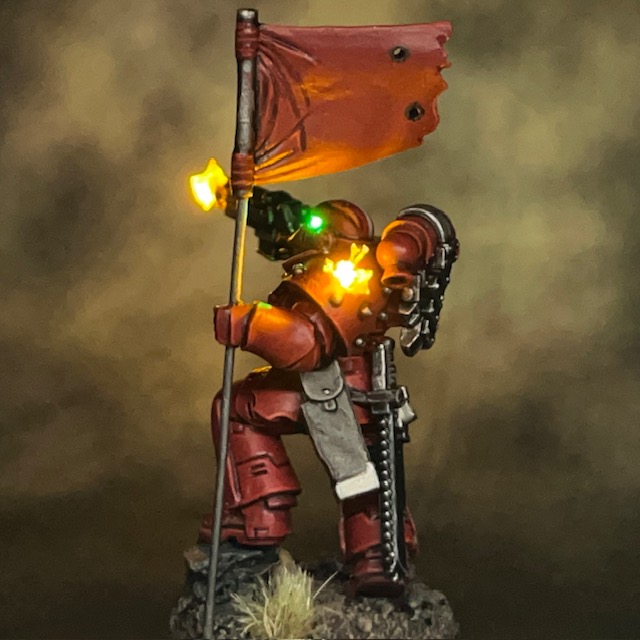
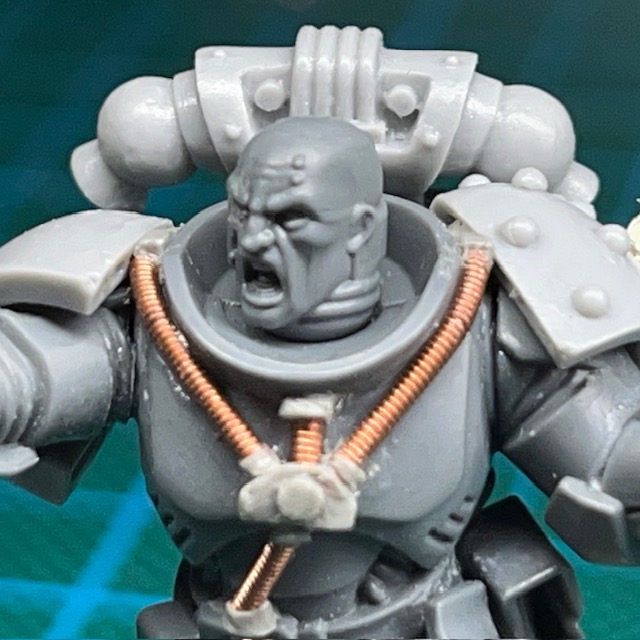
I’m back again with the next addition to my Flesh Eaters Space Marines project. Brother Castiar is the fourth member of my second Assault Intercessor squad, along with Brother Pitman, Brother Oram, and Sergeant Byrne. As well as the usual LED muzzle flare and bullet impact effects, Castiar also has a choice between a bare head or helmet that can be easily swapped during a game.
Modelling
I had built a similar effect before with my Crimson Fists Captain, although in that case he couldn’t wear the helmet ‘mag locked’ to his belt. It’s a technique I’ve been meaning to revisit for a while and refine into a short-form tutorial. The base miniature is an Assault Intercessor from the Indomitus box – yes, I’m still working my way through that!
Swappable Helmet Tutorial
1. This tutorial builds on the techniques used in my LED Eye Lens tutorial. To prepare your miniature and base, first complete Steps 1-10 of that tutorial.
2. This technique uses IC sockets (above left) as sockets for LED legs. They are just the right size for the legs of 1.8mm LEDs to easily fit in and out. IC sockets are often manufactured in long rows or squares, but you can easily cut them down into pairs but cutting in between individual sockets with a craft knife. For this tutorial you will just need a single pair of sockets. IC sockets are available on Amazon here or from electronic component suppliers like RS here.
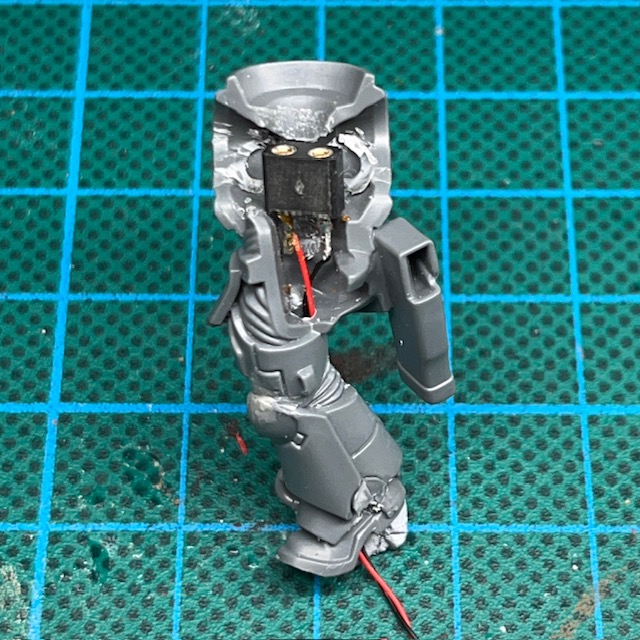
Assuming you’ve followed Steps 1-10 of my LED Eye Lens tutorial, you can now solder the two legs of the IC socket to the two wires inside the torso of your miniature (above right). Solder one wire to each leg. It doesn’t matter which way round you solder the wires, just remember which side was positive and which was negative.
3. Now complete Step 11 – 14 of my LED Eye Lens tutorial to prepare the helmet (above left). Make sure you consider the polarity of the LED legs with respects to the polarity of the IC socket before you fix the LED into place. At this stage I’ve also started using modelling putty to sculpt the flexible ‘rubber seal’ between the helmet and the armour. If you make sure the putty covers the entire underside of the LED this also helps prevent unwanted light spilling out from the bottom of the helmet.
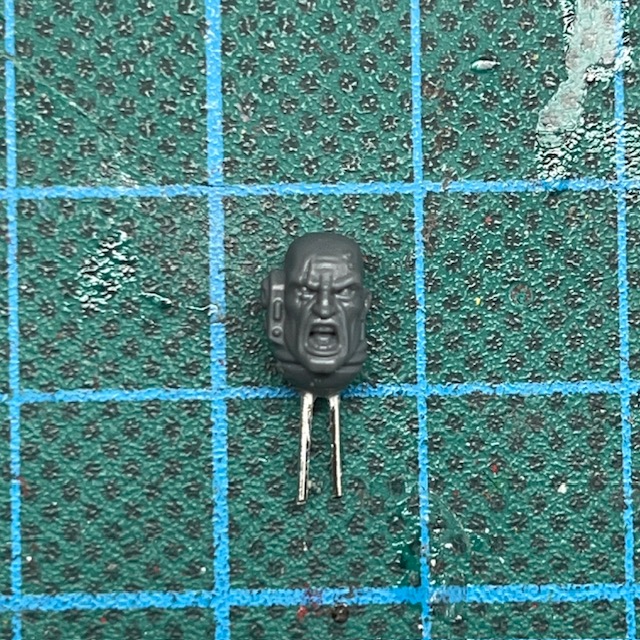
You will also need to prepare the bare head (above right). Use off-cuts from you LED legs to give the bare head legs of its own, then it can easily plug into the same IC socket. Make sure that the metal legs are not touching each other, otherwise you risk short circuiting the battery when the bare head is insert. There’s also no reason that the bare head can’t simply be a replaced with a different LED helmet instead.
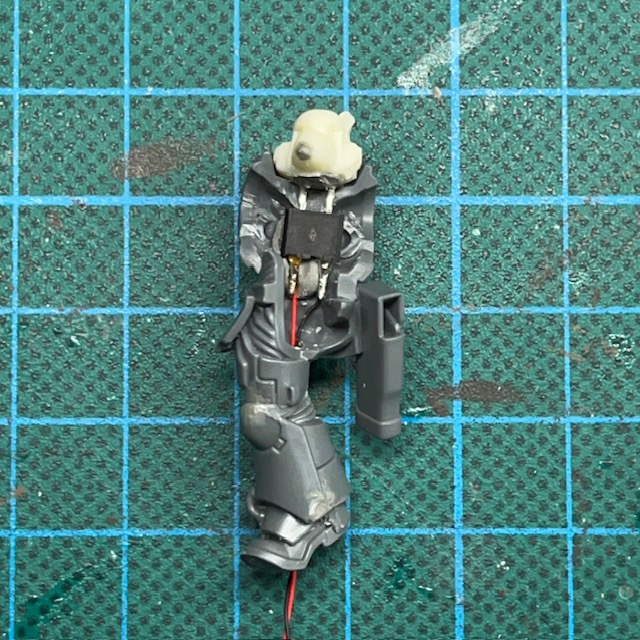
4. Make sure the LED legs are the right length so they fit comfortably through the neck hole and into the IC socket, while also sitting as flush as possible with the top of the torso. Once you are satisfied with the position, fix IC socket in place with glue and/or modelling putty (above left).
You may also want to add additional LED effects, for example LED Muzzle Flares or LED Plasma Weapons. If you do, this is the point at which to do it. Additional LEDs can be connected in parallel with the connections to the IC socket on the base (above right).
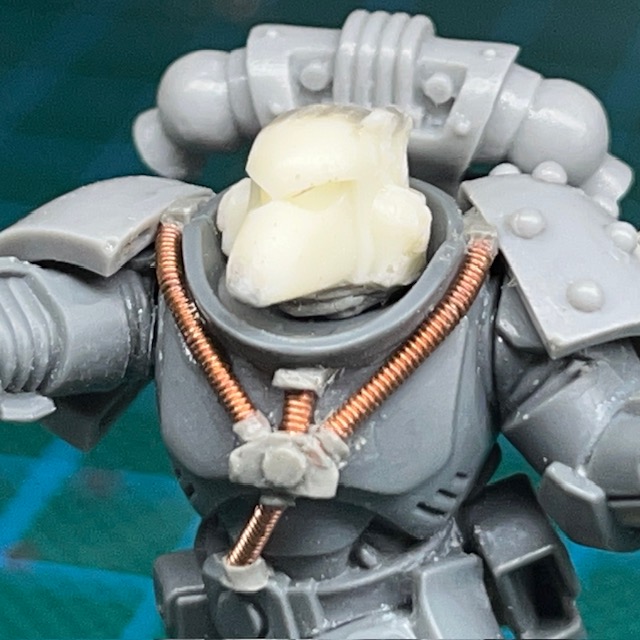
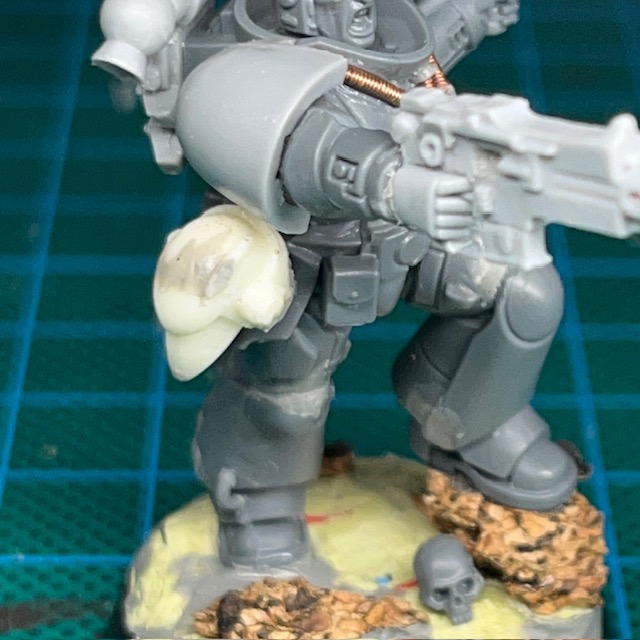
5. Assemble the rest of the miniature, and then make sure the both heads have a good fit with the torso. If there are gaps, you may need to use more modelling putty to sculpt additional detail to fill the gap, like the ‘rubber seal’ around the neck. (above).
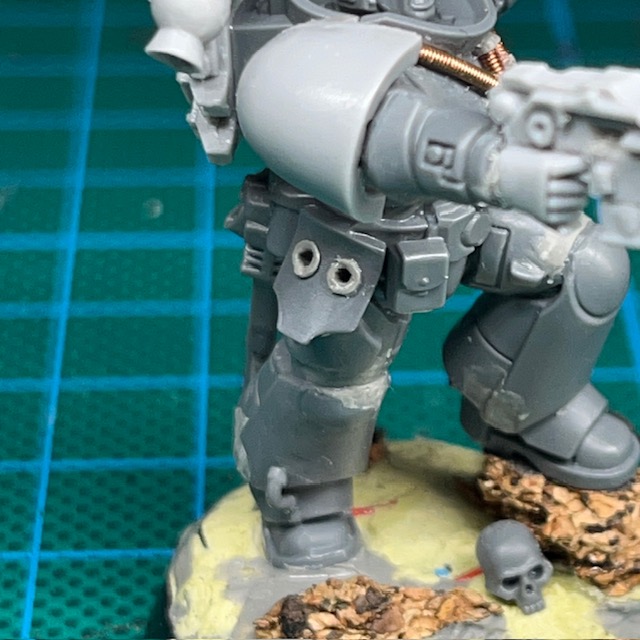
6. This step is optional, but if you want to include the ability to ‘mag lock’ the helmet on the belt, you will need to drill two holes in the waist or hip of the miniature (above left). Make sure the holes are deep enough so that the helmet sits flush with the hip (above right). A 1mm drill bit should be the ideal size for this. After drilling the holes, I added a small ring of modelling putty to make them look similar to the other sockets and access ports you sometimes find on Space Marine armour. Just be careful not to drill through any wires that may be inside the leg! These holes do not need any electrical connections as the helmet is ‘powered down’ when mag locked to the waist, so is not expected to illuminate in this postion.
Painting
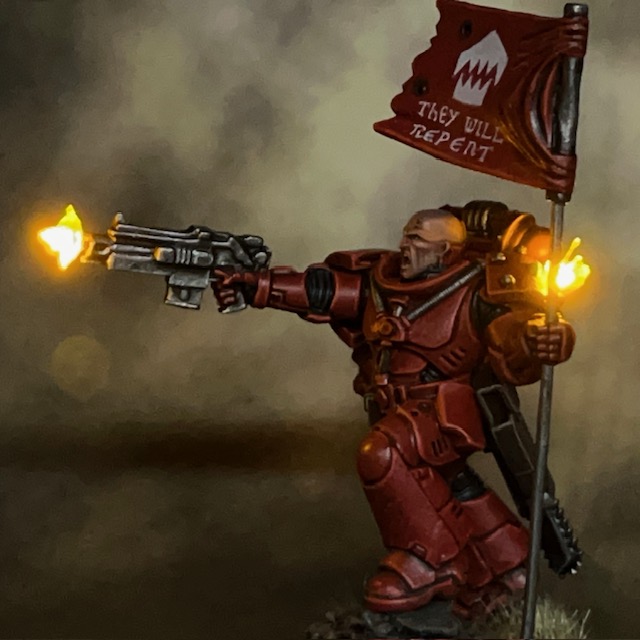
When painting this miniature I stuck with my usual recipes. I used my standard recipes for Flesh Eaters red armour and my recipe for Space Marine pale skin. Something that’s worth noting, I always apply a thin glaze of Biel-Tan Green to the resin in the helmet eyes so they have a green tint even when switched off. This is especially important for this miniature, where the helmet will feasibly be on display on the waist while powered down.
There’s a minor Easter Egg in the slogan Brother Castiar’s banner. Ostensibly, ‘They Will Repent’ is a threat and a promise to his Partisan enemies in the War of the False Primarch. But also – as with the banner on the Infiltrator squad – it’s also a reference to a level in the original Doom. Of course the level name is itself a biblical reference, so I guess it’s a nested Easter Egg, if you’ll excuse the pun!
That’s all for today. It’s been a while since my last blog post, but rest assured I’ve been working on lots behind the scenes, and I have plenty more to show soon. Thanks very much for reading, and please remember you can also find me sharing my work on Instagram, Threads, Twitter/X, Bluesky and Mastodon.
This evening I was fortunate enough to have one of my models make it onto the Warhammer TV Twitch channel again!
Brother Orpheus featured alongside the work of other hobbyists on today’s ‘March for Macragge Hang Out and Paint’ episode on Warhammer TV (Thursday 4th March episode, at around the 1 hour 13 minute mark, if anyone would like to see it).
It’s always an honour to have had my work exhibited in this way, and a big thank you to Simon, Nick, and the rest of the Warhammer Community Team for their kind words about this miniature! And to answer Simon’s question from the episode, all the lighting effects on this miniature are purely achieved with the LEDs, there’s no painted OSL.
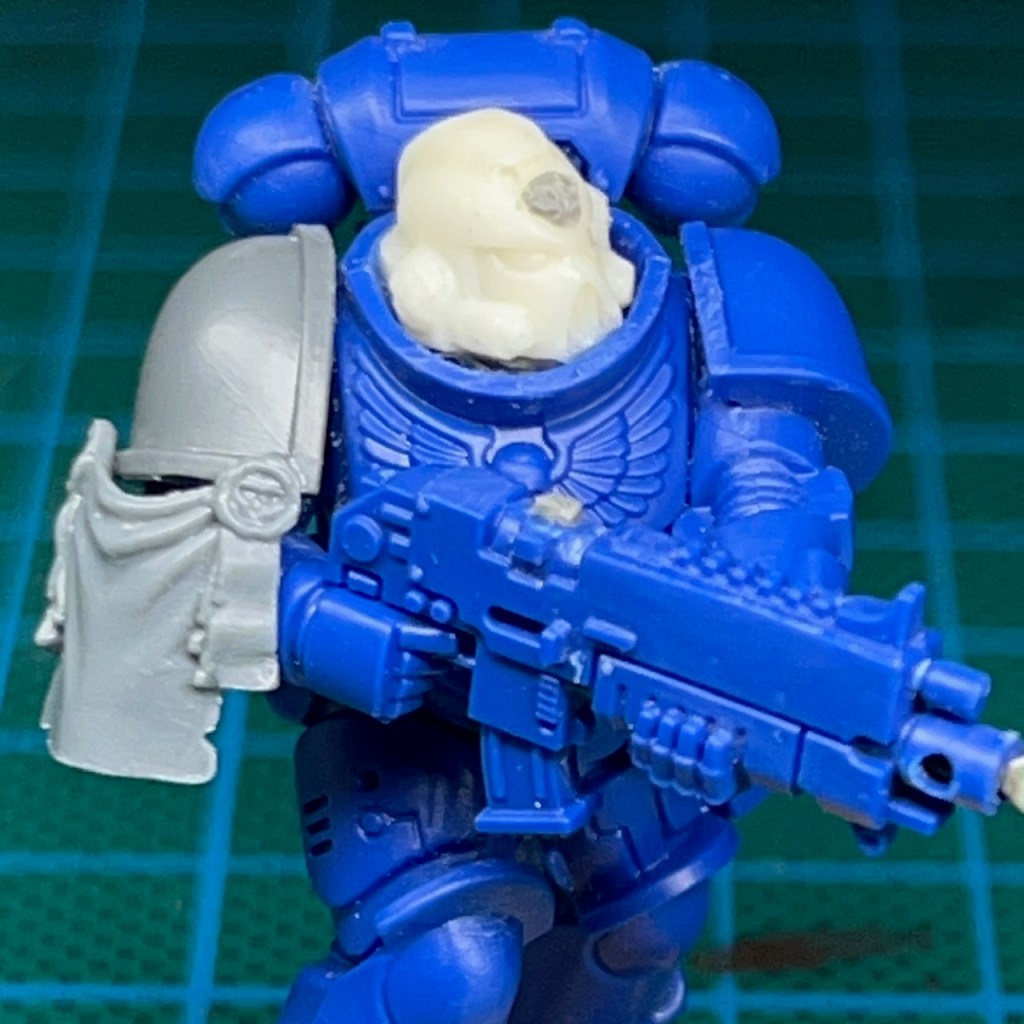
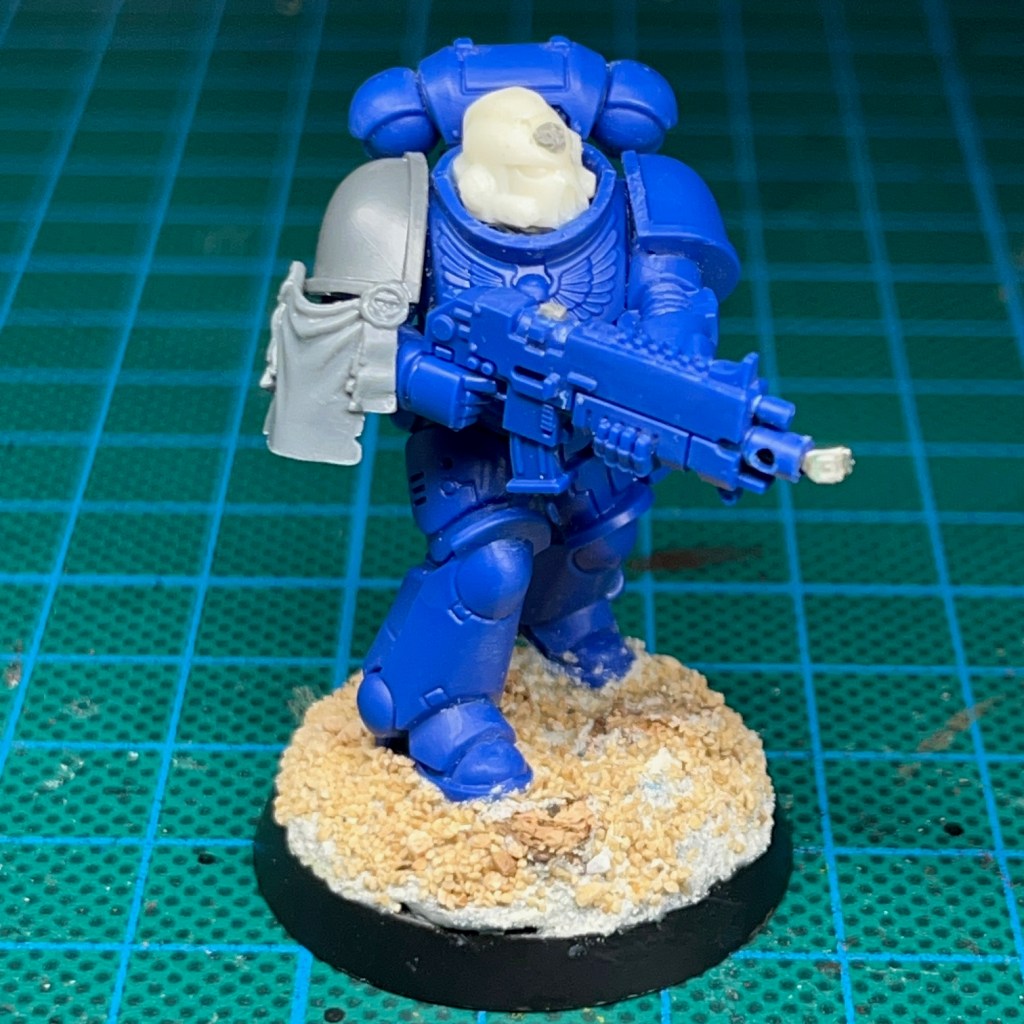
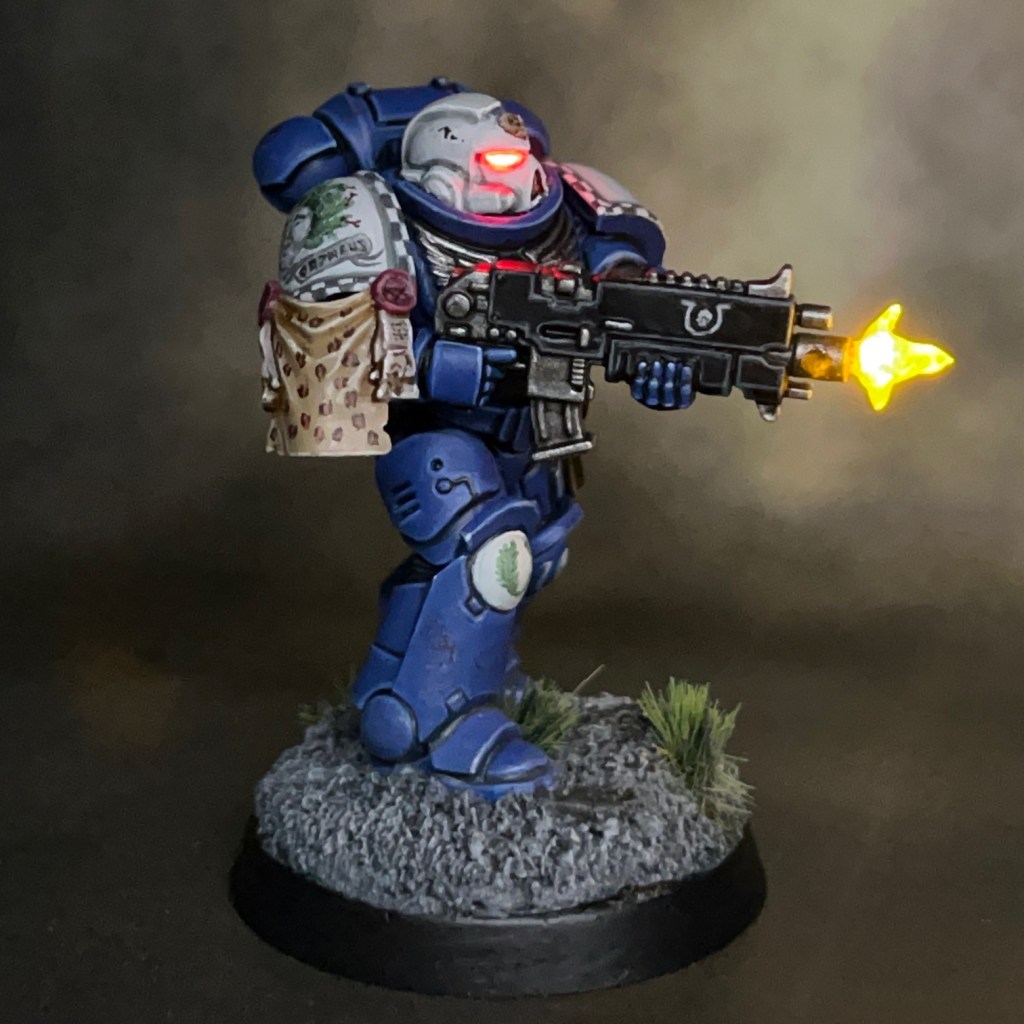
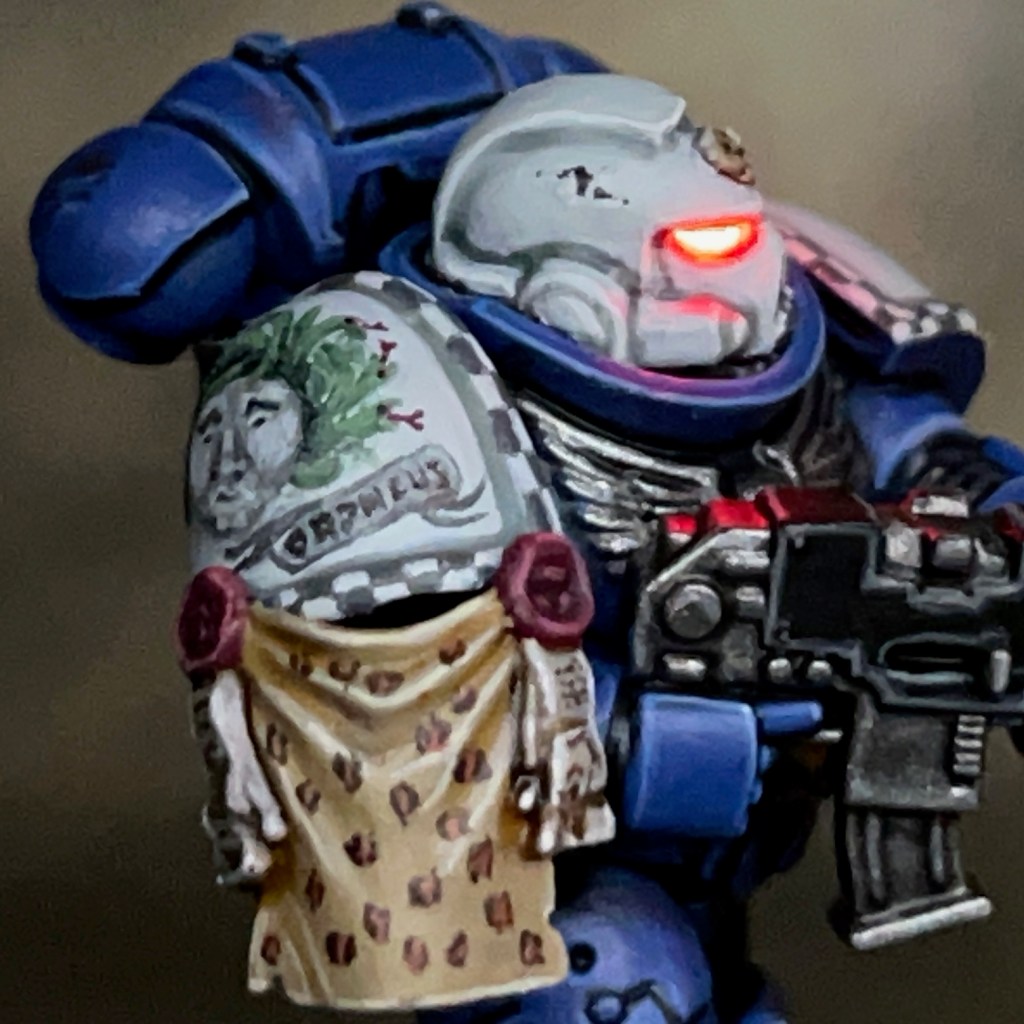
Today we’re looking at Brother Orpheus, my #MarchForMacragge project for this year. If you’re on the ‘hobby’ parts of social media then you may have seen the #MarchForMacragge hashtag being used a lot in the last few weeks. The premise is simple – paint something Ultramarine-related at some point during March and then share the results.
Modelling
I’ll always have a soft spot for the Ultramarines, as I learnt to play 40K back in the day borrowing a friend’s Ultramarine army. For previous years #MarchForMacragge I’ve completed the Ultramarine ‘Imperial Space Marine’, Ultramarines Primaris Lieutenant, and Ultramarine Veteran Sergeant. Two of these are based on classic artwork, so I also looked to artwork for inspiration this time around.
I soon settled on the above image as the basis for this project. It’s such a cool vista with lots of exciting things happening and interesting details. This artwork appeared as a full page spread in one of the second edition 40K rulebooks, and I’ve always found it a source of inspiration (it has previously inspired the heraldry on Brother Dunn) . Rather than try to recreate Brother Orpheus exactly, I decided to bring him up-to-date with a Primaris version.
Brother Orpheus was built from spares found in my ‘bits box’, mostly left-over components from one of the 40K partworks magazines. I believe the legs and torso are originally from a Hellblaster marine.
To create the helmet eye lenses and muzzle flare, I used the techniques exactly as described in my LED Muzzle Flare tutorial.
Painting
I’ve shared my recipes for some of the key colours on this miniature below. As this is a display piece rather than a gaming piece I added a few more stages to the armour recipe. All paints listed are Citadel unless stated otherwise. The miniature was spray undercoated Chaos Black.
Ultramarine Armour
Macragge Blue basecoat (two thin coats)
50:50 Kantor Blue:Abaddon Black shade
Altdorf Blue highlight
Calgar Blue fine highlight
Fenrisian Grey fine highlight on top edges and corners
Blue Horror dot highlight
White Armour
Ulthuan Grey basecoat (two thin coats)
Apothecary White Contrast shade
Ulthuan Grey layer (one thin coat)
Corax White highlight
Skull White fine highlight
For the animal pelt on the pauldron, I used the same technique as used on Brother Nikko of the Flesh Eaters.
Animal Pelt
Zandri Dust base coat
Seraphim Sepia shade
Karak Stone highlight
Screaming skull fine highlight
Tuskgor Fur small dots
50:50 Abaddon Black:Rhinox Hide irregular circles around the dots
When painting freehand I use the ‘iterative’ method. I start by ‘sketching’ in the shape in a dull colour, and then slowly build up in layers to the brighter final colours, correcting mistakes as I go. If you’d like to read more about this technique, and how it can be applied to freehand checker patterns, then check out this post.
That’s all for today, I hope you’ve enjoyed reading about my #MarchForMacragge 2024 project. I’ll be back again soon with more on my regular projects. Thanks very much for reading, and please remember you can also find me sharing my work on Instagram, Threads, Twitter/X, Bluesky and Mastodon.