Yesterday evening I was lucky enough to have one of my models make it onto the Warhammer TV Twitch channel again!
Lieutenant Titus featured alongside the work of other hobbyists on yesterday’s ‘Hang Out and Hobby – March for Macragge 2025’ episode on Warhammer TV (the Friday 4th April episode, at around the 1 hour 36 minute and 20 seconds mark, if anyone would like to see it).
It’s always an honour to have had my work exhibited in this way, and a big thank you to Simon, Nick, and the rest of the Warhammer Community Team for their kind words about this miniature!
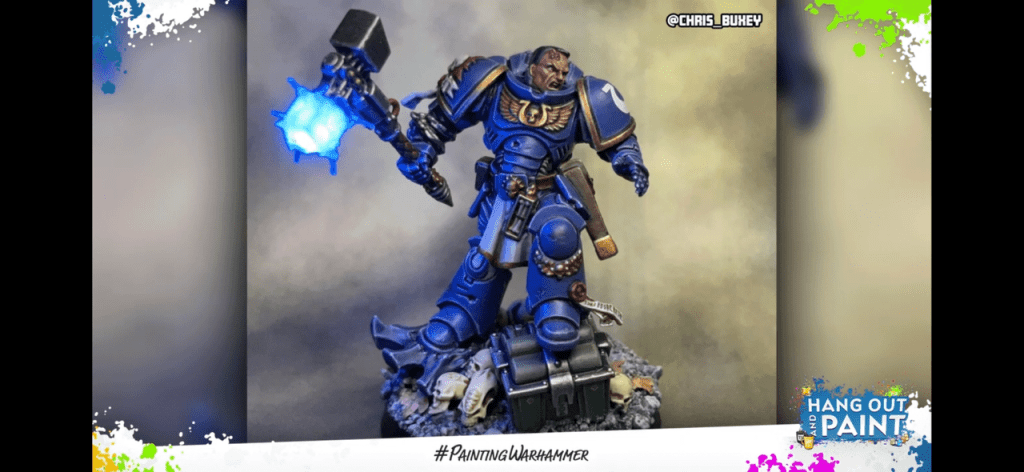
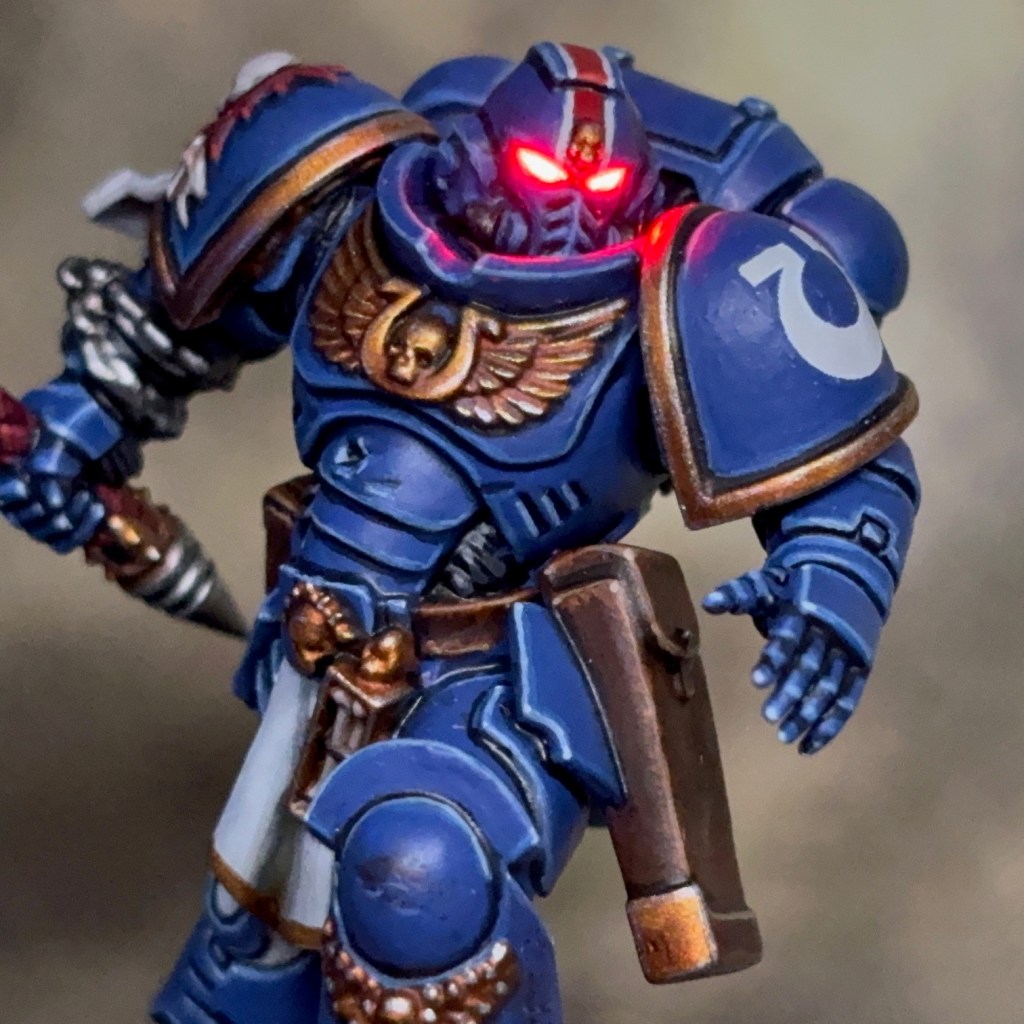
Courage and honour! I’m kicking off 2025 with Demetrian Titus, Lieutenant of the Ultramarines 2nd Company and protagonist of the ‘Space Marine 2’ video game. While I don’t collect Ultramarines, I do have a soft spot for the chapter and have spent a lot of time playing Space Marine 2 recently. So when Titus was released as an individual miniature in Warhammer stores in December, I snapped him up immediately!
Modelling
If you’re familiar with this miniature, then you’ll notice that my version is significantly different from the base model. I wanted to swap the chainsword for a thunder hammer, which was my favourite melee weapon in the single player campaign. I didn’t want to do a straight swap with the chainsword as having Titus posed waving the thunder hammer above his head one-handed didn’t feel like it had the necessary gravitas, so I decided to mix things up and repose the miniature. The new pose is influenced by both the Weta Workshop statue and the life-size Titus statue in the Warhammer World entrance hall.
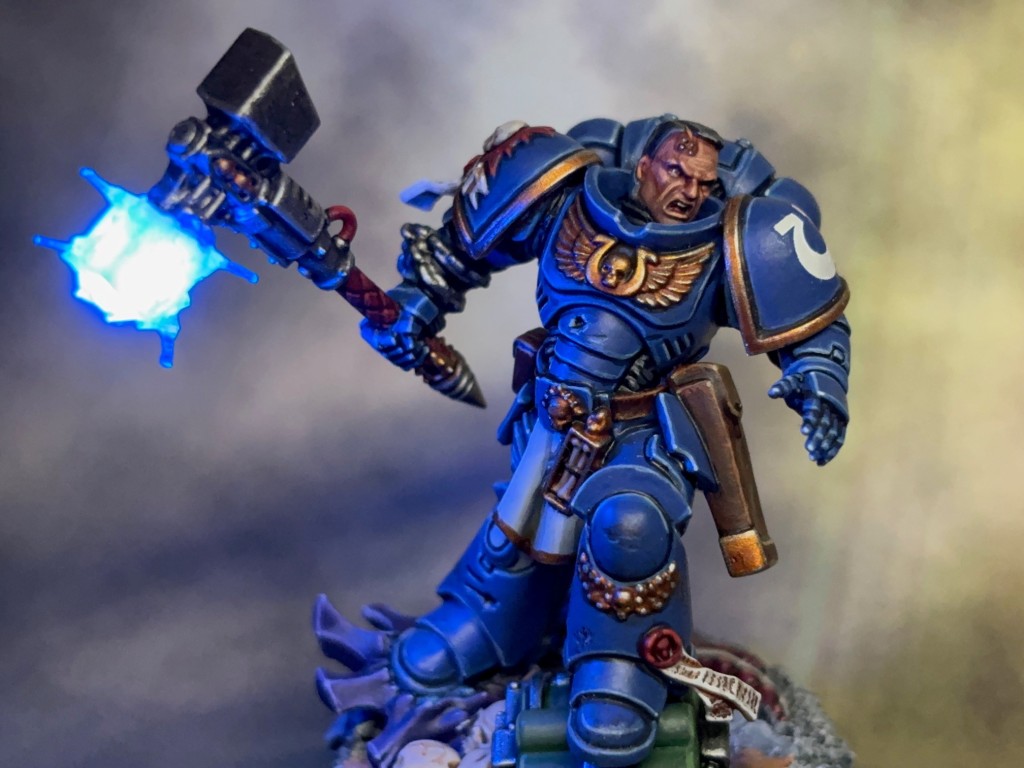
Forging the LED Thunder Hammer
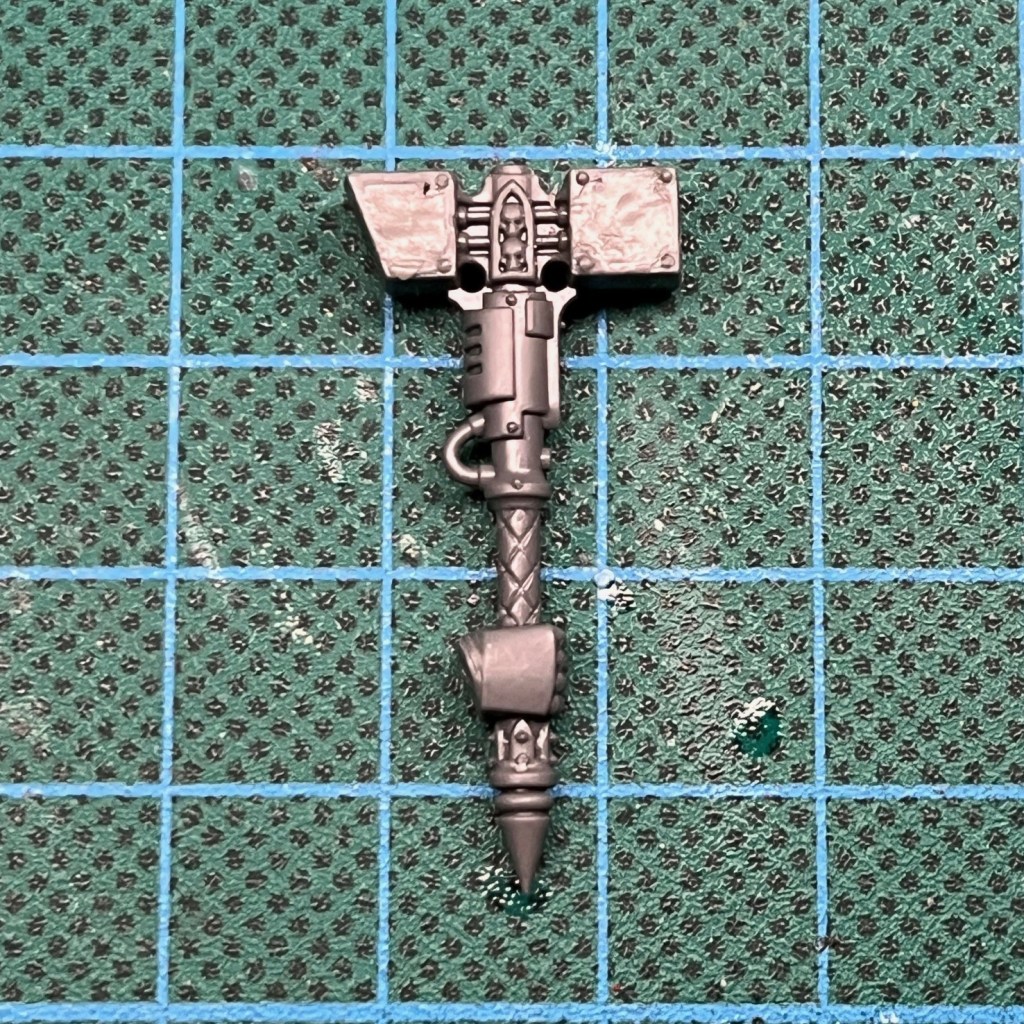
1. This miniature uses a single-handed thunder hammer. This particular one is from the discontinued Dark Angels Terminator set as I happened to have in my bits box, but any single-handed thunder hammer will do. The first step was to prepare the hammer by drilling holes for the wires. I made cuts at joints between different textures (e.g. the top of the grip and the shaft) as these are easier to hide when reassembling. Cutting the hammer into smaller sections makes drilling holes for the wires easier.
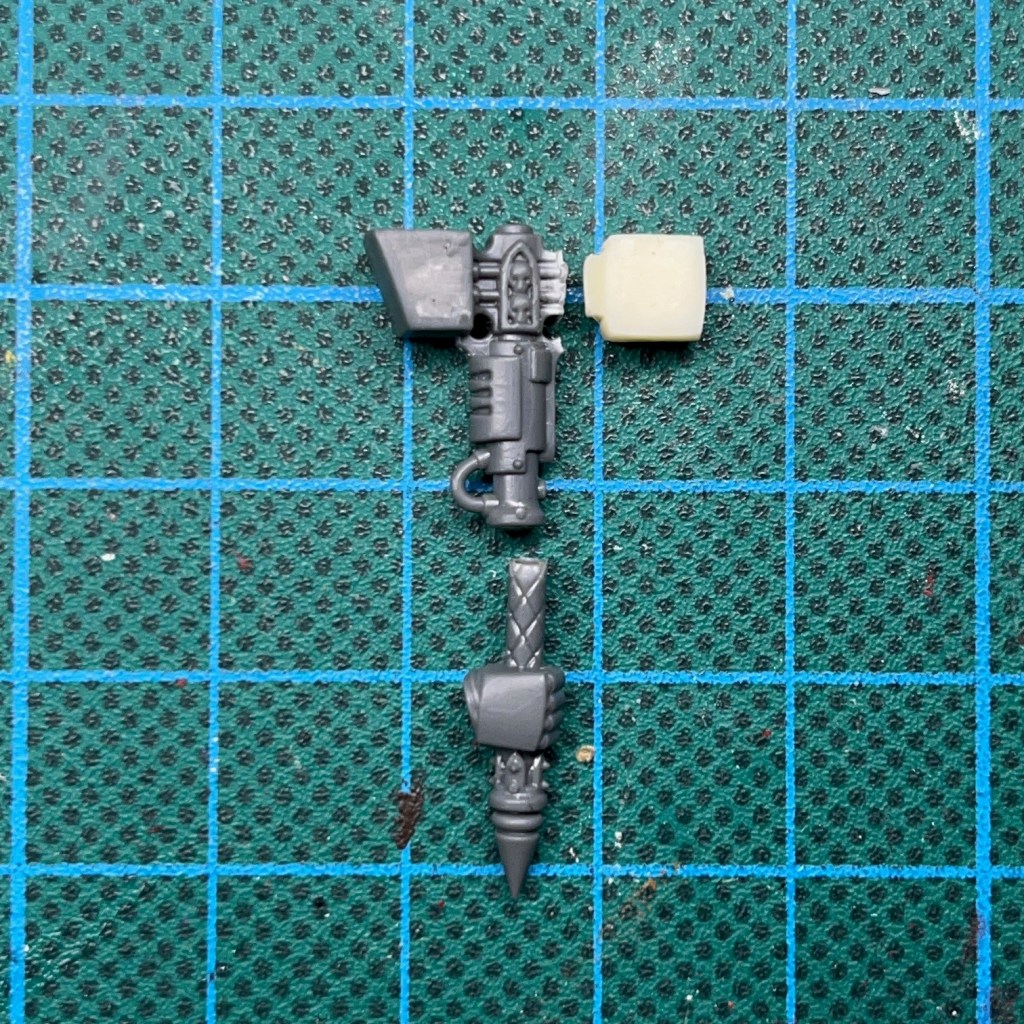
The head of the hammer was cast in polyurethane resin, using the techniques in my Resin Casting Tutorial. This is to allow diffusion and transmission of the LED light.
2. I used a 1.8mm Tru Opto Blue LED to create the blue glow in the thunder hammer. The LED is connected by thin wires that run down through the thunder hammer (as seen below), Titus’ right arm, torso and leg to a 10 ohm resistor and 3V coin cell battery in the base (see my LED Eye Lens Tutorial for more details on how to do this).
To insert the LED into the resin hammer head you will need to drill a hole in the resin. It’s worth noting that the “1.8mm” in the LED’s name refers to its standard directivity, i.e. the radius over which the light is emitted, rather than it’s physical size. I recommend a 3.5mm drill bit for drilling a suitably sized hole in the resin. Once the LED is fully inserted, you can reassemble all parts of the hammer. Any gaps can be filled with modelling putty.
3. I added Water Splash Effect Gel, available from Green Stuff World, in narrow lines over the resin to create the crackling energy effect. This gel is best applied in thin layers, allowing each layer to dry before applying the next.
Once all the gel is completely dry, the final step is to apply a single thin glaze of blue paint over all the resin and gel. As long as this is suitably thin it will enhance the look of the miniature while the LED is off without inhibiting the light of the LED.
Getting A-head on Helmets
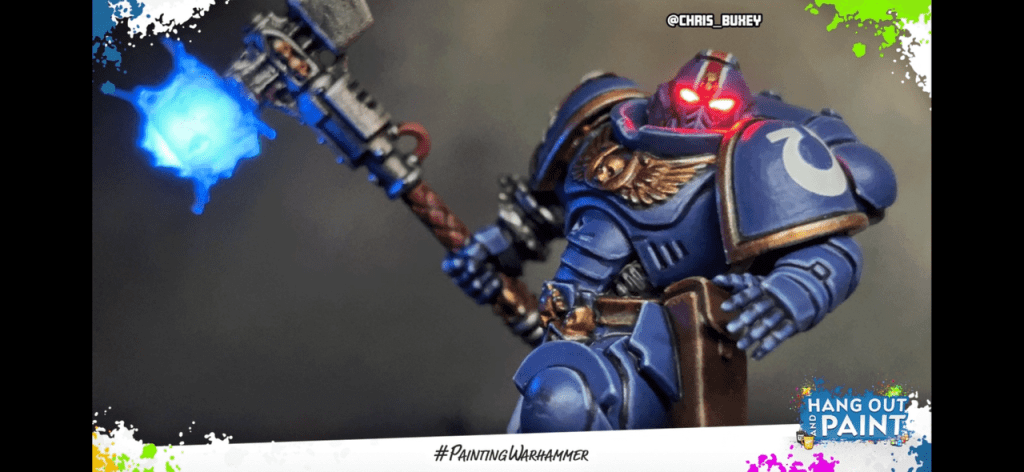
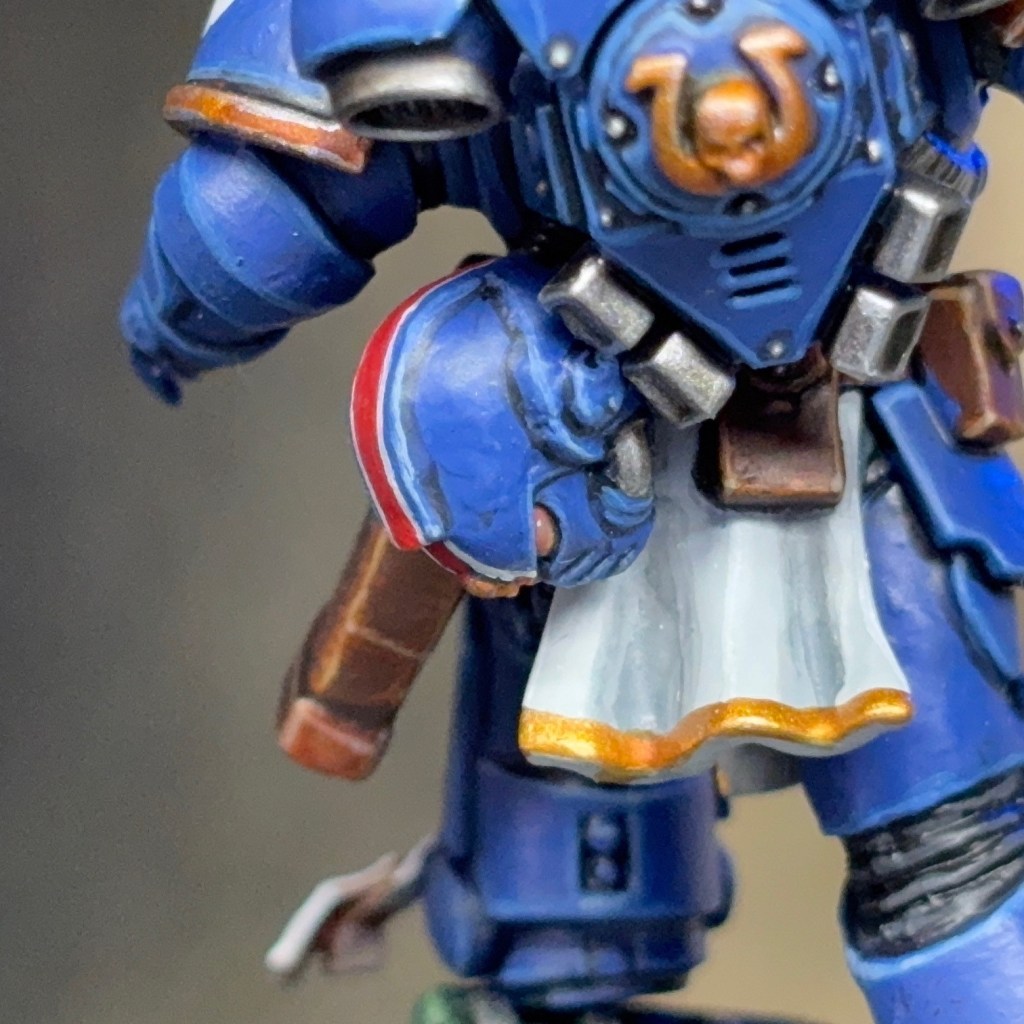
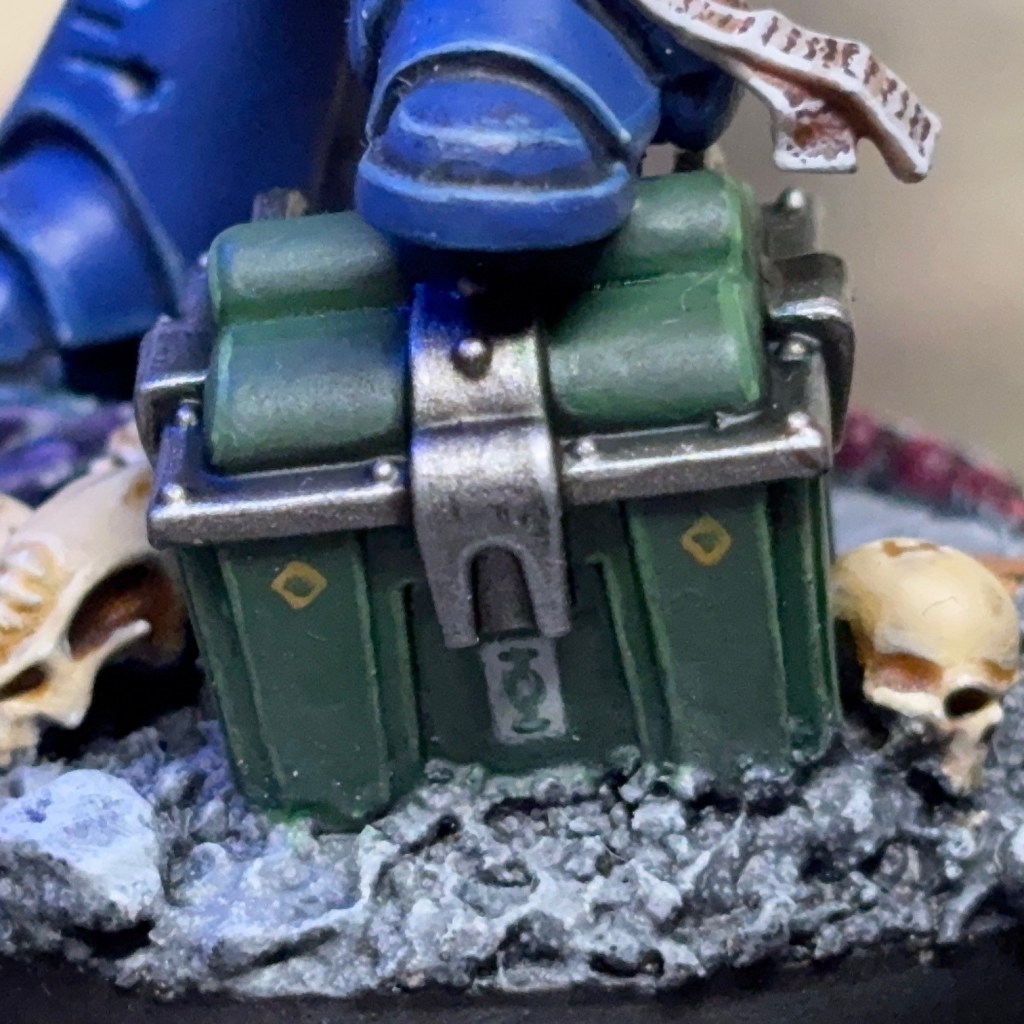
The miniature is supplied with a choice of bare head and helmet. Titus’ stoic visage and the glowering MkX helmet are both iconic looks, but thankfully I didn’t have to choose. I made the bare head and LED helmet interchangeable by using an IC socket and the techniques detailed in my LED Swapable Helmet Tutorial. When not in use, the helmet fits into a socket on Titus’ belt, as shown below.
The helmet contains a single 1.8mm Tru Opto Red LED and was created by following the steps in my LED Eye Lens Tutorial. As mentioned above, the LEDs in the helmet and thunder hammer are connected in parallel to a single 3V coin cell battery and switch in the base that are both accessible from underneath.
Painting
I followed the “official” scheme when choosing colours for this miniature, which seemed important as I was recreating a specific character. I did wonder about painting the Neuroloid in my Hive Fleet Cerberus scheme, but decided that was too much of a deviation from the Tyranids encountered in the game, so used the standard Hive Fleet Leviathan colours. The green box on the base is painted in the style of the crates that conceal ammo and supplies in the game.
This miniature used a lot of different paints, but I have included my recipes for a few key colours, just in case anyone is interested. All paints are Citadel unless stated otherwise. The miniature was spray undercoated Chaos Black.
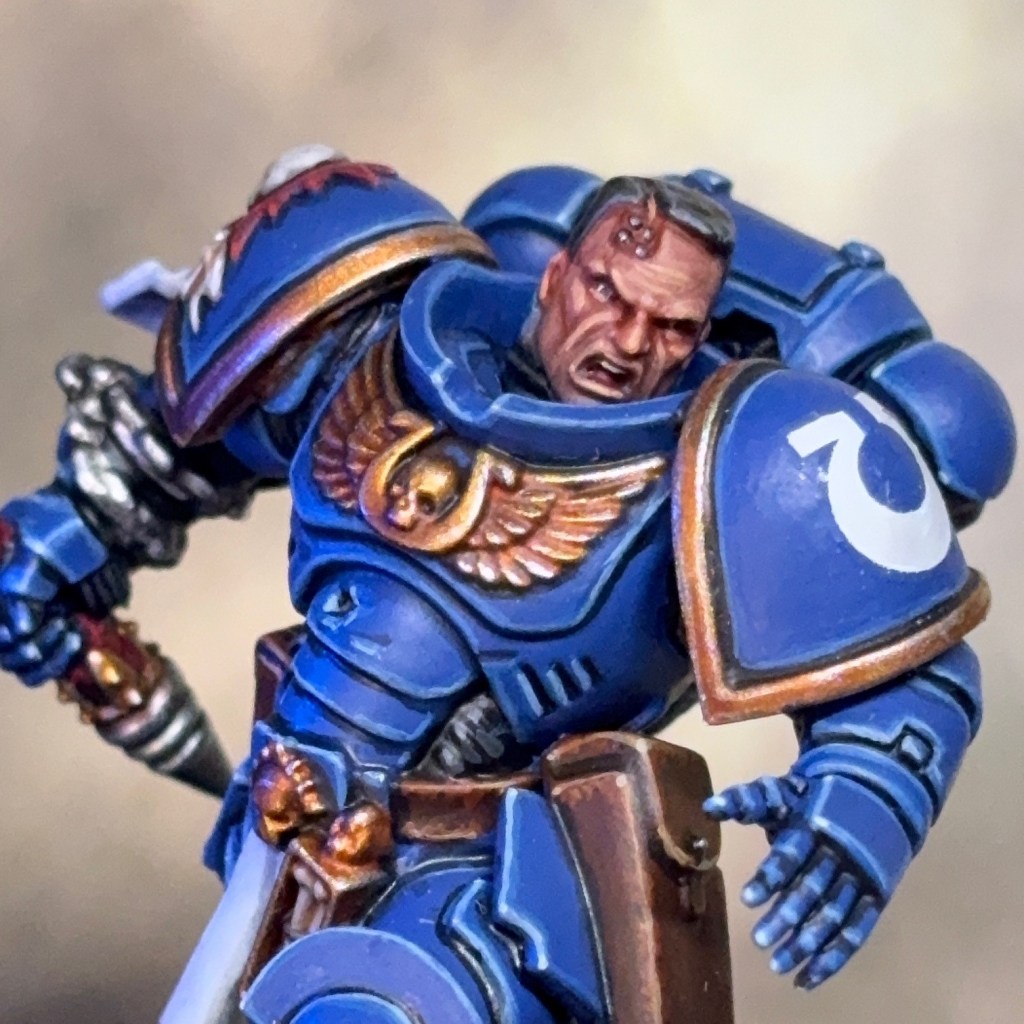
Ultramarine Armour
Macragge Blue basecoat (two thin coats)
50:50 Kantor Blue:Abaddon Black shade
Altdorf Blue highlight
Calgar Blue fine highlight
Fenrisian Grey fine highlight on top edges and corners
Blue Horror dot highlight
White Cloth
Administratum Grey basecoat
Apothecary White shade
Corax White layer
Skull White highlight
Administratum Grey thin glaze
Gold Details
Retributor Armour base coat
Reikland Fleshshade in recesses
Aggaros Dunes thinned glaze on lower portions of gold areas
Step 6 of the above recipe was done twice for extra stubble
So there we are, my first completed miniature of 2025! Hopefully the corpse on the base allows it to also count as progress on my Tyranid project, haha! I’ll be back on the Ultramarines again in March for #MarchForMacragge, but before then I’ll be trying to progress my regular projects. Finally, if you haven’t played Space Marine 2, go and get it because it’s excellent! As ever, thanks very much for reading, and please remember you can also find me sharing my work on Instagram, Threads, Bluesky and Mastodon.
This evening I was fortunate enough to have one of my models make it onto the Warhammer TV Twitch channel again!
Brother Orpheus featured alongside the work of other hobbyists on today’s ‘March for Macragge Hang Out and Paint’ episode on Warhammer TV (Thursday 4th March episode, at around the 1 hour 13 minute mark, if anyone would like to see it).
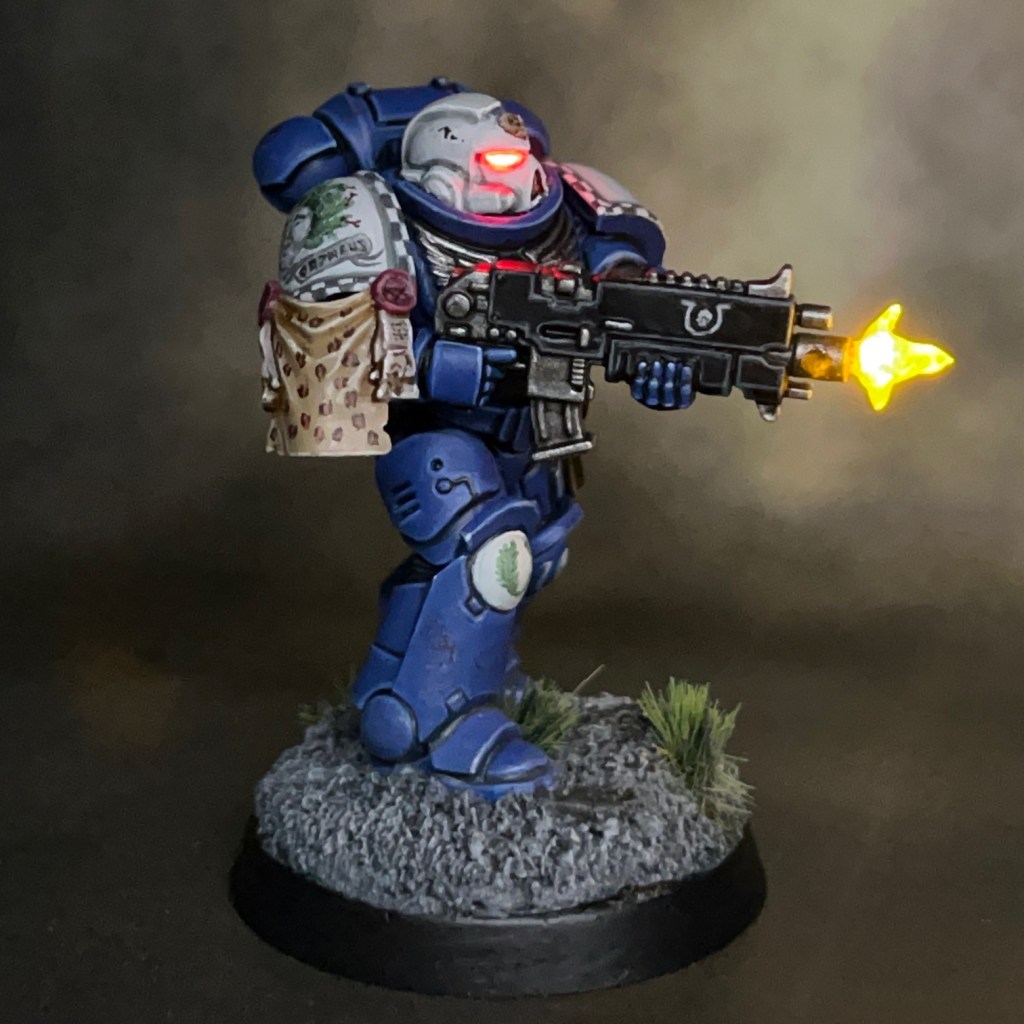
It’s always an honour to have had my work exhibited in this way, and a big thank you to Simon, Nick, and the rest of the Warhammer Community Team for their kind words about this miniature! And to answer Simon’s question from the episode, all the lighting effects on this miniature are purely achieved with the LEDs, there’s no painted OSL.
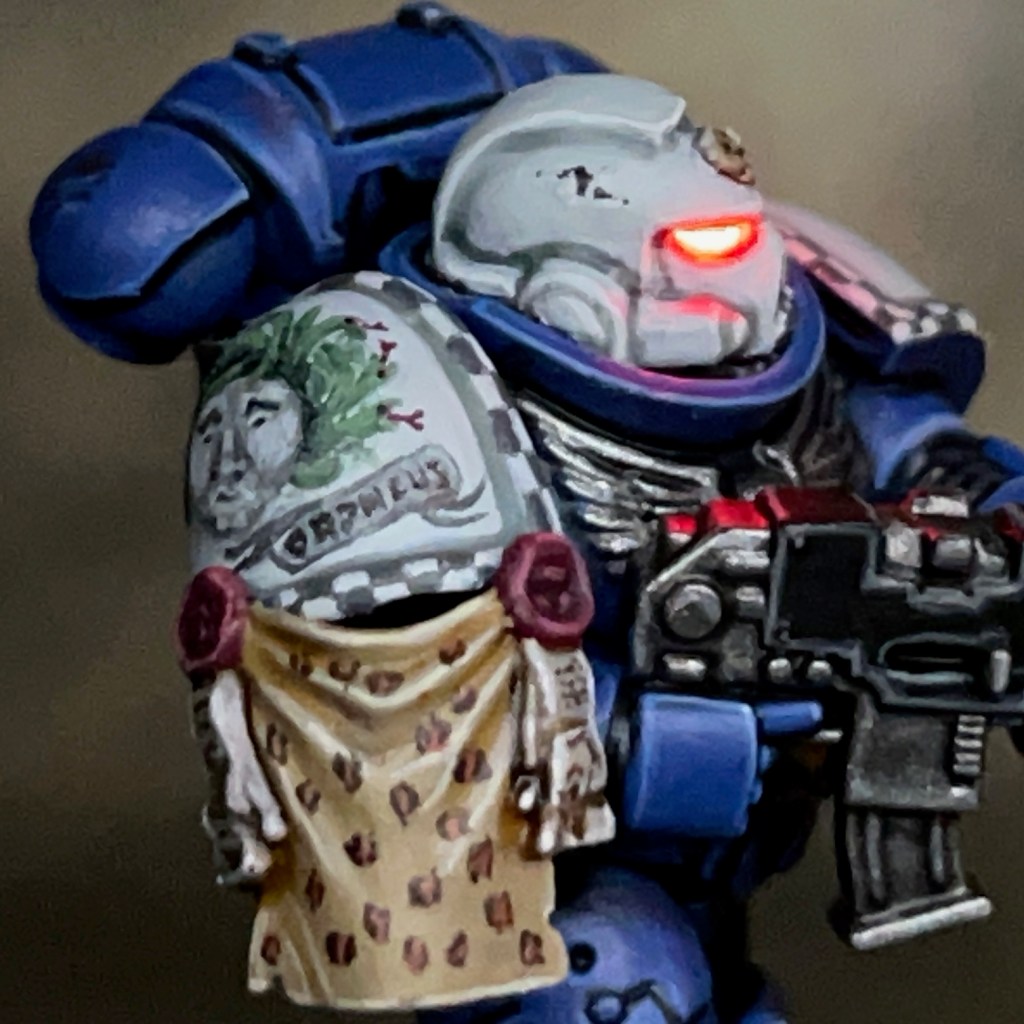
Today we’re looking at Brother Orpheus, my #MarchForMacragge project for this year. If you’re on the ‘hobby’ parts of social media then you may have seen the #MarchForMacragge hashtag being used a lot in the last few weeks. The premise is simple – paint something Ultramarine-related at some point during March and then share the results.
Modelling
I’ll always have a soft spot for the Ultramarines, as I learnt to play 40K back in the day borrowing a friend’s Ultramarine army. For previous years #MarchForMacragge I’ve completed the Ultramarine ‘Imperial Space Marine’, Ultramarines Primaris Lieutenant, and Ultramarine Veteran Sergeant. Two of these are based on classic artwork, so I also looked to artwork for inspiration this time around.
I soon settled on the above image as the basis for this project. It’s such a cool vista with lots of exciting things happening and interesting details. This artwork appeared as a full page spread in one of the second edition 40K rulebooks, and I’ve always found it a source of inspiration (it has previously inspired the heraldry on Brother Dunn) . Rather than try to recreate Brother Orpheus exactly, I decided to bring him up-to-date with a Primaris version.
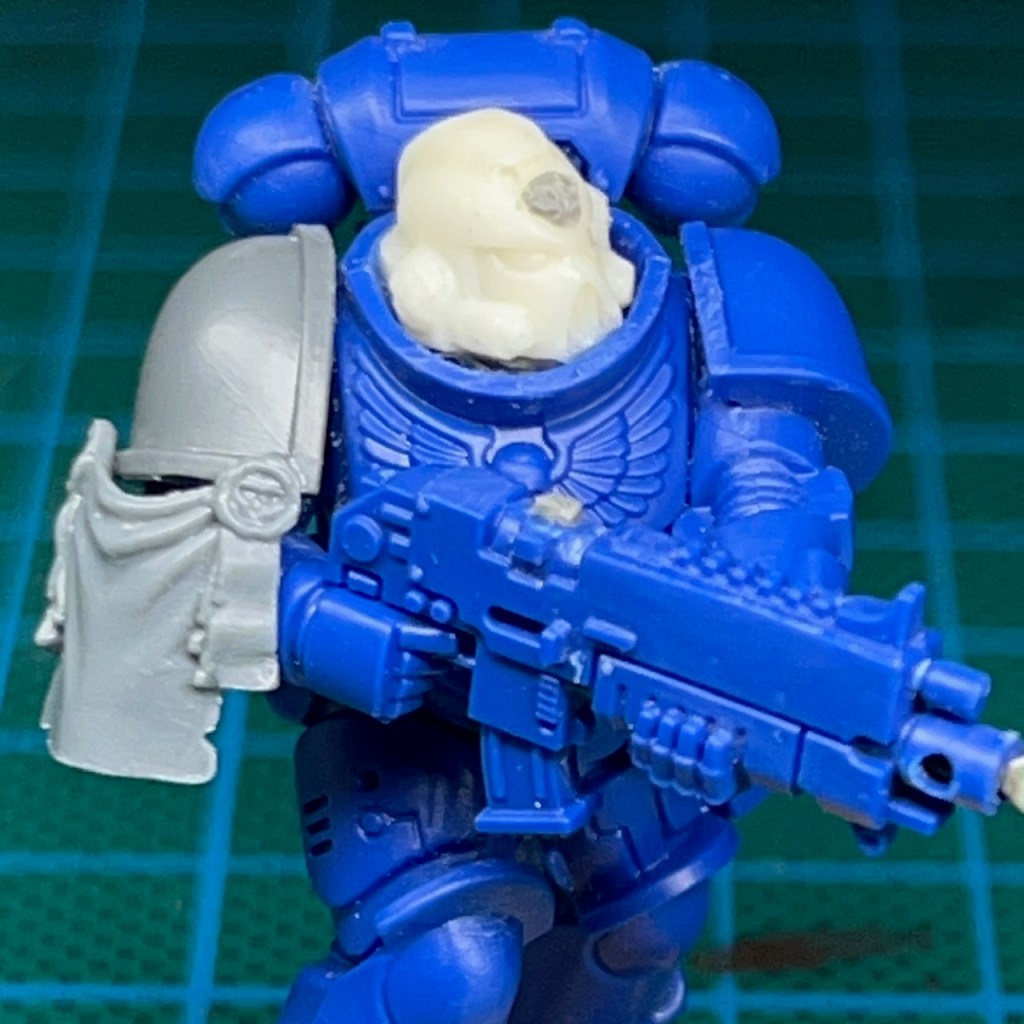
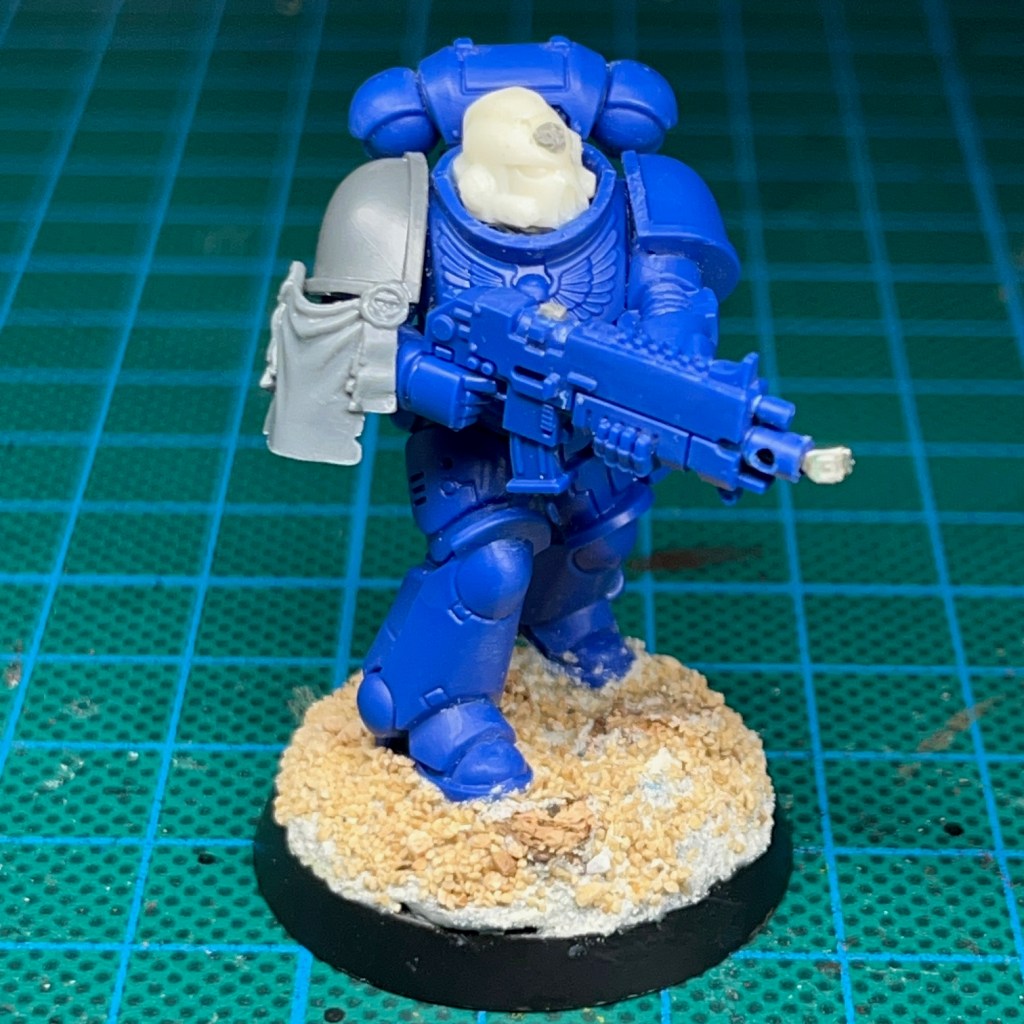
Brother Orpheus was built from spares found in my ‘bits box’, mostly left-over components from one of the 40K partworks magazines. I believe the legs and torso are originally from a Hellblaster marine.
To create the helmet eye lenses and muzzle flare, I used the techniques exactly as described in my LED Muzzle Flare tutorial.
Painting
I’ve shared my recipes for some of the key colours on this miniature below. As this is a display piece rather than a gaming piece I added a few more stages to the armour recipe. All paints listed are Citadel unless stated otherwise. The miniature was spray undercoated Chaos Black.
Ultramarine Armour
Macragge Blue basecoat (two thin coats)
50:50 Kantor Blue:Abaddon Black shade
Altdorf Blue highlight
Calgar Blue fine highlight
Fenrisian Grey fine highlight on top edges and corners
Blue Horror dot highlight
White Armour
Ulthuan Grey basecoat (two thin coats)
Apothecary White Contrast shade
Ulthuan Grey layer (one thin coat)
Corax White highlight
Skull White fine highlight
For the animal pelt on the pauldron, I used the same technique as used on Brother Nikko of the Flesh Eaters.
Animal Pelt
Zandri Dust base coat
Seraphim Sepia shade
Karak Stone highlight
Screaming skull fine highlight
Tuskgor Fur small dots
50:50 Abaddon Black:Rhinox Hide irregular circles around the dots
When painting freehand I use the ‘iterative’ method. I start by ‘sketching’ in the shape in a dull colour, and then slowly build up in layers to the brighter final colours, correcting mistakes as I go. If you’d like to read more about this technique, and how it can be applied to freehand checker patterns, then check out this post.
That’s all for today, I hope you’ve enjoyed reading about my #MarchForMacragge 2024 project. I’ll be back again soon with more on my regular projects. Thanks very much for reading, and please remember you can also find me sharing my work on Instagram, Threads, Twitter/X, Bluesky and Mastodon.
I’m back from Golden Demon 2023 and Warhammer Fest! After 48 hours to rest and decompress, I’m ready to share some thoughts, feelings and photos!
Golden Demon 2023
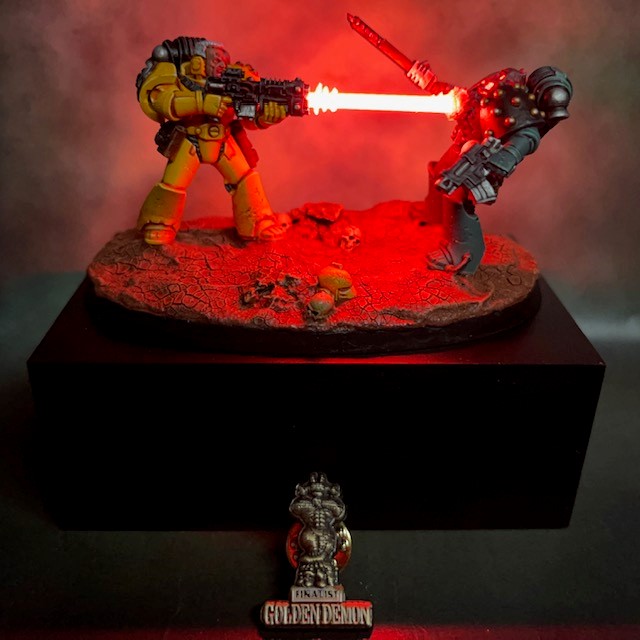
I’m very pleased to say that “Burn traitor!”, my entry to the Golden Demon ‘Duel’ category, made it through the first cut and took home a Finalist pin, as seen above! I’m really happy with this result. As mentioned in my previous post, I wasn’t seriously expecting a trophy – and I’m not certain if an LED miniature could ever win one – but it was lovely to have my hard work acknowledged in this way. There was nothing for my Ultramarine Veteran Sergeant, but I’d be the first to admit he was the weaker of the two entries, so I wasn’t overly surprised by that.
I feel like I learnt a lot from this year’s Golden Demon, both in terms of viewing other entries and listening to other competitors. Many people around the cabinets certainly had plenty of lovely things to say about “Burn traitor!”. One thing this outing confirmed for me is that 12V LEDs are the way to go if you want your lights to be clearly noticeable in the brightly spot lit cabinets. The 3V LEDs in the Ultramarines Veteran Sergeant were still visible, but only if you were nearby and looking directly at the model. The 12V filament LED was clearly noticeable from a distance, even in such a well lit space. After the first 24 hours the LED had lost a lot of its brightness, but the Golden Demon staff were very helpful and understanding, and kindly took the diorama out of the cabinet so I could perform a quick battery change. I didn’t bother to change the battery in the Ultramarine, as that one was under less strain and held up well for the entire weekend.
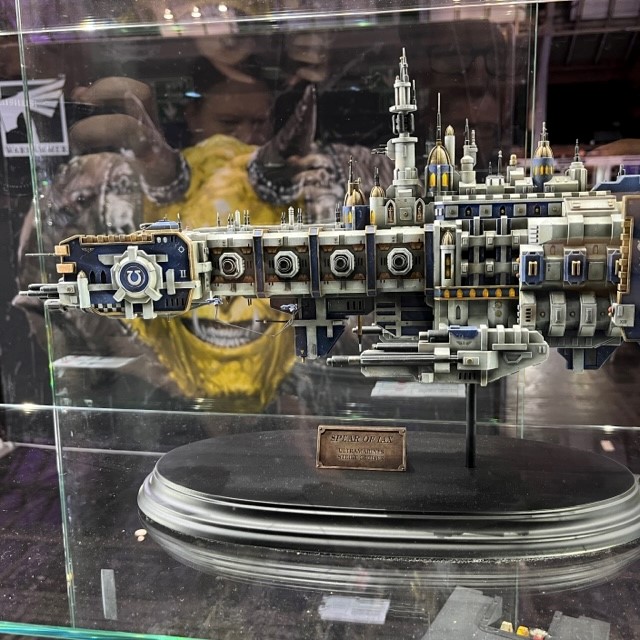
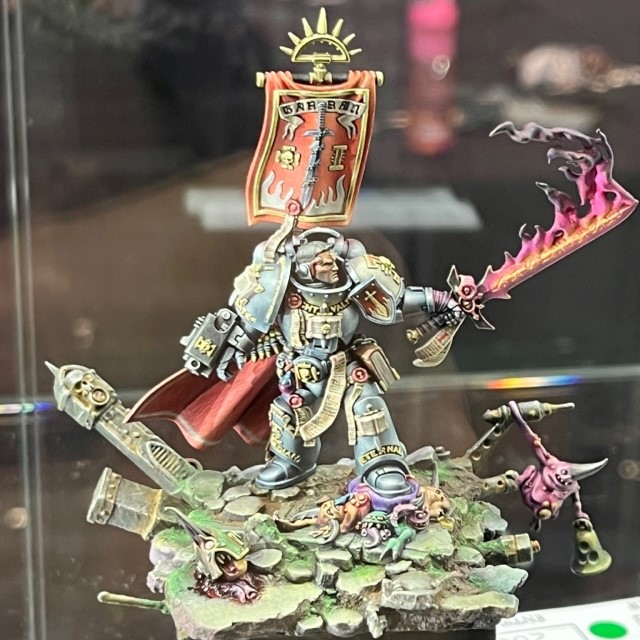
In the images below you can see my two entries displayed in the Golden Demon cabinets, along with Apologist’s Catachan Jungle Fighters command vehicle, and a selection of other entries that caught my eye. The cabinets were surrounded with admirers all weekend, so it was difficult to get close enough to take good pictures, but of course you can see the professional photos of the winners on the Warhammer Community site.
Right now, I feel like I will probably enter Golden Demon again next year, although it will of course be slightly dependant on where Warhammer Fest is and how long you have to be there to submit your entry and find out the results. This year it was a minimum of two days (Sunday to Monday), whereas at Warhammer Fest 2019 it was all done in a single day.
Warhammer Fest
So, what about the rest of Warhammer Fest? Overall, it was very enjoyable. There were lots of cool things to see and plenty to do.
Much of the event was understandably focused on the upcoming Leviathan boxed set release, and we got to see the ‘Eavy Metal versions of the box content in display cabinets (see above). The Screamer Killer was a bit bigger than I was expecting, and the Neurotyrant quite a bit smaller!
We also had a chance to a play the upcoming retro FPS Boltgun. It delivered exactly what it promised, which was a “boomer shooter” experience in a Warhammer 40K wrapping. A lot of the advanced marketing has pitched it as closest to Doom, but from the short section I played, it was a lot closer to Quake 2 in both feel and level design. Only the enemy sprites were in that classic pixilated 2.5D Doom style. In any case, they will get a guaranteed purchase from me!
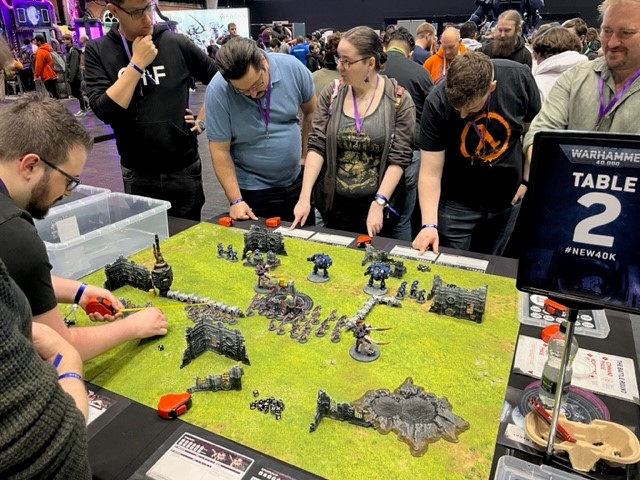
We managed to make it into several preview sessions – spaces were limited – and we also braved the queues to play a demo game of 10th edition using a portion of the Leviathan box. It was actually only one turn for each side due to the time limits imposed by the high demand, but it was very smooth and easy to play, and overall, left me feeling very positive about 10th edition. They had Warhammer TV presenters running the demos, people like Simon, Nick and Ben, and they did a wonderful job at clearly and enthusiastically explaining the game to use – for what was presumably the 50th time that day!
There were plenty of other things to see and do. We played Orks vs Astra Militarum laser tag, got to have a go on a squigapult, and I even managed to take my Ork Kommandos out for a spin in a friendly game of Kill Team. Our group also bought tickets for the ‘Mega Warhammer Pub Quiz’ on Saturday night, and did very well, coming in third place overall, only two points behind the winning team! We were given a load of cool prizes to split between the team members (centre picture above), so now I need to start thinking about how to put LEDs in the McFarlane Blood Angels Primaris Lieutenant!
So, was it all good?
Overall, it was an incredibly positive experience, and I’m very glad I went. That’s not to say there weren’t issues. We had to queue for around two hours for the 10th edition demo game, and we heard that at some points the queue waiting time was well over three hours. There were lengthy queues for many other things too, including the computer game demos and the shop on Saturday. It feels like the queuing for the demo games could have been managed better, with perhaps a wristband or ‘take a ticket’ system that called you up when it was your turn. The shop was a bit strange too, there wasn’t enough event merch and exclusives to go around, and the Forge World section was arranged like a jumble sale, with items piled into hand labelled cardboard boxes! It would have been nice to see more availability of the event merch and items that you can’t normally buy in a Warhammer store, and less of the generic stock that you can buy anywhere.
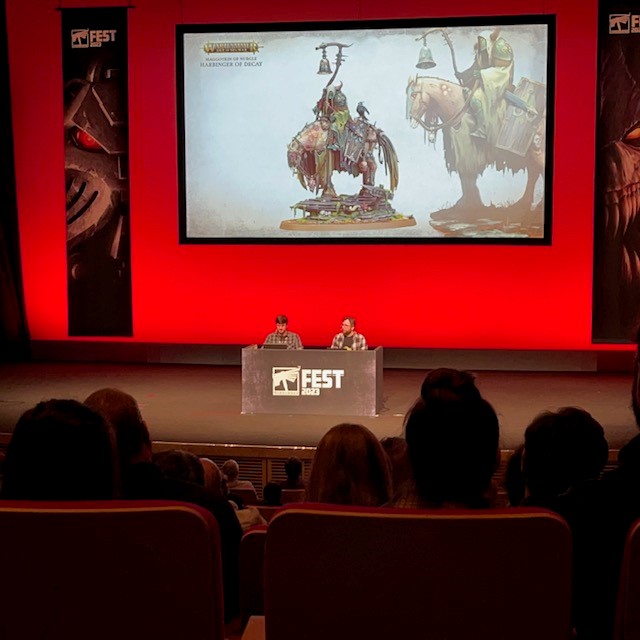
For me, one of the biggest omissions was a lack of design studio staff, ‘Eavy Metal painters or Black Library authors carrying out meet and greets or signings. This is something I remember from Warhammer Fest 2019, and it seems a shame to have left that out this time. Another issue was that all the previews took place in an auditorium that was separate from the main hall, and only had a capacity of 750 people. What would have been better was a large stage and screen area in the main hall, where as many people as wanted to could have gathered around for the previews. As it was, the auditorium required joining the queue about an hour in advance to guarantee a seat.
All those niggles aside, I had a great time this weekend. It may have left me burned out on queuing and walking around exhibition halls, but my Warhammer enthusiasm is higher than ever! I’m already looking forward to the Leviathan release, and forming nascent ideas for Golden Demon 2023, so watch this space. As ever, thanks for reading, and please don’t forget you can also follow my work at Twitter, Mastodon and Instagram.