I’m back from Golden Demon 2023 and Warhammer Fest! After 48 hours to rest and decompress, I’m ready to share some thoughts, feelings and photos!
Golden Demon 2023
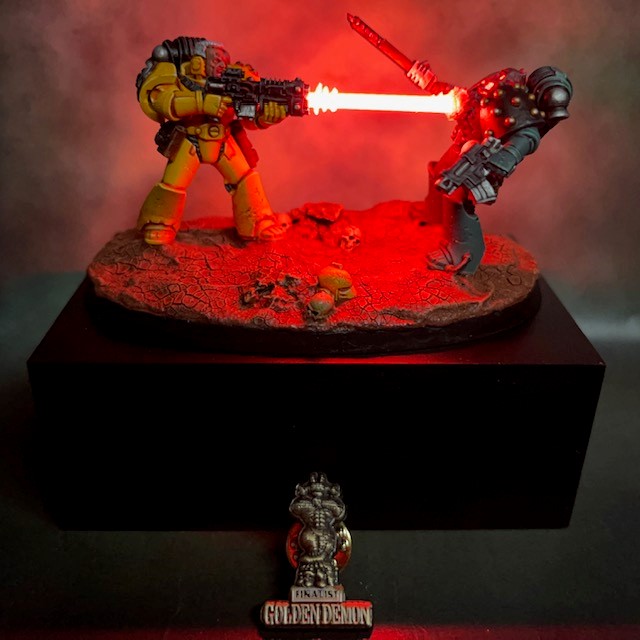
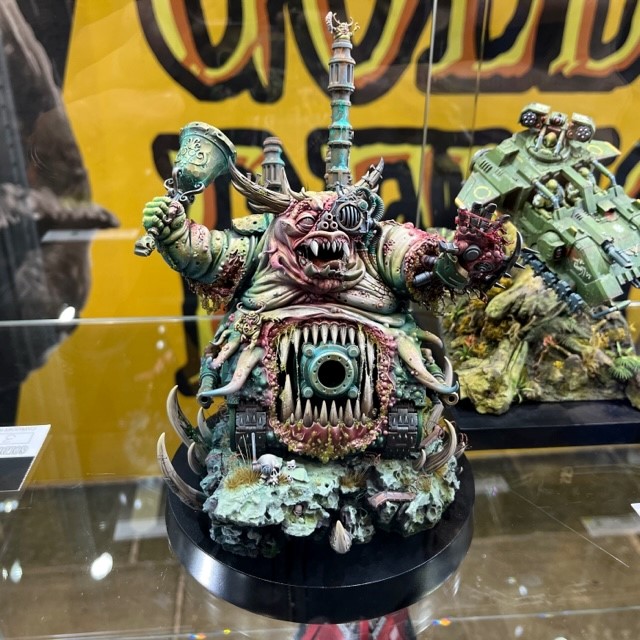
I’m very pleased to say that “Burn traitor!”, my entry to the Golden Demon ‘Duel’ category, made it through the first cut and took home a Finalist pin, as seen above! I’m really happy with this result. As mentioned in my previous post, I wasn’t seriously expecting a trophy – and I’m not certain if an LED miniature could ever win one – but it was lovely to have my hard work acknowledged in this way. There was nothing for my Ultramarine Veteran Sergeant, but I’d be the first to admit he was the weaker of the two entries, so I wasn’t overly surprised by that.
I feel like I learnt a lot from this year’s Golden Demon, both in terms of viewing other entries and listening to other competitors. Many people around the cabinets certainly had plenty of lovely things to say about “Burn traitor!”. One thing this outing confirmed for me is that 12V LEDs are the way to go if you want your lights to be clearly noticeable in the brightly spot lit cabinets. The 3V LEDs in the Ultramarines Veteran Sergeant were still visible, but only if you were nearby and looking directly at the model. The 12V filament LED was clearly noticeable from a distance, even in such a well lit space. After the first 24 hours the LED had lost a lot of its brightness, but the Golden Demon staff were very helpful and understanding, and kindly took the diorama out of the cabinet so I could perform a quick battery change. I didn’t bother to change the battery in the Ultramarine, as that one was under less strain and held up well for the entire weekend.
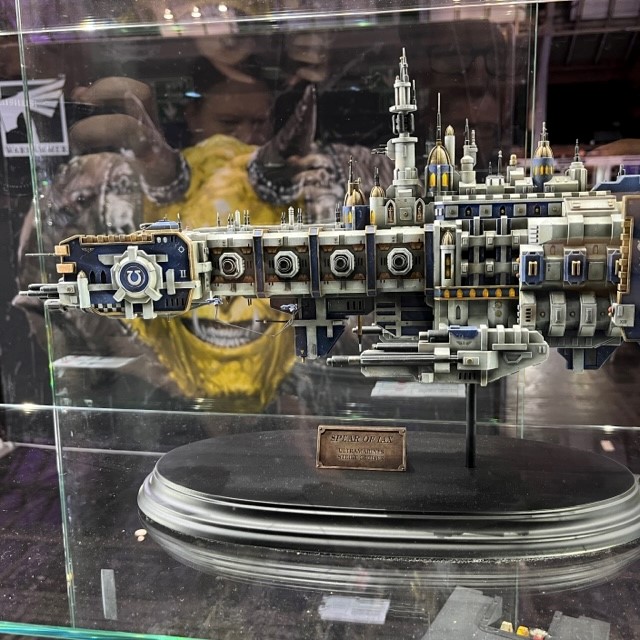
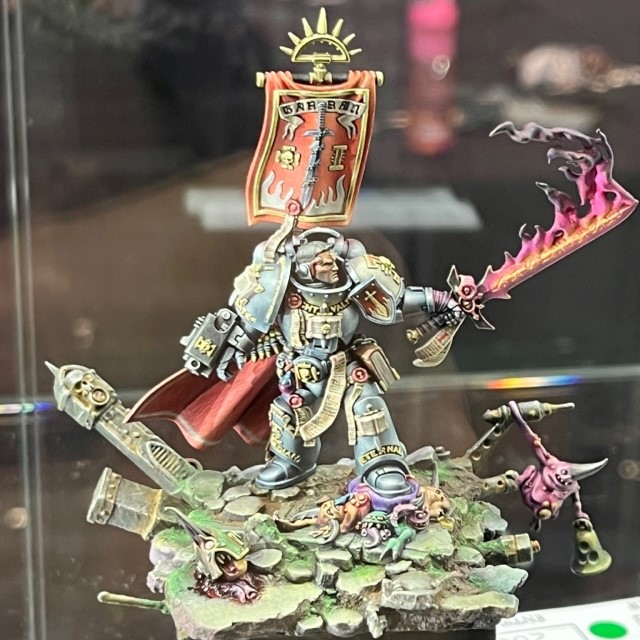
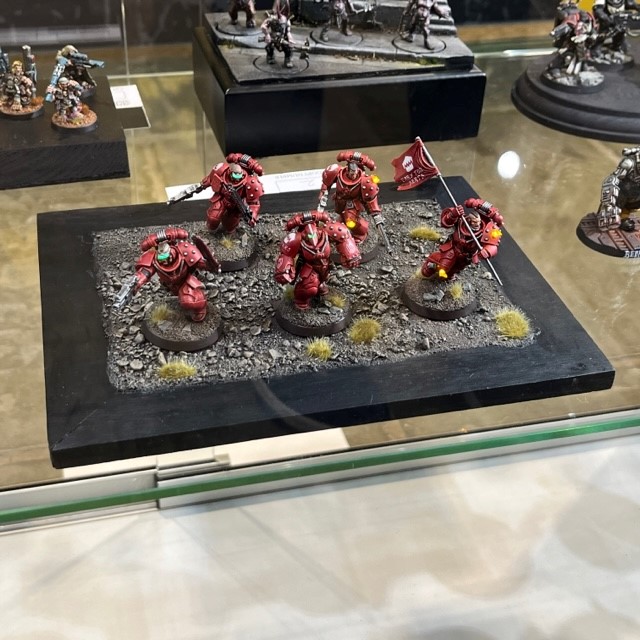
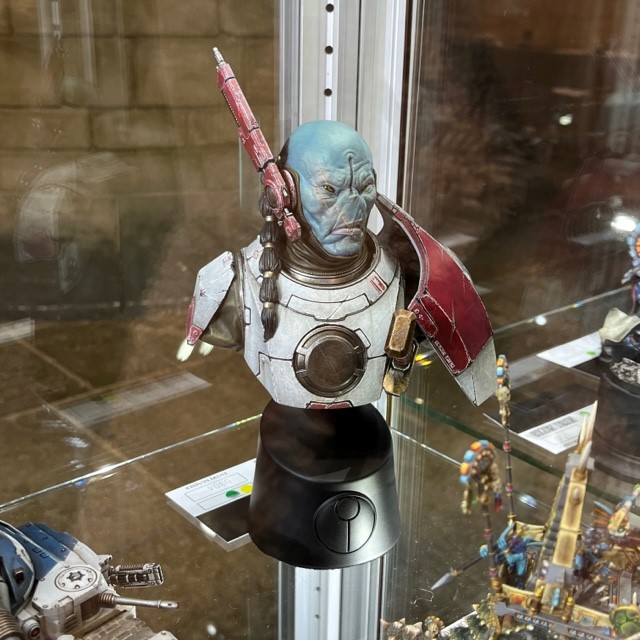
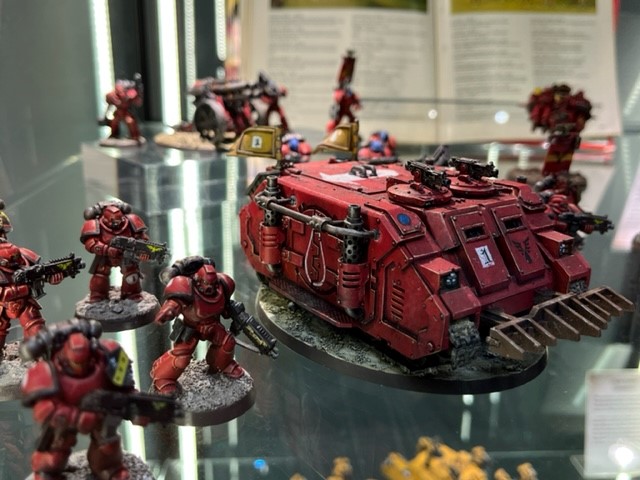
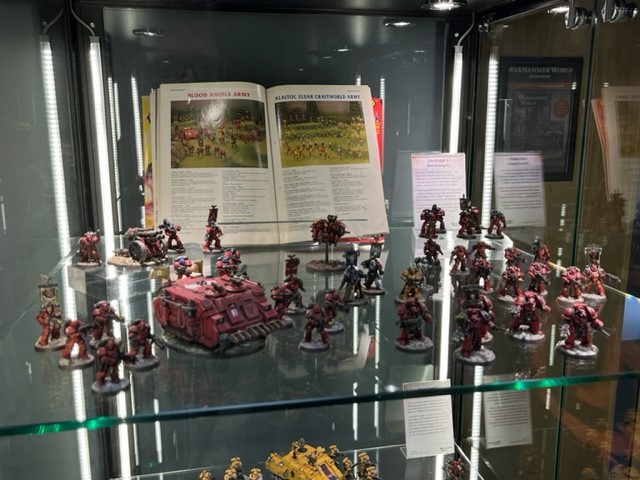
In the images below you can see my two entries displayed in the Golden Demon cabinets, along with Apologist’s Catachan Jungle Fighters command vehicle, and a selection of other entries that caught my eye. The cabinets were surrounded with admirers all weekend, so it was difficult to get close enough to take good pictures, but of course you can see the professional photos of the winners on the Warhammer Community site.
Right now, I feel like I will probably enter Golden Demon again next year, although it will of course be slightly dependant on where Warhammer Fest is and how long you have to be there to submit your entry and find out the results. This year it was a minimum of two days (Sunday to Monday), whereas at Warhammer Fest 2019 it was all done in a single day.
Warhammer Fest
So, what about the rest of Warhammer Fest? Overall, it was very enjoyable. There were lots of cool things to see and plenty to do.
Much of the event was understandably focused on the upcoming Leviathan boxed set release, and we got to see the ‘Eavy Metal versions of the box content in display cabinets (see above). The Screamer Killer was a bit bigger than I was expecting, and the Neurotyrant quite a bit smaller!
We also had a chance to a play the upcoming retro FPS Boltgun. It delivered exactly what it promised, which was a “boomer shooter” experience in a Warhammer 40K wrapping. A lot of the advanced marketing has pitched it as closest to Doom, but from the short section I played, it was a lot closer to Quake 2 in both feel and level design. Only the enemy sprites were in that classic pixilated 2.5D Doom style. In any case, they will get a guaranteed purchase from me!
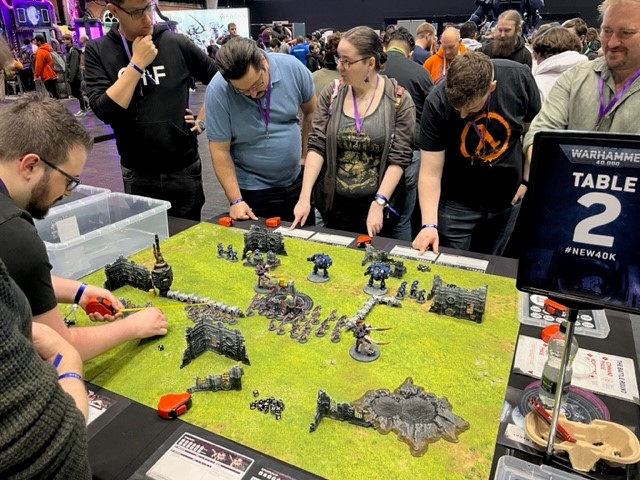
We managed to make it into several preview sessions – spaces were limited – and we also braved the queues to play a demo game of 10th edition using a portion of the Leviathan box. It was actually only one turn for each side due to the time limits imposed by the high demand, but it was very smooth and easy to play, and overall, left me feeling very positive about 10th edition. They had Warhammer TV presenters running the demos, people like Simon, Nick and Ben, and they did a wonderful job at clearly and enthusiastically explaining the game to use – for what was presumably the 50th time that day!
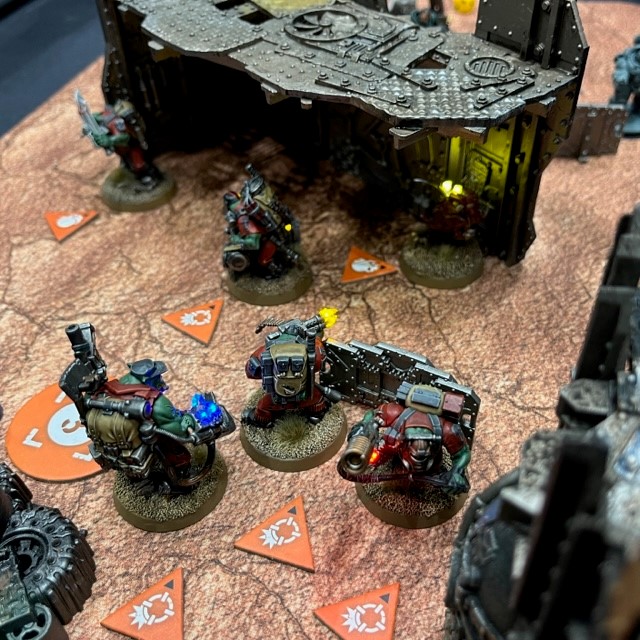
There were plenty of other things to see and do. We played Orks vs Astra Militarum laser tag, got to have a go on a squigapult, and I even managed to take my Ork Kommandos out for a spin in a friendly game of Kill Team. Our group also bought tickets for the ‘Mega Warhammer Pub Quiz’ on Saturday night, and did very well, coming in third place overall, only two points behind the winning team! We were given a load of cool prizes to split between the team members (centre picture above), so now I need to start thinking about how to put LEDs in the McFarlane Blood Angels Primaris Lieutenant!
So, was it all good?
Overall, it was an incredibly positive experience, and I’m very glad I went. That’s not to say there weren’t issues. We had to queue for around two hours for the 10th edition demo game, and we heard that at some points the queue waiting time was well over three hours. There were lengthy queues for many other things too, including the computer game demos and the shop on Saturday. It feels like the queuing for the demo games could have been managed better, with perhaps a wristband or ‘take a ticket’ system that called you up when it was your turn. The shop was a bit strange too, there wasn’t enough event merch and exclusives to go around, and the Forge World section was arranged like a jumble sale, with items piled into hand labelled cardboard boxes! It would have been nice to see more availability of the event merch and items that you can’t normally buy in a Warhammer store, and less of the generic stock that you can buy anywhere.
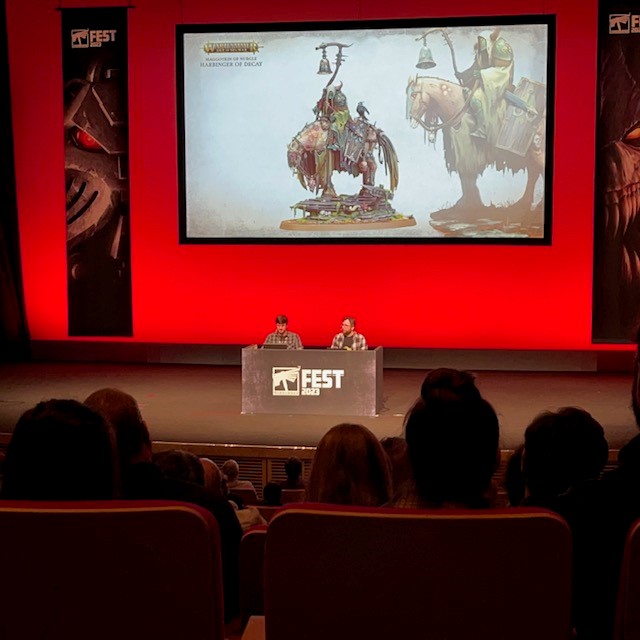
For me, one of the biggest omissions was a lack of design studio staff, ‘Eavy Metal painters or Black Library authors carrying out meet and greets or signings. This is something I remember from Warhammer Fest 2019, and it seems a shame to have left that out this time. Another issue was that all the previews took place in an auditorium that was separate from the main hall, and only had a capacity of 750 people. What would have been better was a large stage and screen area in the main hall, where as many people as wanted to could have gathered around for the previews. As it was, the auditorium required joining the queue about an hour in advance to guarantee a seat.
All those niggles aside, I had a great time this weekend. It may have left me burned out on queuing and walking around exhibition halls, but my Warhammer enthusiasm is higher than ever! I’m already looking forward to the Leviathan release, and forming nascent ideas for Golden Demon 2023, so watch this space. As ever, thanks for reading, and please don’t forget you can also follow my work at Twitter, Mastodon and Instagram.
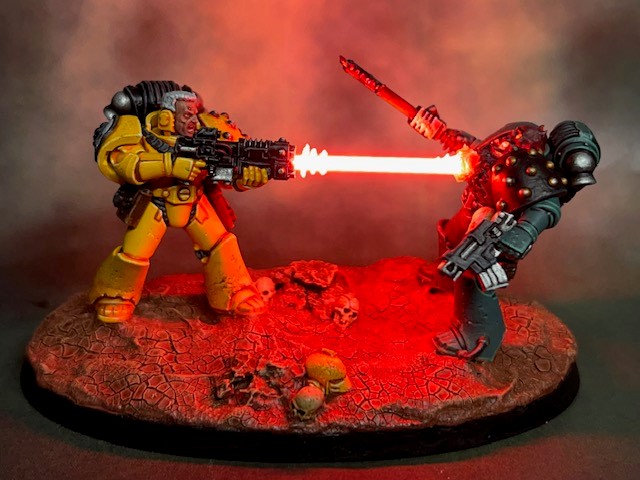
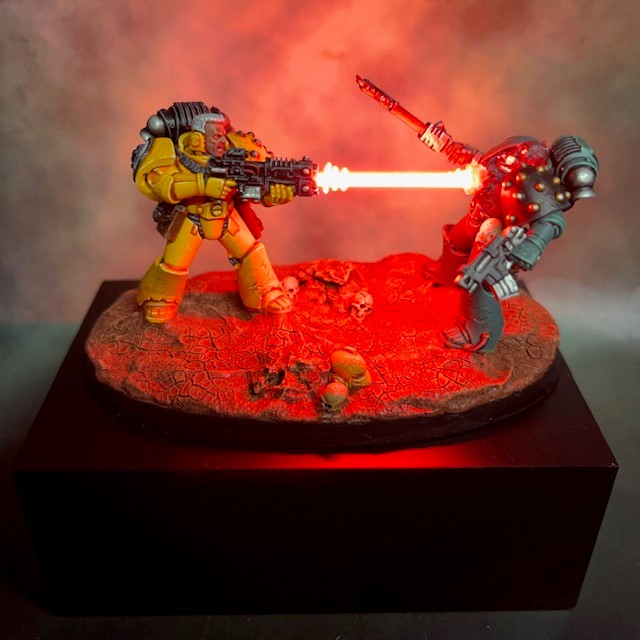
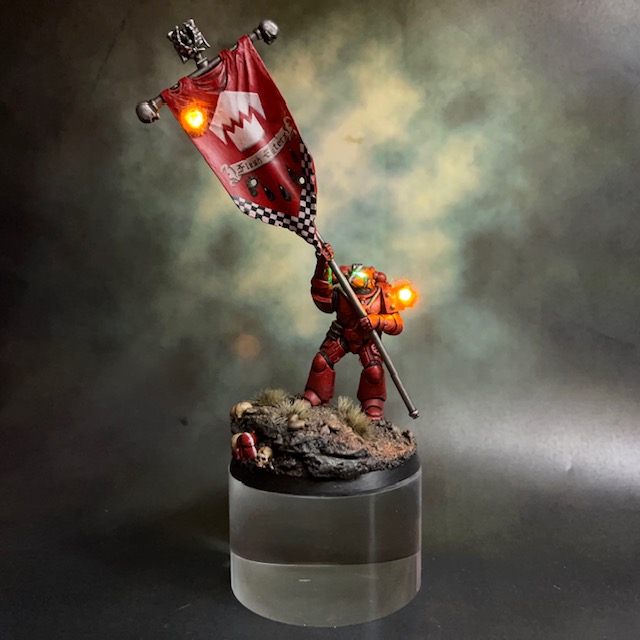
Allow me to present “Burn traitor!”, my Imperial Fist vs Sons of Horus mini diorama and entry to the ‘Duel’ category at Golden Demon 2023. This is my second entry for this year’s contest along with the Ultramarines Veteran Sergeant.
Concept
The idea for this miniature diorama came to me shortly before Golden Demon 2022, although sadly too late to build in time for last year’s contest. Long time readers of this blog may recall me talking about my Flesh Eaters Ancient and how I had experimented with filament LEDs to create an “energy beam” effect. I was trying to use the LEDs to give the impression of the energy beams glancing off the armour, but I couldn’t get it to look how I wanted, mainly because the ends of the LEDs with the connecting terminals on them did not glow. That set me to thinking though, what if I could find a use for the LEDs where both ends were hidden, perhaps with the energy beam leaving a gun and entering a target? And so the idea for this duel was born!
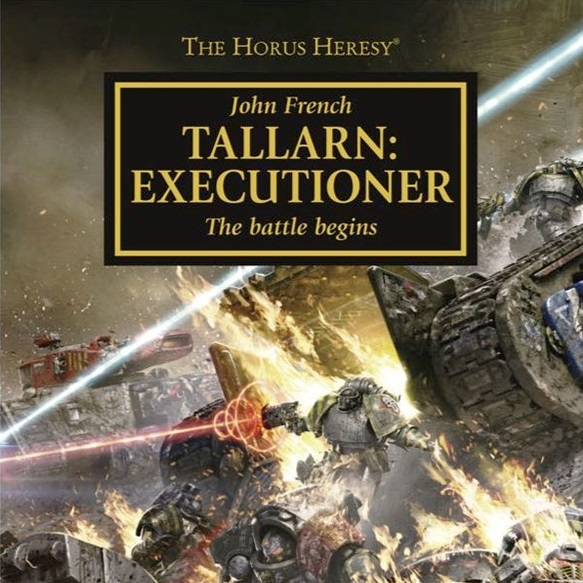
I’ve always been a big fan of volkite heat rays ever since we heard about them in the first Horus Heresy books from Forgeworld. You can see my previous attempts to tackle them with LED effects here. I’ve taken a lot of influence from the cover art of the Tallarn: Executioner, which I believe is one of the most iconic representations of volkite weaponry in official GW art.
As a big fan of Imperial Fists and their successors, I knew from the start that the Marine wielding the volkite would be from the VII Legion. As to who they would be shooting, I considered Iron Warriors and Night Lords, both iconic enemies of the Imperial Fists. But in the end, I settled on the Sons of Horus since they are essentially the main antagonists of the Heresy setting. It also helps to make the duel a microcosm of the Horus Heresy as a whole.
Painting & Modelling
The majority of components in this diorama come from the Legion MkVI Tactical Squad kit and the Citadel Skulls set. The volkite charger is the old resin version from Forgeworld, now discontinued in favour of the plastic version, which had been hanging around in my bits box for a while.
The main point of technical interest in the construction is of course the filament LED. These types of LEDs are often used in lightbulbs or similar applications and are available in a variety of colours and voltages, although 240V is the most common. I picked up mine from a seller on eBay who was UK-based and selling many different varieties in small lots. The type used here was 12V. The higher the voltage, the brighter the LEDs tend to be, but there will always be a compromise between brightness and the number of batteries you are willing or able to conceal in a model. In this case I used four 3V coin cell batteries in series to create a 12V source. I did experiment with a 12V ‘A23’ size battery, however I discovered my normal CR2032 coin cells have a much higher milliampere hour (mAh) rating and would therefore last longer. Battery life is obviously a concern for display miniatures, particularly if they must sit in the Golden Demon cabinets for a day or two. The underside of the base is shown below (I’ll talk about the extra battery in a little later).
The circuit used in this model is incredibly basic. A wire runs up from the batteries in the base, through the Imperial Fist’s leg, body and arm, and connects to the terminal at the end of the filament LED which is hidden inside the hollowed volkite. Another wire connects to the other end of the filament LED inside the Sons of Horus’ torso and runs down through his leg and back to the single resistor, switch and batteries in the base. It really is that simple!
A word of caution if you are attempting this yourself – filament LEDs are extremely fragile! They are built around a thin strip of plastic that holds an array of sub-millimetre LEDs. This strip of plastic can not take any real amount of bending or pressure and will snap at the least provocation. If you are using them in a project, I’d strongly recommend buying twice as many as you need, just in case of accidents.
The LED array is surrounded by a coloured ‘gel’ as an outer sheath. This is even softer than the plastic strip and does not provide any protection to the LEDs. Its only purpose seems to be to evenly diffuse the light from the individual LEDs, which it does very well. As a matter of interest, I attempted to peel away the gel from a couple of spare filament LED to see if it was possible to run the LED array without it. I thought it might be useful for future projects if I could insert LED arrays into very thin spaces. However, removing the gel seems to destroy the LEDs, or otherwise prevent them from functioning. I’m not entirely certain why this would be the case, but I thought it was worth mentioning in case anyone else had the same idea.
Before I even assembled the models, I built the circuit using only the bare components, and then allowed it to run for 48 hours, which is about the maximum time I expect this entry to sit in the Golden Demon cabinets. There was a significant drop in brightness after the first 12 hours, but the batteries did struggle through for the entire time. I’ll be taking spare batteries with me, and if the filament LED is looking too sorry for itself on Sunday morning, I will perhaps ask if I can change the batteries. I’m not sure if it will be allowed, but I don’t see the harm in asking!
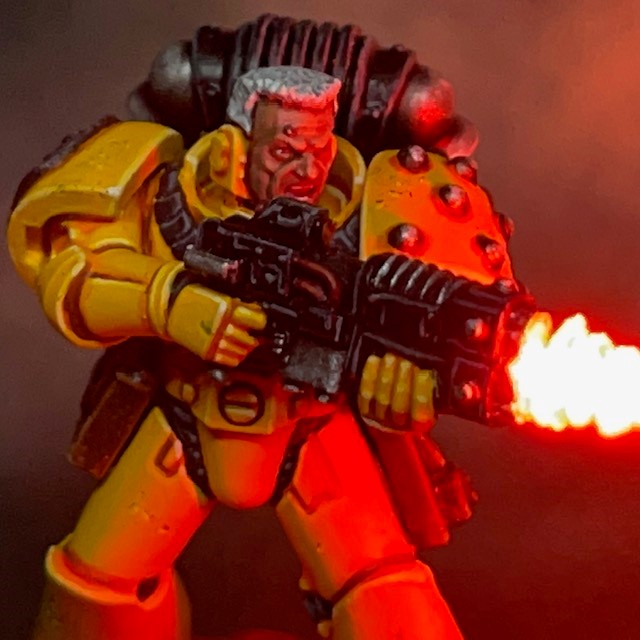
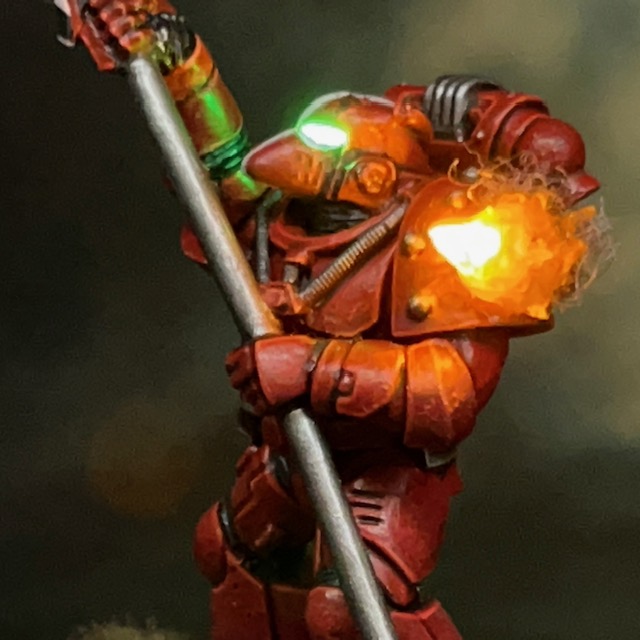
The circular muzzle flare near the volkite barrel is intended to mimic the concentric rings shown in the Tallarn:Executioner artwork shown above. These rings were slowly and carefully built up by applying tiny layers of acrylic gel around the filament LED, using a fine wire as a sculpting tool.
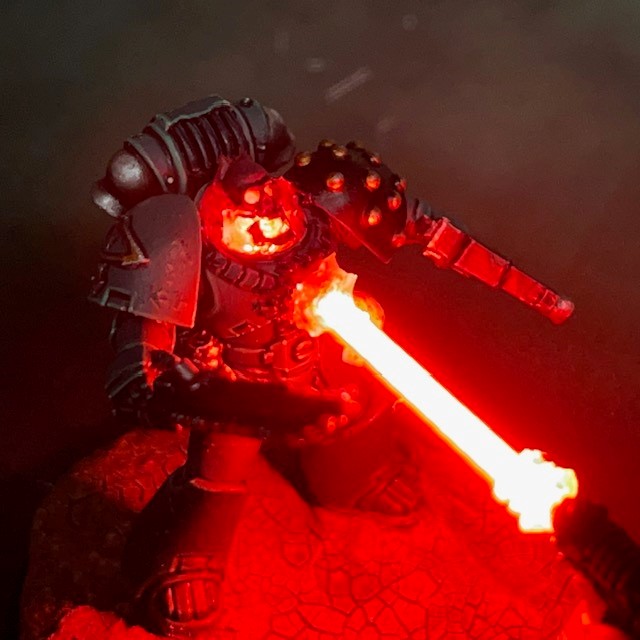
My original plan for the skull was for it to be entirely lit from below by the end of the filament LED which penetrated the Sons of Horus’ torso. But after testing the circuit, I began to worry that this would not be very effective as the batteries started to run down. This could be a big issue for the diorama as the skull and flames are very reliant on the LED to get the full effect. So I decided to include an extra 1.8mm red LED inside the Marine’s torso to provide some additional underlighting. This is supplied by its own separate 3V battery, making the total hidden in this base five. This separate LED should remain brighter for longer than the filament LED.
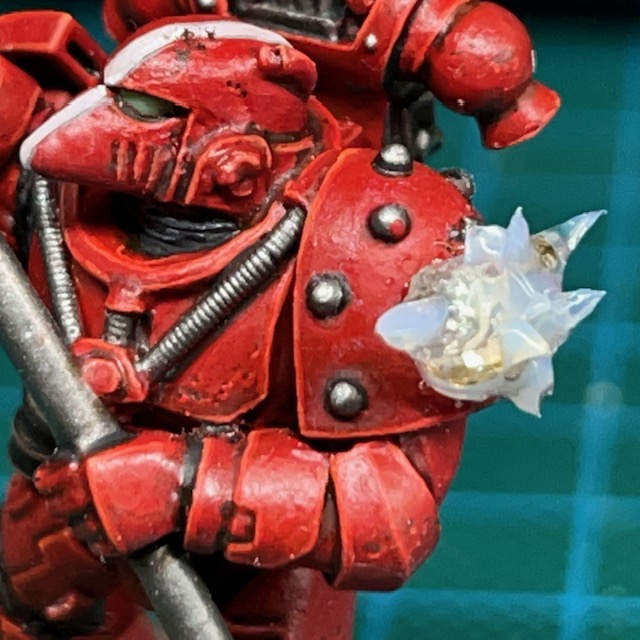
The skull is from the Citadel Skulls kit, recast in resin and partially hollowed out to allow for better light penetration. The lower jaw is a plastic component directly from the same kit – I judged it too flimsy to cast separately, and it needed to be separate to achieve the open-mouthed “silent scream” look that I was going for. The skull and jaw are supported on transparent flames built from successive layers of acrylic gel. I was trying to give the impression that the volkite beam had penetrated the Sons of Horus’ power armour and was burning up all the organic matter from the inside. Hopefully that comes across well.
The individual Imperial Fist and Sons of Horus Marines that I’ve posted previously were both painting test models for this project. The painting recipes I used discussed in these posts were reused for this project. The only change I made was switching the ‘under suit’ on both models (i.e. the joints between the armour plates and visible power cables) to the recipe below.
Black Under Suit
Corvus Black basecoat
Mechanicus Standard Grey highlight
Dawnstone fine highlight
I used this recipe on the Ultramarines Veteran Sergeant and was pleased with the look. Also, by standardising the colours of small details like the under suits, leather pouches and weapon casing, I’m hinting that really all Marines are the same underneath. That’s just another part of the tragedy of the Horus Heresy!
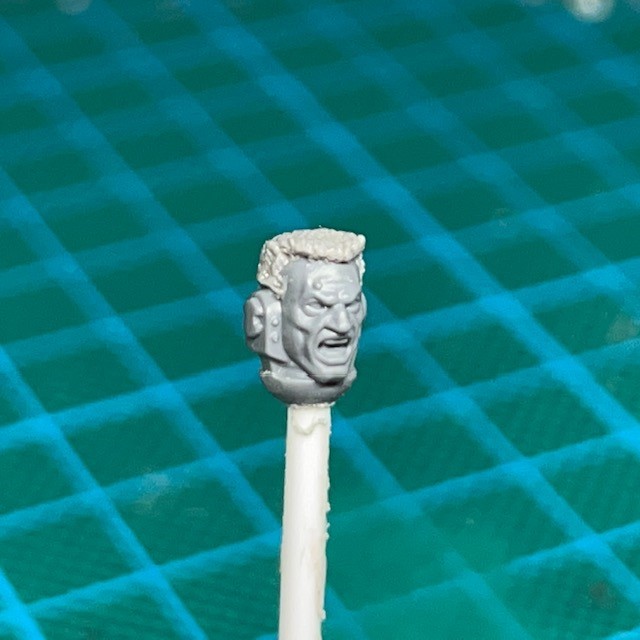
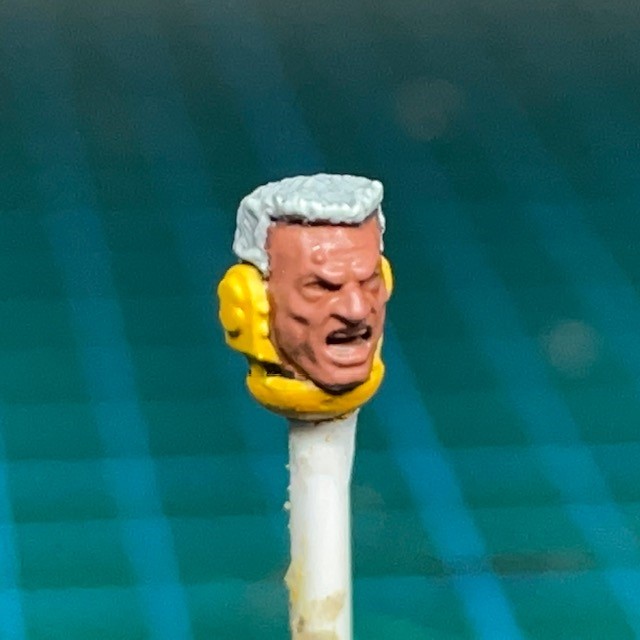
I knew from the start of this project that I wanted to use a bare head on the Imperial Fist. It felt important to be able to see his expression to add some emotion to the duel. I wanted it to look like it was personal. The Sons of Horus marine has a skull trophy taken from a Loyalist, so maybe it is…?
I didn’t just want to use a generic “off the sprue” head, so I decided to sculpt some hair onto a bald Space Marine head to give it a unique look. I went with the generic 80s/90s action hero haircut to tie-in with the vibe of the MkVI Marines. I painted his skin tones using my standard go-to recipe for pale Space Marine flesh, which I’ve detailed below. This is the recipe that I’ve also used on my most recent Flesh Eaters Marines. In this case it was painted over a white undercoat, although I normally paint it over a black undercoat.
Pale Space Marine Flesh
Bugman’s Glow basecoat
Reikland Fleshshade shade
Bugman’s Glow layer on all but deepest areas
50:50 Bugman’s Glow:Cadian Fleshtone on all raised areas
Rhinox Hide layer on eyes
25:25:50 Alaitoc Blue:Bugman’s Glow:Lahmia Medium glaze on lower jaw, lower cheeks, and around mouth (ensure glaze has fully dried before proceeding)
25:25:50 Evil Sunz Scarlet:Bugman’s Glow:Lahmia Medium glaze on cheeks, nose and around eyes (ensure glaze has fully dried before proceeding)
25:25:50 Yriel Yellow:Bugman’s Glow:Lahmia Medium glaze on forehead and eyebrows (ensure glaze has fully dried before proceeding)
Screamer Pink layer on tongue
Corax White layer on eyes and teeth
Rhinox Hide dot in centre of eyes
Corax White dot in centre of Rhinox Hide dot from previous step
Cadian Fleshtone highlight on all raised edges, such as nose, cheeks, expression lines, scars, etc.
50:50 Cadian Fleshtone:Kislev Flesh fine highlight on extreme edges to accentuate expression
Additional optional steps
If the Marine has a shaved head, a 50:25:25 Hoeth Blue:Bugman’s Glow Lahmia Medium glaze on the scalp
If the Marine has facial bionics, service studs, or raised scars, a Carroburg Crimson shade around the edges of the feature
I should probably explain about the colour glazes on different areas of the face. From the steps above, you’ll notice that the lower part of the face is glazed blue, the middle glazed red and the top glazed yellow. The glazing is intended to be subtle, but it does add a slight tint to different areas. This is to add a little realism, as different areas of the human face tend to have subtly different shades. When painting male faces, the jaw area tends to have a slight blue-grey tint from stubble, the centre of the face around the cheeks and nose are often red due to high blood flow, and the thinner skin of the forehead can sometimes have a yellow tint. This is one of the many useful tips and techniques for painting that I’ve picked-up over the years from my good friend and fellow Golden Demon competitor, Apologist. If you don’t already follow his blog or Instagram, then I highly recommend checking them out.
I decided on white hair for the Imperial Fist primarily as a homage to Rogal Dorn, but also, I felt it suited the style and vibe of the miniature. My simple recipe for white hair is reproduced below for reference.
White Hair
Corax White basecoat
Apothecary White shade
Corax White highlight on raised areas
Skull White fine highlight on fringe and around temples
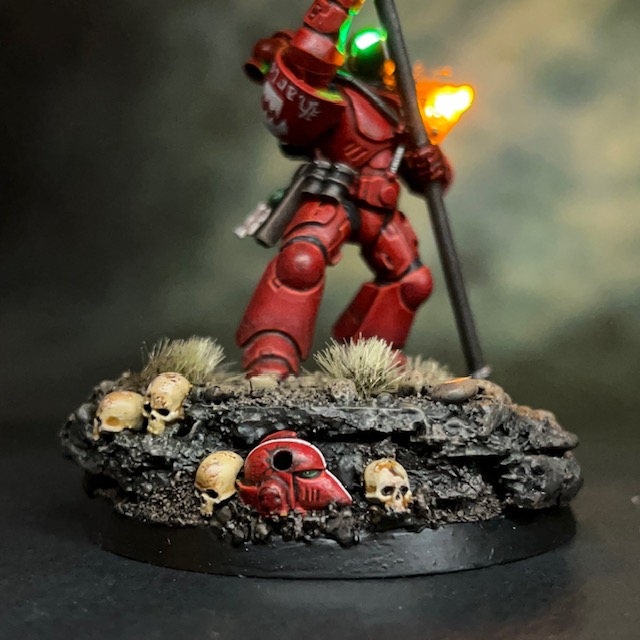
The dusty wasteland base is achieved mostly with the Martian Ironearth technical paint, the use of which I’ve discussed previously here. One of the main reasons for choosing this basing scheme was to really emphasise the point that this was not some carefully stage, honourable duel. It’s a down-and-dirty, life-or-death battle in the middle of a hellish battlefield. I’m imaging this taking place in the closing days of the Siege of Terra. The death toll is already unimaginable, Terra has been laid waste, and the Imperials are on back foot, as indicated by the scattering of skulls and abandoned Imperial Fist helmet. The duel itself isn’t a grand triumph for the Imperial Fists and is unlikely to affect the outcome of the battle. It is simply a small victory and moment of personal catharsis for the Imperial Fist amongst an unending tide of horror. But sometimes you have to grab those little moments where you can.
I did experiment with small ruins and other battlefield detritus behind and around the combatants during the build process, but in the end, I felt that too much extra stage dressing detracted from the duel itself. The base used with the final model is a Citadel 90mm oval, but I did start the build with a 90mm circular base. However, once I had the combatants in place, I realised there was just too much “dead space” on either side of the duel. The two Marines need to be very close together due to the length of the filament LED, making the moment captured almost intimate. So again, any set dressing used to fill the 90mm circular space would have detracted from the duel, hence I decided to switch to the oval base. The plinth was purchased from Taro Modelmaker and sprayed Halfords Satin Black.
I hope you’ve enjoyed that summary of my design and build process. If you’re at Warhammer Fest over the weekend, then maybe you’ll spot it in the Golden Demon cabinets. I’ll be sure to post again soon to let you all know how the two entries get on. As always, thanks very much for reading, and please don’t forget you can also follow my work on social media at Twitter, Mastodon and Instagram.
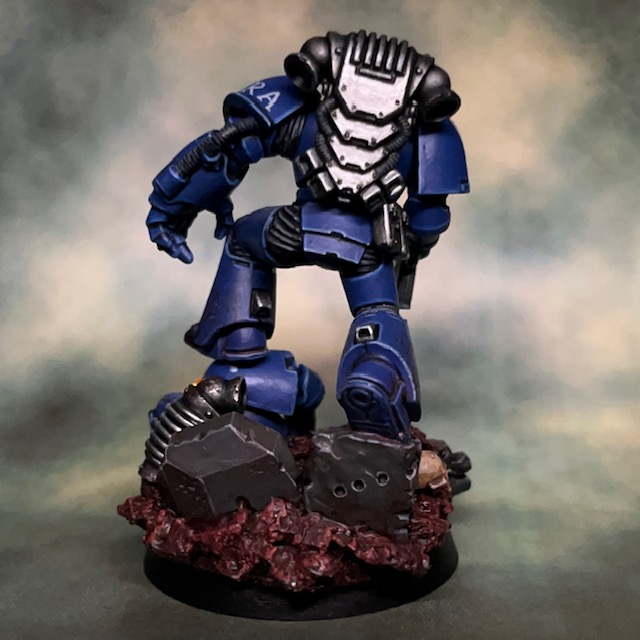
Allow me to present the Ultramarine Veteran Sergeant, my entry to the ‘Warhammer 40,000 Single Miniature’ category at this year’s Golden Demon. So now you know why I haven’t posted many new miniatures since the end of February!
The Road To Golden Demon
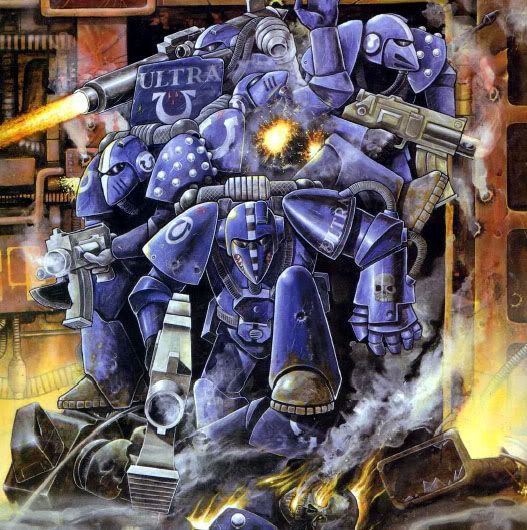
I originally started on a different model for the single miniature catergory, but after a few rounds of testing I couldn’t quite get the LED effects to look how I wanted, so I shelved that project and decided to have a re-think. Then, while browsing old rule books for inspiration, I rediscoved the classic art shown below, and was suddenly inspired!
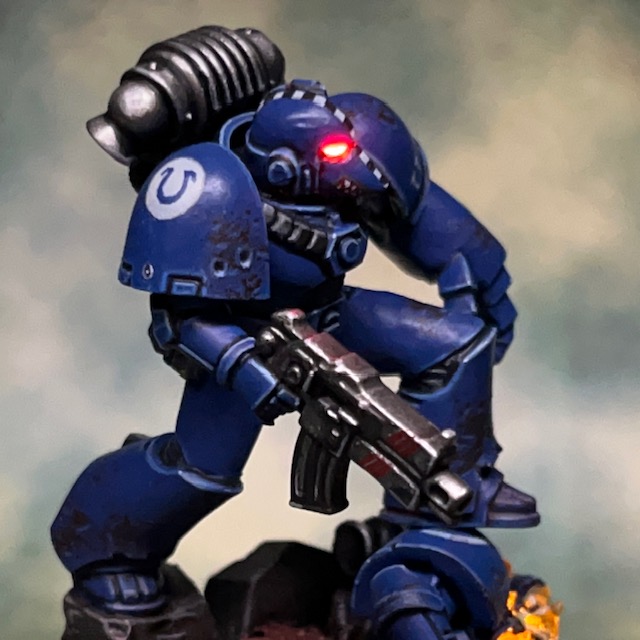
This art was reused a number of times, on everything from colour inserts, book covers, and even on the box art of the short-lived Ultramarines board game. I think it is one of the iconic pieces of Rogue Trader art, so I decided to give it a modern reimaging – with a little added LED magic of course. I did briefly consider planning the whole unit as a ‘Warhammer 40,000 Squad’ category entry, but decided that was a little ambitious in the time available. I decided to concentrate on the veteran sergeant at the front of the unit, as he is definitely the most recognisable part.
Painting & Modelling
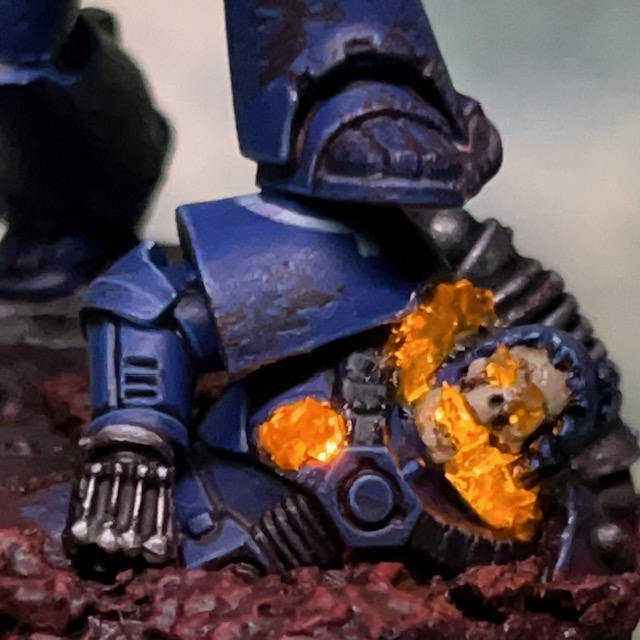
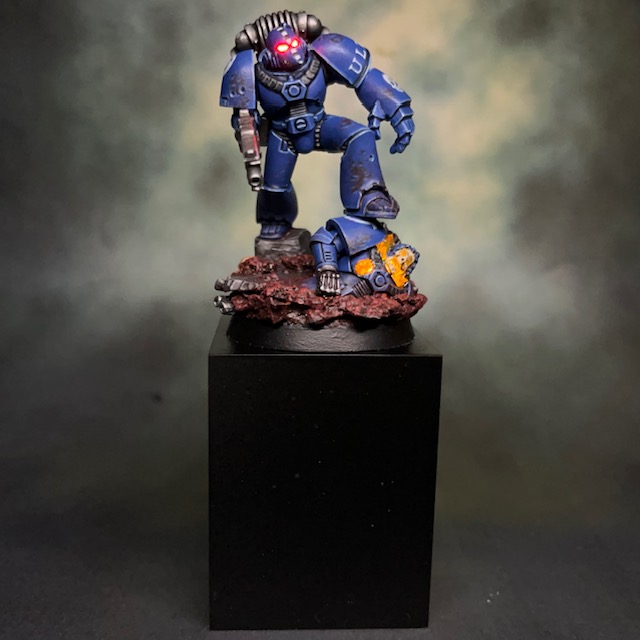
Both the sergeant and his fallen comrade are made almost exclusively from the Legion MkVI Tactical Squad kit, with a couple of minor exceptions. The power fist came from my bits box, and I think it’s from an older version of the Space Marine Tactical Squad sprue, and I chose it because it was a closer match to the art. The skull in the fallen marine came from the Citadel Skulls set. The LED helmet eye lenses are achieved using the technique described in my LED Eye Lens Tutorial. I did the same thing for the fire inside the casualty’s skull, only in this case I used an LED from a LED Tea Light to achieve that flickering fire effect. The flames themselves are sculpted from acrylic gel. Both LEDs are connected in parallel and operated by a single switch and coin cell battery. I’ve tested it, and fingers-crossed the battery will last for 48 hours in the Golden Demon cabinets!
My recipes for the Ultramarines blue armour and the silver metallics are below, if anyone is interested. The whole model was undercoated Chaos Black.
Ultramarine Armour
Macragge Blue basecoat
50:50 Kantor Blue:Abaddon Black shade
Altdorf Blue highlight
Calgar Blue fine highlight
Fenrisian Grey fine highlight on top edges and corners
Blue Horror dot highlight
Silver Metallics
Leadbelcher basecoat
Nuln Oil shade in deepest recesses
Gryph-Charger Grey shade
Ironbreaker specular highlight
Runefang Steel edge highlight
60:40 Runefang Steel: White Scar edge highlight on sharp edges and corners
This model included quite a lot of freehand, much of which you can see above. My biggest tip for this type of freehand is to “sketch” the words or shapes with thinned Administratum Grey, and then go back and fill it in more firmly with Corax White. I try to avoid using White Scar, as it’s just to bright. I normally then finish off with a thin glaze of the base colour over the freehand – in this case that’s Macragge Blue. This helps to dull it down a bit and make the insignia look weather-worn and faded. As an aside, while studying the word ‘ULTRA’ on his shoulder, I noticed the font used in the artwork was Times New Roman! It’s good to see some things never change, even in the grim darkness of the far future!
I think it’s also worth discussing the base. Not a lot of the ground is visible in the artwork, so I felt I had essentially free reign. I’ve always interpreted this picture as showing the Ultramarines breaching a wall or fortification, and I’ve tried to echo that feeling with the way the veteran sergeant is clambering over the fortifcations and even his fallen battle brother. There’s no time to commend his soul to the Emperor, the breach is not yet secured!
The ground in the artwork is a red-brown, and I decided to skew red. This was to enchance the “retro” nature of the model, and call back to some of the weird battlefields you saw in White Dwarf in the late 1980s, before everything became uniform green flock grass in the early 90s. Dark red is also quite an 80s colour by itself. This is also why I chose a square plinth for the model, rather than a round one, to further enhance that retro vibe. Now I think about it, I kind of wish I’d put the miniature on a square base!
Red Rock Base
50:50 Rhinox Hide:Gal Vorbak Red basecoat
Seraphim Sepia shade
Gal Vorbak Red drybrush
Wazdakka Red drybrush
Wild Rider Red drybrush
Trollslayer Orange drybrush
That’s it for today, but I should mention that this is the first of two Golden Demon entries that I will be submitting this year, so there will be more from me again soon. As always, thanks very much for reading, and please don’t forget you can also follow my work on social media at Twitter, Mastodon and Instagram.
This past weekend I attended the Golden Demon painting contest at Warhammer World in Nottingham. In the pictures below you can see my entry packed and ready to go, along with my extensive emergency repair kit and plenty of spare batteries!
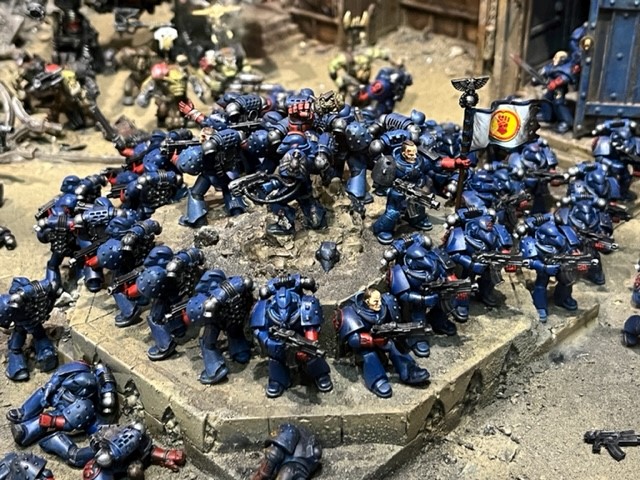
Below you can see my ‘Flesh Eaters Ancient’ entry in the entry display cabinets. I decided to enter him in the anything-goes ‘Open’ category, as I worried that the LEDs were a little be “out there” for the 40K Single Miniature category. In hindsight though, I think it would have been fine. At the last minute I also decided to enter Assault Squad Levers just for fun. They’re certainly not painted to a Golden Demon standard, but they are one of my favourite units that I’ve made to date. This really was a last minute decision though – I built the display base from an old picture frame the day before and was drybrushing the small rocks in the hotel on the morning of the contest! You can see a picture of the unit in the ’40K Squad’ cabinet below.
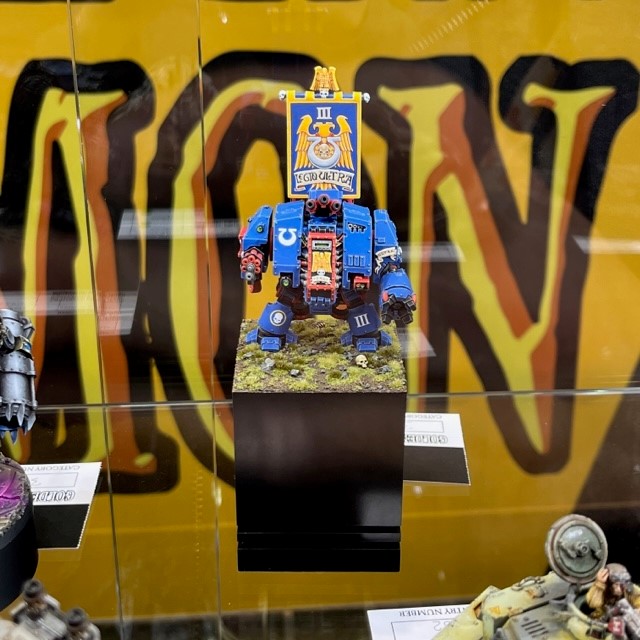
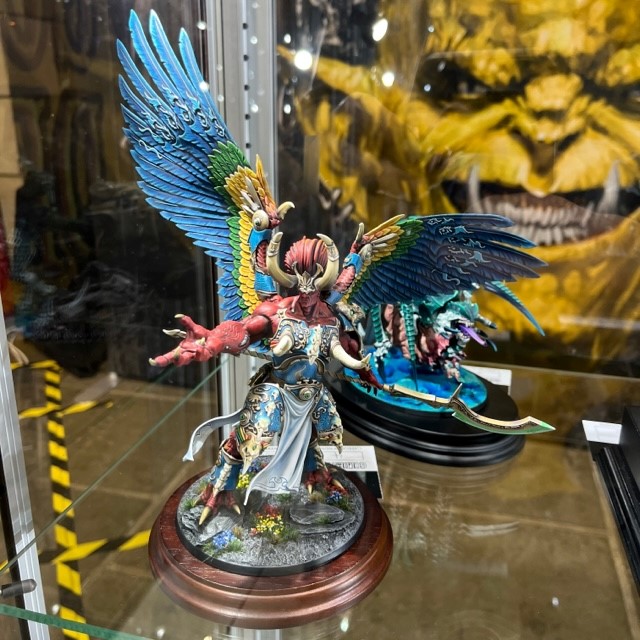
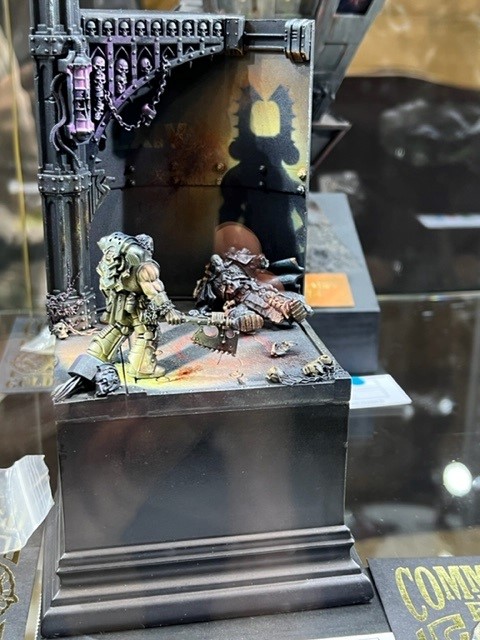
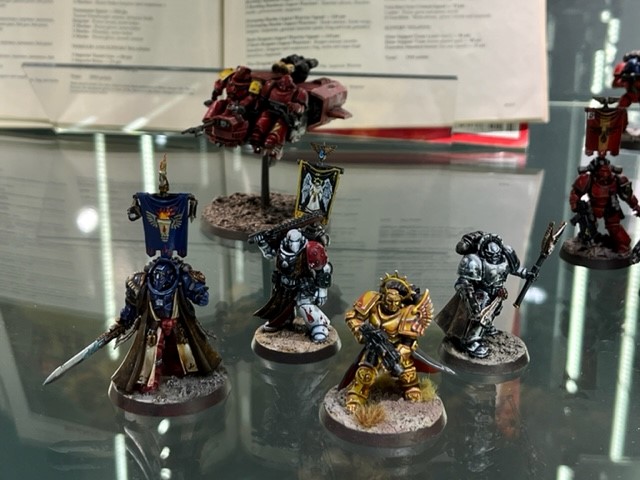
There were so many great entries that it would be impossible to do them all justice with a quick camera phone photo. I had to snap quickly so I wasn’t holding up the lines of viewers. Here are a select few highlights!
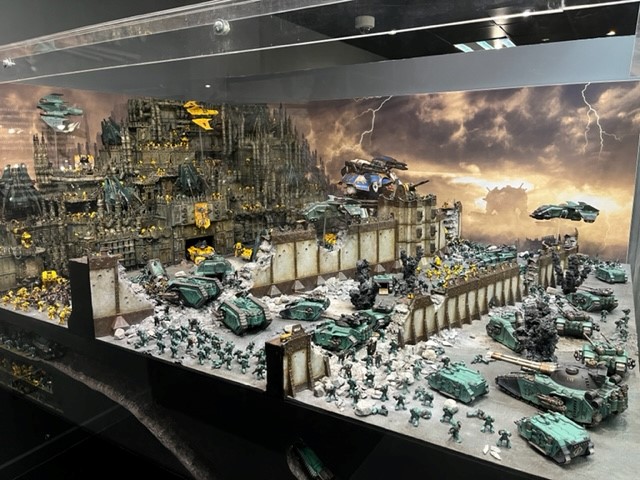
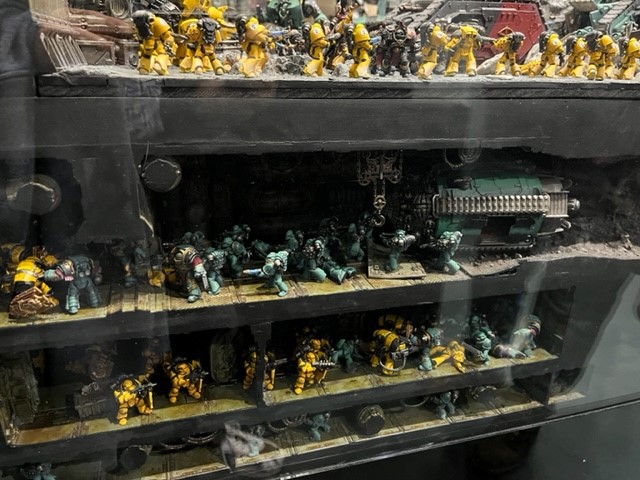
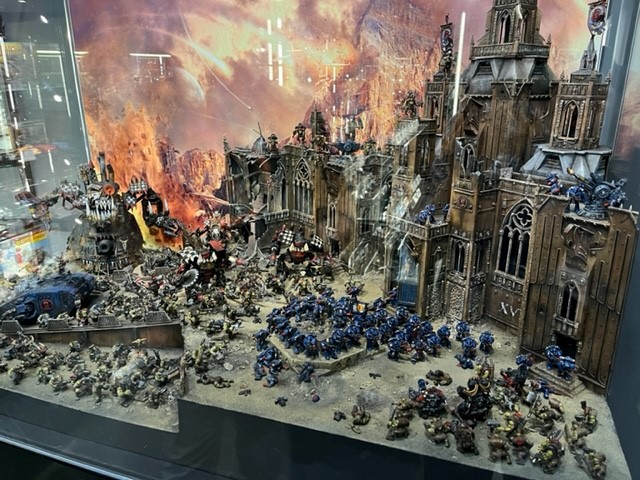
We also checked out the Warhammer World exhibition hall while we were there (twice in fact). It was free entry to the exhibition with our Golden Demon tickets, but even when you have to pay it’s definitely worth the money. A new Horus Heresy display had been created since our last pre-Covid visit, highlights of which can be seen below. I loved the tunnel-fighting cross-section below the main board!
And of course I had to pay my respects at the classic Crimson Fists display on the way through.
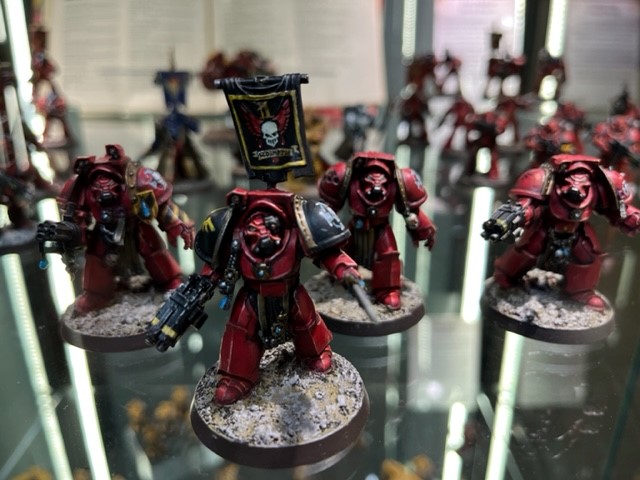
We also checked out Apologist’s retro-inspired Blood Angels army which was on display in the hall. You may recognise them from White Dwarf 479. Check out Apologist’s blog and Instagram, if you don’t already follow him, for some excellent hobby!
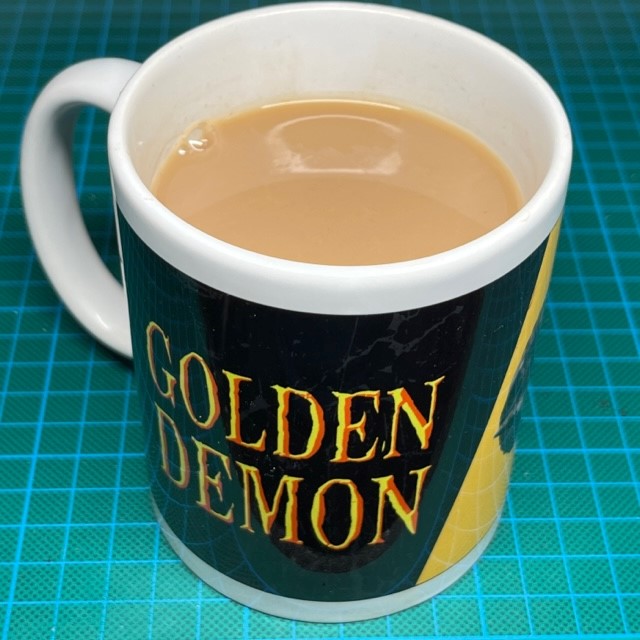
As you may have guessed there was no trophy or finalist pin for me this time! However, I did buy myself myself a Golden Demon mug as consolation prize (wooden spoons were not available)! Joking aside, we had a great time and it was well worth the trip. It was also nice to briefly meet and say hello to other hobbyists from the Warhammer Community social media sphere, such as Spencer and Gonders.
I’m not too disappointed I came away empty-handed considering the level of talent on display was so incredibly high. The whole experience was incredibly positive and has left me feeling inspired to try and up my game. In fact, I’m already in the initial planning stages of several entries for next time!
That’s all for today, but I’ll be make with more painted miniatures soon. As ever, thanks for reading, and please don’t forget you can also follow my work on Twitter and Instagram.
Raise the colours high, Ancient Harlon! Let the enemy see who comes to claim their lives!
– Flesh Eaters Chaplain Uriah Grimm
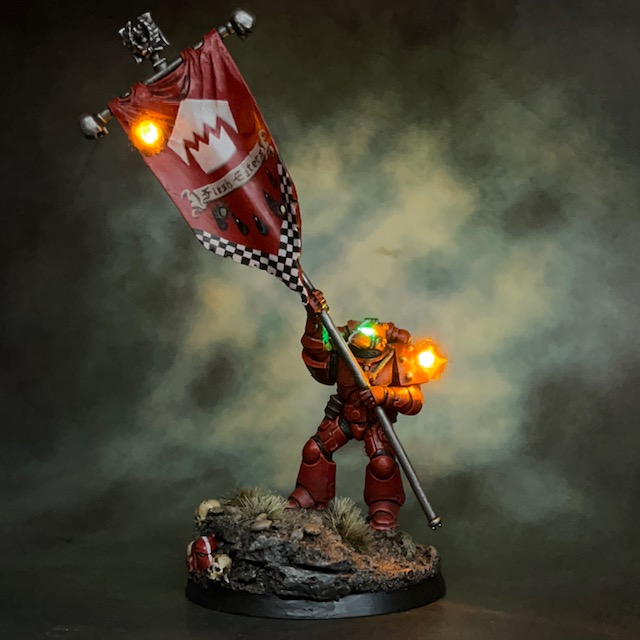
Allow me to introduce Brother Harlon, Flesh Eaters Ancient. This model is my entry into the Golden Demon painting contest this weekend at Warhammer World.
The Long Road To Golden Demon
I know I say this increasingly often, but this was one of the most fiddly LED projects to date. I had already planned to make this model for my Flesh Eaters army project, but decided it might make a good Golden Demon entry. I was lucky enough get a Golden Demon ticket in the first round at the start of August, so I had a little time to plan and think. My initial idea for what I would build and submit was actually not part of the Flesh Eaters project, but I couldn’t get the prototype of the circuit to run for long enough off small batteries. With the current multi-day format the model will be on display somewhere between 24 – 36 hours, so it had to be long lasting. Unfortunately the prototype for my original project only lasted a mere 5 hours! So I decided to put that one on the back-burner (no details yet, as I may revisit it later) and instead tackle the Primaris Ancient. So with one project abandoned and two weeks in August “lost” to a summer holiday, I didn’t properly start the Ancient until the 1st September.
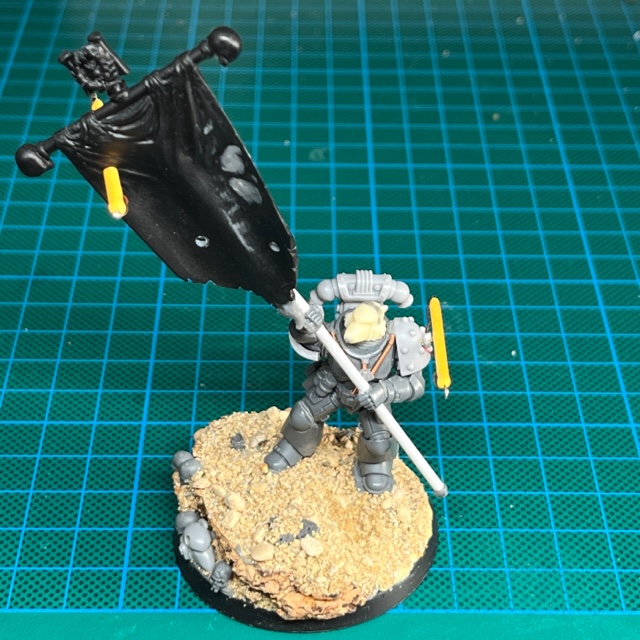
My initial iteration of this project involved using filament LEDs to represent energy beams lancing past the Ancient and through the banner. You can see some WIP shots of this version below. Unfortunately there were two drawbacks with this version:
They required a 12V battery, which meant a different base design.
The ends of the filament were not illuminated. No matter what I did to try and hide this they drew the eye and spoiled the effect.
They were ridiculously bright! So bright in fact that I couldn’t take a decent photo and it was difficult to see the details of the paintjob.
I tried my best to persevere, telling myself it would all come together when it was finished, but I had my doubts. Finally, when I accidently snapped one of the filaments while making fine adjustments two days before the contest, I finally said “screw it”, and removed both filaments and the 12V battery from the painted model! Making such a huge, fundamental change to a competition entry just 48 hours before submission was the stuff of stress-dream nightmares! But I managed to do it after a couple of hours and without inflicting too much damage on the paintwork.
Painting & Modelling
The standard bearer in picture above is one of my primary influences for this piece. This photo is taken from one of the colour sections of the ‘Rogue Trader’ first edition Warhammer 40,000 rulebook. I’ve always thought this was a really cool model.
The base model for my version is a Primaris Ancient. As you can see in the images below, the model required some serious reposing. I wanted to banner to be on the viewer’s left as they looked at the model, while the stock Primaris Ancient holds the banner to the viewer’s right. The reason I wanted to change this is two-fold: one was to emulate the pose of the model that inspired it, the other was because when humans view an image their eyes start in the top left and track down diagonally to the bottom right (interestingly this is regardless of cultural influences). So I wanted the visual story to begin with the banner under fire, followed by the Flesh Eaters heraldry announcing who you were looking at, then on to the heroic Marine himself with the glowing eye lenses firmly in the centre of the image. Finally, the eyes take in the second round of incoming fire and the damage to the pauldron, bookending the visual story with the fact that this is a Marine in the heart of battle!
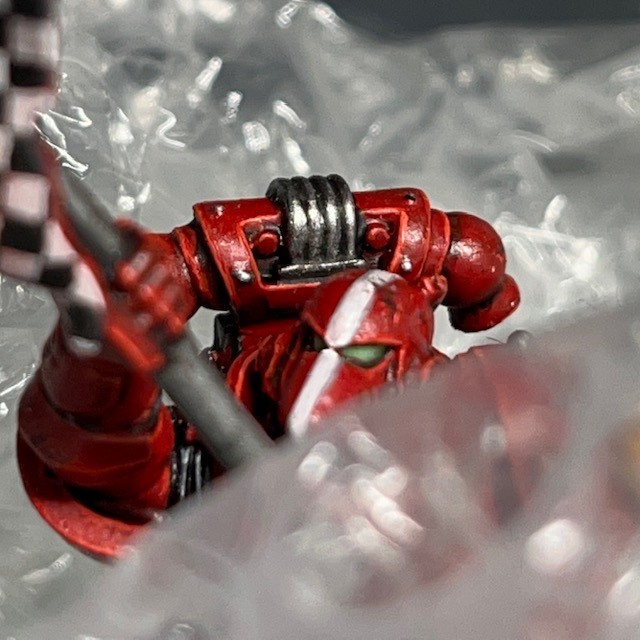
To paint this model is used my normal red armour receipe, but with a few extra steps; a Rhinox Hide glaze shade at the bottom of large panels, a Trollslayer Orange point highlight, and a Bloodletter glaze. I wanted to do an extra nice paint job for Golden Demon, while not having the model look out of place with the rest of the army. If you look at the close-up shots then hopefully you’ll notice some subtle battle damage as well.
For the banner, I was trying to emulate the look of the banner from the Rogue Trader book. I decided not to extend the chequered pattern the whole way around the border. This was partially to save time, but also because I thought it would draw the eye too much. I thought it was worth adding the chapter name as the Flesh Eaters are relatively obscure and some viewers may not recognise the chapter symbol alone.
The final thing to talk about is the display plinth, seen in the picture below. I went for a transparent Perspex base, rather than the traditional black, to demonstrate that the miniature was entirely self-contained. This way you can see that there are no batteries or circuits hidden in the plinth.
So there we have it! Of course I will keep you all updated on how it goes. It would be weird for an LED model to win a painting contest, so I’m not holding my breath for any trophies, but it’s the taking part and the fun of being there that counts! As ever, thanks for reading, and please don’t forget you can also follow my work on Twitter and Instagram.