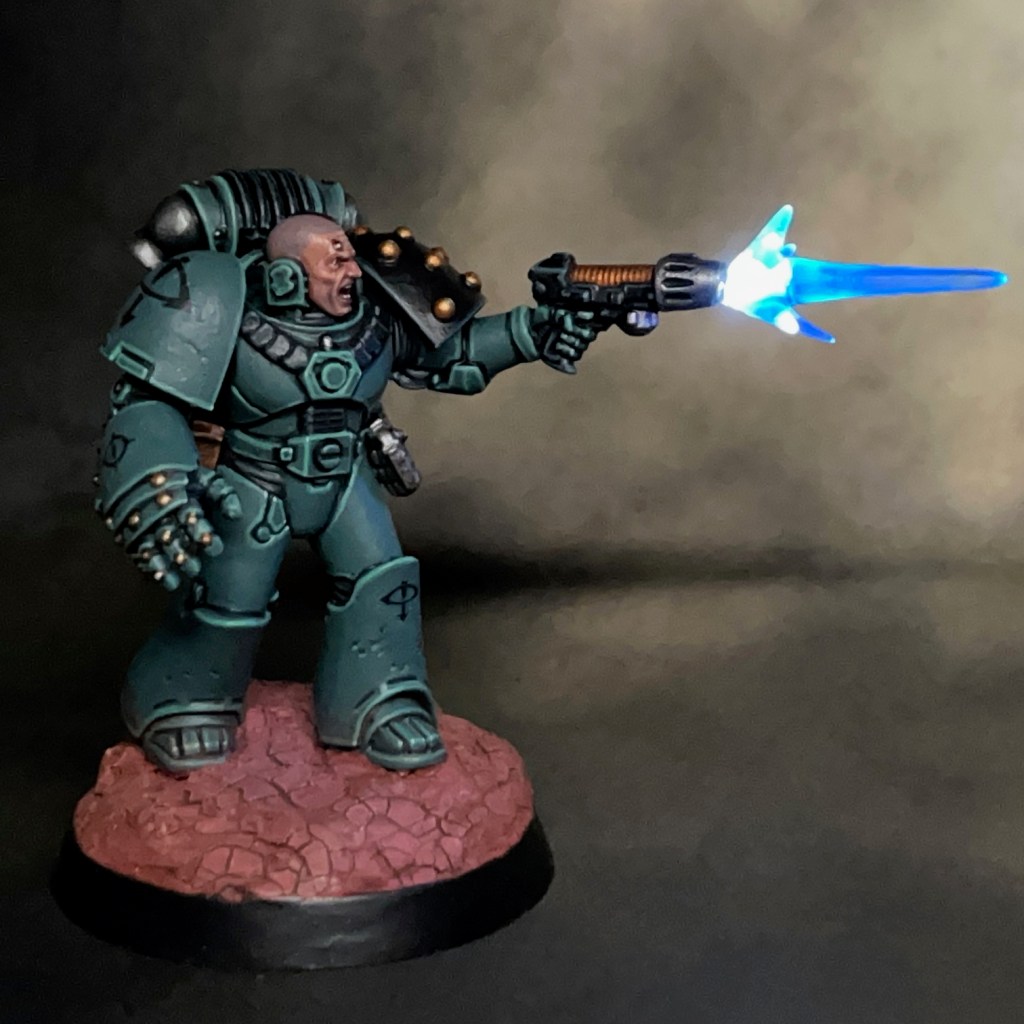
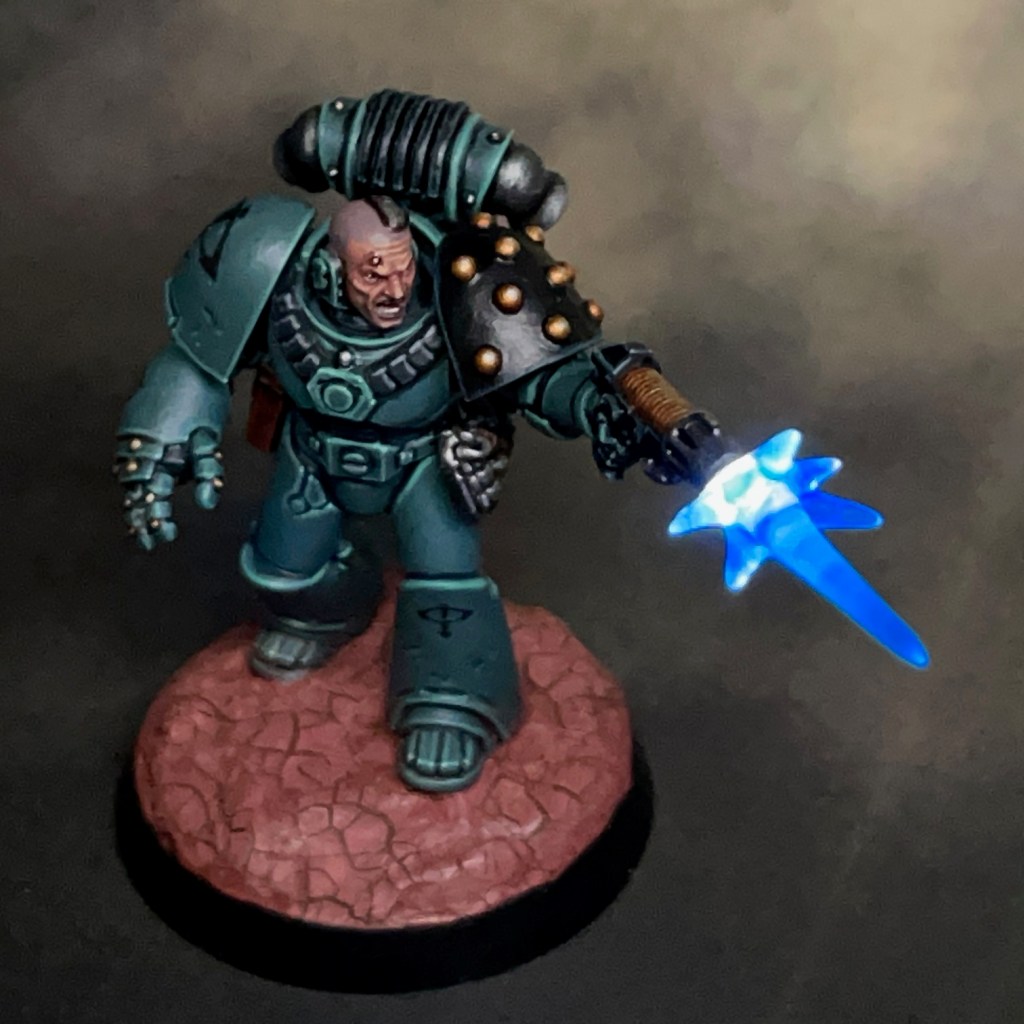
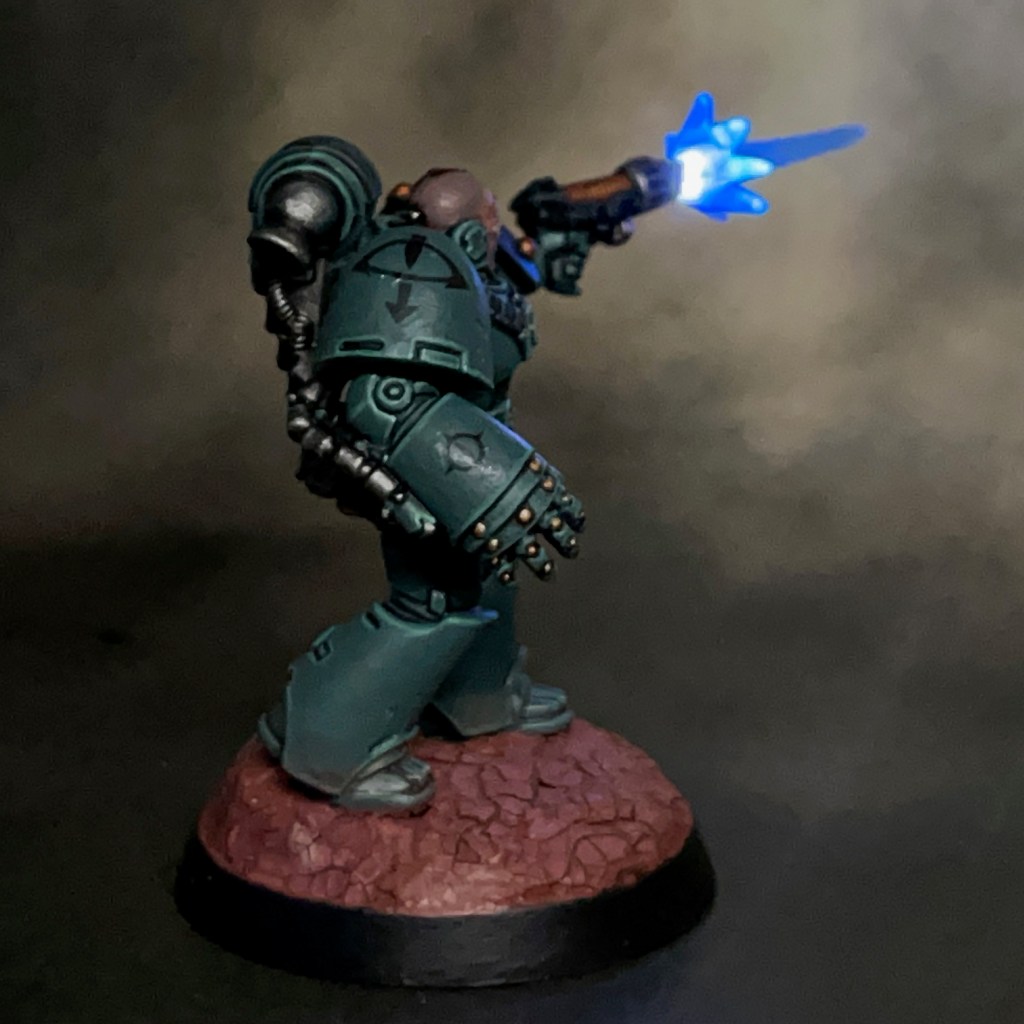
This week I’d like to present Sergeant Khons of the Sons of Horus. This miniature and its LED effects have been specially commissioned by the team at Green Stuff World to show off some of their 3D printed accessories and LED kits. This is my second Green Stuff World commission after Themistius Kalden and his energy shield that I posted last week.
Modelling
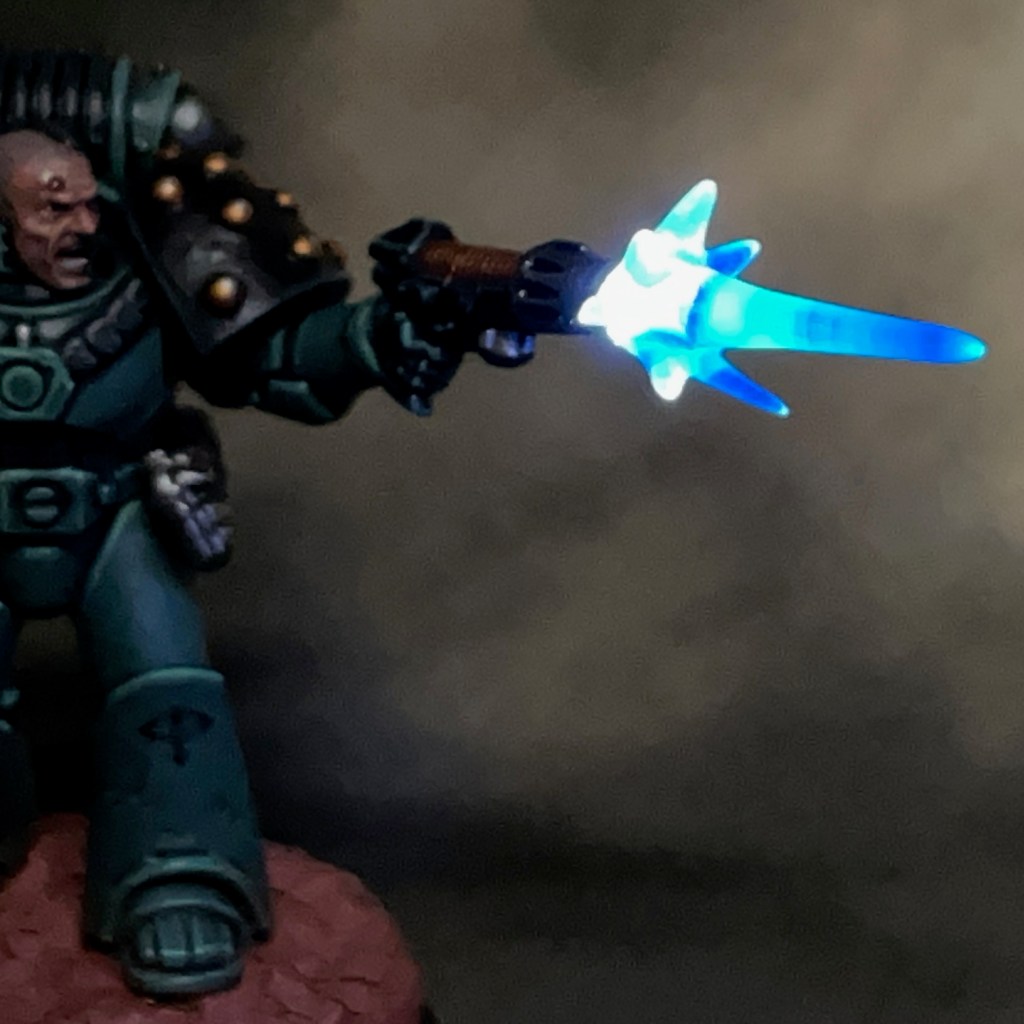
This miniature was intended to demonstrate the Green Stuff World 3D Printed Plasma Effects. When I was asked to incorporate the plasma effects into a miniature, I immediately knew this effect would look awesome on a space marine with a plasma pistol. I settled on the Sons of Horus for the paint scheme as I really I enjoyed painting Brother Amset, and I’ve been looking for an excuse to paint another Sons of Horus marine ever since.
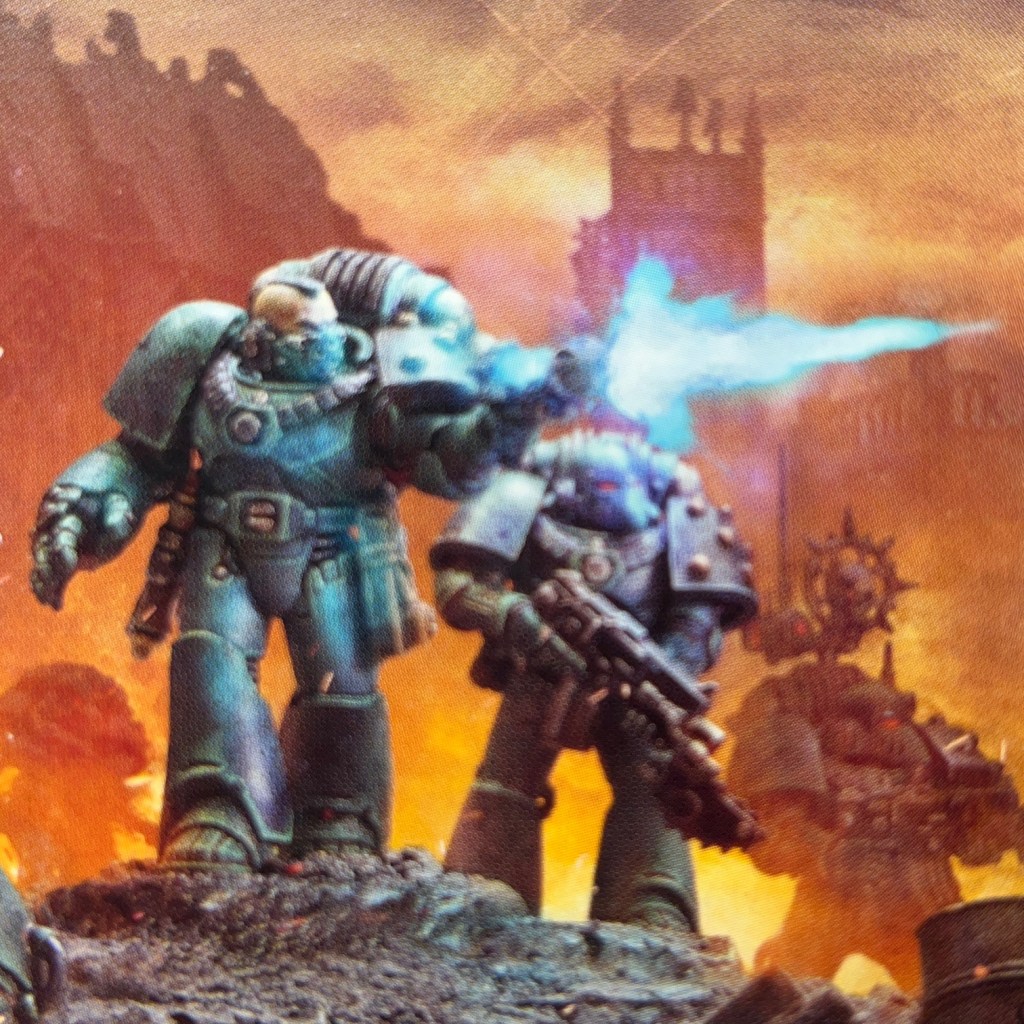
The equipment and pose of the miniature were influenced by sergeant on the Legion MKVI Tactical Squad box art, shown above. I swapped the mask for a bare head as a shouting or grimacing face combined with an LED muzzle flare really helps to sell the ‘mid-action’ pose.
As part of the commission I filmed all the stages of the build process, which you can see in the video below.
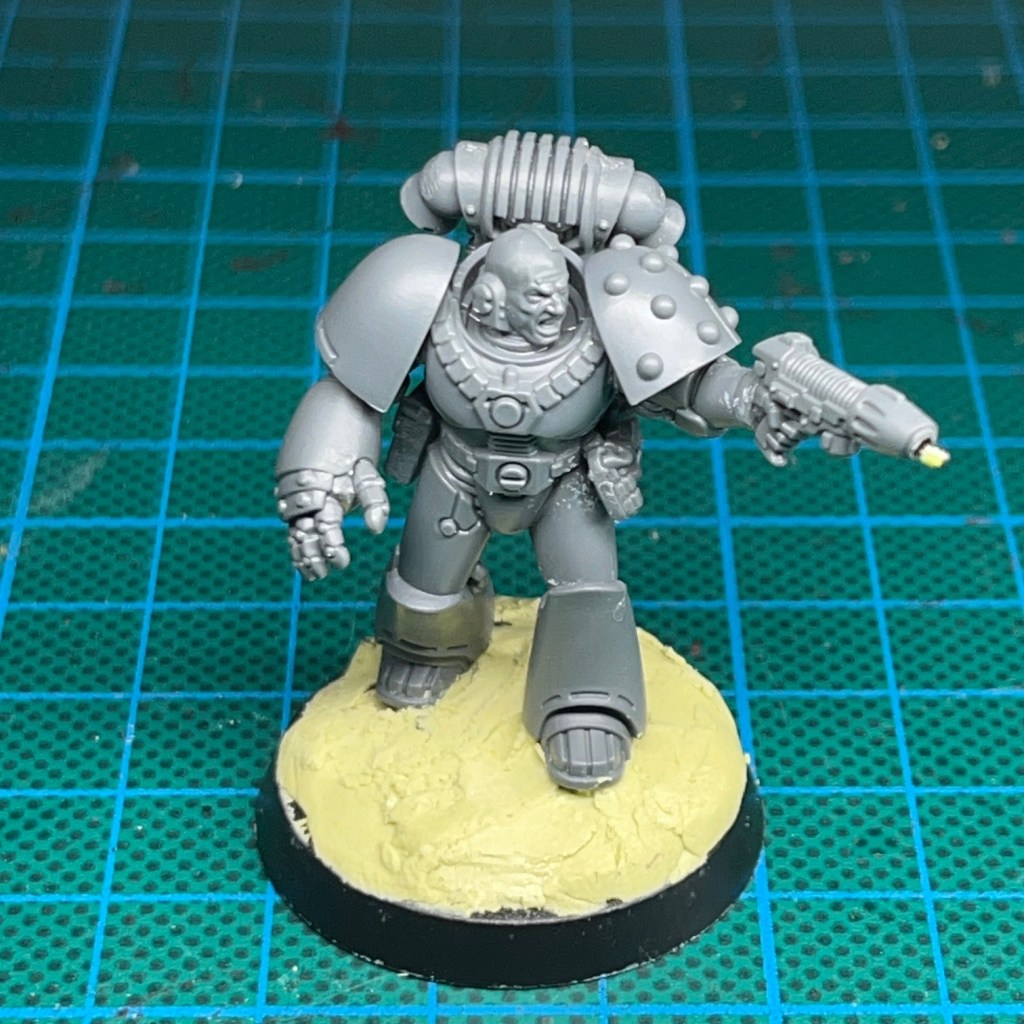
A full PDF tutorial for this build will be released via Green Stuff World soon. When it is, I’ll add it here and link to it from my tutorial section. In the meantime to get you started here’s a list of all the components and consumables I used. The miniature is from the Legion MKVI Tactical Squad kit.
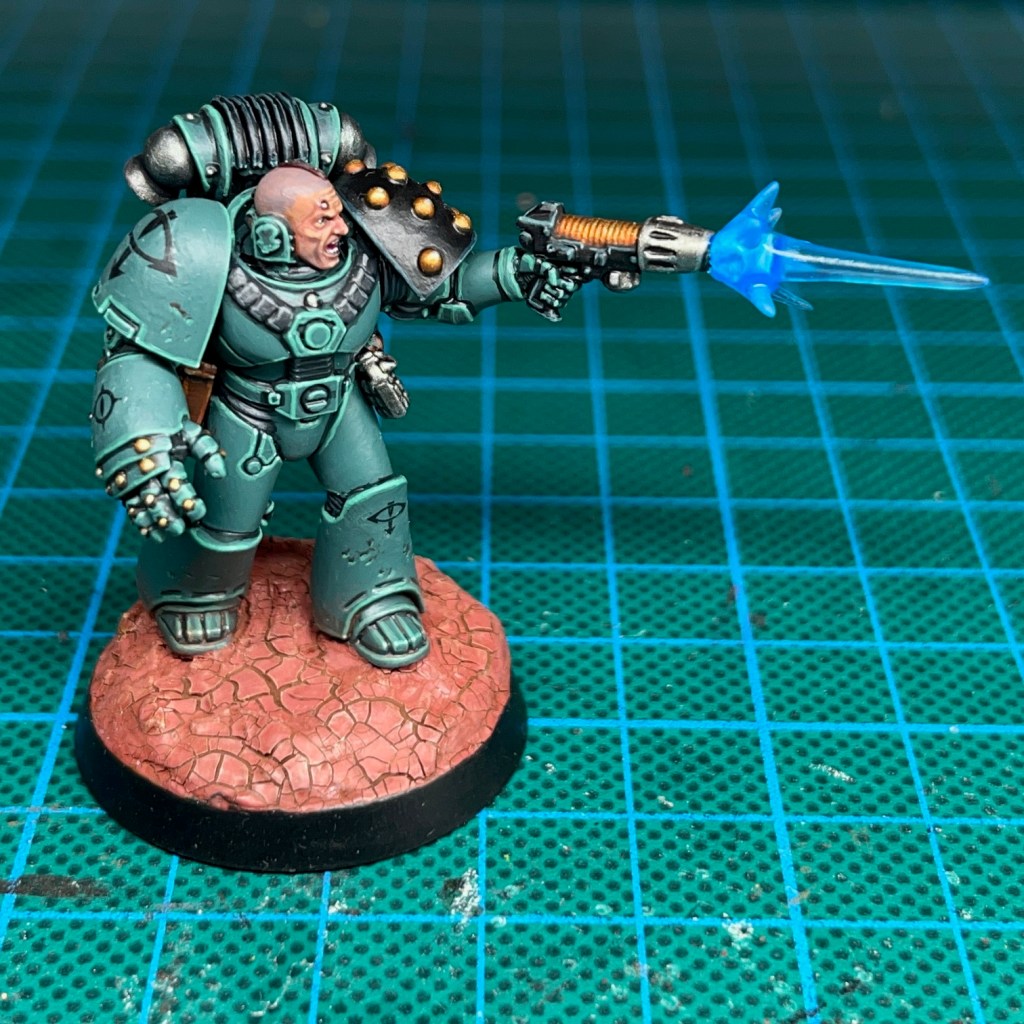
My Sons of Horus armour recipe can be found in this previous post. For the face, I used my standard Pale Skin recipe. During the painting stage the plasma effect was given a thin blue glaze. This was done to help give the cool white LEDs a blue tint, and also to give the plasma effect some visual interest when the LED was switched off. The iconography on this miniature came from the transfer sheet included in the box.
LED effects aside, I’m really pleased with the paint job on this model. I think it’s one of the best space marines that I’ve painted to date – if I do say so myself!
That’s all for today, I hope you enjoyed this miniature and the demonstration of the Green Stuff World kits. Thanks very much for reading, and please remember you can also find me sharing my work on Instagram, Threads, Twitter/X, Bluesky and Mastodon.
Oh, and if you have time, please consider voting for my miniature painting in the CRIT Awards!
I choose to interpret my title as Shield Captain literally.
Themistius Kalden, Custodes Shield Captain
Allow me to present Themistius Kalden, Shield Captain of the Shadowkeepers Shield Host of the Adeptus Custodes. This miniature and its LED effects have been specially commissioned by the team at Green Stuff World to show off some of their 3D printed accessories and LED kits.
The 3D printed Energy Shields kit was one of several I was commissioned to demonstrate. My first thoughts were a space marine with a storm shield, but after a bit more musing, I thought a Custodian with a shield might be more interesting.
Modelling
As part of the commission I filmed all the stages of the build process, which you can see in the video below.
A full PDF tutorial will be released via Green Stuff World soon. When it is, I’ll add it here and link to it from my tutorial section (EDIT: The full PDF tutorial can now be found here). In the meantime, to get you started here’s a list of all the components and consumables I used. The miniature is from the Custodian Wardens kit.
For the paint scheme, I followed a similar recipe to my previous Custodian Shadowkeeper. The only difference was I used true metallic rather than NMM, just because NMM is very time consuming and I wanted to meet my deadline. For the face, I used my normal Pale Skin recipe. The energy shield was given a red glaze and very watered down highlight to the edges, just to help give it a bit more definition without impacting the transparency.
That’s all for today. I’ll be back again soon with more LED miniatures, including more collaborations with Green Stuff World. Thanks very much for reading, and please remember you can also find me sharing my work on Instagram, Threads, Twitter/X, Bluesky and Mastodon.
Sometimes you need to look the enemy in the eye, and sometimes you need to trust in your wargear.
Brother Castiar, Flesh Eaters
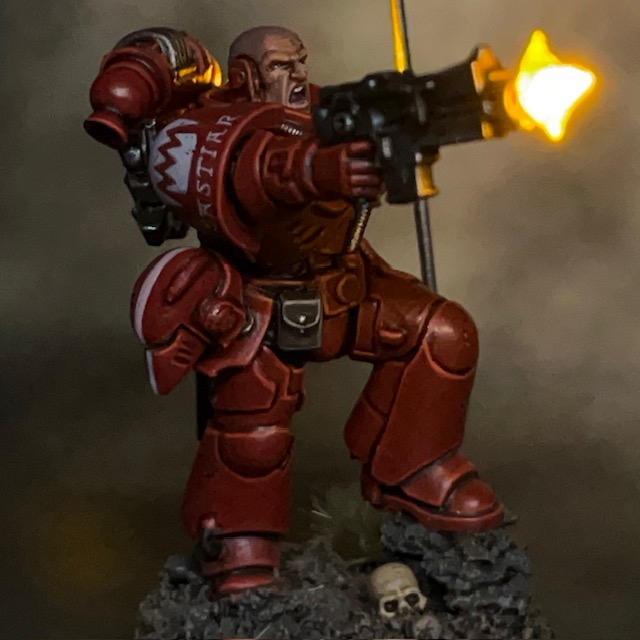
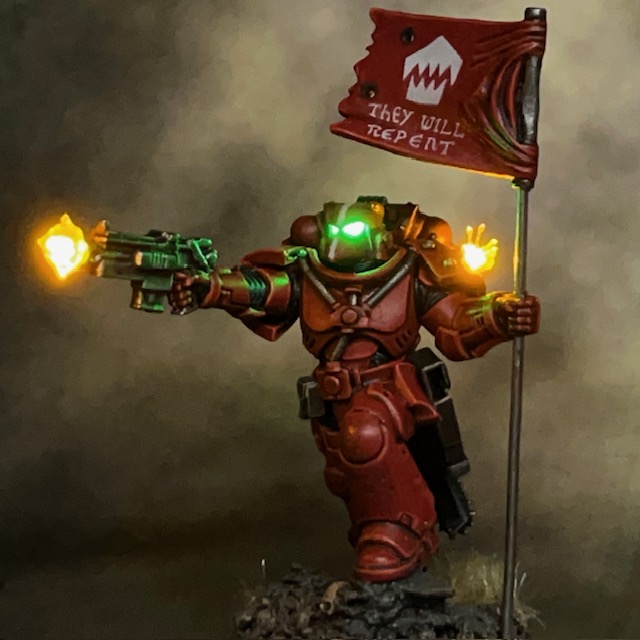
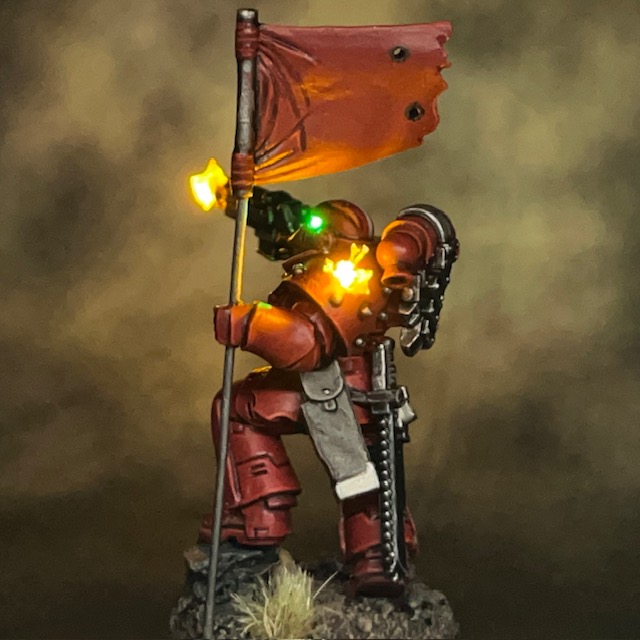
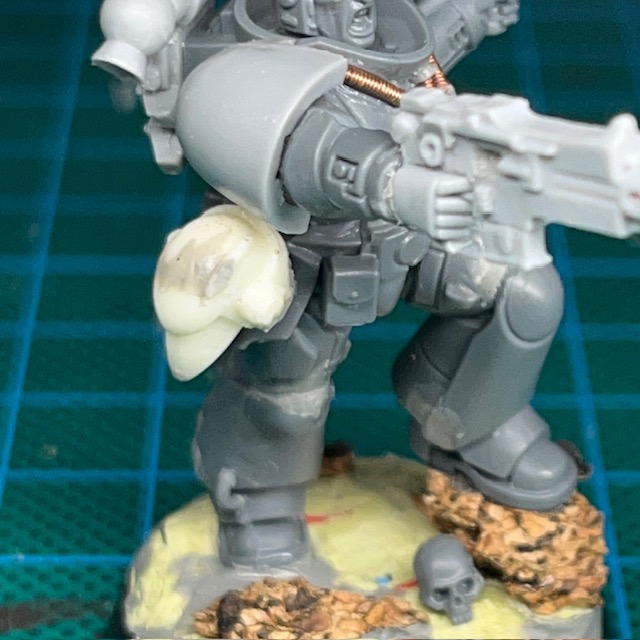
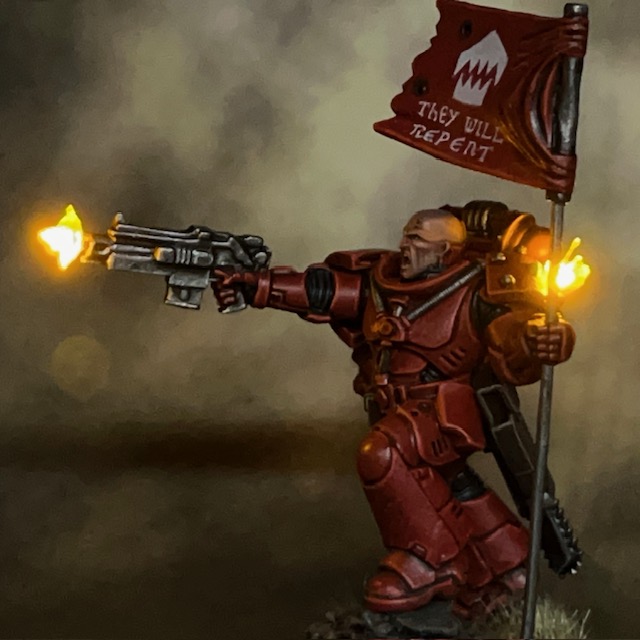
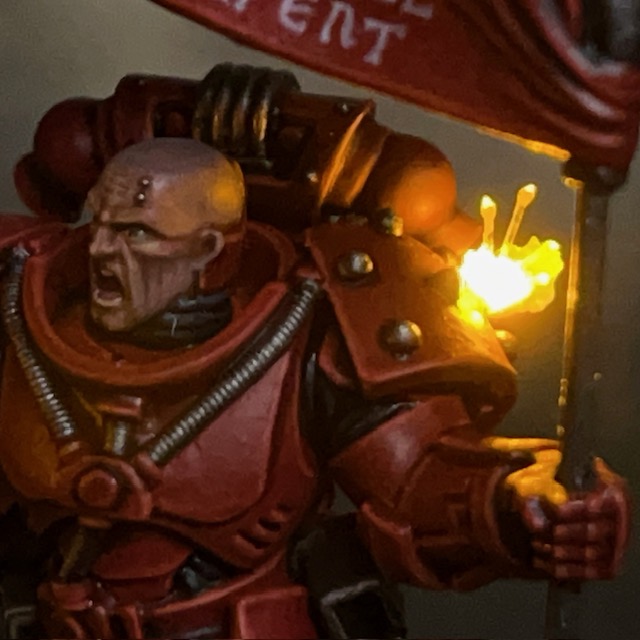
I’m back again with the next addition to my Flesh Eaters Space Marines project. Brother Castiar is the fourth member of my second Assault Intercessor squad, along with Brother Pitman, Brother Oram, and Sergeant Byrne. As well as the usual LED muzzle flare and bullet impact effects, Castiar also has a choice between a bare head or helmet that can be easily swapped during a game.
Modelling
I had built a similar effect before with my Crimson Fists Captain, although in that case he couldn’t wear the helmet ‘mag locked’ to his belt. It’s a technique I’ve been meaning to revisit for a while and refine into a short-form tutorial. The base miniature is an Assault Intercessor from the Indomitus box – yes, I’m still working my way through that!
Swappable Helmet Tutorial
1. This tutorial builds on the techniques used in my LED Eye Lens tutorial. To prepare your miniature and base, first complete Steps 1-10 of that tutorial.
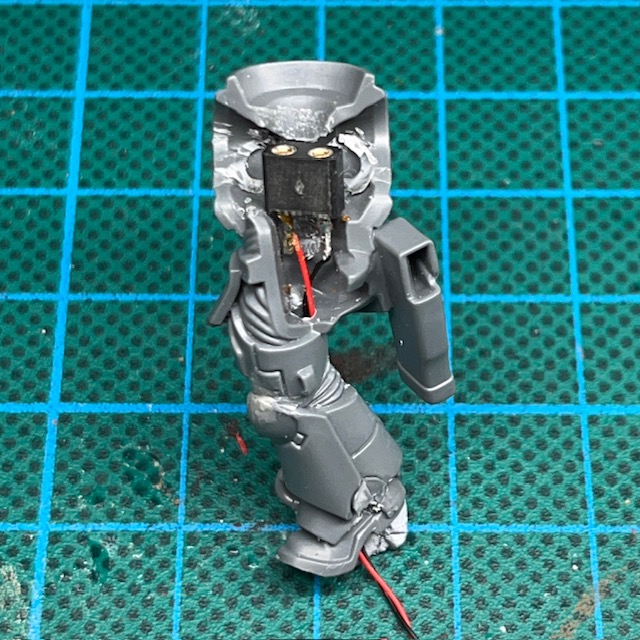
2. This technique uses IC sockets (above left) as sockets for LED legs. They are just the right size for the legs of 1.8mm LEDs to easily fit in and out. IC sockets are often manufactured in long rows or squares, but you can easily cut them down into pairs but cutting in between individual sockets with a craft knife. For this tutorial you will just need a single pair of sockets. IC sockets are available on Amazon here or from electronic component suppliers like RS here.
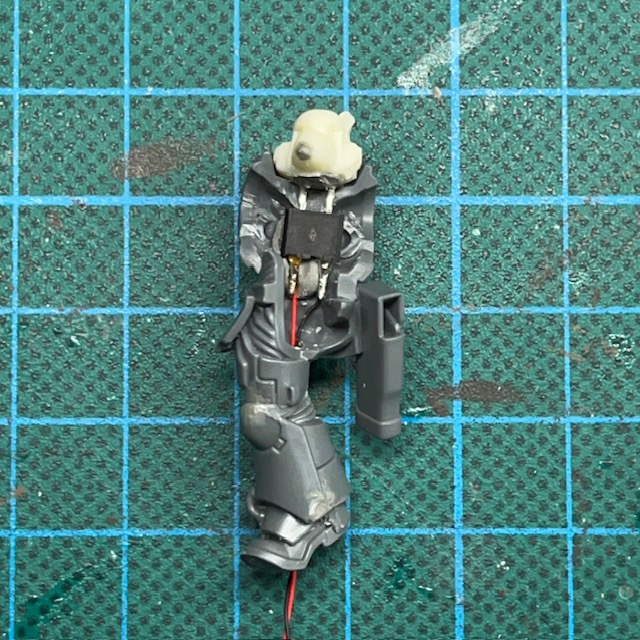
Assuming you’ve followed Steps 1-10 of my LED Eye Lens tutorial, you can now solder the two legs of the IC socket to the two wires inside the torso of your miniature (above right). Solder one wire to each leg. It doesn’t matter which way round you solder the wires, just remember which side was positive and which was negative.
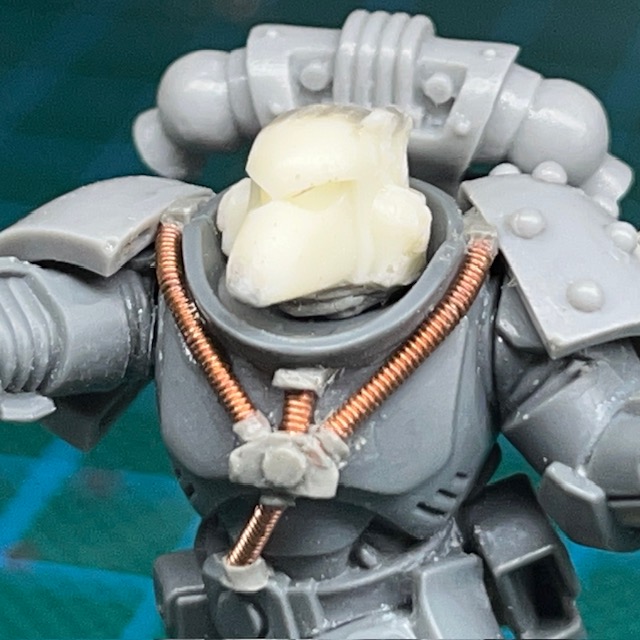
3. Now complete Step 11 – 14 of my LED Eye Lens tutorial to prepare the helmet (above left). Make sure you consider the polarity of the LED legs with respects to the polarity of the IC socket before you fix the LED into place. At this stage I’ve also started using modelling putty to sculpt the flexible ‘rubber seal’ between the helmet and the armour. If you make sure the putty covers the entire underside of the LED this also helps prevent unwanted light spilling out from the bottom of the helmet.
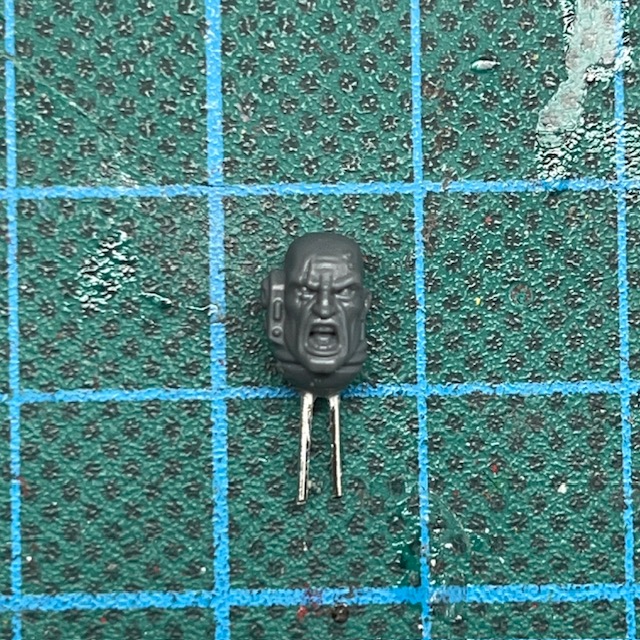
You will also need to prepare the bare head (above right). Use off-cuts from you LED legs to give the bare head legs of its own, then it can easily plug into the same IC socket. Make sure that the metal legs are not touching each other, otherwise you risk short circuiting the battery when the bare head is insert. There’s also no reason that the bare head can’t simply be a replaced with a different LED helmet instead.
4. Make sure the LED legs are the right length so they fit comfortably through the neck hole and into the IC socket, while also sitting as flush as possible with the top of the torso. Once you are satisfied with the position, fix IC socket in place with glue and/or modelling putty (above left).
You may also want to add additional LED effects, for example LED Muzzle Flares or LED Plasma Weapons. If you do, this is the point at which to do it. Additional LEDs can be connected in parallel with the connections to the IC socket on the base (above right).
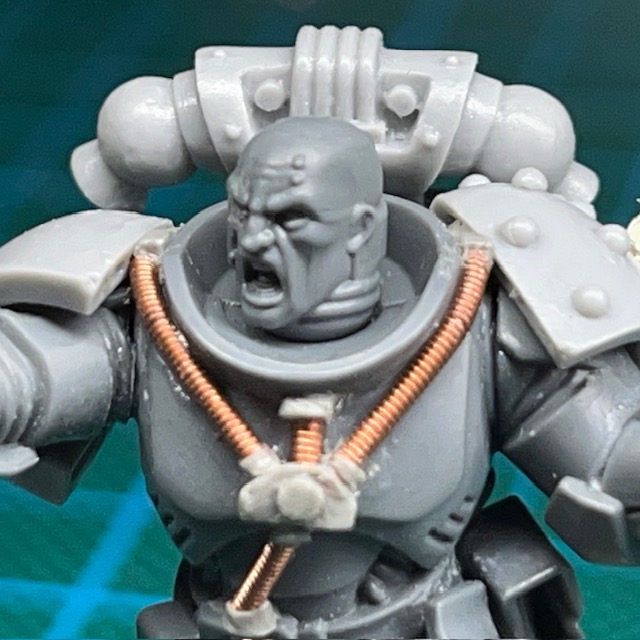
5. Assemble the rest of the miniature, and then make sure the both heads have a good fit with the torso. If there are gaps, you may need to use more modelling putty to sculpt additional detail to fill the gap, like the ‘rubber seal’ around the neck. (above).
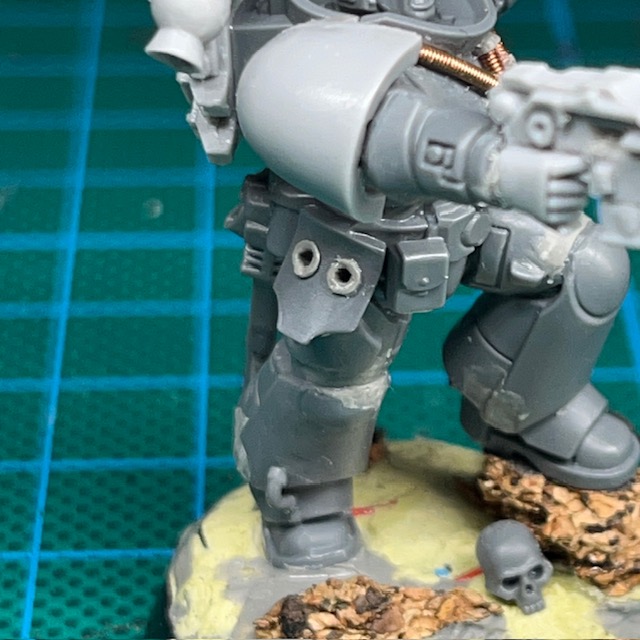
6. This step is optional, but if you want to include the ability to ‘mag lock’ the helmet on the belt, you will need to drill two holes in the waist or hip of the miniature (above left). Make sure the holes are deep enough so that the helmet sits flush with the hip (above right). A 1mm drill bit should be the ideal size for this. After drilling the holes, I added a small ring of modelling putty to make them look similar to the other sockets and access ports you sometimes find on Space Marine armour. Just be careful not to drill through any wires that may be inside the leg! These holes do not need any electrical connections as the helmet is ‘powered down’ when mag locked to the waist, so is not expected to illuminate in this postion.
Painting
When painting this miniature I stuck with my usual recipes. I used my standard recipes for Flesh Eaters red armour and my recipe for Space Marine pale skin. Something that’s worth noting, I always apply a thin glaze of Biel-Tan Green to the resin in the helmet eyes so they have a green tint even when switched off. This is especially important for this miniature, where the helmet will feasibly be on display on the waist while powered down.
There’s a minor Easter Egg in the slogan Brother Castiar’s banner. Ostensibly, ‘They Will Repent’ is a threat and a promise to his Partisan enemies in the War of the False Primarch. But also – as with the banner on the Infiltrator squad – it’s also a reference to a level in the original Doom. Of course the level name is itself a biblical reference, so I guess it’s a nested Easter Egg, if you’ll excuse the pun!
That’s all for today. It’s been a while since my last blog post, but rest assured I’ve been working on lots behind the scenes, and I have plenty more to show soon. Thanks very much for reading, and please remember you can also find me sharing my work on Instagram, Threads, Twitter/X, Bluesky and Mastodon.
Heal ya!? None of these potions will heal ya! This one will kill ya fastest, if that’s what yoo mean…
Muggob Muckstirra, Swampcalla Shaman
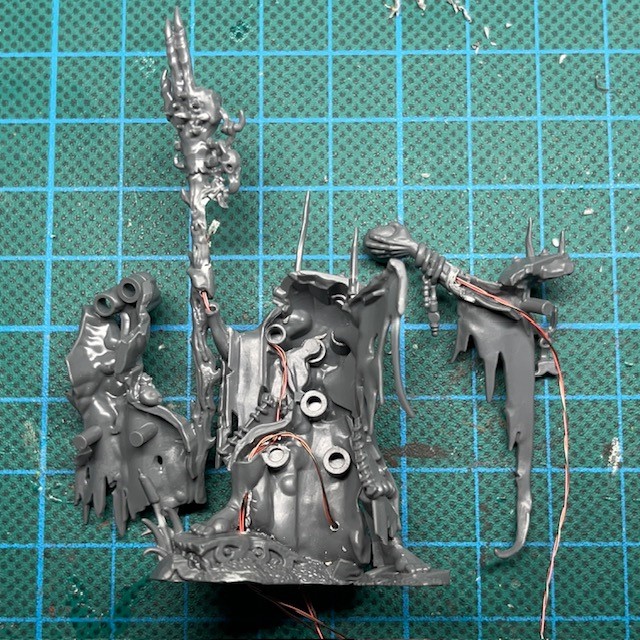
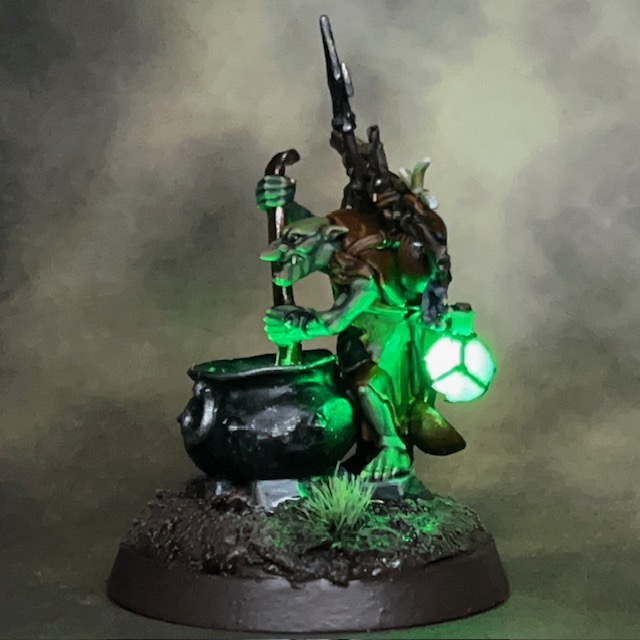
Today I’m looking at an Orruk Kruleboyz Swampcalla Shaman from Warhammer Age of Sigmar. This is the next miniature in my new Kruleboyz side project, and the partner piece to the Pot-Grot that I posted last week.
Modelling
This miniature used a total of four 3V Green 0603 SMD chip LED and accompanying resistors from Small Scale Lights. That’s one for the potion bottle on the staff, one each for the two potion bottles hanging from the back of the model, and one in the dish of Boggy Mist potion. The base, battery holder and switch were prepared using the method described in Step 1 – 6 of my LED Eye Lens Tutorial, and the four LEDs were connected in parallel across the battery and switch. You can see some pictures of the wiring below.
I discussed how the potion bottles were created last week in my post on the Pot-Grot, but they are essentially polyurethane resin casts made using the techniques described in my Resin Casting for Special Effects Tutorial.
The illuminated Boggy Mist potion pouring from the dish was a bit of an experiment. Or to put it another way, I made it up as I went along! I’ve laid out the steps I followed below.
1. One of the 3V Green 0603 SMD chip LEDs was inserted into the dish, facing outwards, with the connecting wires running down through the shaman’s arm and into the torso. I painted the dish before moving on to Step 2.
2. I created a water effect in the dish using Splash Effect acrylic gel. This gel goes on white but dries clear. You will get better, clearer drying from the gel if you build it up in thin layers, allowing each layer to fully dry clear before applying the next layer.
3. Next, I began to build up the pouring effect in successive layers of acrylic gel applied directly over the LED chip. This took several applications to achieve the full effect.
4. Once I was happy with how the pouring liquid looked, and after the final layer of gel had dried, I gave all of the acrylic gel a thick shade of Biel-Tan Green. This is mainly to make the gel look more interesting when the LED is switched off.
In hindsight I probably should have begun by filling the dish with a small layer of polyurethane resin – as I did with the Pot-Grot’s cauldron – to help diffuse the light better. Still, this doesn’t look too bad as it is! I did have a quick play with fibre optics and thin acrylic rod too, just to see if I could make the steam of liquid leaving the dish any longer and keep it illuminated. But I wasn’t very pleased with the results so I settled for a smaller stream.
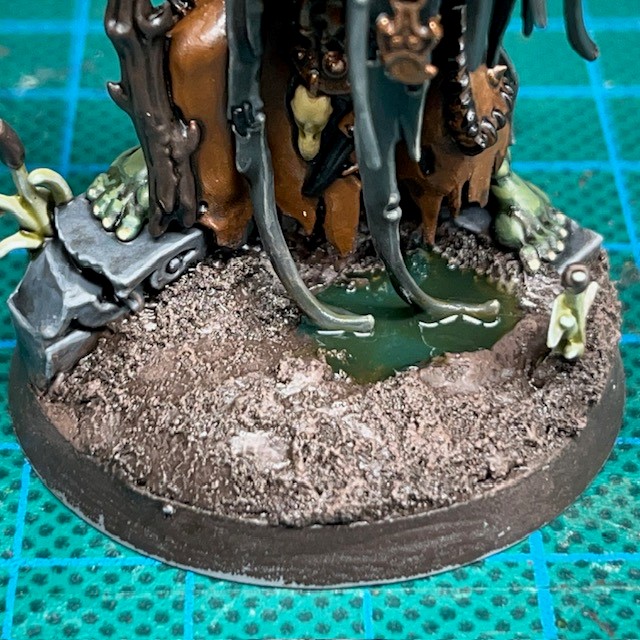
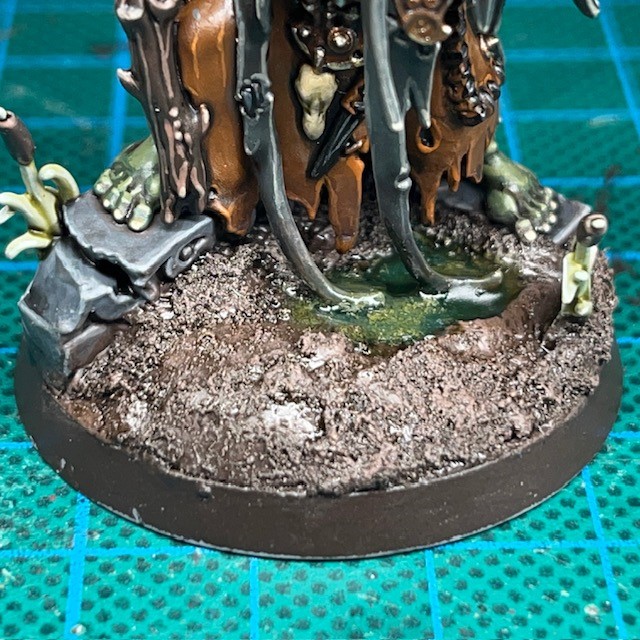
In addition to the other effects, I also added a swampy pool to the base of the shaman using a mixture of resin and paint. I’ve described the steps involved below. I deliberately positioned the pool so the shaman’s robes would be trailing into the water, emphasising his connection to the swamp.
1. When texturing and painting the base, leave an area clear and flat to represent the swampy pool. Paint the floor of this area in Caliban Green.
2. Once the paint is dry, add a thin layer of transparent UV resin to fill the pool. UV resin can be cured quickly with a small UV torch or left to cure outside in direct sunlight.
4. Wait for the Camoshade to partially – but not fully – dry, and then apply a second layer of UV resin. This will mix with the paint and give a sense of murky, brackish depth to the pool. You may find it useful to have a thin plastic rod or stiff metal wire handy so you can stir up any big clumps of paint in the resin before you harden it with the UV torch.
At this point I’d normally discuss paint recipes, but I’m saving that for next week when I’m hoping to show more Kruleboyz and discuss the project parameters. I’ll be talking about Kruleboyz painting recipes, palette selection and LED choice for this project, so check back next week if you’re interested in that.
That’s all for today. I’ll be back again soon with more Kruleboyz, plus of course more of all the usual projects like Flesh Eaters space marines and Tyranids! Thanks very much for reading, and please remember you can also find me sharing my work on Instagram, Threads, Twitter/X, Bluesky and Mastodon.
Hubble, bubble, toil and…hey boss, do we have any, erm….rubble?
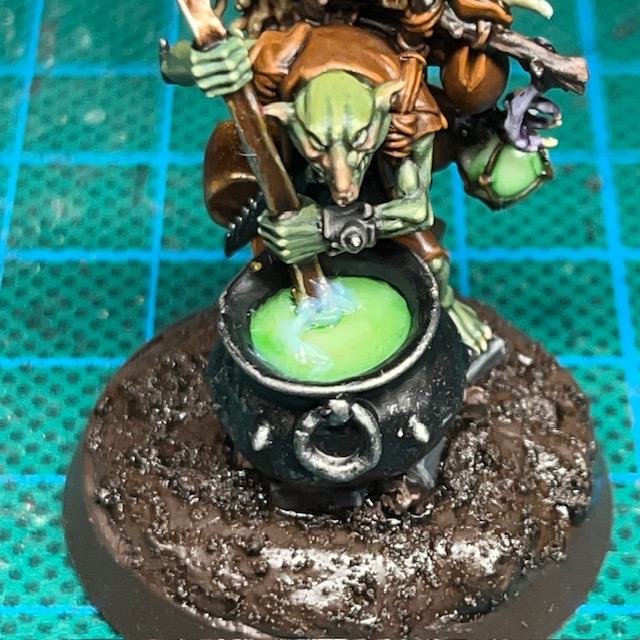
Stirit, Pot-Grot
Here’s something a bit different for today’s blog post, an Orruk Kruleboyz Pot-Grot from Warhammer Age of Sigmar. This is the first miniature in a new Kruleboyz side project.
Seriously, another side project!?
Yes, another side project! My young son recently expressed an interest in having a go at the Warhammer hobby, particularly the painting, so we had a look at the starter sets. My son is more into fantasy than sci-fi at the moment, and the Stormcast leapt out at him as something he wanted to paint. I’m a fan of greenskins (as you may recall), so I thought painting some Kruleboyz might be fun. We bought a Age of Sigmar Warrior Edition Starter Set to split. I couldn’t resist picking up a couple of other Kruleboyz bits too!
Modelling
The Pot-Grot miniature comes with a plastic cauldron, and my initial plan was simply to recast the plastic liquid surface of the cauldron in resin to allow the light through. But the component was quite thin and after several miscasts I decided to take a different approach, which I’ve detailed below in a short-form tutorial.
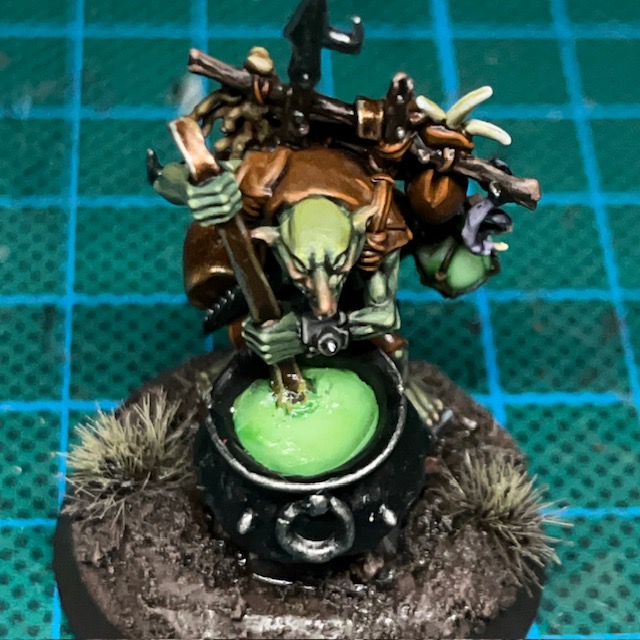
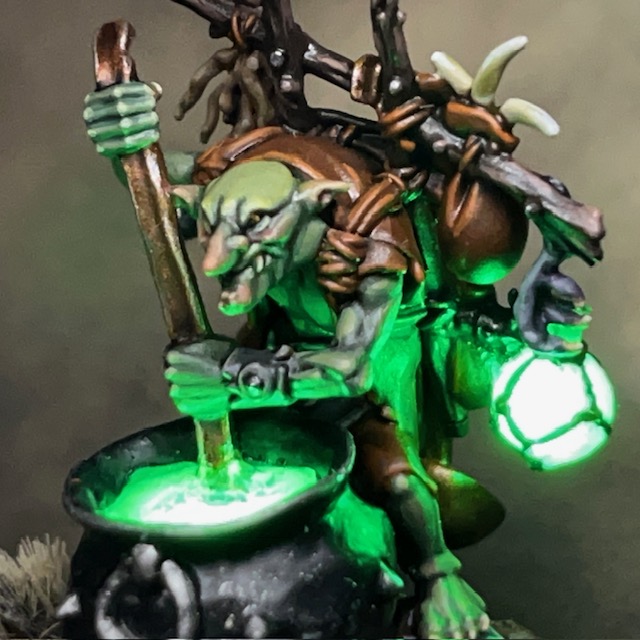
1. Began by preparing the base, battery holder and switch using the method described in Step 1 – 6 of my LED Eye Lens Tutorial. Next insert the LED into the bottom of the cauldron, facing up. I used a Tru Opto Green 1.8mm LED with a 10 ohm resistor. Drill two holes in the bottom of the cauldron to allow the legs of the LED to pass through. Solder the LED and resistor in series with the battery and switch. Then make sure any gaps in the sides and bottom of the cauldron are filled with modelling putty, otherwise the resin will leak out during the next stage. At this stage I also carefully removed the plastic potion bottle from the side of the backpack with a sharp craft knife. A 3V Green 0603 SMD chip LED and accompanying resistor from Small Scale Lights was inserted in its place. The wires from this LED ran down through the backpack and legs of the model to connect in parallel with the other LED.
2. Fill the cauldron almost to the top with polyurethane resin. You will find a syringe helpful for this. I also added a polyurethane resin recast of the potions bottle to the side of the backpack, drilling a small hole so the 0603 chip LED could fit inside and illuminate the bottle. Check out my Resin Casting for Special Effects Tutorial if you need more information on working with polyurethane resin for this type of casting.
3. Once the resin has set, check that the LEDs are still functioning and that you have a good visible glow through the resin. Depending on the level of resin in the cauldron, you may need to extend the grot’s ladle so that it touches the surface. This can be done with a plastic rod or spare piece of sprue.
4. The next step is to undercoat and paint the miniature. When undercoating, be careful not to spray the resin cauldron surface or potion bottle. A temporary covering of blu tack or tin foil can help protect the resin. As part of the painting process, I added a thin glaze of Biel-Tan Green to the surface of the cauldron and the potion bottle. This is mainly to make the resin surfaces look more interesting when the LED is switched off.
5. Now add a thin layer of transparent UV resin, only 1-2mm deep, over the surface of the cauldron. This helps to give surface of the cauldron a liquid feel and a sense of depth. The UV resin can be cured quickly with a small UV torch or left to cure outside in direct sunlight.
6. Finally sculpt some ripples around the ladle and a trail to imply motion using Splash Effect acrylic gel. The acrylic gel is white when applied but dries transparent over several hours. I didn’t add too many ripples as I wanted to give them impression that the contents of the cauldron were quite viscous and not easily disturbed.
You can see the finished effect in the two images above, both with the LED switched off and on. After I’d built the miniature, it occurred to me that I could have also added an additional yellow LED under the cauldron to simulate the fire. Oh well, maybe next time!
At this point I’d normally discuss paint recipes, but I’m not going to talk about painting this miniature today. I’m planning to discuss Kruleboyz painting recipes, palette selection and LED choice for the whole side project in an upcoming post.
That’s it for today. I’ll be back again soon with more about the Kruleboyz, plus of course even more Flesh Eaters space marines and definitely some Tyranids! Thanks very much for reading, and please remember you can also find me sharing my work on Instagram, Threads, Twitter/X, Bluesky and Mastodon.