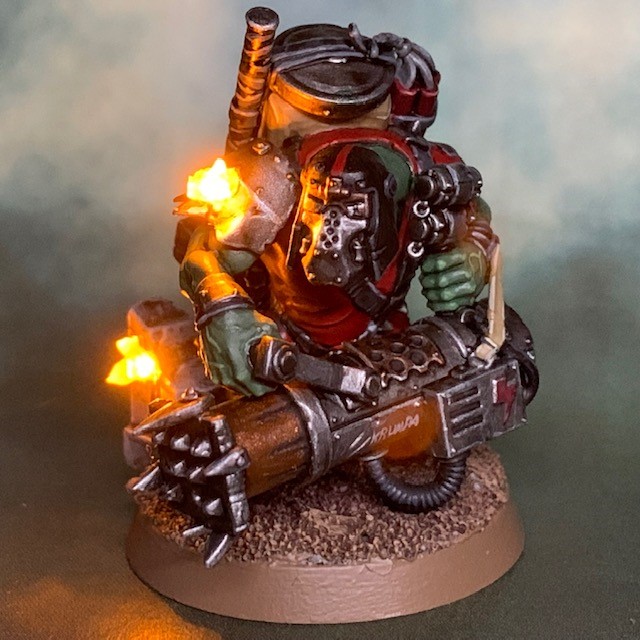
Wot’s yellow an’ sayz “Help, I’m a ‘Umie and I’m on fire!”…? Err, hang on, I fink I told it wrong…
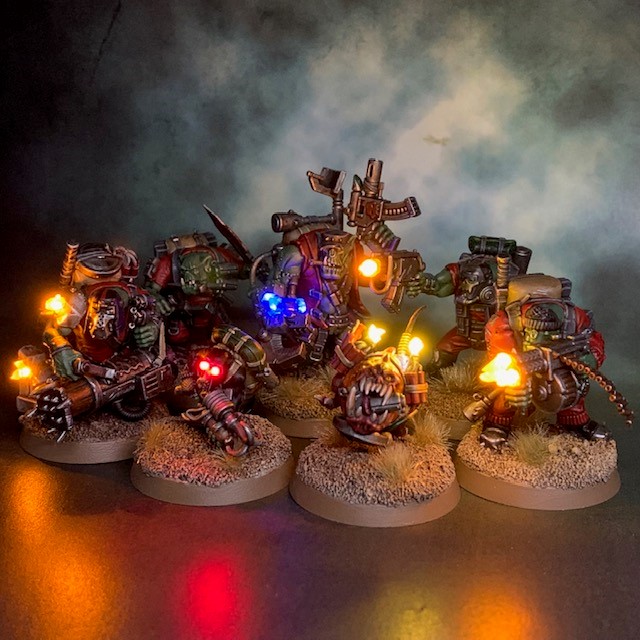
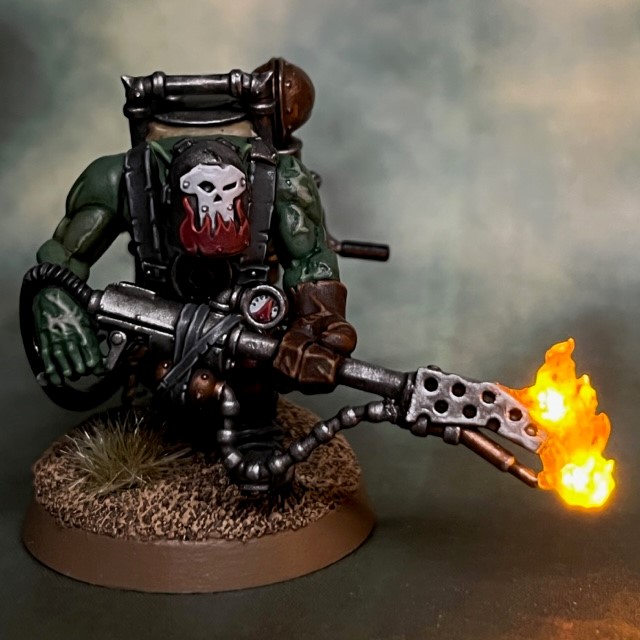
Slagskraga, Kommando Burna Boy


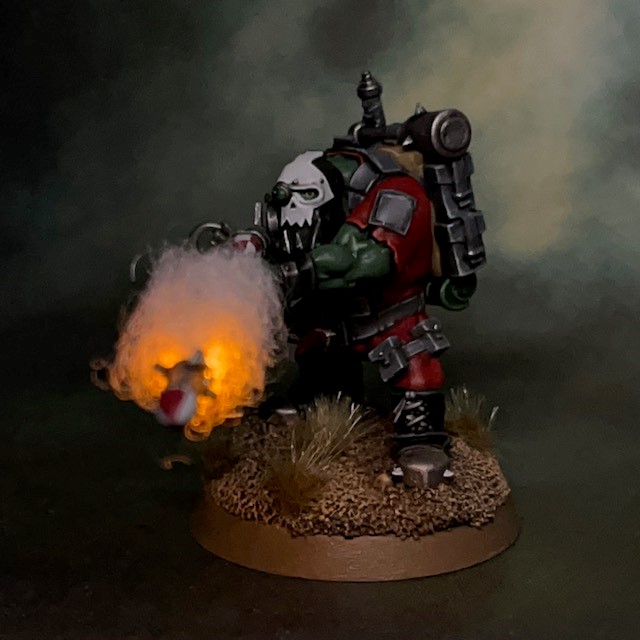
At last, the final Octarius Ork Kommando is complete, only around seven months after buying the box! I didn’t leave the Burna Boy until last for any conscious reason. I think it was just that I was more inspired by the other models and the effects I had planned, many of which were experimenting with new techniques, whereas I had a “safe” plan for the Burna Boy that fell back on tried-and-tested techniques.
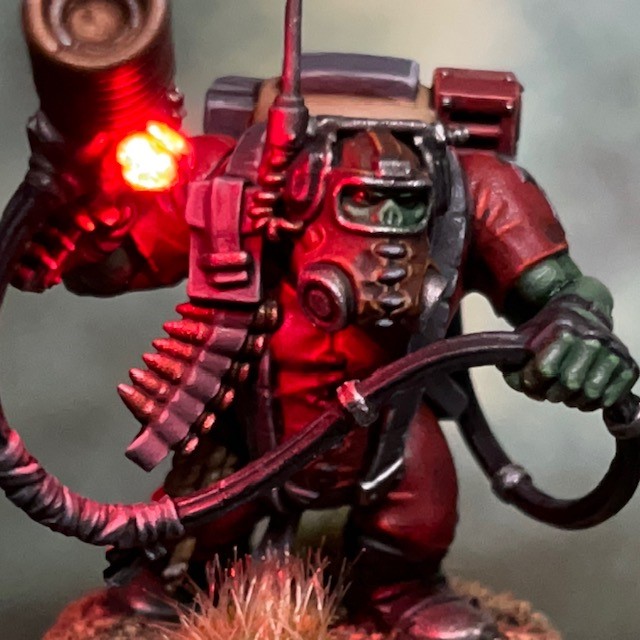
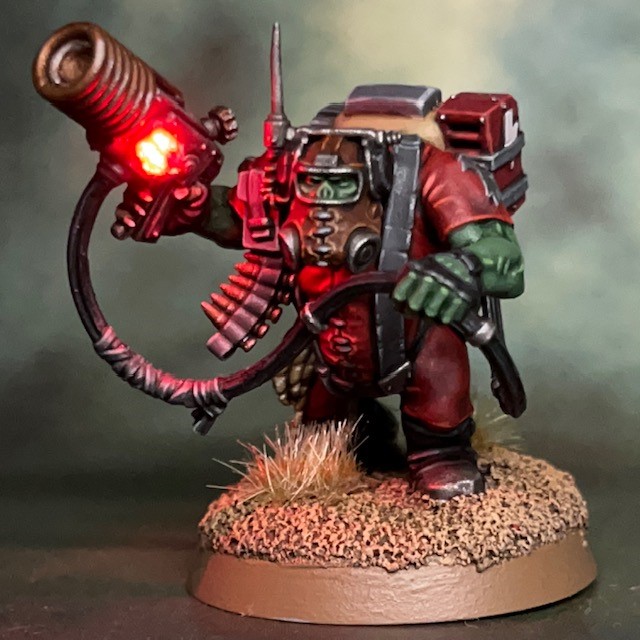
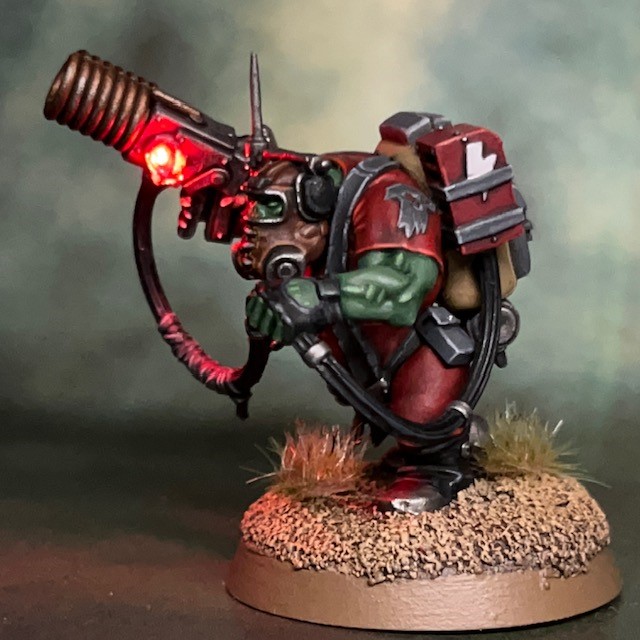
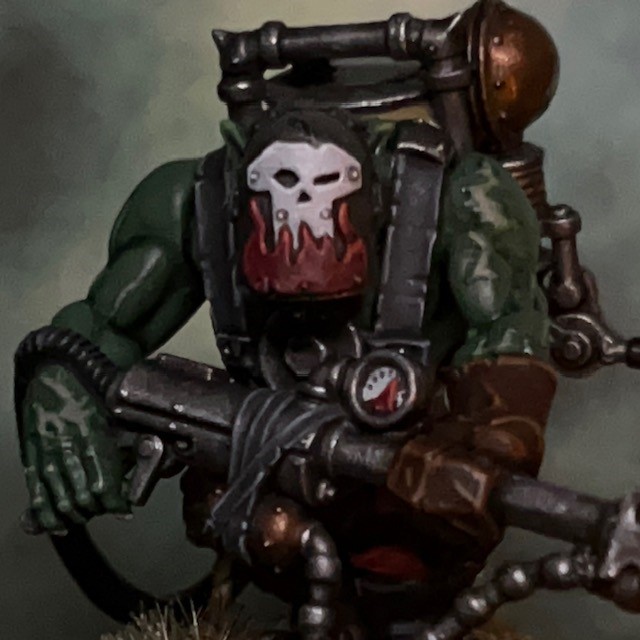
Having finished the model, I do wish I’d got to it sooner. After spending a lot of time looking at it, I think it’s one of the most characterful models in the Kommando set. I particularly like the little details like the burn scars on its hands and arms, and the fuel pressure gauge on the burna.
Design, Building & Painting
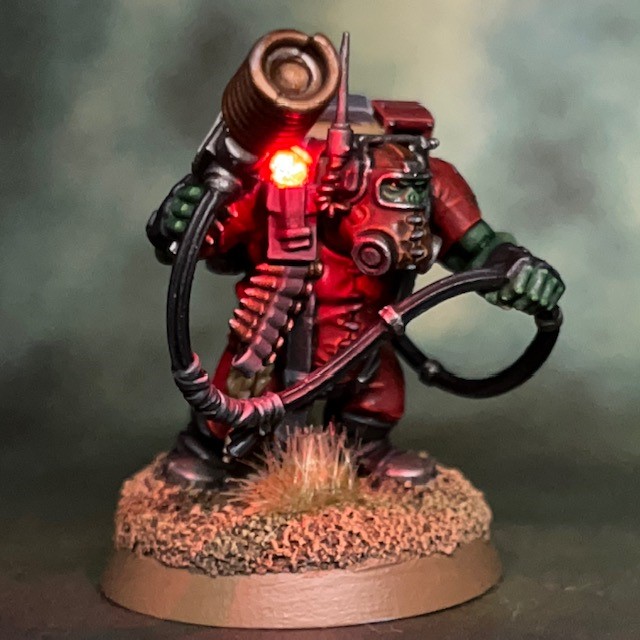
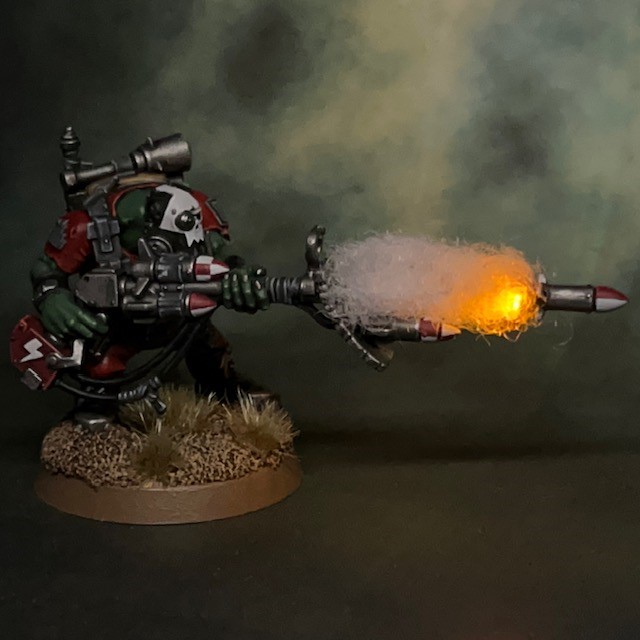
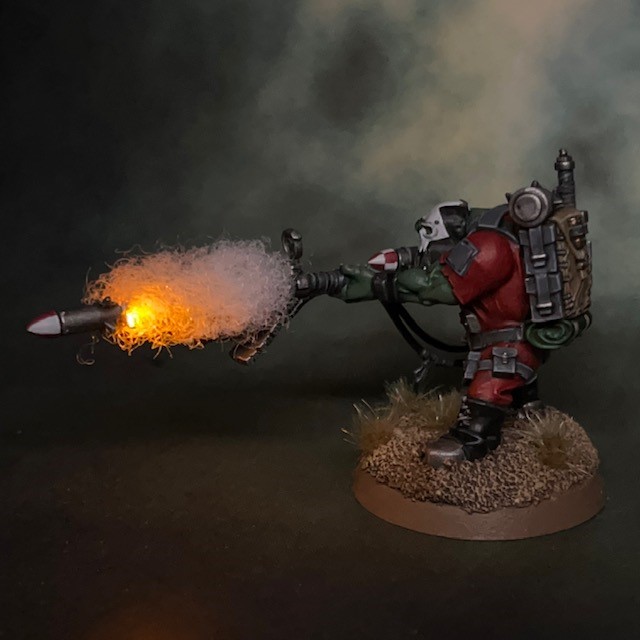
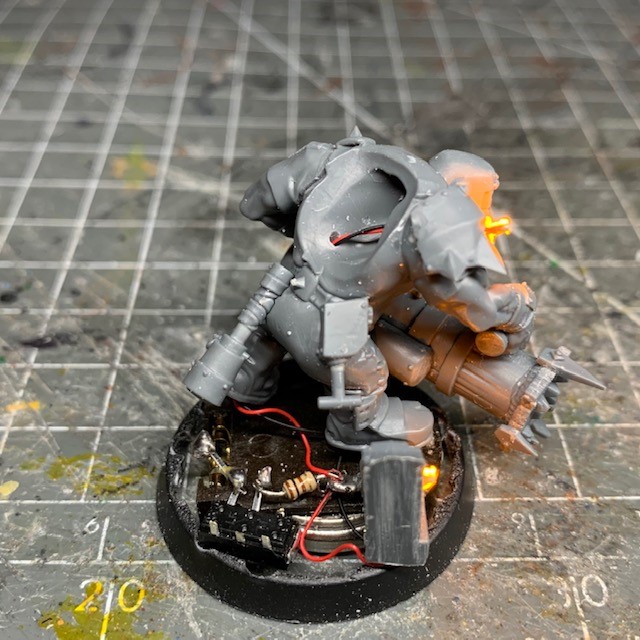
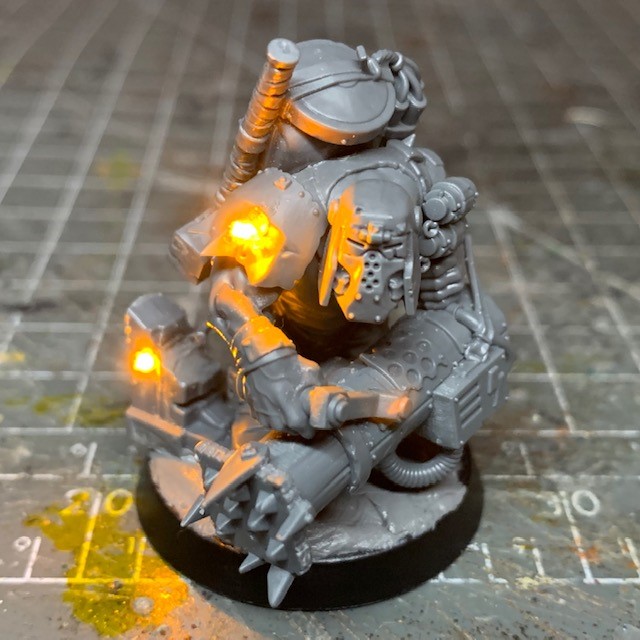
To create the LED effects on the Burna Boy I primarily I used the techniques described in my ‘Simple LED Muzzle Flare tutorial‘, which can be found on my LED Miniatures Tutorials page. The main difference is that I used two of the yellow 0805 SMD chip LEDs instead of one. Both were connected in parallel to the single coin cell battery in the base.
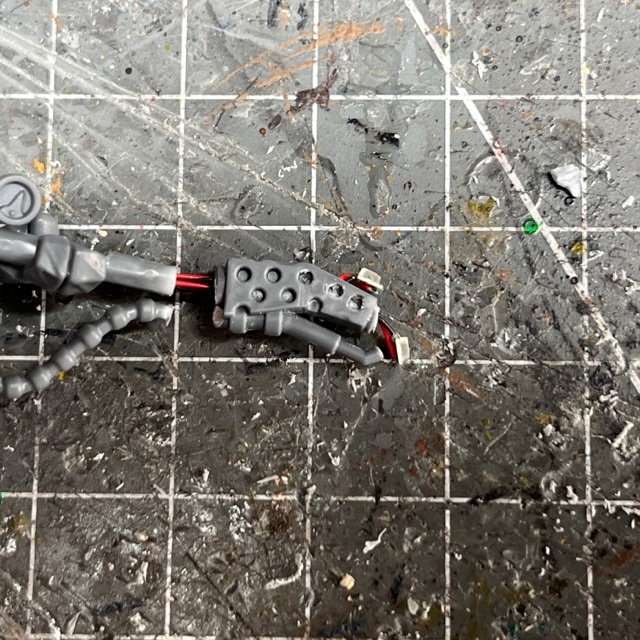

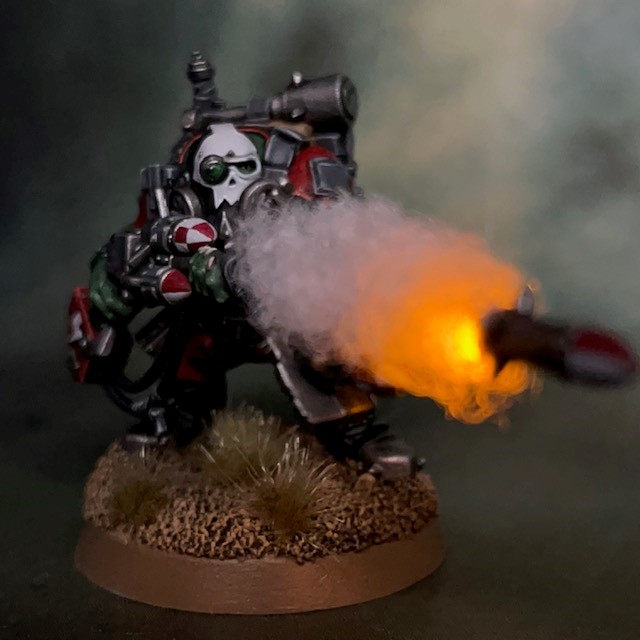
In the left-hand image above you can see how the LEDs were arranged on the nozzle of the burna. In hindsight I should have positioned the top LED slightly lower down. I was hoping their respective glows would ‘merge’ to create a larger overall light once I’d applied the flame effect. But in the end they were slightly too far apart. The right-hand image above shows the path of the LED wires in this particular model – through the burna, up the left arm, through the torso and down through the left leg.
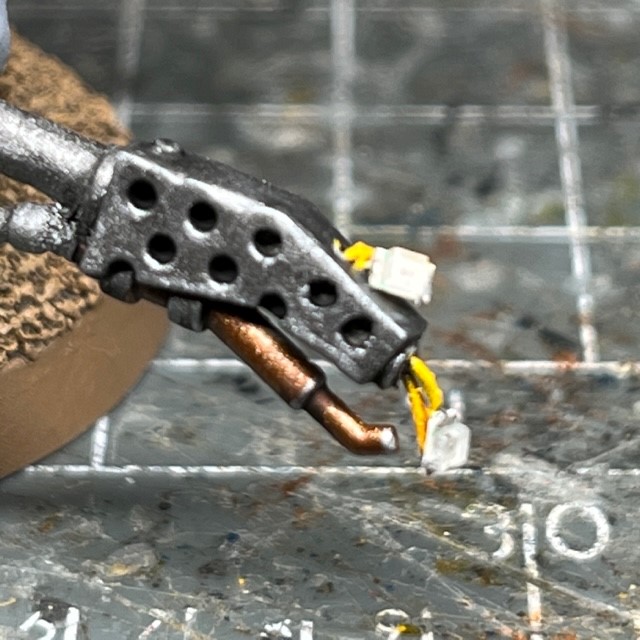

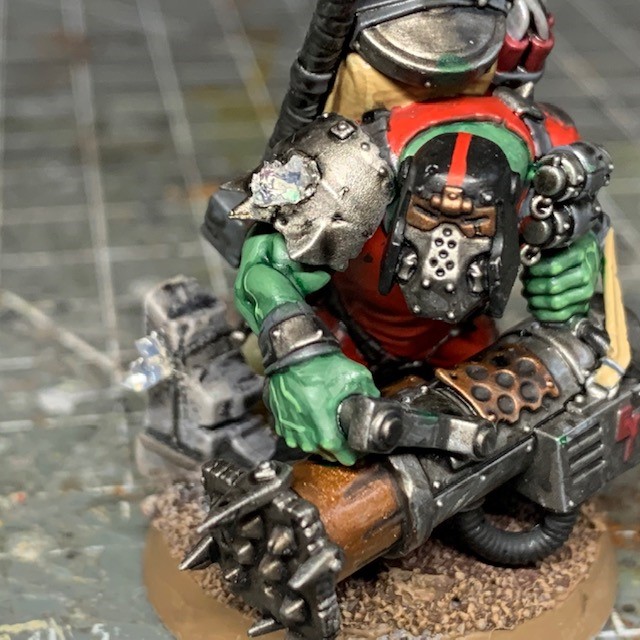
As you can see in the left-hand image above, I painted the red and black connecting wires of the LED yellow to help them blend into the final flame effect. The right-hand images shows the flame effect after I applied paint. I began with a shade of Citadel Fuegan Orange over the entire flame. Once this had dried I applied a yellow glaze of Citadel Lamenters Yellow (alternatively, a 1:4 glaze of Yriel Yellow to Lahmian Medium will work). Next I applied a shade of Citadel Druchii Violet to the top third of the flame only. Finally I applied a red glaze of Citadel Bloodletter Red (alternatively, a 1:4 glaze of Evil Sun Scarlet to Lahmian Medium will work) just to the top third. This is more for the looks of the flame when the LEDs are switched off. When the LEDs are on the distinction is harder to see.
That’s all for today. It’s very satisfying to actually finish a project and have all the Kommandos done! Check back again soon for some group pictures of Kaptain Gron and his Kommando Boyz. Don’t forget you can also follow my work on Twitter and Instagram.