Kruleboyz Pot-Grot

Hubble, bubble, toil and…hey boss, do we have any, erm….rubble?
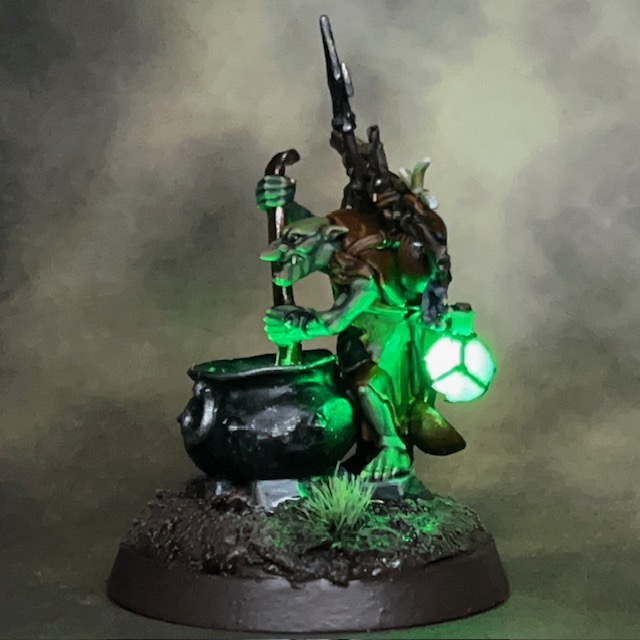
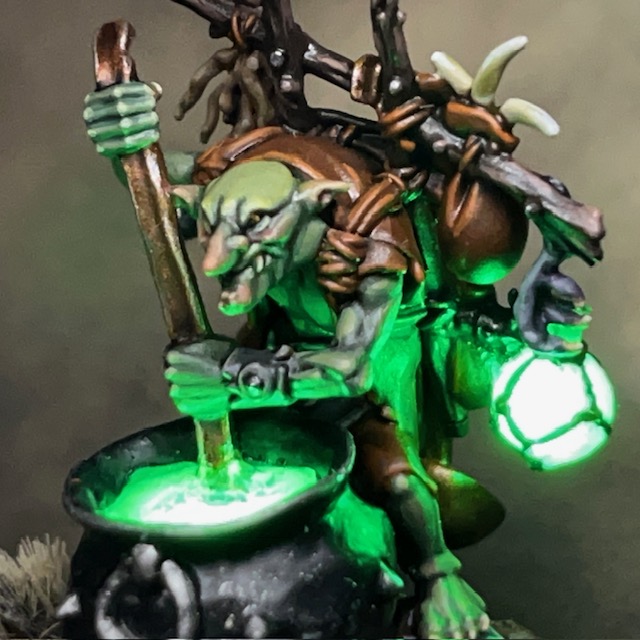
Stirit, Pot-Grot

Here’s something a bit different for today’s blog post, an Orruk Kruleboyz Pot-Grot from Warhammer Age of Sigmar. This is the first miniature in a new Kruleboyz side project.

Seriously, another side project!?

Yes, another side project! My young son recently expressed an interest in having a go at the Warhammer hobby, particularly the painting, so we had a look at the starter sets. My son is more into fantasy than sci-fi at the moment, and the Stormcast leapt out at him as something he wanted to paint. I’m a fan of greenskins (as you may recall), so I thought painting some Kruleboyz might be fun. We bought a Age of Sigmar Warrior Edition Starter Set to split. I couldn’t resist picking up a couple of other Kruleboyz bits too!

Modelling

The Pot-Grot miniature comes with a plastic cauldron, and my initial plan was simply to recast the plastic liquid surface of the cauldron in resin to allow the light through. But the component was quite thin and after several miscasts I decided to take a different approach, which I’ve detailed below in a short-form tutorial.

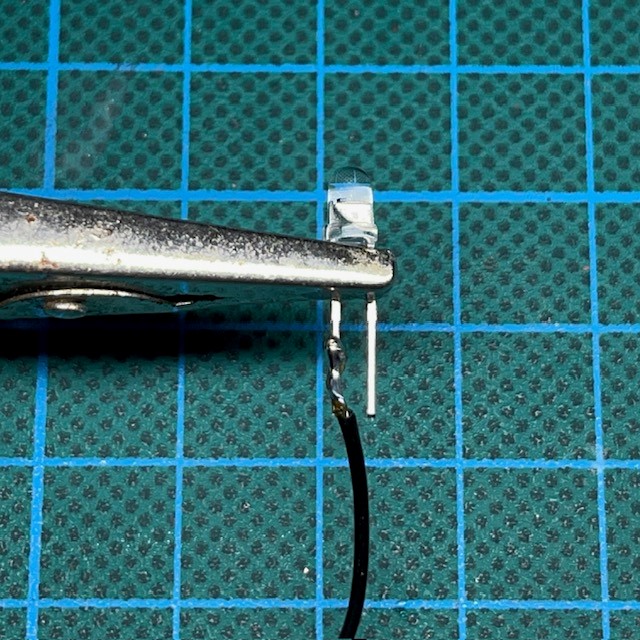
1. Began by preparing the base, battery holder and switch using the method described in Step 1 – 6 of my LED Eye Lens Tutorial. Next insert the LED into the bottom of the cauldron, facing up. I used a Tru Opto Green 1.8mm LED with a 10 ohm resistor. Drill two holes in the bottom of the cauldron to allow the legs of the LED to pass through. Solder the LED and resistor in series with the battery and switch. Then make sure any gaps in the sides and bottom of the cauldron are filled with modelling putty, otherwise the resin will leak out during the next stage. At this stage I also carefully removed the plastic potion bottle from the side of the backpack with a sharp craft knife. A 3V Green 0603 SMD chip LED and accompanying resistor from Small Scale Lights was inserted in its place. The wires from this LED ran down through the backpack and legs of the model to connect in parallel with the other LED.

2. Fill the cauldron almost to the top with polyurethane resin. You will find a syringe helpful for this. I also added a polyurethane resin recast of the potions bottle to the side of the backpack, drilling a small hole so the 0603 chip LED could fit inside and illuminate the bottle. Check out my Resin Casting for Special Effects Tutorial if you need more information on working with polyurethane resin for this type of casting.

3. Once the resin has set, check that the LEDs are still functioning and that you have a good visible glow through the resin. Depending on the level of resin in the cauldron, you may need to extend the grot’s ladle so that it touches the surface. This can be done with a plastic rod or spare piece of sprue.

4. The next step is to undercoat and paint the miniature. When undercoating, be careful not to spray the resin cauldron surface or potion bottle. A temporary covering of blu tack or tin foil can help protect the resin. As part of the painting process, I added a thin glaze of Biel-Tan Green to the surface of the cauldron and the potion bottle. This is mainly to make the resin surfaces look more interesting when the LED is switched off.

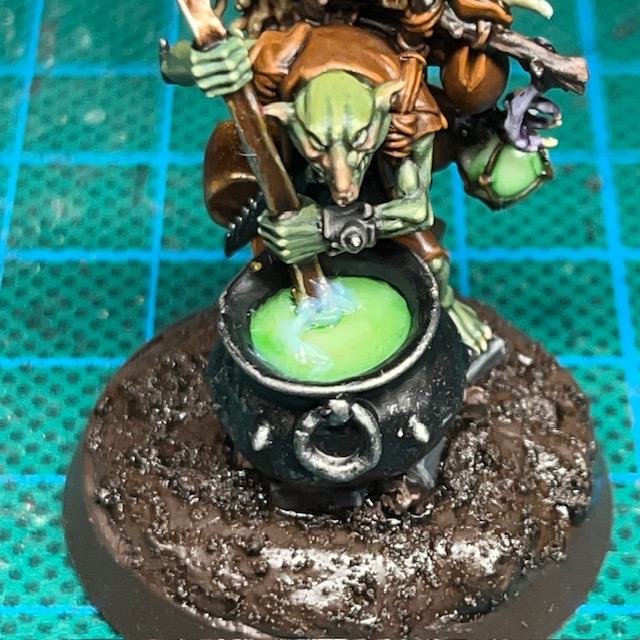
5. Now add a thin layer of transparent UV resin, only 1-2mm deep, over the surface of the cauldron. This helps to give surface of the cauldron a liquid feel and a sense of depth. The UV resin can be cured quickly with a small UV torch or left to cure outside in direct sunlight.

6. Finally sculpt some ripples around the ladle and a trail to imply motion using Splash Effect acrylic gel. The acrylic gel is white when applied but dries transparent over several hours. I didn’t add too many ripples as I wanted to give them impression that the contents of the cauldron were quite viscous and not easily disturbed.

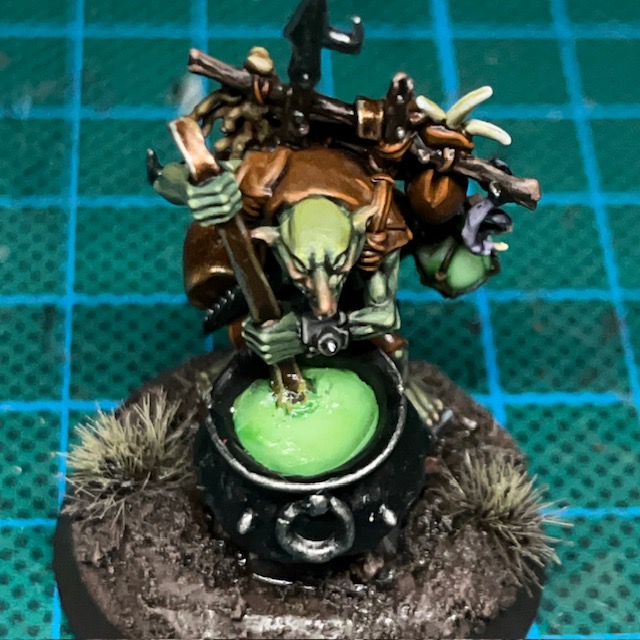
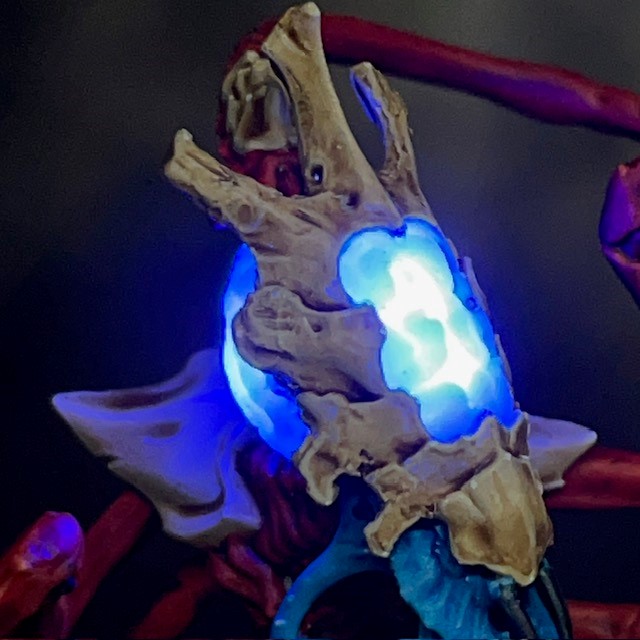
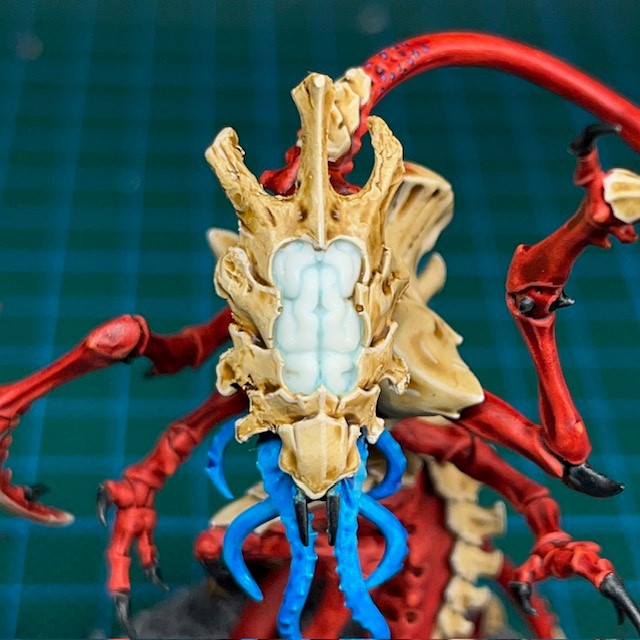
You can see the finished effect in the two images above, both with the LED switched off and on. After I’d built the miniature, it occurred to me that I could have also added an additional yellow LED under the cauldron to simulate the fire. Oh well, maybe next time!

At this point I’d normally discuss paint recipes, but I’m not going to talk about painting this miniature today. I’m planning to discuss Kruleboyz painting recipes, palette selection and LED choice for the whole side project in an upcoming post.

That’s it for today. I’ll be back again soon with more about the Kruleboyz, plus of course even more Flesh Eaters space marines and definitely some Tyranids! Thanks very much for reading, and please remember you can also find me sharing my work on InstagramThreadsTwitter/XBluesky and Mastodon.

Brother Pitman, Flesh Eaters Assault Intercessor

So you like bolters do you, traitors? Well GOOD NEWS!

Brother Pitman, Assault Specialist

It’s back to the Flesh Eaters project this week with Brother Pitman, an Assault Intercessor equipped with duel heavy bolt pistols and a chainsword. Brother Pitman will be joining my second Assault Intercessor squad as the third member of the unit.

Modelling & Painting

This miniature is a redux of Crimson Fists Sergeant Bast. I was always pleased with his guns akimbo pose, and wanted to bring it into my Flesh Eaters project. There are a couple of other effects I want to port over from my Crimson Fists army, but those are projects for another day.

The LED effects on Brother Pitman were assembled using the techniques described in my LED Muzzle Flare Tutorial, with the slight change that there are two LED muzzle flares instead of one. To achieve this, I simply repeated Steps 2 – 7 of the tutorial. The second yellow chip LED was connected in parallel with the first yellow chip LED and the green helmet LED.

A tip I remember picking up from a fellow miniature painter – possibly Apologist – is that if you have a model with duel weapons, it can enchance the pose if the miniature’s head is looking in the same direction as one of the guns it is firing. This is a principle I’ve tried to follow here. If you have the two guns firing in opposite directions and the miniature’s head facing halfway between the two, then it can make the model seem ‘disengaged’ from the act of firing the weapons.

The conclave known as the ‘Diet of Fools’ ensured the Flesh Eaters and the other chapters of the Pentarchy of Blood were incredibly well equipped for the task ahead. This glut of equipment, supplied by order of the High Lords of Terra, wasn’t just reserved for officers but also filtered down to the line units. In these holo-picts we can see a very well provisioned Brother Pitman. His chainsword will carry the word of Terra – quite literally – to his Partisan foes!

EXTRACT FROM ‘A TREATISE ON THE WAR OF THE FALSE PRIMARCH’ BY SCRIBE HOWTOPHER BUXCRAFT

As I’ve described previously for other Flesh Eaters miniatures, the base model is a Primaris Assault Intercessor (from the Indomitus box) that I have modified to wear MkVI armour, in keeping with the War of the False Primarch theme for my Flesh Eaters army. The heavy bolt pistols are made from Umbra pattern bolt guns with the magazine cut down to give them a smaller profile.

For those that are interested, my painting recipe for the red Flesh Eaters armour can be found in this earlier post. I’ve added a little more battle damage to this Intercessor squad than the previous one. The ‘paint chips’ on their armour were applied using the sponge method and Rhinox Hide, which I then highlighted along the lower edge with Evil Sunz Scarlet and Wild Rider Red to give a sense of depth. Below you can see a picture of Squad Byrne so far – three down, two to go!

That’s all for today, I hope you’ve enjoyed this addition to the Flesh Eaters project. I’ll be back with more LED miniatures soon. Thanks very much for reading, and please remember you can also find me sharing my work on InstagramThreadsTwitter/XBluesky and Mastodon.

Updated ‘Basic LED Soldering’ Tutorial

I have another updated tutorial for you this week, a refreshed versionof my Basic LED Soldering tutorial. It now includes better images, extra links to recommended equipment, and some additional technical details. This is part of my effort to update all the old tutorials from 2018 when I first began uploading them to this website.

Please take a look, and as ever, feedback is welcome!

Tyranid Neurolictor

They get in your mind. They make you see things. They make you do things!

Astra Militarum after-action report on Hive Fleet Cerberus (suppressed)

Work continues on Tyranid Hive Fleet Cerberus this week with the Neurolictor. The Neurolictor is a psychic infiltrator, able to project a neural disruption field that causes terror in its prey. I knew as soon as I saw this model that I was going to have to give it a glowing LED brain!

Modelling

I bought this model on the day it was released in September last year. I planned to start working on it immediately, but the more I thought about how I would illuminate the model, the more complex I realised that task was, which put me off making a start. In the end I didn’t begin work until January. This project has taken around four weeks of hobby time, compared to about two weeks for a standard space marine.

If you’d like to replicate this model yourself, then the techniques set out in my LED Psyker tutorial are probably the best starting point. I began by recasting the two parts of the head that I wanted to illuminate – the front and the rear of the brain – in polyurethane resin, as per my Resin Casting tutorial. You can see the initial test casts in the left-hand picture below.

This miniature uses four 3V Blue 0805 SMD chip LEDs, each in series with their supplied resistor. Two of the LEDs were evenly spaced under the forehead to illuminate the top and bottom of the front brain. The other two were then used to illuminate each half of the rear brain.

This miniature is powered by two CR2032 coin cell batteries in the base. Two of the LEDs are connected in parallel with each battery. In theory I could have run all four LEDs from a single battery, but as there was room in the base I decided to use two batteries. This will give the miniature more longevity on the battlefield between battery changes.

Painting

When painting the Neurolictor I used the Hive Fleet Cerberus recipe described in this post. For this colour scheme, simple weapons like claws are black, but more advanced bioweapons are blue. In the case of the Neurolictor, I decided the ‘advanced’ description applied to the feeder tendrils. This also helps them stand out against the rest of the miniature.

When it came to painting the resin brain, I wanted to give it a little texture and depth without dulling the light that was passing through. You can see the bare resin in the left-hand picture above. I played around with a few techniques, but in the end I gave the resin two very diluted glazes of Soulstone Blue, the end result of which you can see in the middle picture. Next I painted the brain with two very diluted glazes of Lothern Blue. You can see the final result in the right-hand picture above. This gives the brain area of the miniature some depth and interest even when the LED is switched off.

That’s all for today, I hope you’ve enjoyed seeing how this Neurolictor was built. I’ll be back with more LED miniatures soon. Thanks very much for reading, and please remember you can also find me sharing my work on InstagramThreadsTwitter/XBluesky and Mastodon.