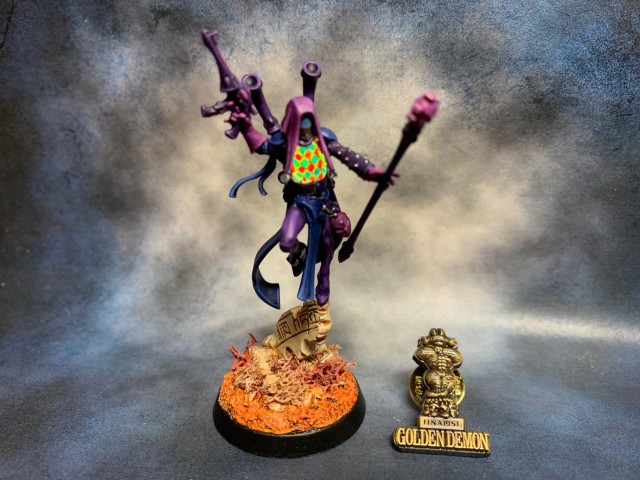
Allow me to present my entry for today’s Golden Demon competition at Warhammer Fest – Asurvel Menerrys, Harlequin Shadowseer with LED-powered dathedi holo-suit. Caution: Flashing images in video.
You ask for evidence that the Aeldari are not, in fact, all but dead? Evidence that some of their number deny the future allotted them? Evidence that they laugh in the face of Fate? Then let me speak to you of Asurvel Menerrys, Harlequin High Shadowseer of the Masque of the Obtuse Path.
– Inquisitrix Barbari Kills
Motivation
I had this idea quite a while ago. I don’t collect Harlequins, but they’ve always been my favourite Aeldari faction, so I felt it was worth doing as a one-off piece, just to push the limits of what can be done with LEDs and miniatures. I’ll be entering it into the Golden Demon ‘Open’ category, as LEDs aren’t strictly painting, and the Open is more “anything goes”.
How Was It Done?
In theory, this was a simple conversion. In practise, not so much. The main modification is the front of the torso, which I have recast in resin to make it semi-transparent to light. Before recasting I removed some of the detail, such as the necklace, to give me a nice flat surface on which to paint the diamond pattern.
Painting the pattern was something of an experiment (I did try it out on a spare casting first), and consisted of three stages.
- A coat of ‘Ardcoat gloss varnish across the resin. This was to give the following layers of paint something to ‘key’ onto.
- A diamond cross-hatch pattern painted in Abaddon Black, but thinned down about 50:50 with Lahmian Medium to make it translucent.
- Filling in alternating diamonds with GW’s gemstone technical paints, i.e. Spiritstone Red and Soulstone Blue. While being translucent, they are thicker than glazes and provide better coverage.
I used the gemstone technical paints because they’re semi-transparent, but have better coverage than the glazes. Each of the different gemstone paints allows a different wavelength (i.e. colour) of light to pass through. When the multi-colour LED is the same colour as the gemstone paint diamond on the chest, the paint appears bright as the light passes through it. When the LED is a different colour, most of the light is blocked and the diamond appears darker. This creates the effect of the diamonds changing colour and brightness, and is the basis of the holo-suit effect.

So what about the actual LED and the wiring? For this I simply used the standard techniques discussed in my LED eye lense tutorial, including the coin cell battery in the base and the hidden wiring in the leg. The only difference was that the LED was in the torso rather than the head of the miniature. But otherwise all the principles are the same.
The wires run up through the middle of the stone ruins, then up into the leg before connecting to the LED in the torso. Drilling these very fine holes and then putting it all back together as though nothing had happened was one of the most difficult parts of the build.
The exact LED that I used was a 3mm Rainbow LEDs (3V ‘fast change’ version) from Small Scale Models. I selected this LED as it was a compact way to provide a range of colours with fast changes between each one. This helps to create the confusing illusion of the holo-suit. The bonus is that there’s no need for any additional circuitry, it’s all contained within the LED. I highly recommend Small Scale Models for miniature LEDs. If you’re in the market for some of your own, you should give them a try.
When originally drawing-up the plans for the Shadowseer, I had intended to also recast and illuminate the neuro disruptor with a nice internal blue glow. However, I realised that I couldn’t be sure that the single coin cell battery could power both the holo-suit and the neuro disruptor for the full 5 or 6-hour duration of the Golden Demon models being on display. So I decided to err on the side of caution and go with the shuriken pistol this time.
Colour Palette

I thought long and hard about the colour palette for this model. I’d painted one Harlequin before, a Solitaire, for a narrative game scenario. But I’d been in kind of a hurry and the shades of green and yellow I’d picked didn’t really work. I knew this time I definitely wanted to give it more thought.
I ended up chatting with my good friend Apologist. If you haven’t see Apologist’s website, Death of a Rubricist, then you should really take a look. He has excellent articles on painting and modelling techniques, and his conversions are a joy to behold. I knew I didn’t want to go with green or yellow, as they’d bring back bad memories of my Solitaire. Apologists suggested purple, as it’s traditionally seen as quite an ‘opulent’ colour, which is definitely on-brand for the Aeldari.
With purple as my starting point, I now had to select the rest of the colours. I knew I wanted to keep the palette fairly limited – the LED would be providing enough additional colours as it was – so I used a colour wheel (found here) to select analogous colour harmonies. In this case, that means pink and blue.
Why No Free-Hand Patterns?
I took the deliberate decision not to paint any free-hand patterns – such as more diamonds – anywhere else on the model, besides those on the resin chest. As I say in my LED design tutorial, a good LED-equipped miniature is like a slight-of-hand magic trick. Anything that causes questions in the viewer’s mind breaks the illusion. If I’d painted the diamond pattern on the legs, for example, that would raise the question in the viewer’s mind “why aren’t those diamonds changing colour too?”. At that point, the illusion is broken. This is why I kept all other detail – except perhaps for the mask – to a minimum.
Non-Metallic Metal Mask

They say the reflective mask of a Shadowseer shows the worst fears of any who look upon it. If your worst fear is attempting to paint Non-Metallic Metal (NMM) effects on your models, then in this case I guess that’s true!
This effect is technically known as Sky-Earth Non-Metallic Metal (SENNM) as the impression it is intended to give is showing a reflection of the ground in front of the model stretching away to the horizon, and then the sky above it. It’s actually quite an easy effect to paint, as long as you follow these simple rules.
- Start at the bottom with a light brown, then paint horizontally across the visor in stripes, gradually adding more and more dark brown to the mix with each successive stripe.
- By the time you reach the middle of the reflective surface, your brown should be dark brown.
- Begin the sky next, starting immediately above the centre with a light blue. Again, add more and more dark blue to the mix as you paint successive horizontal stripes.
- By the time you reach the top your blue should be dark blue.
- Finally, apply a very watered down blue glaze to the entire surface. This helps to tie the blue sky stripes together and also adds a subtle blue tint to the ground, further enhancing the impression of a reflective surface.
Just to note, I added a tiny bit of orange to my brown, since the ground shown on the base was orange! Which leads me on to…
Basing

So what made me decide on an orange base? Firstly, orange is a complimentary colour to purple, so it helped to balance the whole model while drawing a clear distinction between the Harlequin and his surroundings. Secondly, I wanted to give the Harlequin a truly “alien” feeling, rather than having him leaping over green grass or the grey of a ruined city. Finally, I chose autumnal colours for the ground and the foliage to allude to the fact that we are in the very much in the autumn of the Aeldari’s time in the galaxy.
What’s Next?
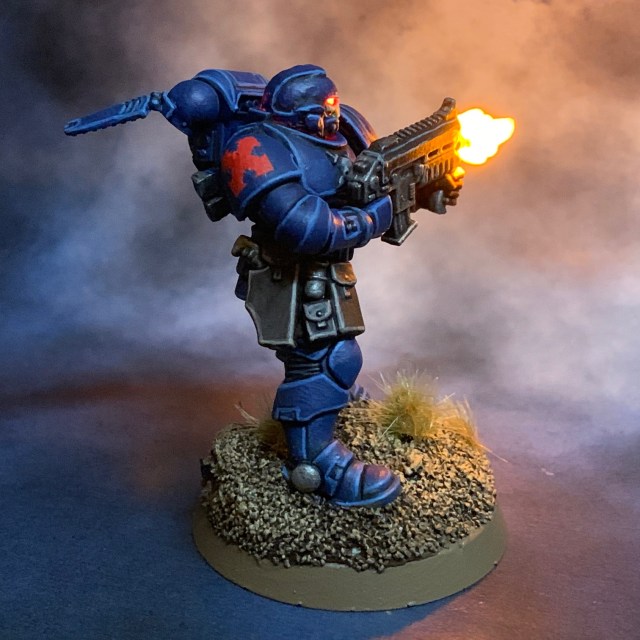
This was one of the harder models I’ve made, mainly due to the very fine wiring required to pass through spindly Aeldari limbs! I really like the Harlequin concept, but I couldn’t bring myself to make a whole army using this technique. Maybe a Kill Team, but definitely not an army. I think there’s room for improvement too, I could definitely do a better job next time around. But that’s something for the future anyway. In the meantime, it’s back to the Crimson Fists!