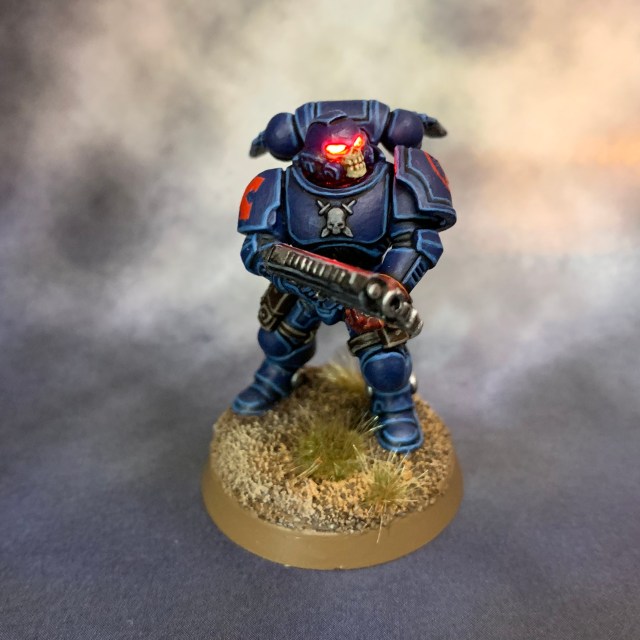
I find our enemies often make mistakes. The most common is believing that they can hold the breach. – Brother Achillus


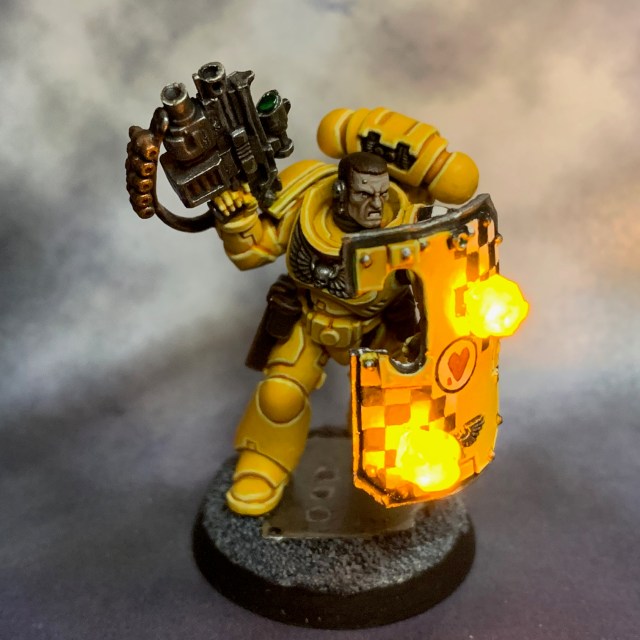
Here is Brother Achillus, the second Space Marine in my Badab War Lamenters Kill Team project. Brother Achillus is wearing MkVII ‘Imperator’ armour and is equipped with an ‘Umbra Ferrox’ pattern bolter, auxiliary grenade launcher and boarding shield. He will be the demolitions specialist in the Kill Team.
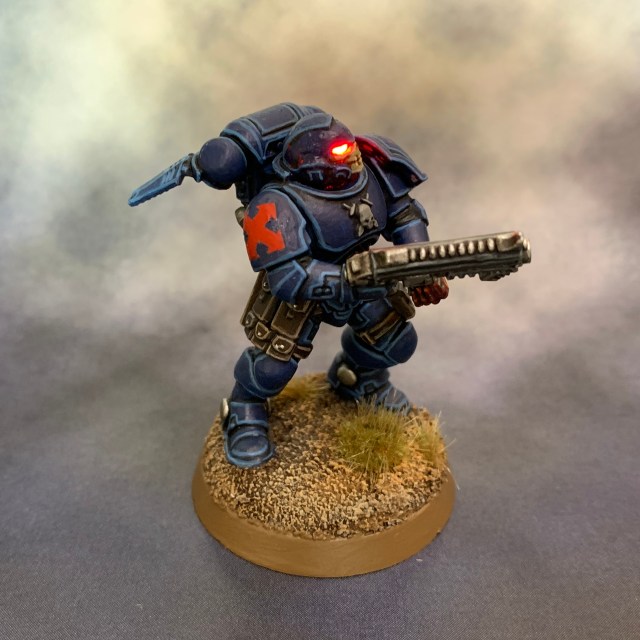
LED Breacher Shield Explosions
So how was the explosion effect achieved? This is an idea that I’ve been kicking around in my head for a while. Essentially it is the process detailed in my LED Muzzle Flare Tutorial. The wires still run from the base and up through the body and arm, but in this case the LED connections terminates on the front of the shield rather than on the end of a gun barrel.

I hid the connections at the back of the shield under some Green Stuff putty. I deliberately made sure the connections ran in straight lines so that the putty I built up to hide them would look like additional reinforced bracing on the back of the shield. The LEDs used in this case were TruOpto 1.8mm Yellow LEDs.


The resin explosions themselves were simply cut-down versions of muzzle flares that I had previously cast. I gave them a light shade of Fuegan Orange and then a light glaze of Lamenters Yellow (appropriately). This doesn’t inhibit the light getting through, and actually makes them look better when the LED is switched off, as shown below.
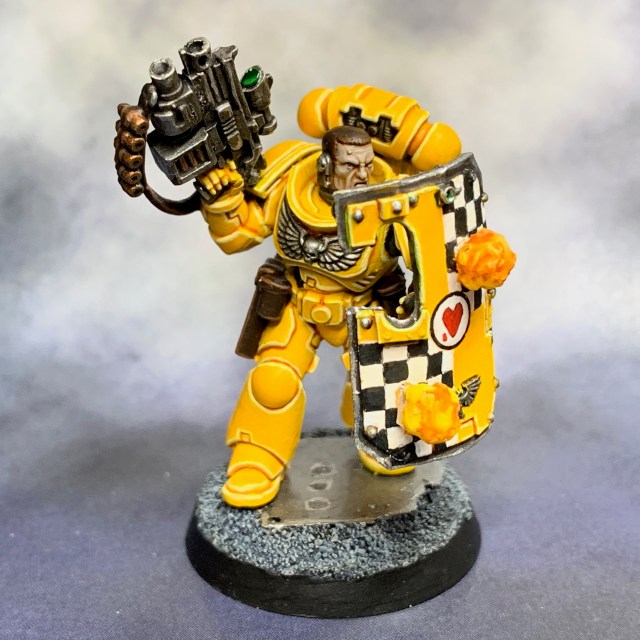
I may revisit the resin at some point and sculpt and cast specific explosions, rather than the re-purposed muzzle flares, but that’s something for the future.
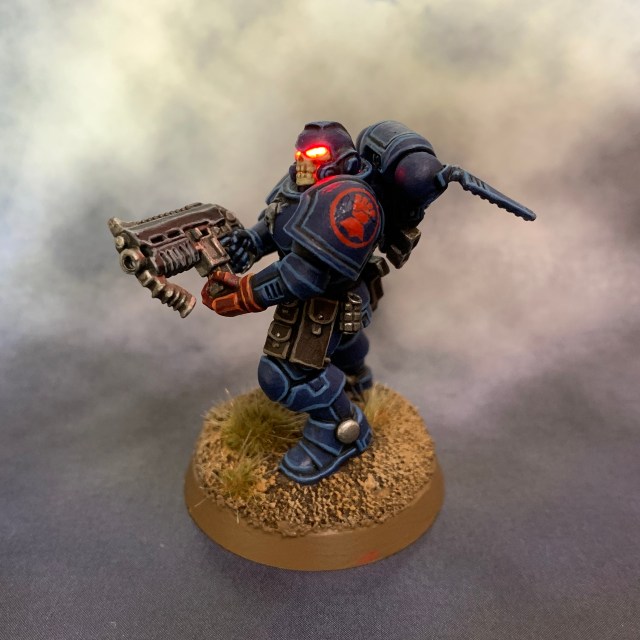
True Scaling
As with my Lamenter in MkVI ‘Corvus’ armour, I was trying to keep this model both retro and ‘true scale’. So again, although this model is based around a plastic Primaris Marine, I was careful to remove and resculpt any details that were obviously ‘Primaris’, such as the rims around the knee pads and the stabilisers on the ankles. He also has a MkVII appropriate backpack, and his bolt rifle has been swapped out for a more traditional bolt gun.

Painting Lamenters skin tones
When choosing the skin tone for the Lamenters, I new I wanted to go slightly pallid rather than tanned. I find that I tend to paint human skin differently each time; partially because I never find a technique I’m 100% happy with, and partially because I paint skin infrequently and forget what I did last time! However I do normally try and paint Space Marines with tanned skin. To me a lifetime of warfare waged under a thousand alien suns kind of implies a decent base tan.
But in this case I wanted to go pale. There were several reasons for this. Firstly, to hint at the Blood Angels heritage (Blood Angels are often depicted as pale and vampiric). But also I wanted to imply that this was a team that had spent a lot of time inside space ship corridors, fighting boarding actions away from natural light. The other reason of course is that a healthy tan and a square jaw often indicates the faultless hero in western culture. While I definitely don’t see the Lamenters as bad guys in the Badab setting, I didn’t particularly want to set them up as out-and-out blameless heroes either. Classic 40K shades of grey!
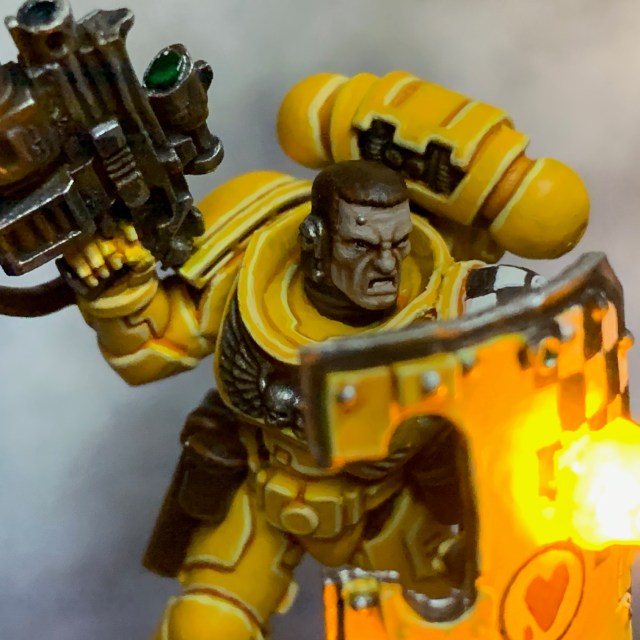
This was a very simple technique. A base coat of Rakarth Flesh, a shade of Reikland Fleshshade, then two highlights mixing greater amounts of Flayed One Flesh into Rakarth Flesh. I’m pretty pleased with the results and will definitely duplicate this on other helmetless Lamenters.
That’s it for today, stay tuned for more Lamenters, more Badab and of course more Crimson Fists in the not-to-distant future!