LED Miniature Makers of Social Media 2023

About a year ago I published an article looking at other LED miniature makers in the online community. I thought it was about time to do the same thing again and celebrate the excellent LED miniature work posted by other hobbyists on social media. Embedded below are some of my recent favourites, presented in no particular order. Why not take a few minutes to check out their work, and if you like what you see then give them a follow!

grimdark_illuminations

Alex is an absolutely LED miniature making machine. His productivity puts me to shame! Check out his awesome Horus Heresy Iron Warriors army in the post below.

zebamunda

I’ve only discovered Zebamunda’s work recently, but it’s incredibly impressive. Take a look at the clever use of LED displays in Necromunda scenery.

warhamster_king_of_leds

Warhamster is incredibly prolific and has a huge range of LED projects on his Instagram. A particular favourite of mine is the recent Gravis Apothecary and it’s different LED colour modes. Also take a look at his recent work on Stormcast for Age of Sigmar.
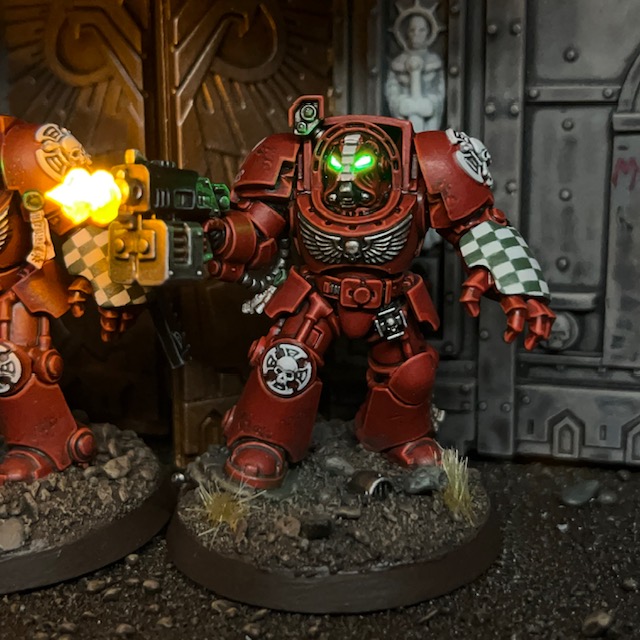
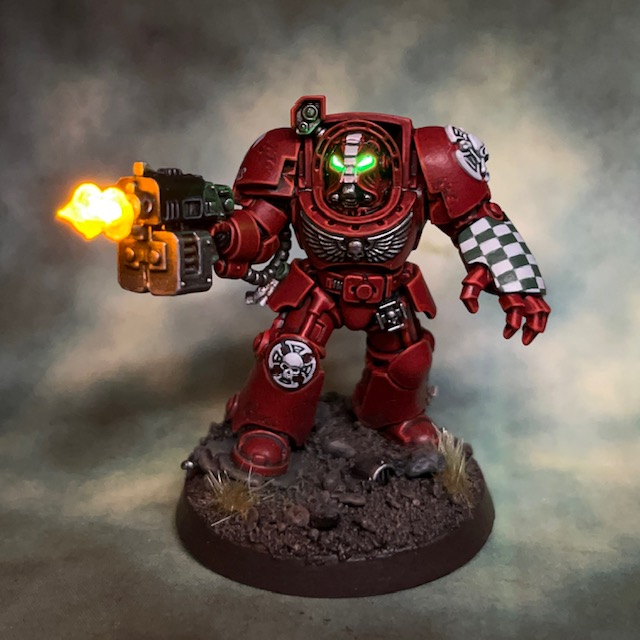
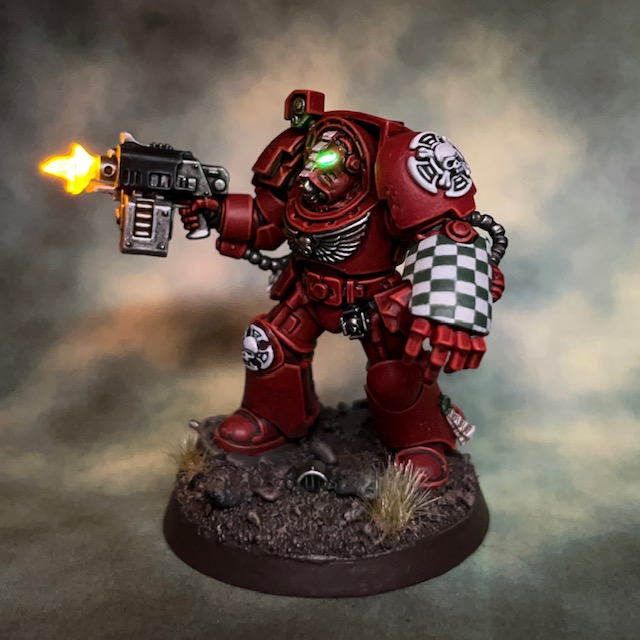
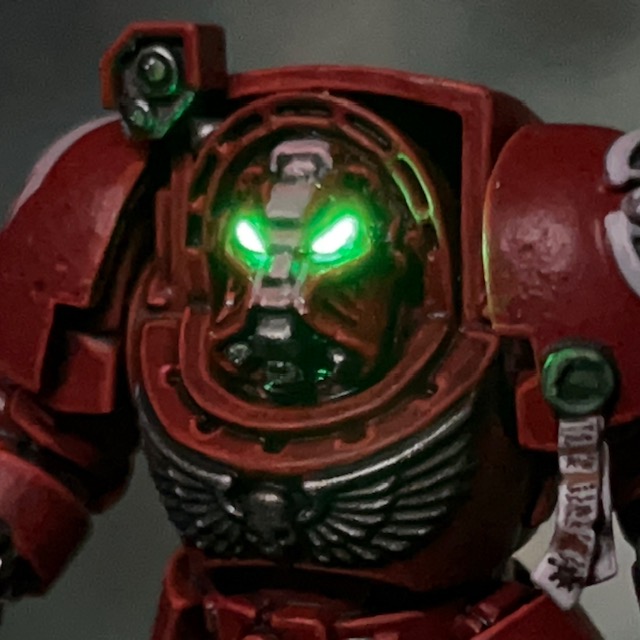
Jaw Drop Prop Shop

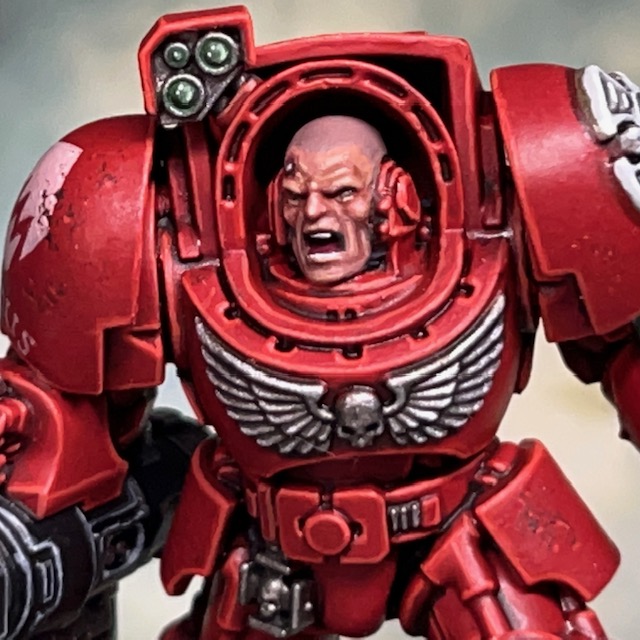
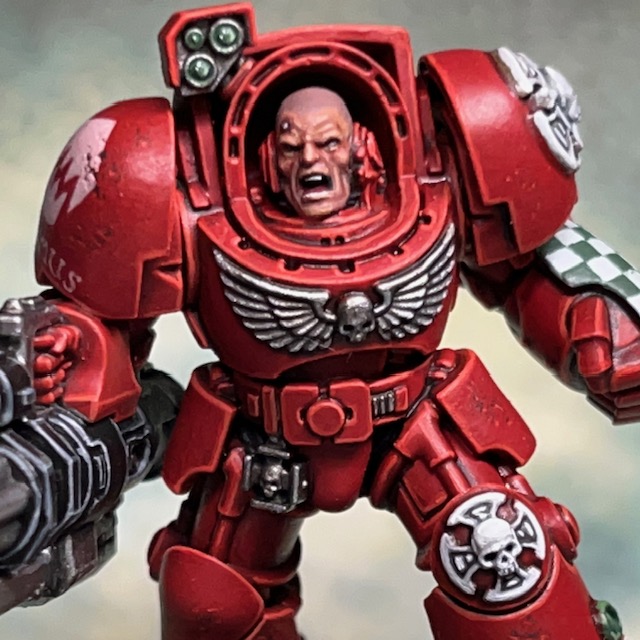
Jaw Drop Prop Shop has been doing some wonderful work with LED effects on Space Marines. Check out his channel for some great videos, including LED tutorials.

Hobbyvices

Hobbyvices has been doing some very cool display board work recently. Check out the lights and smoke(!) in the Soulblight Gravelords display below!

doc.brown_miniatures

Doc Brown remains one of my favourite LED miniature makers. The work that went into the moving and rotating cannons on this Space Marine Stalker is phenomenal. The video below is definitely work a watch!

technicalrunnerd

Technicalrunnerd continues to impress and delight with his creative use of LEDs and other electronics in his Chaos army.

bobo’s hobbies

Bobo does excellent work on artfully illuminated Space Hulk scenery and accessories. Check out the atmospheric door below and more examples on his Instagram.

jjh_maestro

A slight detour from Warhammer, but if you like illuminated Gundams then jjh_maestro is a great person to follow!

jamcstarwarslegion

Again, not Warhammer, but take a look at the excellent work that Abraham has been doing lighting up Star Wars Legion models.

bjarnidali

Bjarnidali has been doing some very clever work with scenery. Check out the colour coded door indicators in the video below.

groundeffected

Groundeffected’s work has to be seen to be believed! Check out the awesome hovering grav tank in the video below! Also, note the excellent paint job in addition to the special effects.

That’s just a small sample of the great work that you can find out there. Many apologies if I follow your LED work on Instagram or Twitter and I’ve missed you out, it wasn’t intentional! If you have any suggestions for other great LED miniature artists that I’ve not mentioned above, please let me know in the comments.

If this has inspired you and you’d like to have a go at making some LED miniatures yourself then you can find my tutorials here and supplies here. As always, thanks very much for reading, and remember you can also follow my work on social media at Instagram, ThreadsTwitter/X and Mastodon. That’s all for today, see you again soon!

Brother Erasmus, Flesh Eaters Assault Cannon Terminator

We can eat our enemies, and our enemies can EAT THIS!

Brother Erasmus, Flesh Eaters Terminator

My work on the Warhammer 40,000 ‘Leviathan’ Terminator squad continues this week with Brother Erasmus, a Flesh Eaters Terminator with a LED motorised assault cannon! From the moment the Leviathan contents was previewed, I knew I’d have to give this miniature some special treatment.

Modelling

To make this miniature I followed my own LED Motorised Assault Cannon tutorial, with only one small difference: I placed a miniature slide switch in parallel with the ‘push to make’ switch. With this modification, turning on either switch will activate the assault cannon, regardless of what position the other switch is in. This means I can still use the ‘push to make’ switch to “fire” the assault cannon during a game, whereas the slide switch can be used to keep the assault cannon on for photography and display purposes.

The image on the left below shows the two switches connected in parallel, with the ‘push to make’ switch facing up and the slide switch facing down. The image on the right shows the assault cannon construction in progress. The motor used was 4mm x 8mm so was small enough to fit inside the assault cannon without modifying its shape. The holes you can see drilled in the side were covered up when the magazine was glued into place on the side.

If you’re trying this yourself, just be a bit cautious when attaching the barrels to the shaft of the motor. I used too much force on the shaft and pushed the plastic back off the first motor, destroying it completely. I had to pause work on this miniature while I waited for a replacement to arrive. If it hadn’t done this, then we probably would have seen Brother Erasmus last week. This mistake can be avoided by bracing the plastic back of the motor with a pair of tweezers when you are attaching the barrels.

I decided that an unhelmeted head was the best choice for this model. As there was only room for one CR2032 battery in the base, the motor, the muzzle flare and the helmet eye lenses would have all shared a single battery. This meant that when the assault cannon was operating, the helmet eye lenses would have dimmed, which I felt would have been too immersion breaking.

The head used is from the Leviathan Terminator Captain. I had this going spare as I had already sourced an alternative head for my Captain. I decided to shave off his hair and one of the service studs with a hobby knife, just so it looked like a different head. The Captain’s head is normally facing to his left, but I placed the head facing to the right, following the line of fire of the assault cannon. Unfortunately, some of the detail was missing from the left side of the Captain’s head as that is normally obscured, so I had to sculpt in the missing parts with modelling putty, mainly around his left earpiece.

Painting

As with the rest of the Terminator squad, I painted Brother Erasmus using my normal Flesh Eaters armourTerminator iconography and freehand check recipes. I’m going to do a post taking a detailed look at my method for painting light skin soon, but you can find a brief rundown of my recipe for painting Space Marine pale flesh towards the end of this post.

It’s often tricky to exactly match Rogue Trader-era Space Marine heraldry (above left) exactly, especially when the design of the weapons has evolved over the years. Instead I tried to capture the feel of it with checks on the magazine (above centre) and around the barrels (above right). If you look very closely, you’ll see a version of the assault cannon ‘lightning bolt’ symbol.

As I suggest in the tutorial, the button that activates the assault cannon is hidden underneath a skull. Pressing down on the central skull (above left) will “fire” the assault cannon. I did briefly consider breaking my War of the False Primarch army theme and using a Tyranid skull for the button as a nod to Leviathan, but in the end decided against it. I’ve come this far on-theme and it would have been a shame to deviate from it now.

So there we are, four Terminators done! The Sergeant is probably going to take the most conversion work out of all of them, so I’m not sure how quickly I’ll get him done. Thanks very much for reading today’s post, and please don’t forget you can also follow my work on social media at InstagramThreadsTwitter/X and Mastodon.

Flesh Eaters Terminator Progress

I finished a third ‘Leviathan’ Terminator over the weekend, so Brother Rephas (right) joins the squad with a storm bolter and power fist. Since I’m getting this squad done at a much faster rate than my normal hobby progress, I thought it was worth taking a group picture to celebrate.

Modelling & Painting

If you’ve been building this Terminator squad too, you may have spotted that Brother Rephas has had an arm swap with the sergeant. This is because I wanted another basic Terminator in an active firing position, and also I needed his original arm for a pose I have planned for the sergeant.

The storm bolter LED muzzle flares used the techniques detailed in my LED Muzzle Flare Tutorial, the only difference being that there are two muzzle flares on a storm bolter. This meant two Yellow/Amber 0805 Chip LED (3V) connected in parallel. For the helmet eye lenses I used a TruOpto OSPG7331A-KL 1.8mm Green LED. Due to the position of the Terminator’s head in respect to its body, I found it easier to insert the helmet LED from the rear of the helmet, rather than underneath as I normally do.

After posting the previous Terminators, my good friend Apologist asked whether I’d considered illuminating the small shoulder lights/sensors with LEDs. I had, but decided against it. Actually lighting them up is technically trival, I would have done it in the same way as this servo skull. However, it would have added additional cost per model, and I think it would have drawn focus away from the head and gun effects for no real gain in overall aesthetics. So because of these two reasons I decided against it and to take the approach of painting the shoulder lenses as ‘passive’ sensors. I thought it was worth sharing that answer, in case anyone else was wondering the same thing.

When it came to painting Brother Rephas, I used my normal Flesh Eaters armour, Terminator iconography and freehand check recipes.

That’s it for today, as always, thanks very much for reading, and please don’t forget you can also follow my work on social media at InstagramThreadsTwitter/X and Mastodon. Next up, assault cannon goes brrrrrrr!

Brother Furian, Flesh Eaters Terminator

More Warhammer 40,000 ‘Leviathan’ Terminator action this week with Brother Furian, a Flesh Eaters Terminator with storm bolter and chainfist.

Modelling

As this model wasn’t in a dynamic firing pose or carrying any special weapons, I decided to keep the LEDs simple and just illuminate the helmet eye lenses. I used the techniques detailed in my LED Eye Lens Tutorial, the only difference being that I used a TruOpto OSPG7331A-KL 1.8mm Green LED. As I mentioned in my post about Brother Lazarus, I found it easier to insert the helmet LED from the rear of the Terminator helmet, rather than underneath as I normally do.

As a last minute addition, just to give this model a bit more interest, I decided to turn his power fist into a chainfist – a weapon option that is not in the Leviathan box. The chain blade component came from an old Forge World Tartaros Terminator upgrade kit, but there’s an equivalent on the modern plastic Legion Tartaros sprue. It fitted neatly over the bottom of the power fist with only some minor gap filling required.

Painting

I don’t have many additional things to say about the paint scheme for this miniature. I’ve previously talked about painting Flesh Eaters armour in others posts, and described how I paint Terminator iconography here. However, after posting Brother Lazarus, I had a few positive comments and questions about the freehand checks, so I thought I’d share my method here.

‘Iterative’ Freehand Check Technique

I’ve decided to call this the ‘iterative’ technique, as it’s based on making small iterations to the neatness of the squares. The two Citadel paints I used for the checks on this Terminator were Corax White and Waaagh Flesh.

  1. Start with a solid background colour, using the lighter of the two colours. Apply this as several thin coats if necessary to ensure a smooth surface.
  2. Lightly “sketch” roughly where you think the squares should be. Use a thinned down version of the darker colour.
  1. Go back over the dark squares with an additional coat of the darker colour, making the squares more solid.
  2. Correct any mistakes by applying the lighter colour along the edges of the light squares to ensure they are straight. Remember that there should not be any overlaps – squares should only be touching other squares of the same colour at the very corners.
  3. Apply a final correction of the darker colour along the edges of the darkers squares, again to ensure they are straight. You can repeat steps 4 and 5 as many times are needed, making finer and finer corrections until you are happy with the result.

So there we have it, that’s the ‘iterative’ freehand technique. I prefer this over sketching a grid and then filling in the gaps. Drawing a grid tends to mean that the darker squares are larger than the lighter squares, since they incorporate the grid itself into their colour area, which leads to overlapping corners. If you’d like to see the iterative technique applied elsewhere, I also used it on my Lamenters.

Image © Games Workshop

When looking for ideas on how to paint the chain blade on the chain fist, I consulted the Rogue Trader-era Terminator heraldry shown above. I thought the whole thing would be quite confusing on the eye if I tried to reproduce exactly, but I quite liked the idea of a shark-like face, especially as I had used that imagery elsewhere with the Flesh Eaters. However, I wondered if painting teeth on the blade would look strange when it already has its own ‘teeth’. In the end I just settled for painting the eye as a nod to the original heraldry, which then hopefully gives the impression the whole chain blade is a shark-like head, with the chain teeth standing in for the teeth of the creature.

That’s it for today, but I’ll be back again very soon with more Terminators. I’m determined to power through the whole squad before moving on to other projects! As always, thanks very much for reading, and please don’t forget you can also follow my work on social media at Instagram, ThreadsTwitter/X and Mastodon.

Brother Lazarus, Flesh Eaters Terminator

My work on the Warhammer 40,000 ‘Leviathan’ box continues this week with Brother Lazarus, a Flesh Eaters Terminator with storm bolter and power fist.

Modelling

I decided to start with this particular Terminator as he was in a good firing pose, which made it easy to add some LED muzzle flares. I used the techniques detailed in my LED Muzzle Flare Tutorial, the only difference being that there are two muzzles on a storm bolter! This meant two Yellow/Amber 0805 Chip LED (3V) connected in parallel. For the helmet eye lenses I used a TruOpto OSPG7331A-KL 1.8mm Green LED. Due to the position of the Terminator’s head in respect to its body, I found it easier to insert the helmet LED from the rear of the helmet, rather than underneath as I normally do.

Thankfully there was little else to do in terms of conversion work on this model. Regular readers will know that my Flesh Eaters army is based on the War of the False Primarch setting, which takes place in M33. This means that the Primaris models I’ve used in MkX power armour have been converted to give them a more MkVI appearance. However this wasn’t necessary with the Leviathan Terminators, as Indomitus pattern Terminator armour is perfectly in keeping with the time period and ‘Rogue Trader’ aesthetic that I’m aiming for with this army.

Painting

I spent a lot of time thinking about how to paint this model. Although the colour scheme is well established for this army, there are two things I’ve not had to paint elsewhere in the Flesh Eaters – a Crux Terminatus and winged skull on a chest plate. I was certain that I didn’t want to introduce any additional colours into my army’s colour palette if I could avoid it, so I initially decided to paint all of them Corax White. However that much white turned out to be a little visually overpowering, so I changed the winged skull to Leadbelcher instead. This meant that it no longer drew the eye away from more visually interesting areas.

I’ve listed my Crux Terminatus recipe below, primarily as a reminder to myself for when I come to paint the rest of the squad.

Crux Terminatus

  • Administratum Grey basecoat
  • Contrast Apothecary White shade
  • Nuln Oil shade in deepest recesses
  • Corax White layer
  • Skull White highlight

The other aspect of the paint scheme that caused me a lot of thought was how to pattern the power fist. Other power fists in this army have so far only been carried by sergeants, and I’ve opted for rank insignia as decoration. But Brother Lazarus is not a sergeant, and I wanted to include some traditional Terminator power fist markings. At first, I thought I might paint the classic black and yellow stripes, but I was reluctant to introduce the additional yellow into my army palette as it is not used elsewhere. I also worried that it might make the model read visually as a Blood Angel. I did also consider black and white stripes but wasn’t sure it would have the same visual ‘pop’ – plus it might look like zebra skin!

In the end I settled for green and white checks. This checkerboard pattern is a traditional Terminator decoration, and I’ve used green elsewhere in the army as a spot colour for items like targeting lenses and purity seals. I’m pleased with the results and think I made the right call in the end. I also continued the custom of including the marine’s name under the chapter symbol on their pauldron. I grabbed my old Space Hulk Campaigns book off the shelf and had a skim through for a suitable and storied name for a Terminator, eventually settling on Brother Lazarus.

That’s it for today, but hopefully I’ll be back again soon with more Terminators! As ever, thanks very much for reading, and please don’t forget you can also follow my work on social media at TwitterMastodonThreads and Instagram.