
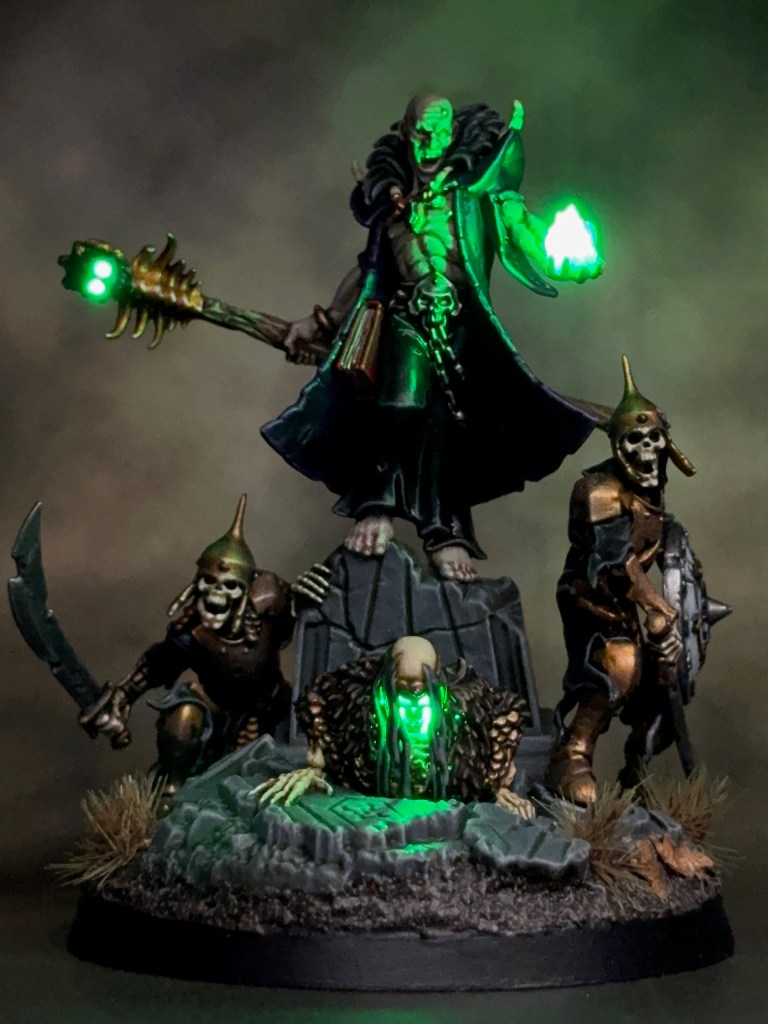
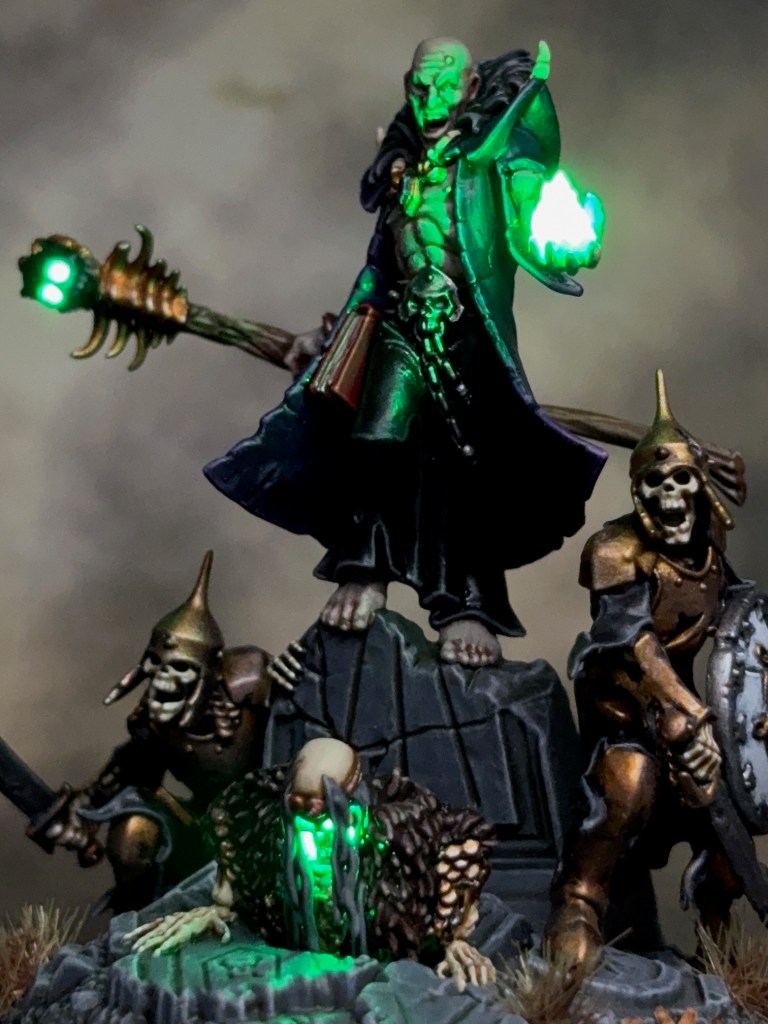
This week I’m sharing my take on the Warhammer+ Soulblight Gravelords ‘The Summons’, with some extra LED magic of course! I had hoped to finish this spooky miniature in time for Halloween, but it took a longer to paint than I’d estimated.
Modelling
I’ve been flirting with the idea of building some variety of Warhammer Undead army for many years now. So when the Warhammer+ miniatures were announced for this year, the Necromancer really leapt out at me as the clear choice. The stock miniature doesn’t feature any obvious light sources, so I had some creative freedom on which parts I chose to illuminate. I considered a number of ideas; candles, lanterns, glowing necklace gems, burning green eyes on the Necromancer, and even an unholy glow projected upwards from the open grave.
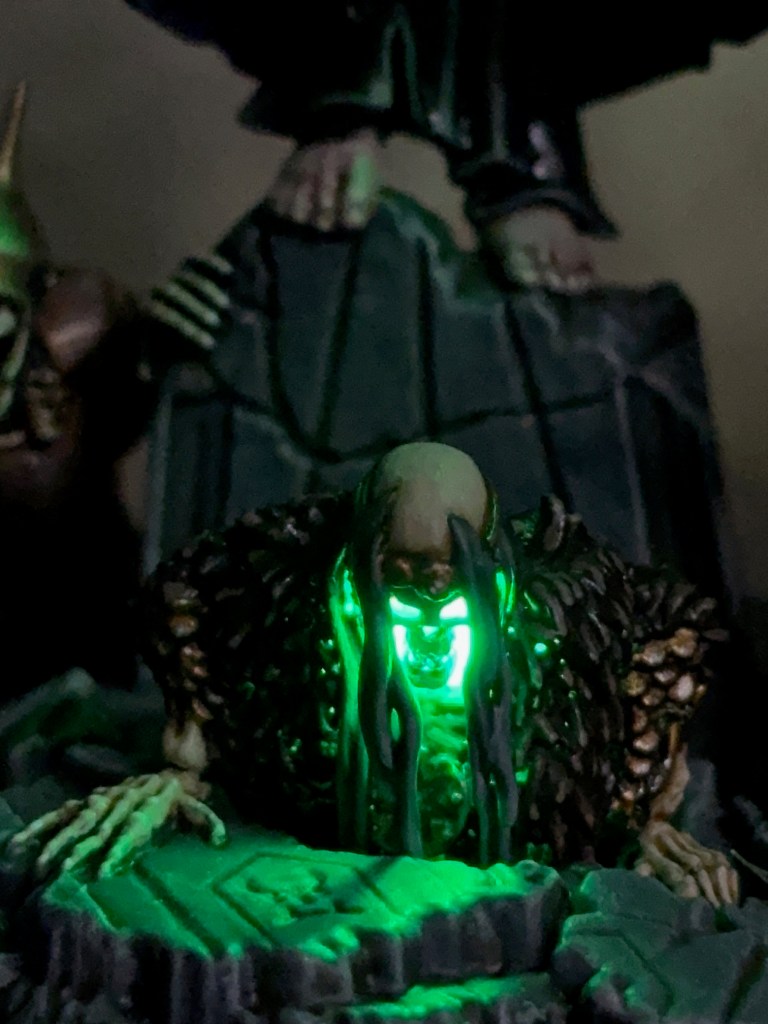
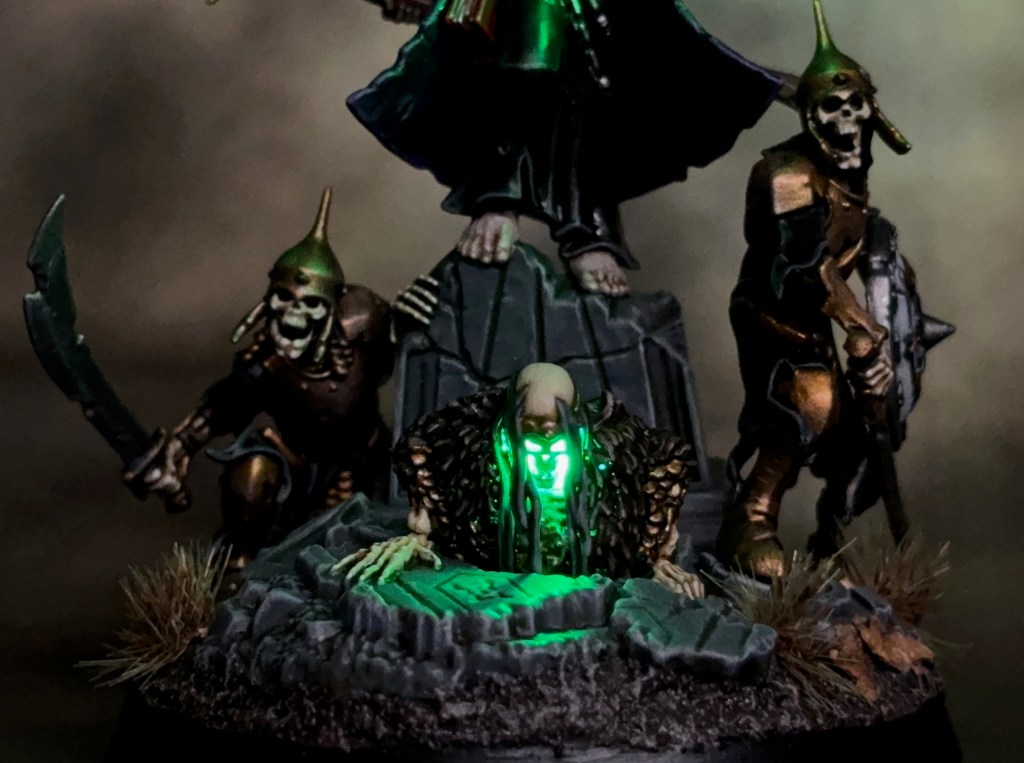
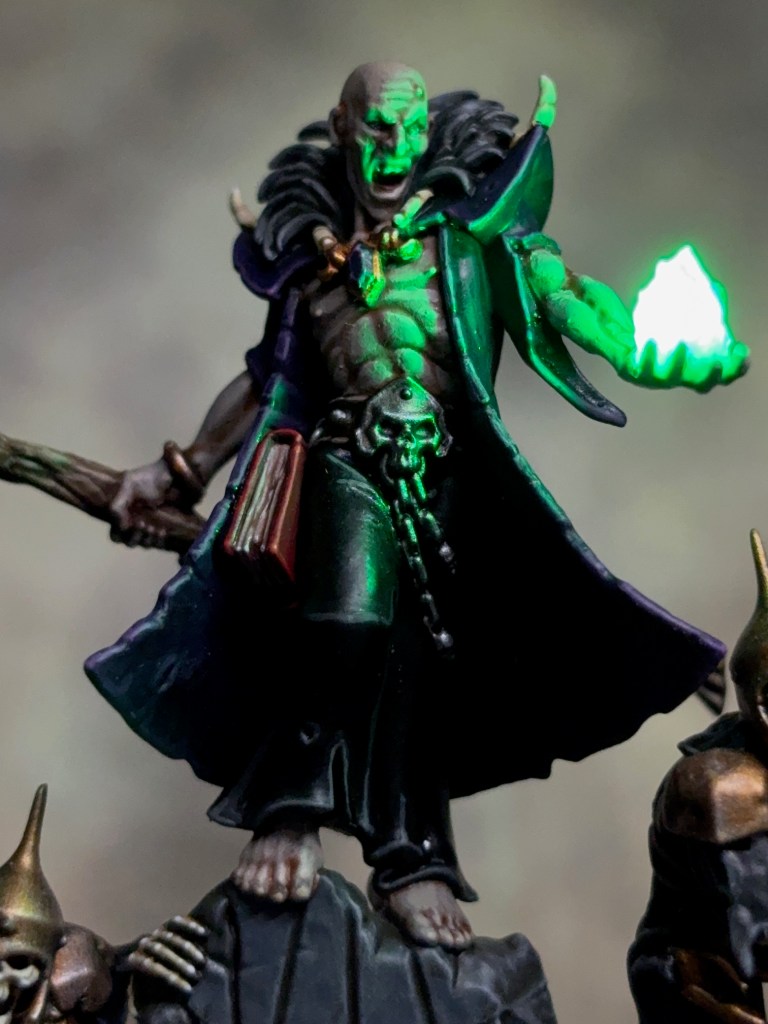
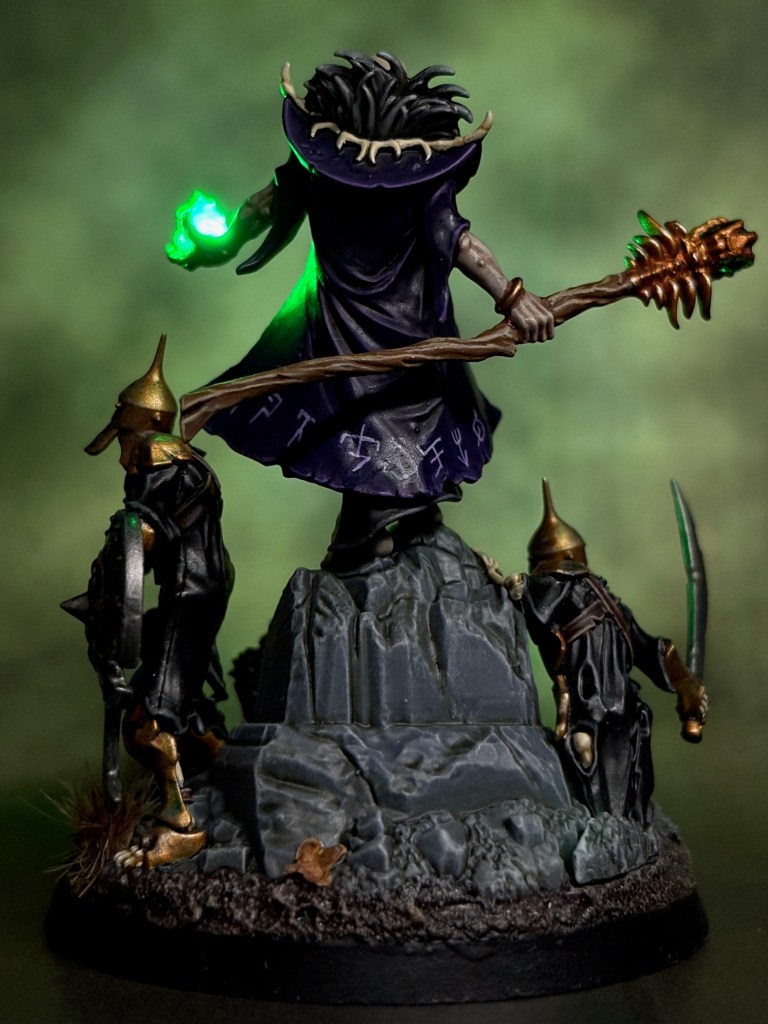
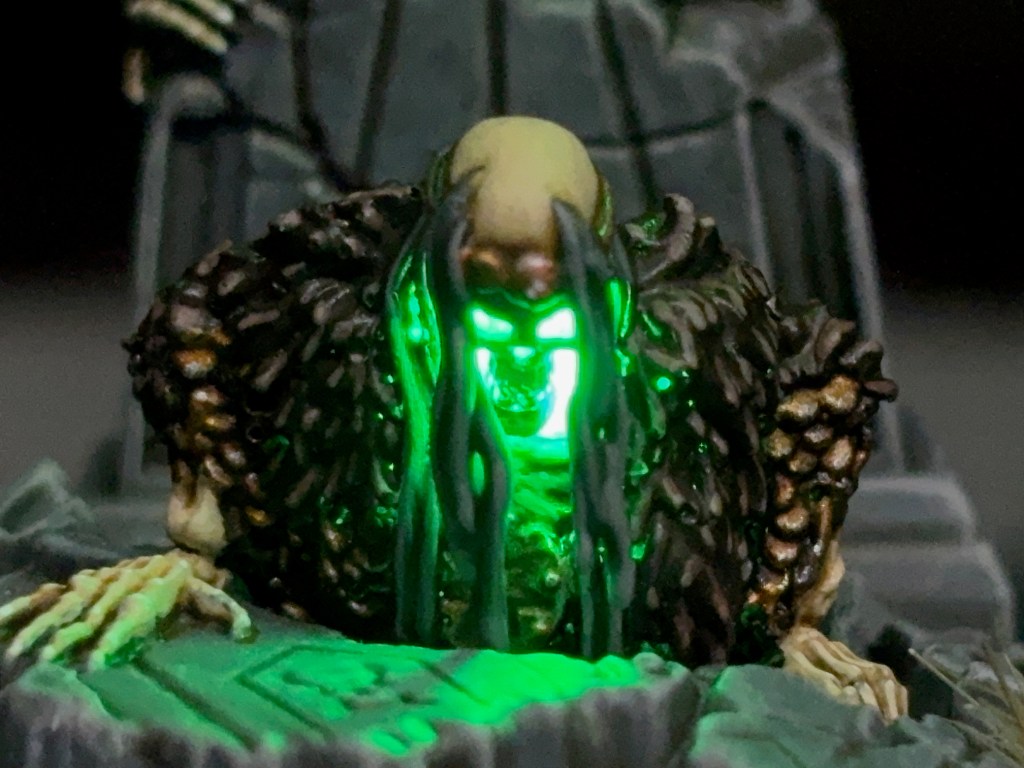
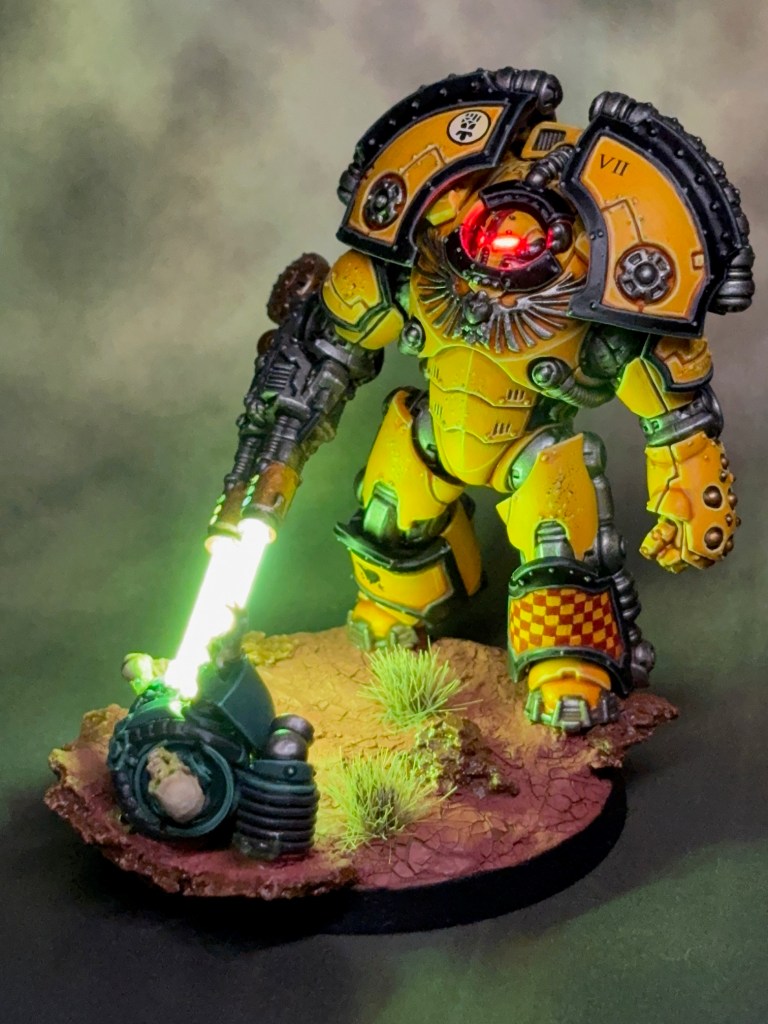
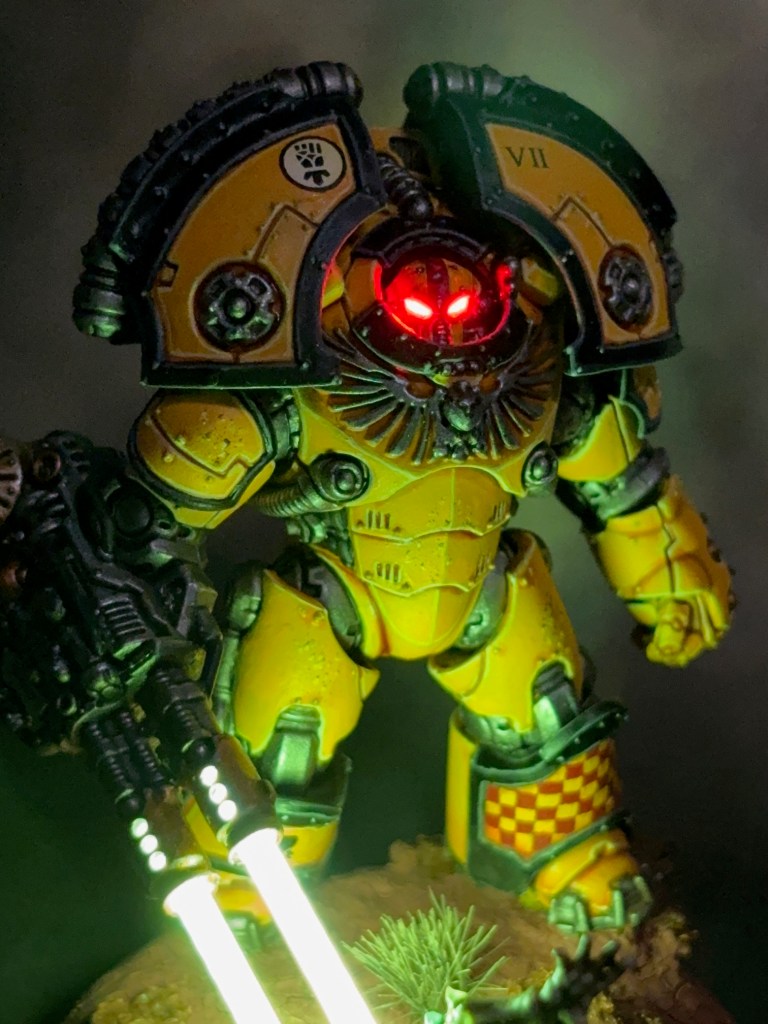
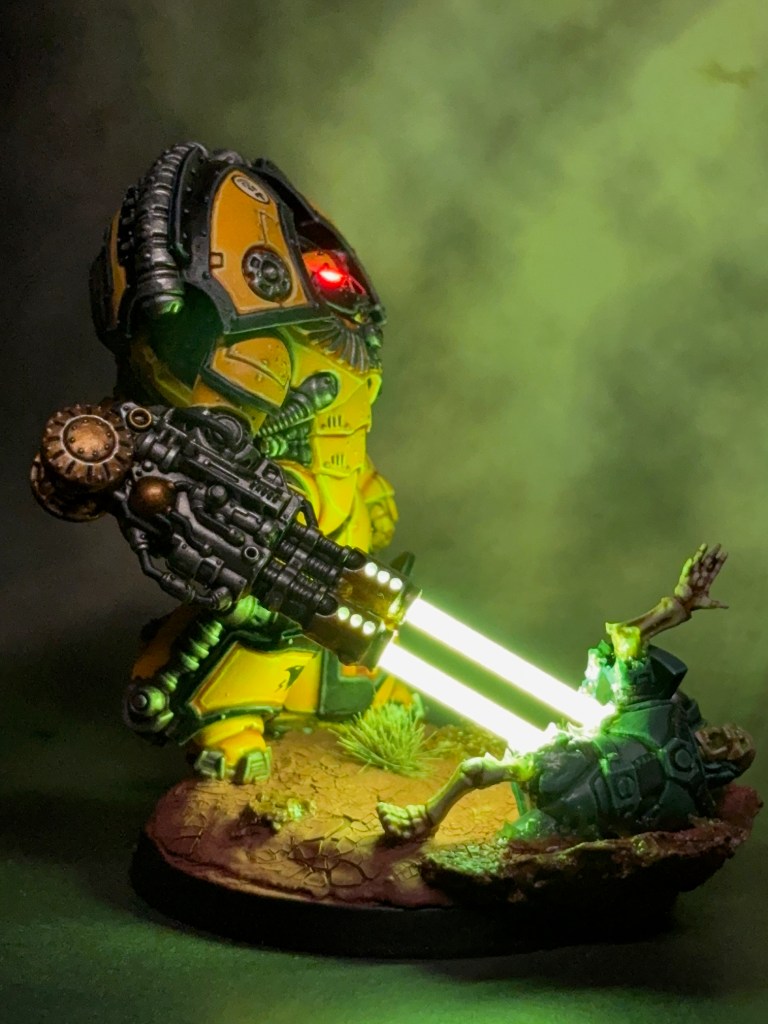
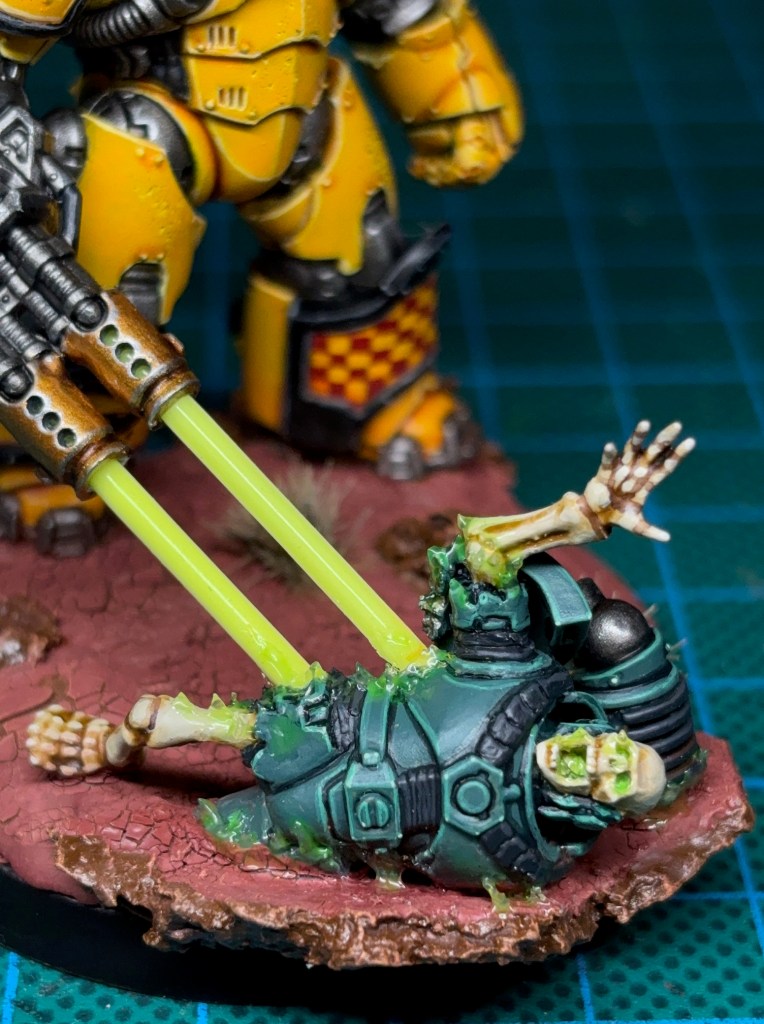
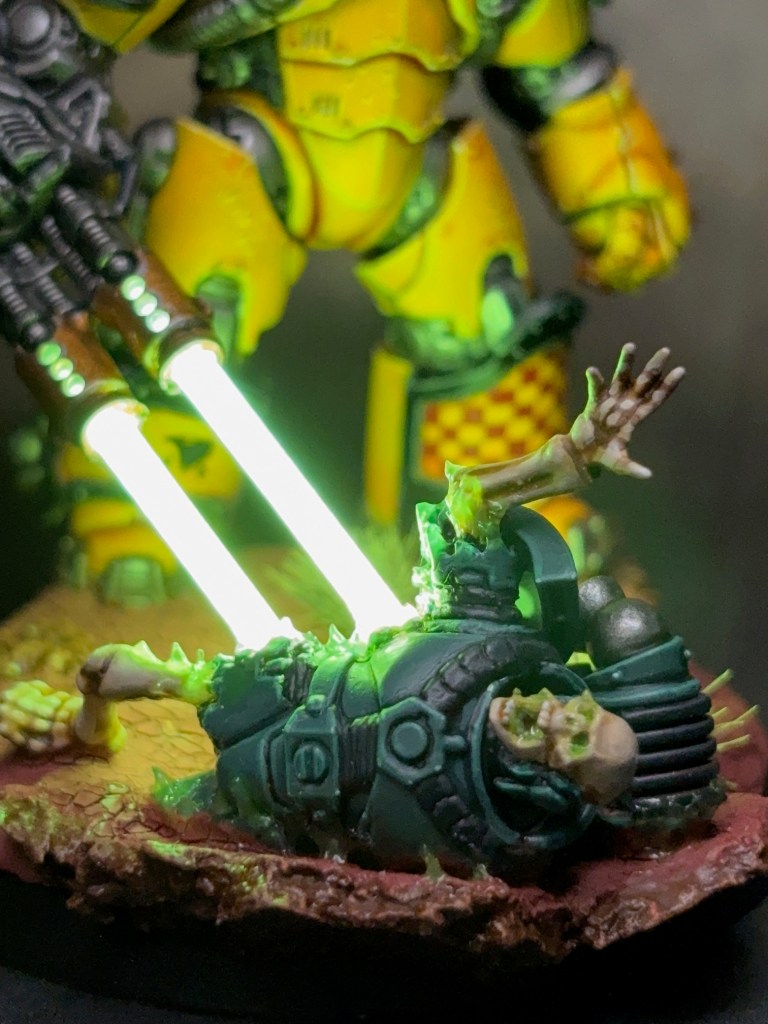
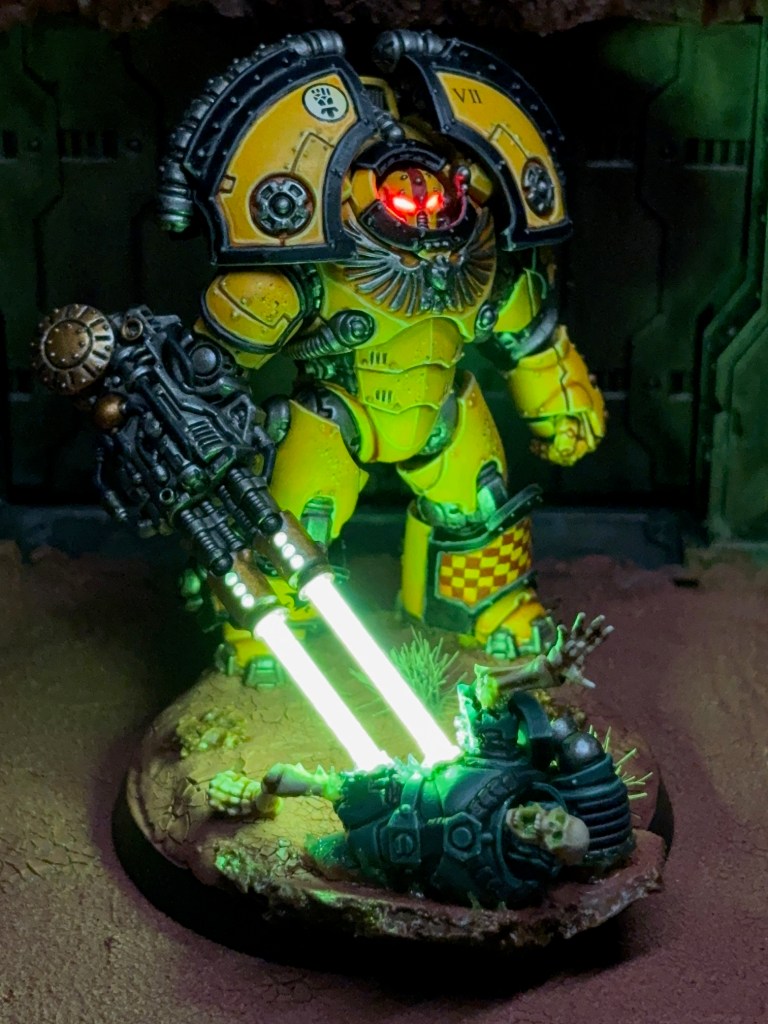
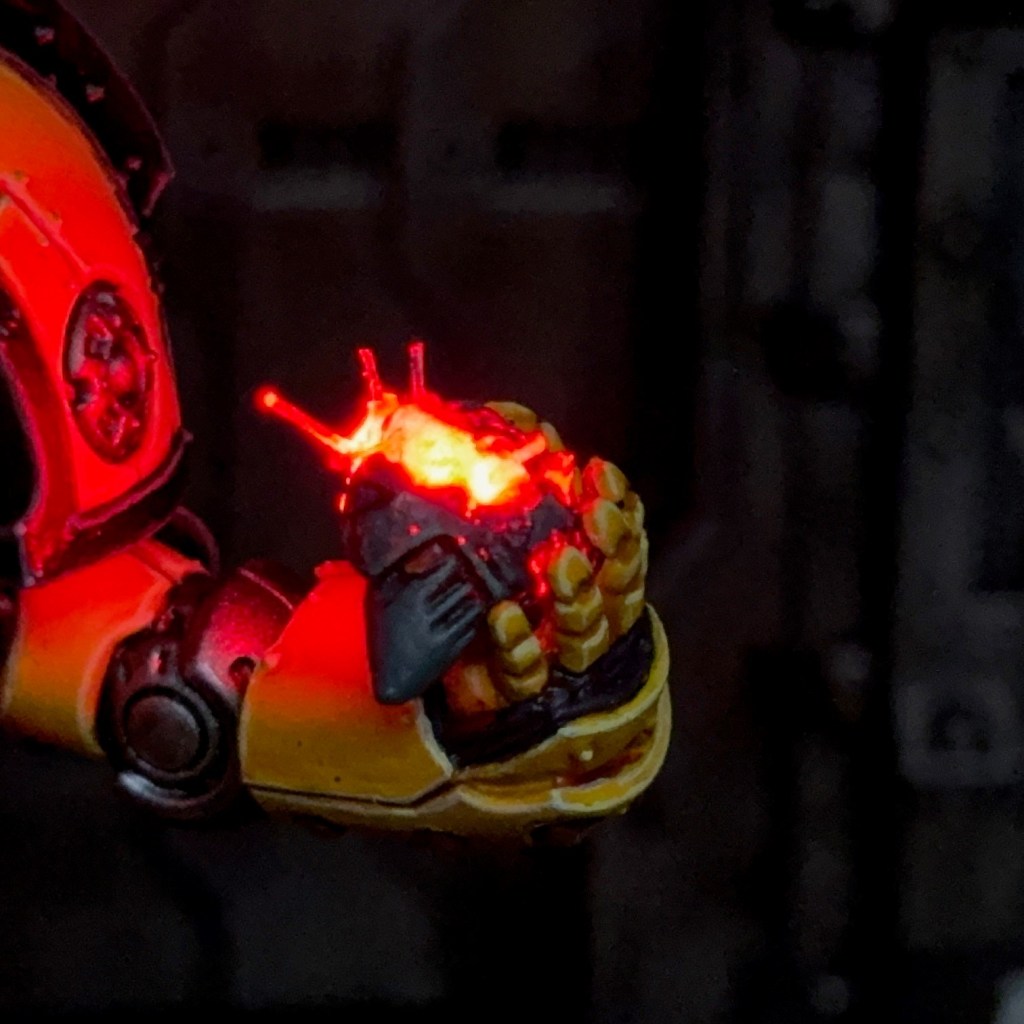
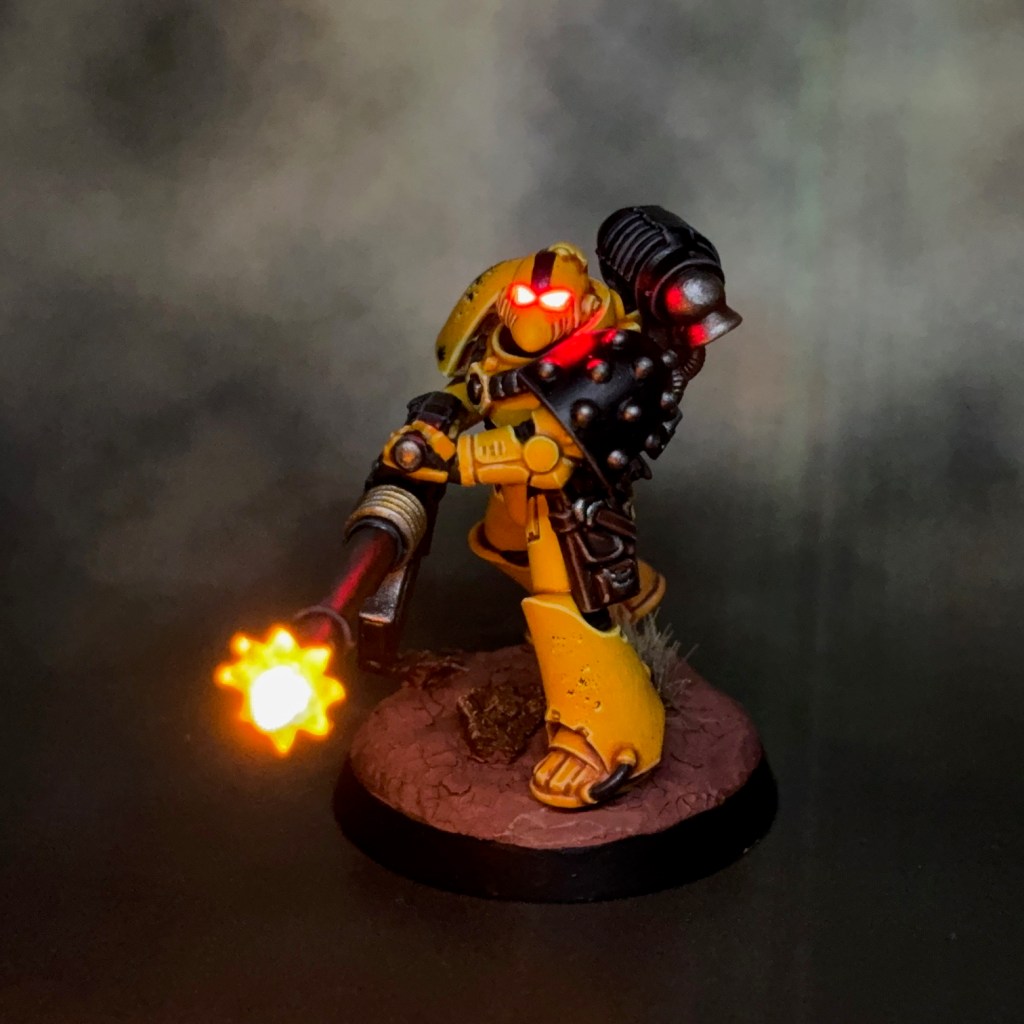
I settled on illuminating the eyes of the Skull Staff, a soulfire flame in the conveniently outstretched hand, and the skull of the skeleton who is mid-reanimation. These areas created a visually pleasing triangle of light when viewed from the front.
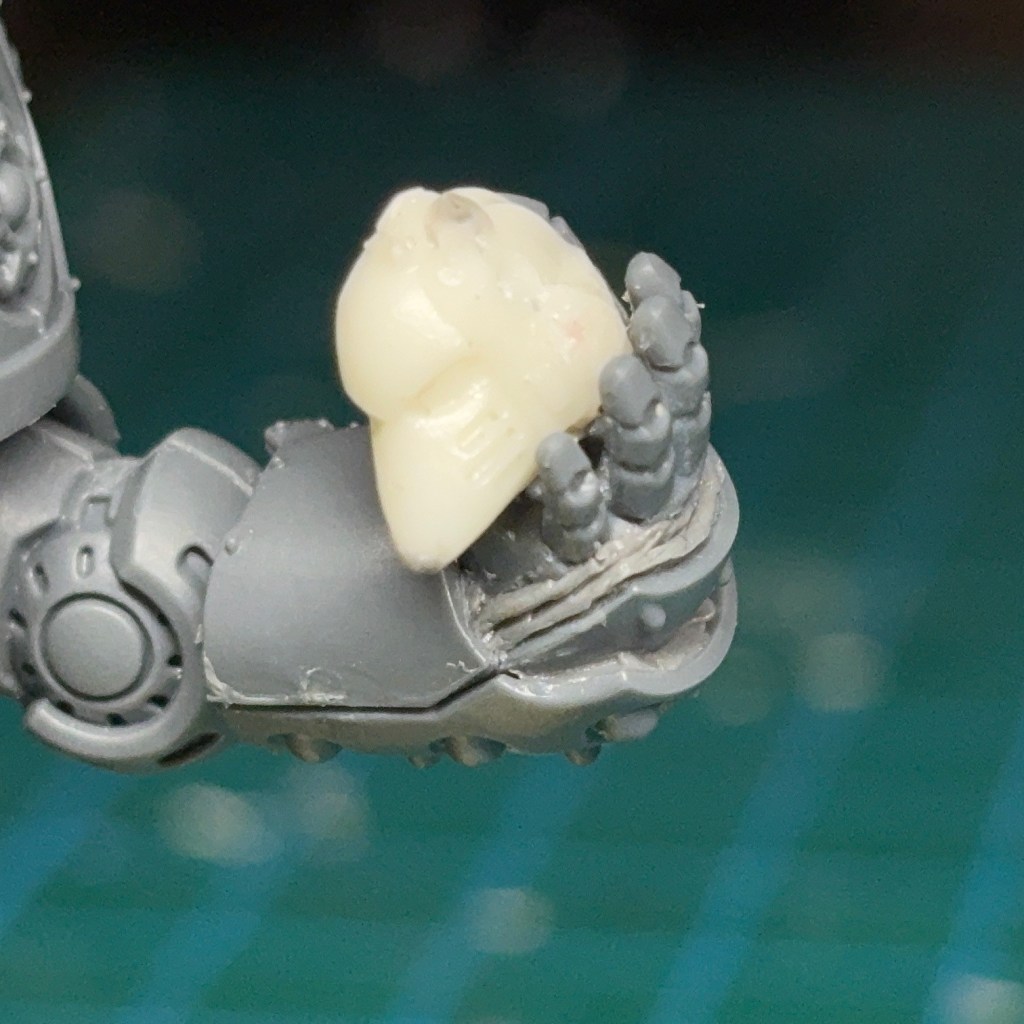
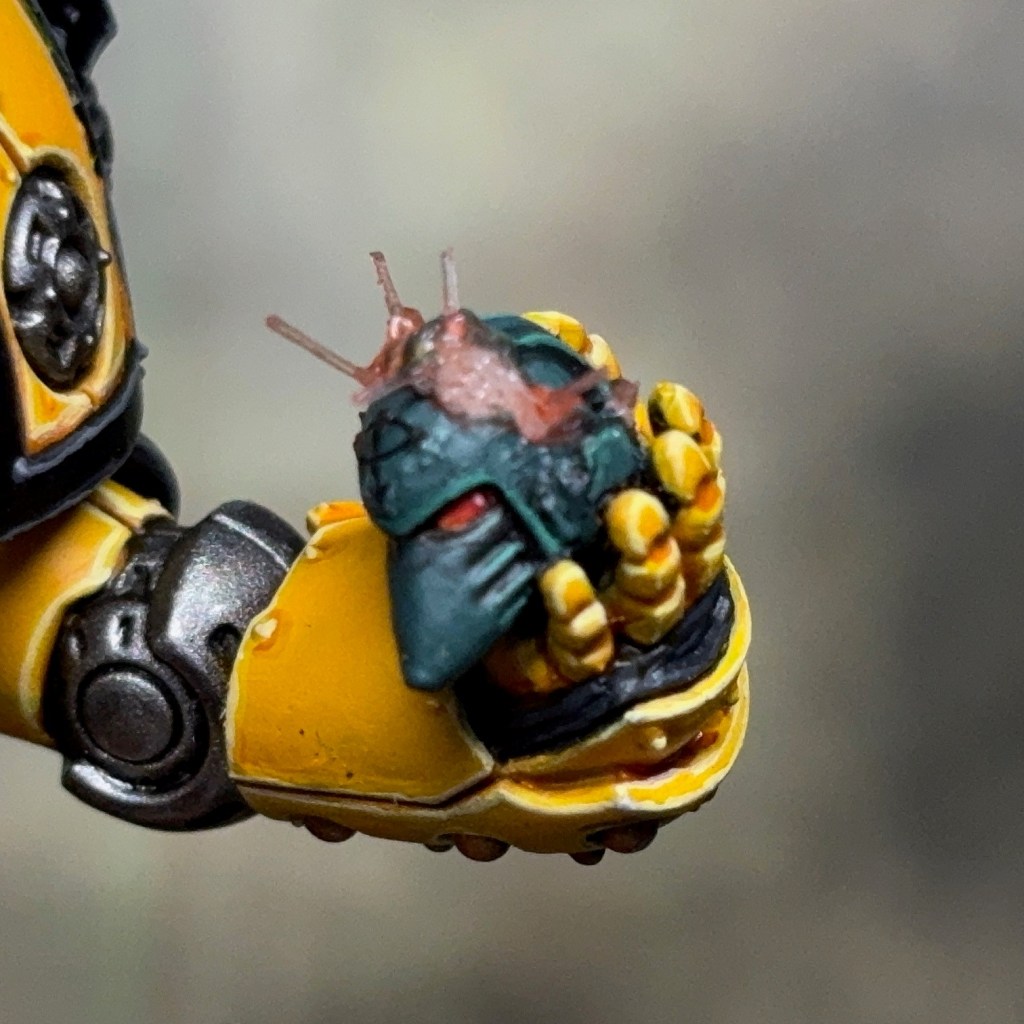
The Skull Staff and reanimating skeleton were illuminated followed the techniques described in my LED Eye Lens tutorial, only with skulls rather than space marine helmets. The soulfire flame was created using acrylic gel from Green Stuff World and followed the techniques described in my Simple LED Muzzle Flare tutorial.
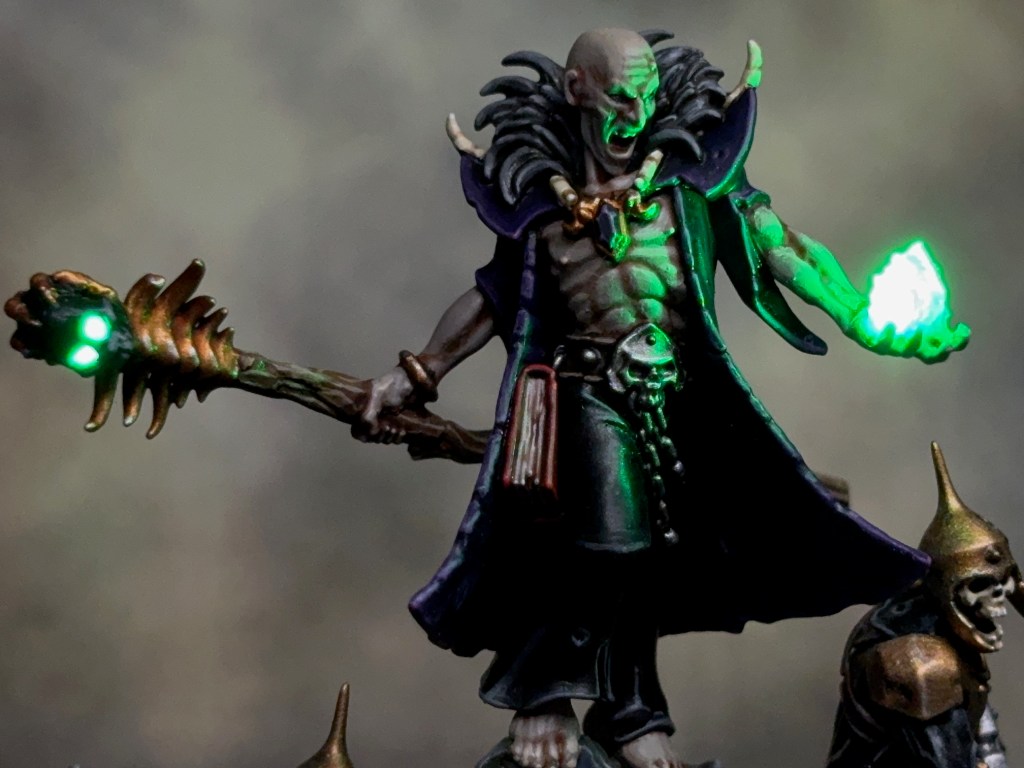
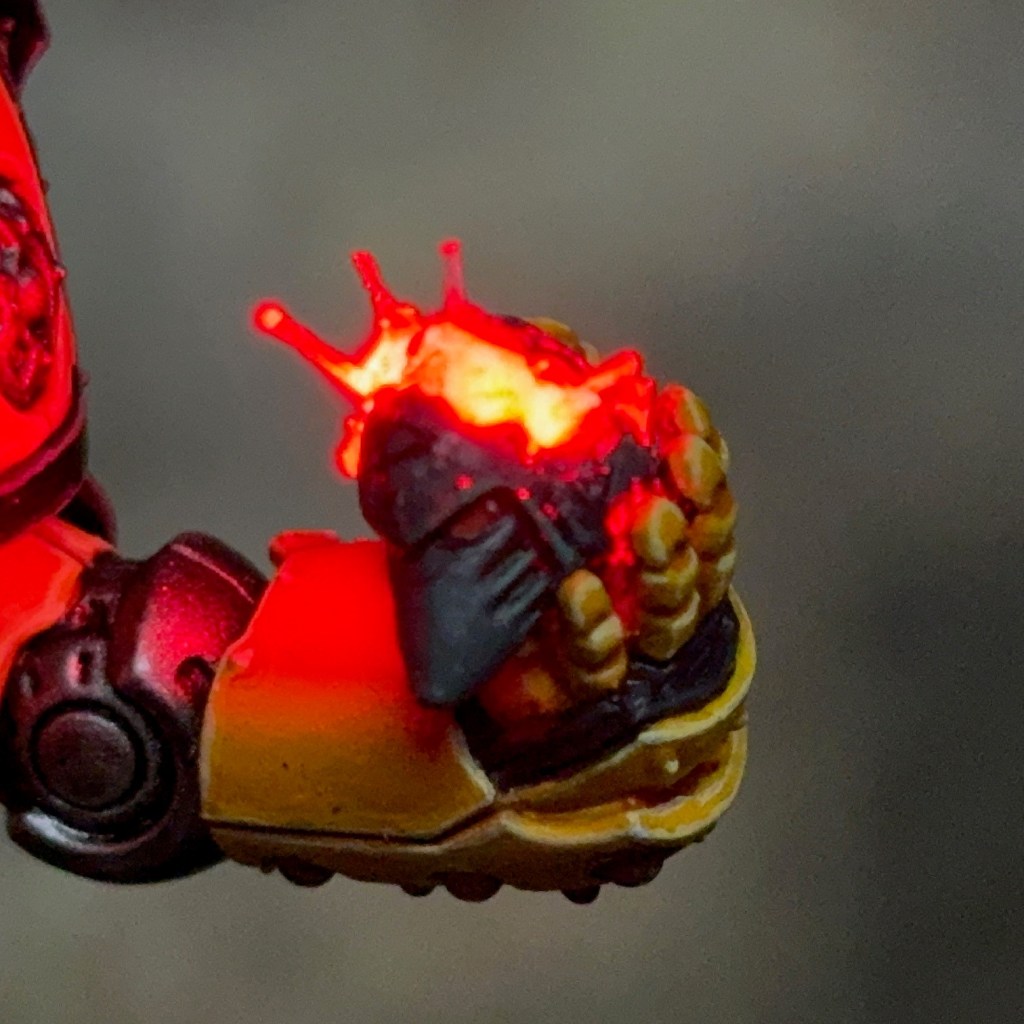
All three of the LEDs are 3V Green 0805 SMD Chip LEDs with 10 ohm resistors. The three LEDs are connected in parallel with a single CR2032 coin cell battery and switch in the base.
Painting
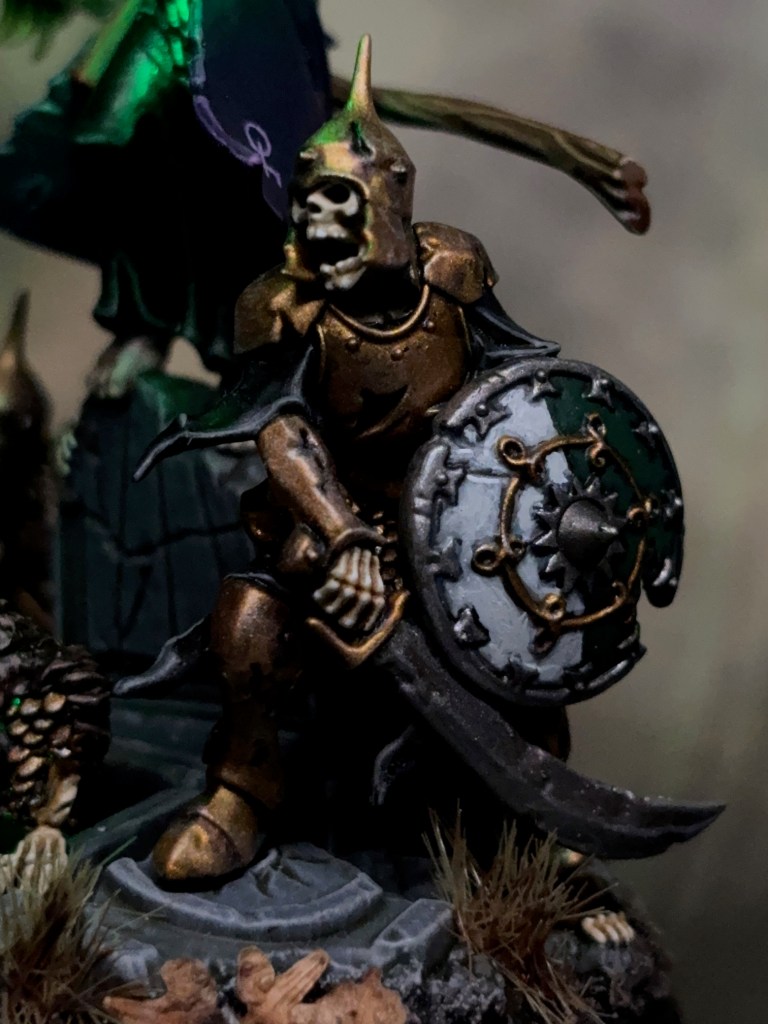
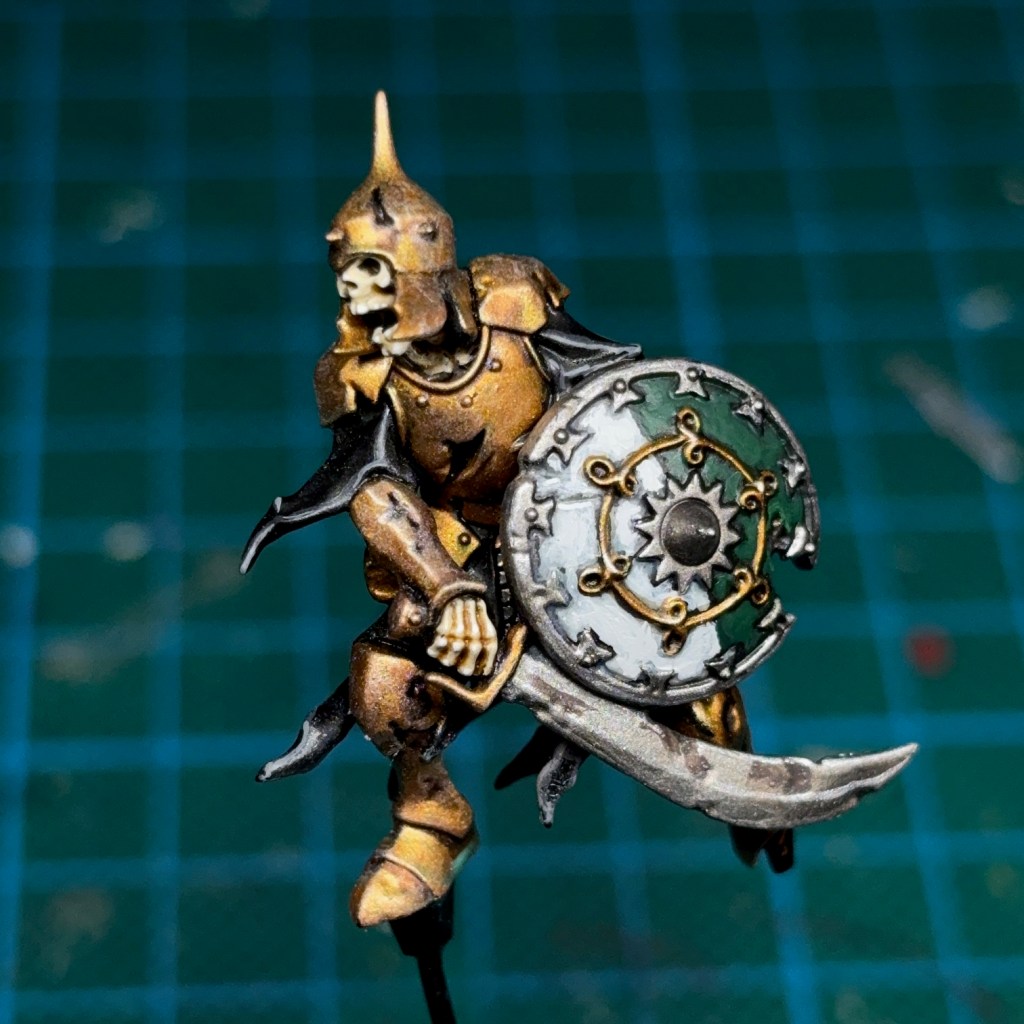
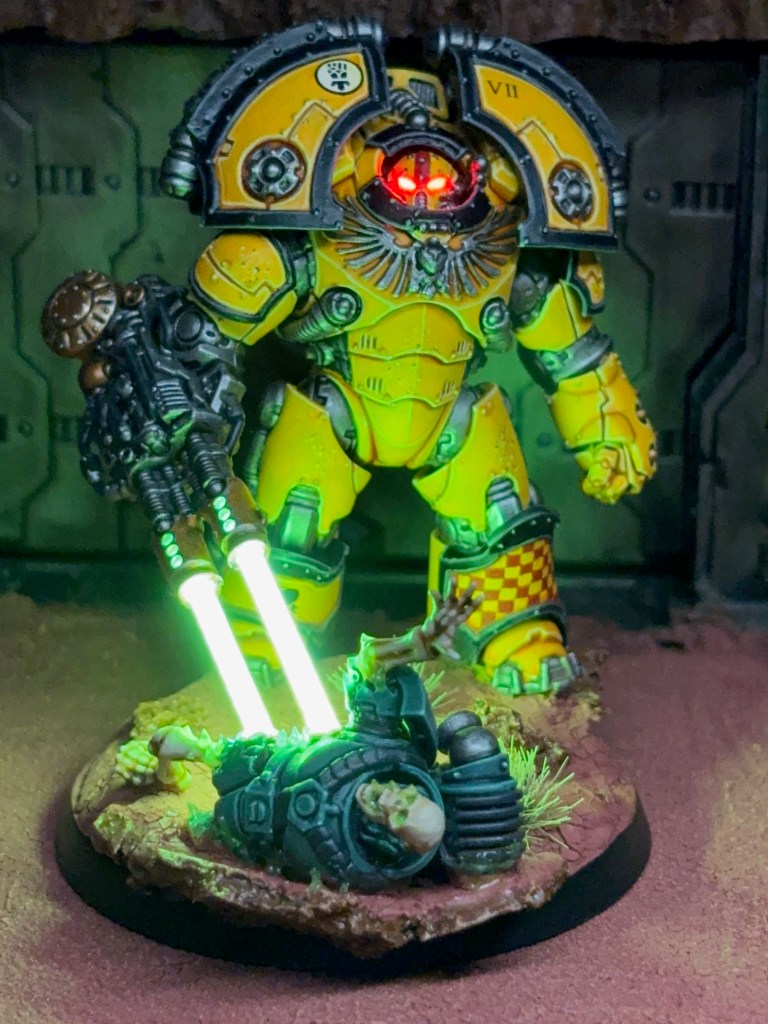
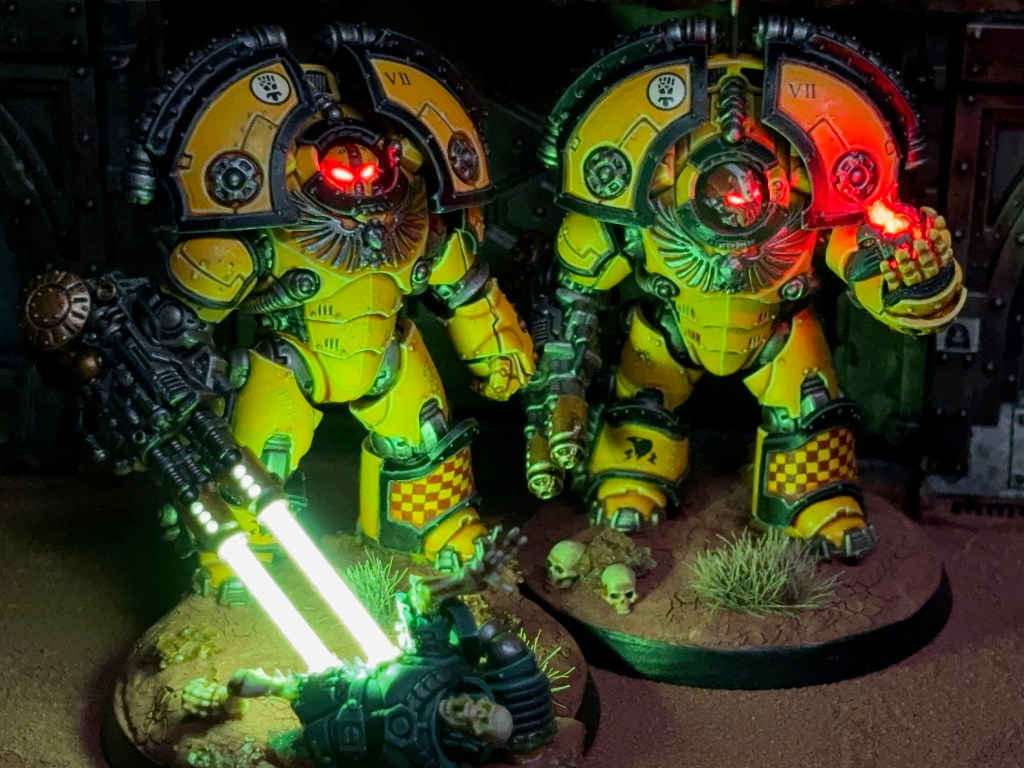
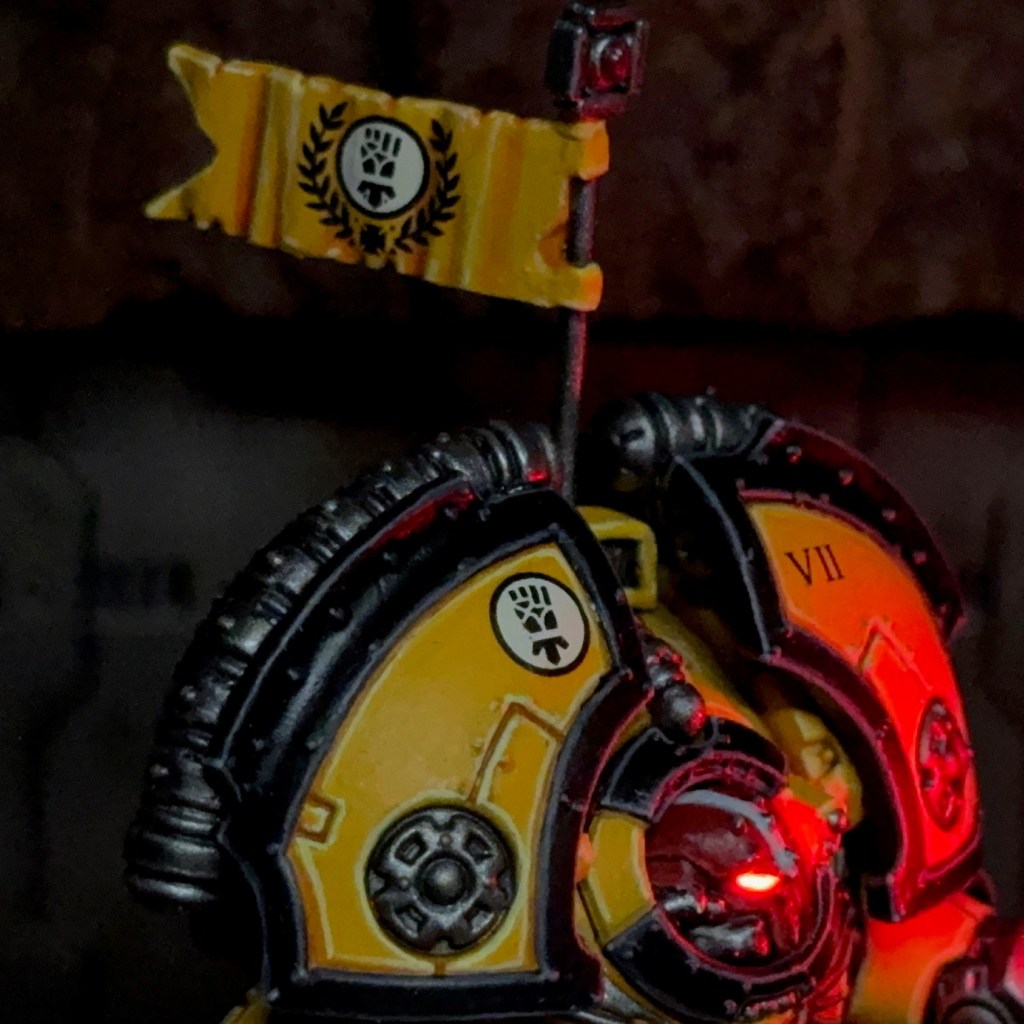
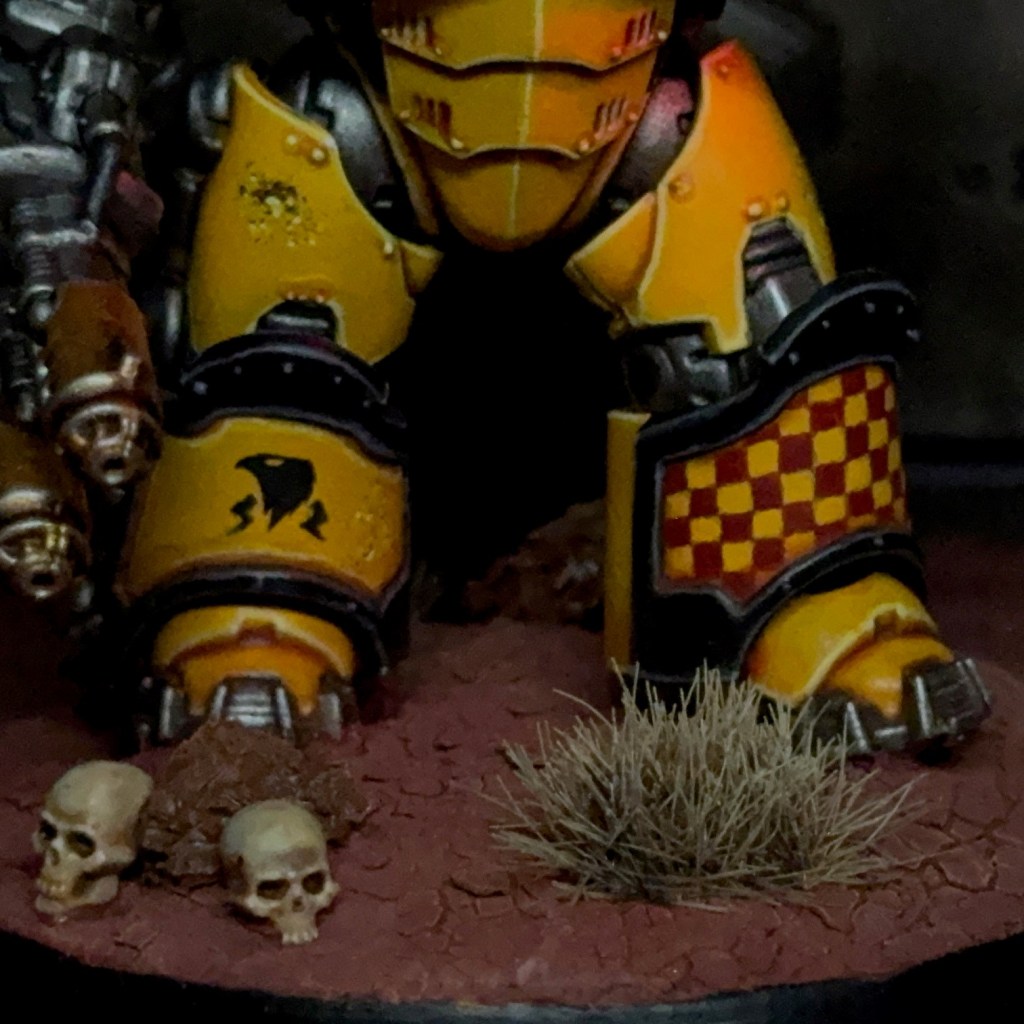
When deciding on the paint scheme, I decided to stay reasonably close to the box art as I didn’t have an existing army colour palette to match. The purple and black robes were also very evocative of the classic Warhammer Fantasy Necromancer. But I did add a few small twists of my own. In my head canon this is Wilhelm Lichtenfels, a Necromancer I created for a short lived narrative campaign ‘Shadow Over Steepacre’, that I played with with my gaming group back when Age of Sigmar was first released. The Steepacre town heraldry was white and green, which is reproduced in the skeleton’s shield. I’ve made previous versions of Wilhelm, and each version becomes a little more corrupted (and a little more buff).
R.I.P? More like ripped! Am I right, ladies?!
Helga Stormglad, Steepacre resident (burned as witch)
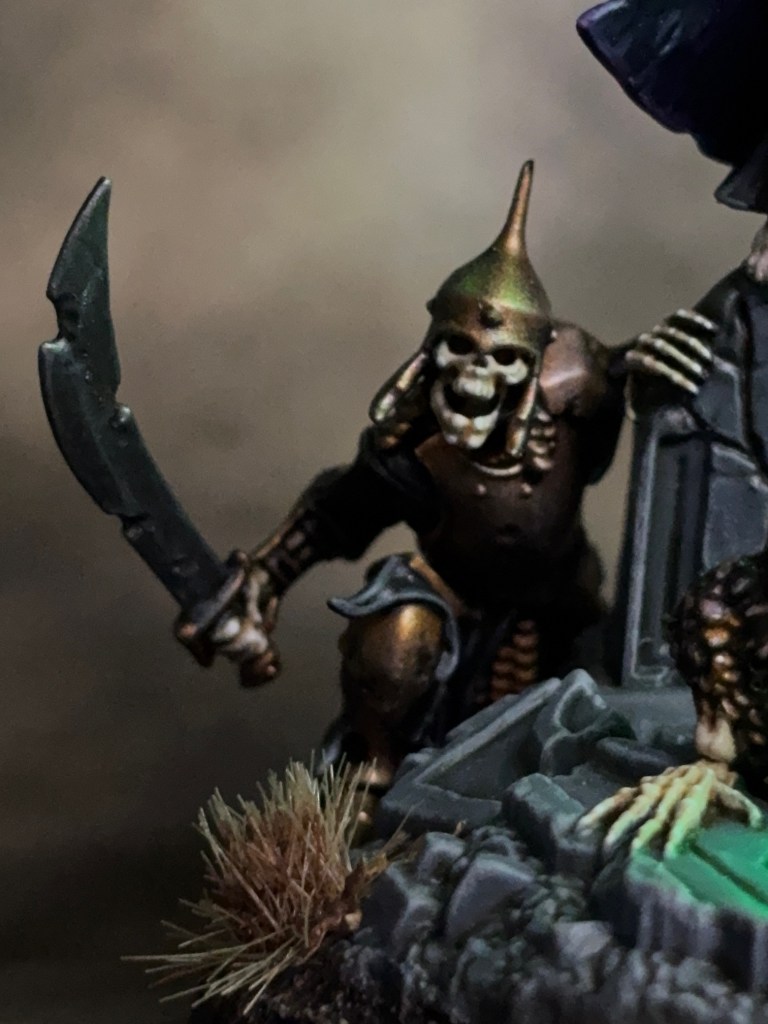
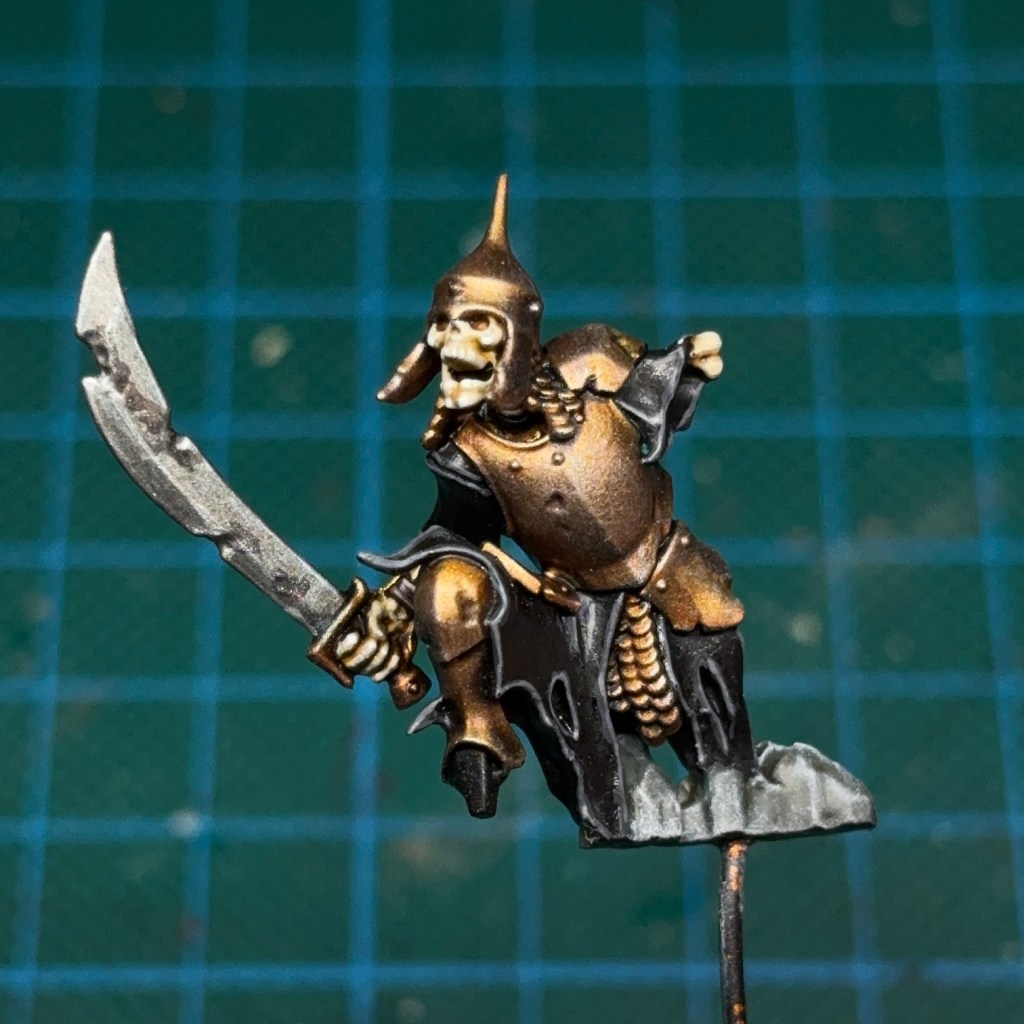
The miniature was undercoated with Citadel ‘Chaos Black’ spray. All other paints are Citadel unless specified otherwise. It’s worth noting that for ease of access to details I painted the skeletons as separate sub-assemblies.
- Bones
- Wraithbone basecoat
- Skeleton Horde Contrast shade
- Ushabti Bone highlight
- Screaming Skull fine highlight
- White Scar spot highlight
- Pallid Skin
- Rakarth Flesh basecoat
- Reikland Fleshshade shade
- Rakarth Flesh layer
- Skin Tones (Pale) tutorial steps 5-11 (replacing Bugman’s Glow with Rakarth Flesh)
- 50:50 Rakarth Flesh:Flayed One Flesh highlight
- 33:66 Rakarth Flesh:Flayed One Flesh fine highlight
- Flayed One Flesh spot highlight
- Dark Purple Cape
- Naggaroth Night basecoat
- Druchii Violet shade
- Xereus Purple highlight
- Genestealer Purple fine highlight
- Cape Runes
- Xereus Purple layer
- 90:10 Corax White:Xereus Purple highlight
- Naggaroth Night thin glaze
- Black Cloth
- Abaddon Black basecoat
- Agrax Earthshade shade
- Eshin Grey highlight
- Dawnstone fine highlight
- Grey Fur
- Mechanicus Standard Grey basecoat
- Agrax Earthshade shade
- Dawnstone layer
- Administratum Grey layer
- Brown Fur
- Rhinox Hide basecoat
- Seraphim Sepia shade
- Gorthor Brown layer
- Baneblade Brown layer
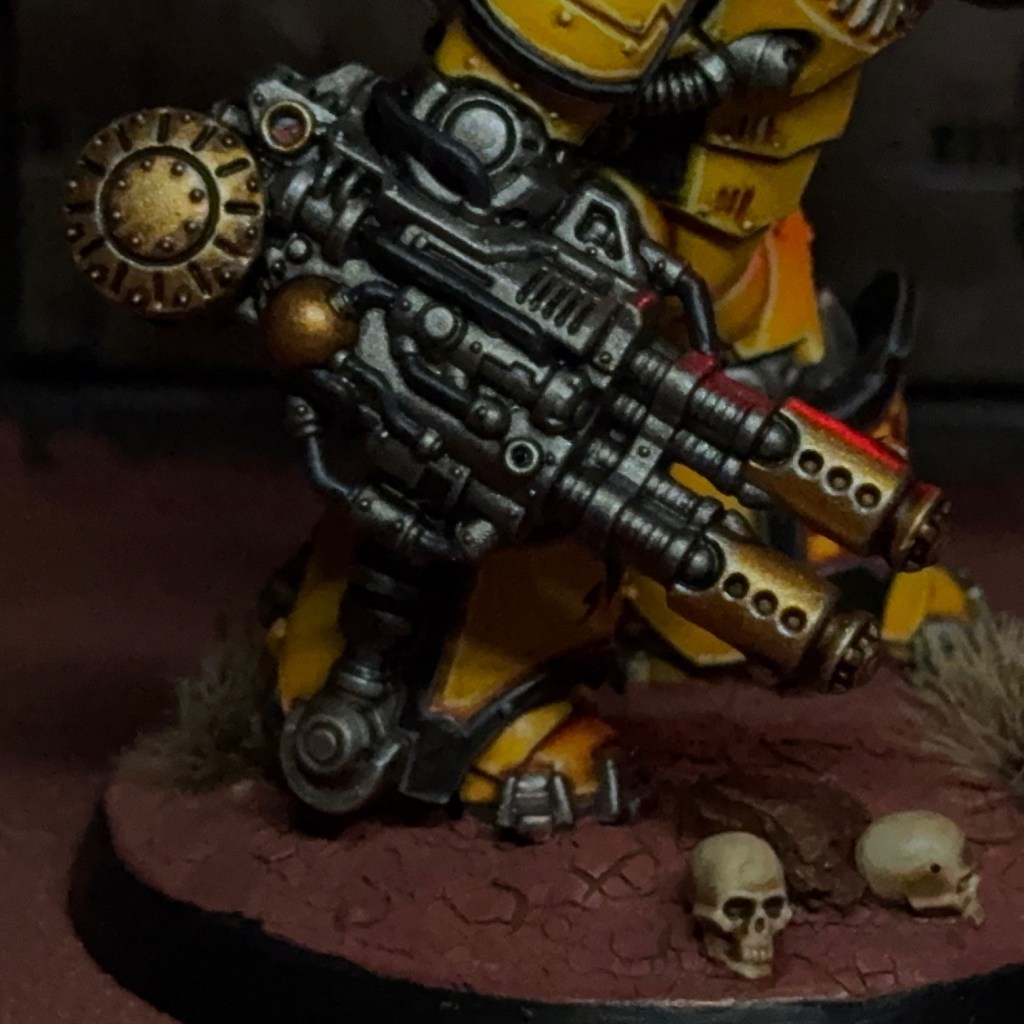
- Bronze Armour
- Retributor Gold basecoat
- Kabalite Green thin glaze
- Agrax Earthshade shade
- Runefang Steel drybrush
- Iron Weapons & Trim
- Leadbelcher basecoat
- Nuln Oil shade
- Runefang Steel highlight
- Obsidian Skull Staff
- Abaddon Black basecoat
- 50:50 Abaddon Black:Daemonette Hide highlight
- Daemonette Hide fine highlight
- Dawnstone Grey spot highlight
- Gold Staff, Jewellery & Coins
- Retributor Gold basecoat
- Reikland Fleshshade shade
- Runefang Steel highlight
- Wooden Staff
- Steel Legion Drab basecoat
- Reikland Fleshshade shade
- Tallarn Sand highlight
- Karak Stone fine highlight
- Red Leather Book Cover
- Khorne Red basecoat
- Carronburg Crimson shade
- Wazzdakka Red highlight
- Evil Sunz Scarlet fine highlight
- Wild Rider Red spot highlight
- Book Pages
- Rakarth Flesh basecoat
- Reikland Fleshshade shade
- Pallid Wych Flesh highlight
- White Scar spot highlight
- Shield Green Heraldry
- Caliban Green basecoat
- Athonian Camoshade shade
- 50:50 Caliban Green:Warpstone Glow layer
- Warpstone Glow highlight
- Shield White Heraldry
- Corax White basecoat
- Apothecary White Contrast shade
- Corax White layer
- White Scar highlight
- Grave Stone (base)
- Mechanicus Standard Grey basecoat
- Athonian Camoshade shade
- Dawnstone drybrush
- Administratum Grey drybrush
- Corax White light drybrush
- Dark Earth (base)
- Dryad Bark basecoat
- Agrax Earthshade shade
- Gorthor Brown drybrush
- Karak Stone drybrush
- Ushabti Bone light drybrush
- Grass (base)
- Mordian Corpsegrass Tufts
- Reikland Fleshshade in base of tuft
The only other thing worth mentioning is that the magical flame was painted with a thin glaze of Hexwraith Flame.
That’s all for today, I hope you’ve enjoyed this (sort of) seasonal miniature! I’ll be back again soon, most likely with more space marines. As ever, thanks very much for reading, and please remember you can also find me sharing my work on Instagram, Threads, Bluesky and Mastodon. Or if you prefer you can subscribe to my website by entering your email in the box below to receive updates whenever I post a new blog article or tutorial.


