Uriah Grimm, Flesh Eaters Chaplain

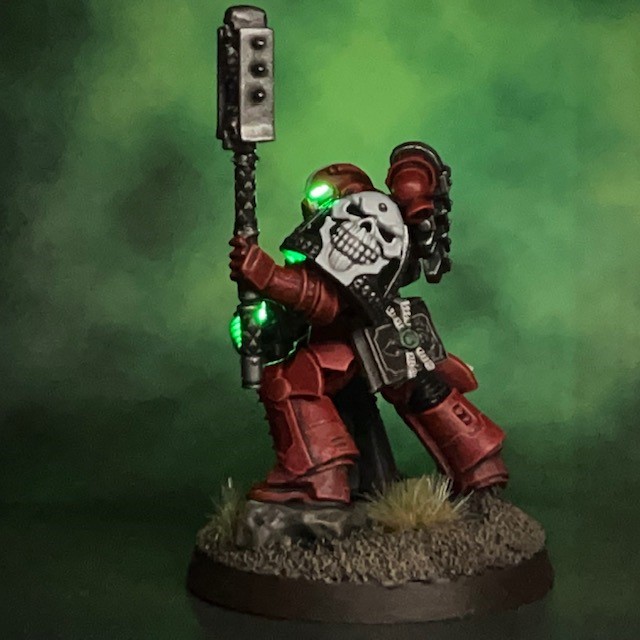
In war are we eternally reborn.

Uriah Grimm, Brother-Chaplain of the Flesh Eaters

Brother-Chaplain Uriah Grimm is the first HQ choice for my Flesh Eaters army project. I started work on him a few months ago, hope to have him complete in time for a call for examples of Dramatis Persona in the War of the False Primarch, but in the end I missed the deadline by quite a way. Next I thought I’d have him finished in time for the Armies on Parade 2022 ‘Gods of War’ month, but that came and went too! Still, he’s finished now, and I’d always rather take my time and get things “right” rather than rush to a deadline.

Design & Building

“Don’t talk to me or my son ever again!”

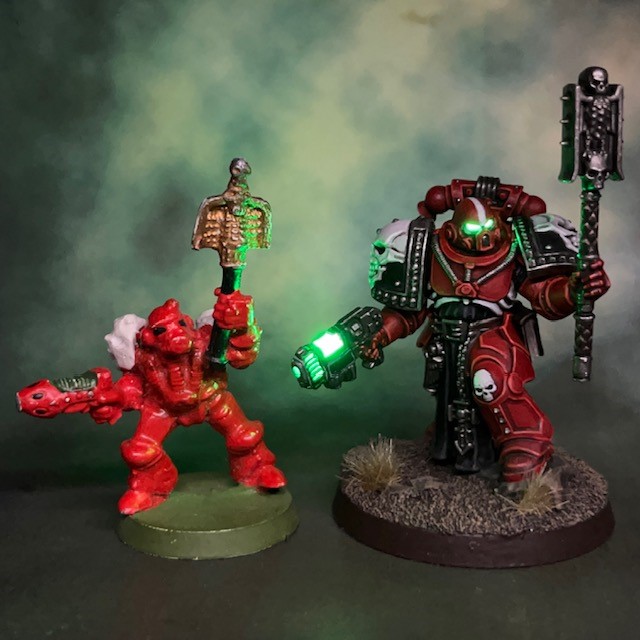
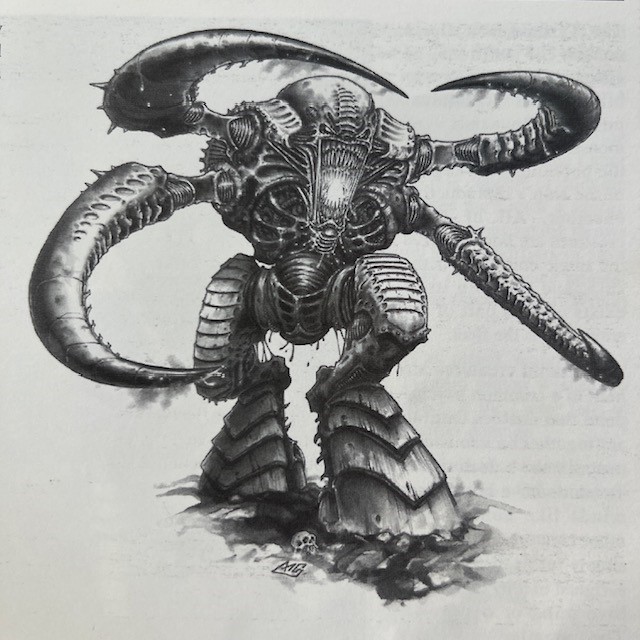
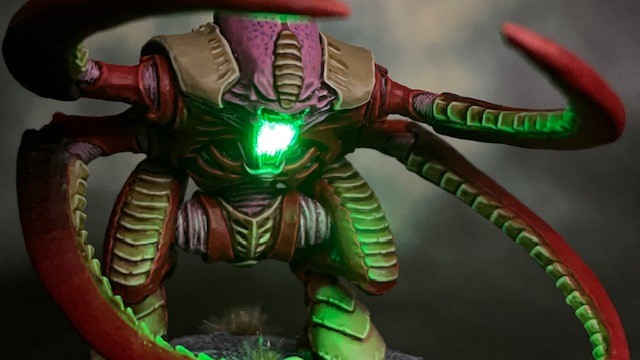
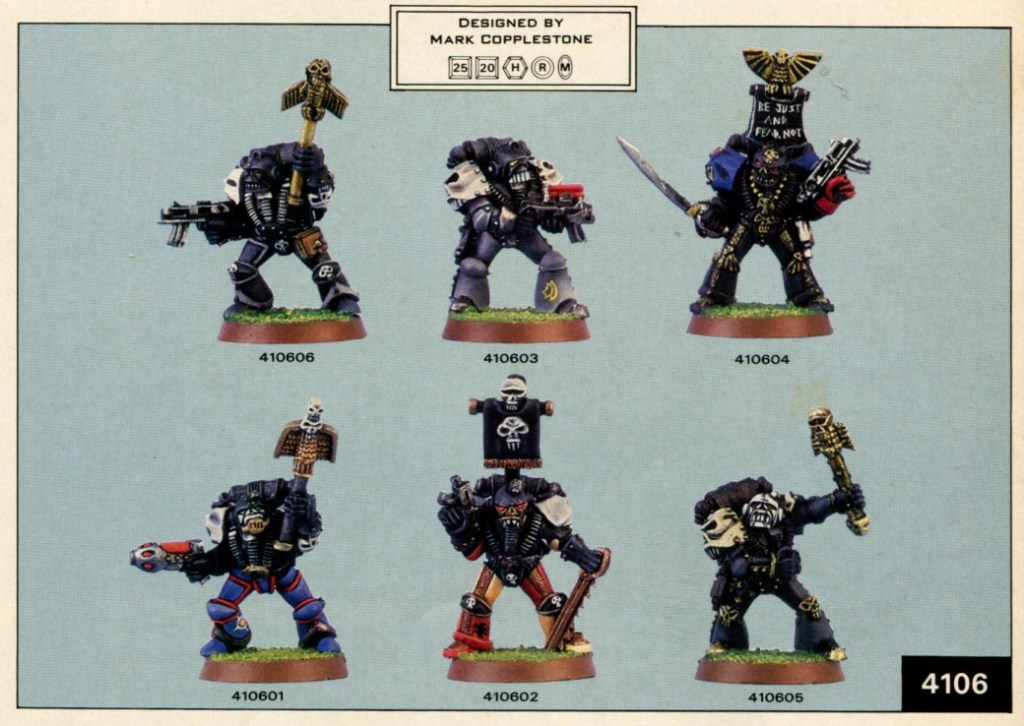
Chaplain Grimm is heavily influenced by the Rogue Trader era Chaplain pictured above. This is the first 40K model I ever painted way back in 1993, using a mix of Citadel paints from the time (good old ‘Blood Red’) and my dad’s Humbrol paints. You may have seen me post this ancient model before, I like to dig it out occasionally just to remind people that we’ve all got to start our hobby journey somewhere and anyone can improve their painting with a little practice. You can see a more competently painted version of the same model in the bottom left of the image below.

Rogue Trader era metal Space Marine Chaplains, as seen in White Dwarf 108

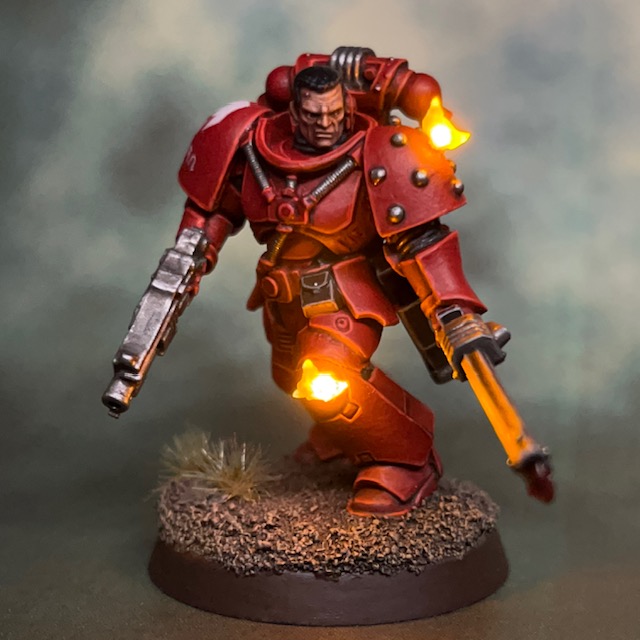
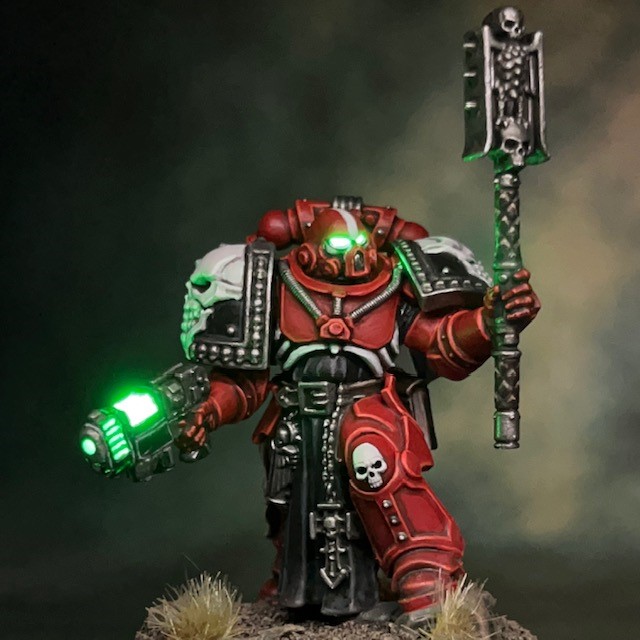
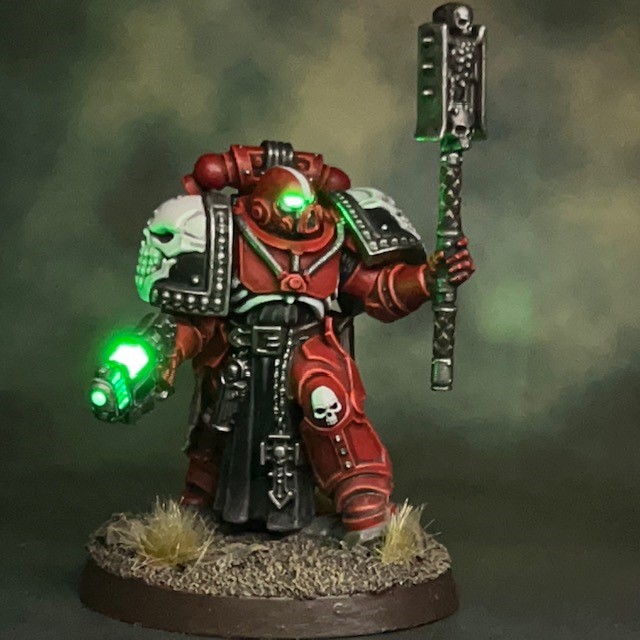
When updating this model I didn’t want to make a literal rivet-by-rivet identical version, just to capture the key points and general feel of the miniature. The pose, the weapons, the distinctive skull shoulder pads and helmet were the main points I wanted to preserve. Everything else was up for grabs. You may recognise I’ve based my miniature on the Indomitus Chaplain, while the arms and shoulders are from the Black Templars Castellan, the backpack is from the Forge World Mk V Heresy Armour set and finally the helmet is a re-sculpt based on the Primaris Reiver helmet.

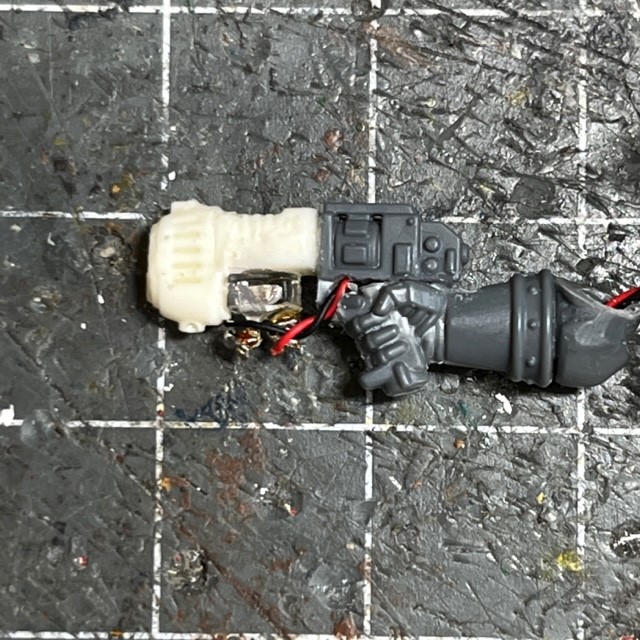
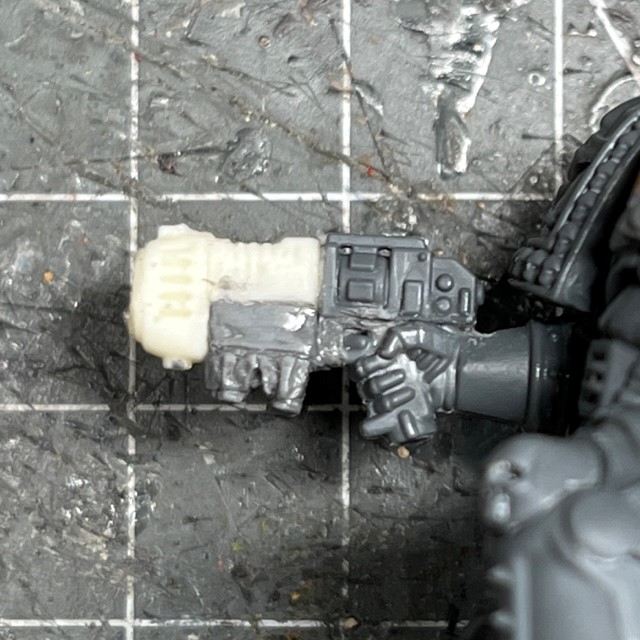
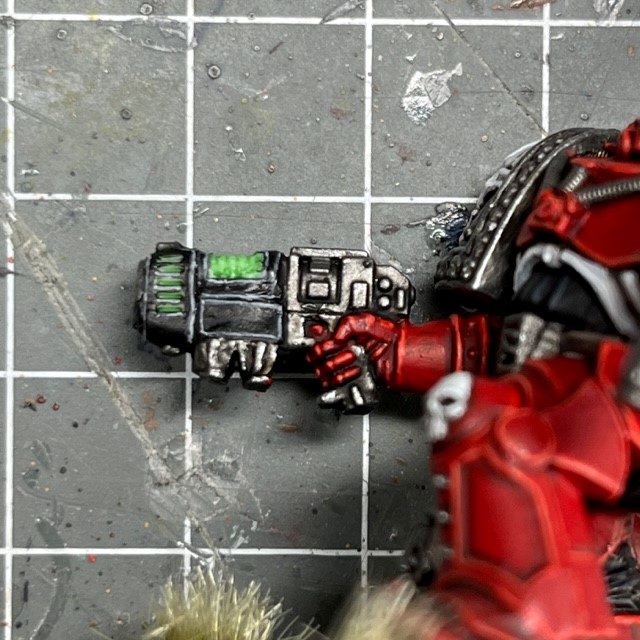
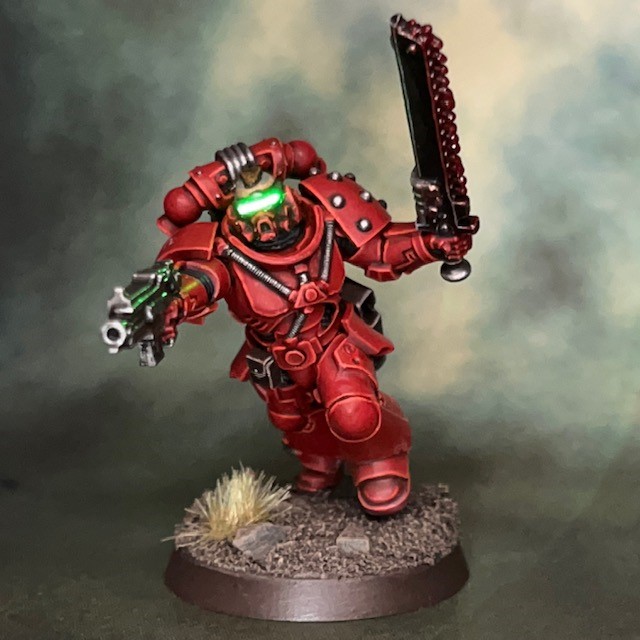
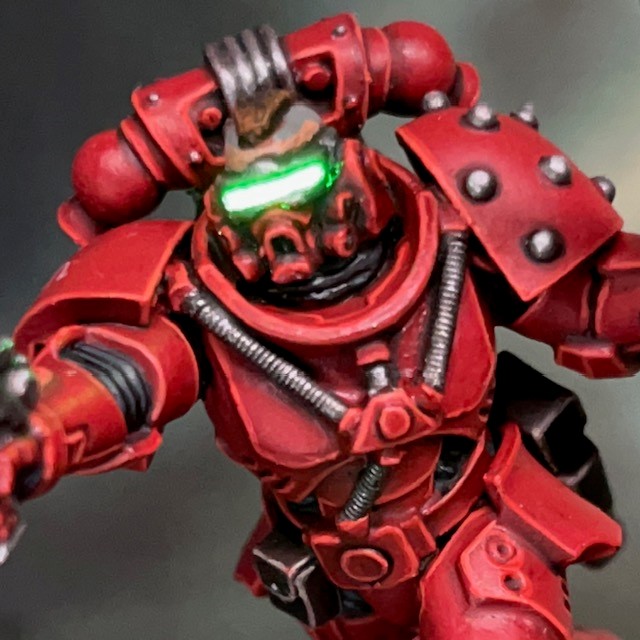
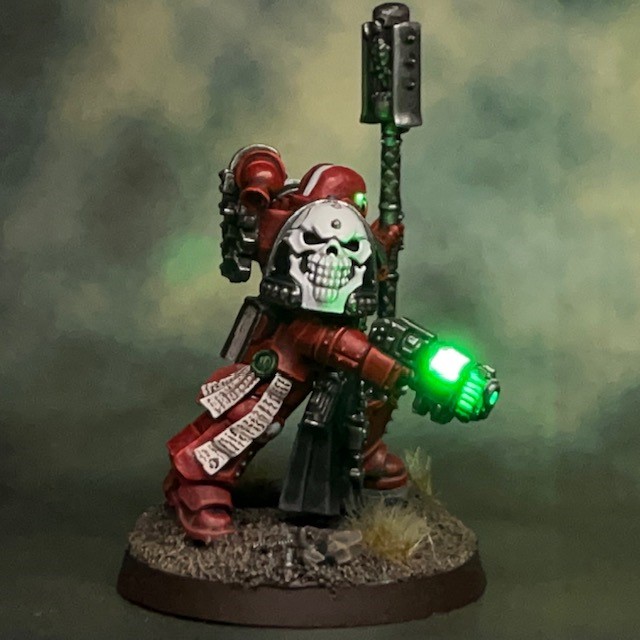
The LED plasma pistol was created using the techniques described in my LED Plasma Weapon tutorial, although in this case I used a TruOpto 1.8mm Green LED instead of the pink LED described in the tutorial. The reason for this is that I am trying to limit the colour pallete of LEDs in this project to only green and yellow. The other slight difference – as seen in the images above – is that I rotated the LED through 90 degrees so that it faced upwards through the plasma coil rather than out of the barrel. This makes the coils a little brighter which I prefer when you can’t really see down the barrel in this pose. The otherwise bare resin of the coils has been given a thin shade of Citadel Biel-Tan Green, just to make it look a little more visually appealing when the LED is switched off, as seen in the right-hand picture above.

Painting (a.k.a. To Bone or Not To Bone?)

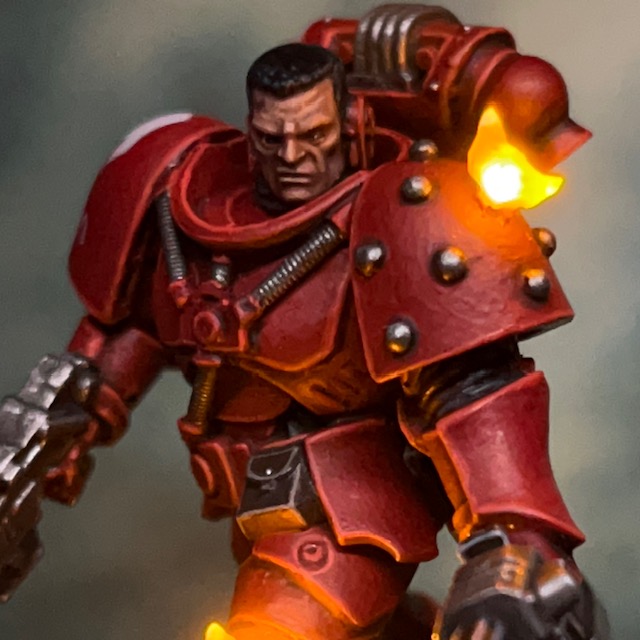
One of the things that delayed me finishing this model was settling on exactly how I was going to paint it. I knew from the start that I wanted to limit the ceremonial “black” colour of the chaplain office to robes and other small areas. My main hang-up was whether to go with a traditional beige colour for the bone-styled areas of the Grimm’s armour, or to stick with Corax White? As you can see the white won in the end. This was because it emulated the original model I had painted, and also it meant I didn’t have to add any more colours to my armour colour palette, as Corax White is already part of the scheme. At first I started painting the whole shoulder pads white (rims and all), but I realised that was a little much and decided to introduce the silver and black so that the shoulders didn’t end up dominating the whole model.

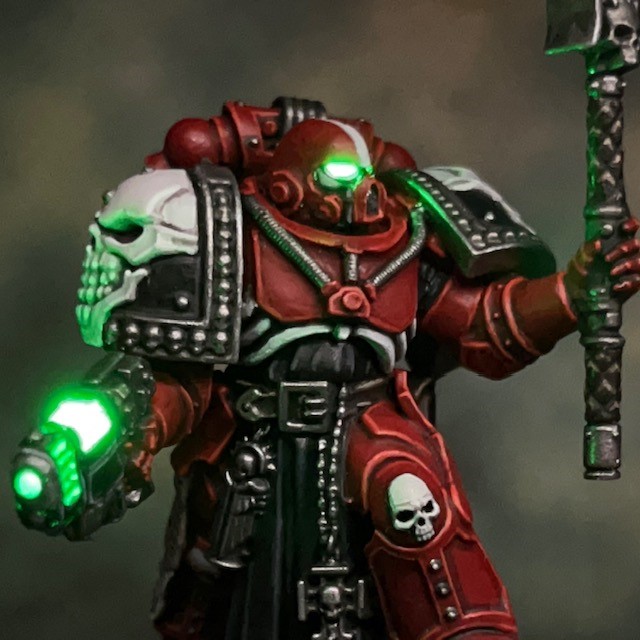
The Caputmori – an eagle with a human skull – became the notorious symbol of the Partisan forces during the War of the False Primarch. The replacement of the twin heads of the Imperial eagle with a single alternative was a clear challenge to the authority of the High Lords. So how did a chaplain of the staunchly loyal Flesh Eaters acquire such a symbol of office? As with so many things in the War of the False Primarch, we are reduced to speculation. Maybe it was taken from a defeated Partisan chaplain as a trophy of conquest? Or perhaps Brother-Chaplian Grimm was simply attempting to “reclaim” this symbol for Pentarchy of Blood? We may never know the truth. But what we can be sure of is that the crozius arcanum did not leave his side for the duration of his recorded engagements during the war.

EXTRACT FROM ‘A TREATISE ON THE WAR OF THE FALSE PRIMARCH’ BY SCRIBE HOWTOPHER BUXCRAFT

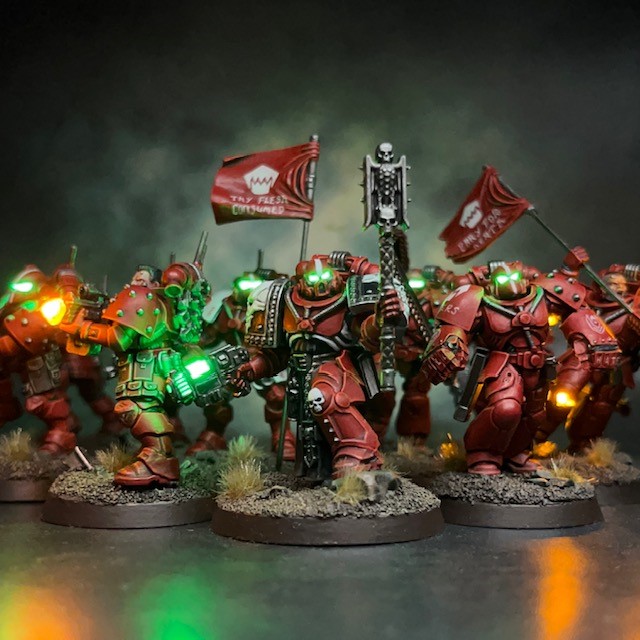
So there we have it, two Troops choices and an HQ. I think that technically counts as a ‘Battle Forged’ army, doesn’t it? That abomination the False Primarch doesn’t stand a chance! Thanks for reading, and I’ll see you again soon for with some more Flesh Eaters.

Brother Dunn, Flesh Eaters Assault Marine

My Flesh Eater project continues this week with Brother Dunn, a chainsword-wielding Assault Intercessor equipped with an LED infra-visor and the fifth member of Assault Squad Levers.

Building & Painting

The design of Brother Dunn is intended to capture the look of Assault Marines with infra-visors and was inspired by the classic Rogue Trader Assault Marine art and model, as seen in this previous article about Brother Talon. I’ve recreated this Rogue Trader-era look using the head of a Space Marine Primaris Incursor and the techniques described in my LED Eye Lens tutorial. The only difference worth noting is that I used a TruOpto 1.8mm Green LED instead of the red LED described in the tutorial. The base model is a Primaris Assault Intercessor that I have modified to wear MkVI armour, in keeping with the War of the False Primarch theme for my Flesh Eaters army.

In this holo-pict we can see Brother Dunn of the Flesh Eaters sporting personal heraldry on his tilt shield. Astartes are granted personal heraldry on ascending to the rank of veteran, or in some cases for acts of extreme personal valour. We can assume the latter is likely the case with Brother Dunn as he is clearly a member of a line unit. The shield displays the classic ‘severed gorgon’s head’ heraldic device. The meaning of heraldry chosen by Astartes is often very personal. We might guess that the defeated gorgon represents the False Primarch, the Abomination himself, and the forward-facing central snake could perhaps be the notorious ‘Vox Volnoscere’? This would then likely mean that the five blood drops dripping from the gorgon’s neck symbolise the Pentarchy of Blood, of which the Flesh Eaters were an integral part. Can his heraldry therefore be read as a direct taunt to the Partisans, or perhaps an oath that Brother Dunn himself would see fulfilled?

Of course, the chances are equally good that Brother Dunn simply chose an image from ancient texts that would appear frightening to his enemies, and there is no deeper meaning than that!

Extract from ‘A Treatise on the War of the False Primarch’ by Scribe Howtopher Buxcraft

The personal heraldry on this model was a bit of an experiment, and I’m fairly pleased with the way it turned out. The tilt shield is a moulded-on part of the torso for this model, so I had to include it. I started by painting another Flesh Eaters symbol in Corax White, but I didn’t like the way it drew the eye away from the model’s face. So I decided to do a freehand design in Evil Sunz Scarlet and Wild Rider Red, my two red highlight colours. This way the heraldry does not immediately draw the eye to it, but there is something rewarding to find when the eye does get there. The gorgon head theme is partially inspired by a John Blanche drawing of a marine with similar heraldry, but I think it fits well with the theme, as detailed above.

The only other thing of note is the bolter. Rules-wise, I will use Brother Talon as a Primaris Assault Intercessor, so he is equipped with a heavy bolt pistol. I didn’t want to spoil the MkVI aesthetic though, so instead I used an Umbra-pattern bolter with a shortened magazine as a visual representation of the heavy bolt pistol.

That’s all for today, and that’s also it for Assault Squad Levers! I’ll be back again soon with some group shots of the unit. Then it will be time to think about some officers to lead this army! As ever, thanks for reading, and please don’t forget you can also follow my work on Twitter and Instagram.

Brother Akerman, Flesh Eaters Assault Marine

Nice try, heretic. Now it’s my turn!

Brother Akerman, Flesh Eaters Assault Marine

My collection of Flesh Eater Assault Intercessors continues to grow. This week I’ve added Brother Akerman, a chainsword-wielding marine with a short temper who doesn’t take kindly to being shot at!

Building & Painting

With Brother Akerman I’ve revisited the LED effect bullet ricochets last seen in Brother Kane. I decided I wanted to give the impression that the whole squad was under fire, not just Kane, which meant someone else needed to step into the line of fire! Akerman’s bullet ricochet effects were achieved using the techniques described in my Simple LED Muzzle Flare tutorial, only with the “flares” coming from the armour rather than a gun barrel. Both LEDs are powered from the same battery. They are connected in parallel with each other and in series with a single 100 ohm resistor and a single switch. In the two images above you can see the exposed LEDs on the left, and then the impact effects after the acrylic gel had been applied, as described in steps 13 – 15 of the tutorial.

As I’ve described previously for other members of this squad, the base model is a Primaris Assault Intercessor that I have modified to wear MkVI armour, in keeping with the War of the False Primarch theme for my Flesh Eaters army. You can read the latest from the War of the False Primarch campaign here. For those that are interested, my painting recipe for the red Flesh Eaters armour can be found in this previous post.  

That’s all for this week, I’ll be back again soon with the final member of this unit! As always, thanks for reading, and please don’t forget you can also follow my work on Twitter and Instagram.

Brother Talon, Flesh Eaters Assault Marine

Death in battle holds no fear for me when it serves the Emperor’s will.

Brother Talon, Flesh Eaters Assault Marine

My Flesh Eater project continues this week with Brother Talon, a chainsword-wielding Assault Intercessor equipped with an LED infra-visor.

Building & Painting

This miniature and the idea of Assault Marines with infra-visors was inspired by the classic model Rogue Trader Assault Marine art and the miniature shown above. For me this is the classic Assault Marine look; fearlessly storming the breach with little more than a pistol, chainsword and faith in the Emperor. Of course this battle brother has a little extra as well, in the form of the infra-visor. As the name suggests, the infra-visor was a piece of equipment that helped the wearer identify the infrared heat signatures of hidden targets. Ideal for spotting potential enemy ambushes in close-quarters fighting and boarding actions!

I’ve recreated this Rogue Trader-era look using the head of a Space Marine Primaris Incursor and the techniques described in my LED Eye Lens tutorial. The only difference worth nothing is that I used a TruOpto 1.8mm Green LED instead of the red LED described in the tutorial. The base model is a Primaris Assault Intercessor that I have modified to wear MkVI armour, in keeping with the War of the False Primarch theme for my Flesh Eaters army.

I’ve added some “gore” to the chainsword using a fairly simple technique. I applied two thick coats of PVA glue to the chainsword – waiting for the PVA to dry after each coat – and then applied a thick coat of Citadel Blood for the Blood God. I also streaked some of this over the side of the blade, hilt, hand and wrist guard. This process is shown in the two pictures above. You may also notice the ‘skull and crossbones’ on the wrist guard. This is a classic piece of heraldry that indicates Brother Talon is seeking an honourable death in battle to prove his faith in the Emperor. If you’re interested, my painting recipe for the red Flesh Eaters armour can be found in this previous post.  

The only other thing of note is the bolter. Rules-wise, I will use Brother Talon as a Primaris Assault Intercessor, so he is equipped with a heavy bolt pistol. I didn’t want to spoil the MkVI aesthetic though, so instead I used an Umbra-pattern bolter with a shortened magazine as a visual representation of the heavy bolt pistol.

That’s all for this week, I’ll be back again soon with more Flesh Eaters. Just two more models to go in this unit, and then I think it’s time for a character or two! As ever, thanks for reading, and please don’t forget you can also follow my work on Twitter and Instagram.

Classic ‘Screamer Killer’ Carnifex

My latest project is an update of the classic ‘Screamer Killer’ Carnifex released by Games Workshop way back in 1992. Although the first Warhammer models I ever bought were Blood Angels, my first full army were the Tyranids. In fact, Tyranids are the only army that I have consistently purchased a codex for in every edition of Warhammer 40K! So it’s a happy coincidence that I finished this on the same week the the 9th edition codex is being released.

Building & Painting

I have many happy memories using this model back in the 90s – mainly in unsuccessful attempts to beat my friend’s Avatar in close combat – but it definitely needed a little TLC after years languishing in a box. As well as paint-stripping and updating my previous ancient paint-job, the other goal of this update was of course to add a little LED magic to create a ‘bioplasma’ effect. I think it almost goes without saying that drilling through the chunky metal leg and body of the Screamer Killer was a lot more onerous than drilling out a plastic Space Marine leg! You can see the route of the wire in the images above. I was influenced by the classic Mark Gibbons artwork shown above, and hopefully you’ll agree that I’ve captured the look. I tried to echo the pose as well, although there’s only so much that can be done with the limitations of a chunky metal model.

The LED bioplasma effect was achieved using the techniques described in my Simple LED Muzzle Flare tutorial, only with a green 0805 chip LED instead of the yellow one listed in the tutorial. Additionally, the acrylic gel was simply painted with Citadel ‘Technical’ Hexwraith Flame instead of the yellow colours listed in the tutorial.

When it came to the painting I wanted to stick fairly close to the original scheme, especially as all my other Tyranid models are in red and bone. I deviated slightly from the classic ‘Eavy Metal scheme for this model by making all the armour plates and all the flesh areas a consistent colour. The original scheme had a bit of a mish-mash of colours in different areas that, in hindsight, didn’t make a lot of sense to me. I also added the mottling to the head to give a bit of visual interest to what is otherwise a large area of flat colour.

As ever, when I list my painting recipes on this blog, I’m not only recording them for those of you who are interested, but also as a reminder for myself! All paints listed are from the Citadel range and are applied over a grey undercoat.

  • Red Flesh
  • Mephiston Red base coat
  • Agrax Earthshade shade
  • Evil Sunz Scarlet highlight
  • Wild Rider Red highlight
  • Bone Armour
  • Zandri Dust base coat
  • Contrast Skeleton Horde shade
  • 50:50 Zandri Dust / Ushabti Bone highlight
  • Ushabti Bone highlight
  • Screaming Skull fine highlight
  • Pink Flesh
  • Corax White base coat
  • Carroburg Crimson shade
  • Emperor’s Children layer
  • Fulgrim Pink highlight
  • Dark Pink Flesh
  • Screamer Pink base coat
  • Drakenhof Nightshade shade
  • Pink Horror highlight
  • Purple Mottling
  • 50:50 Genestealer Purple / Emperor’s Children base coat
  • Genestealer Purple layer
  • Xereus Purple layer
  • Naggaroth Night layer
  • Green Organs
  • Waaagh! Flesh base coat
  • Biel-Tan Green shade
  • Warboss Green highlight
  • Skarsnik Green highlight
  • Yellow Eyes
  • Averland Sunset base coat
  • Agrax Earthshade shade
  • Yriel Yellow layer
  • Rhinox Hide pupils
  • Corax White fine highlight
  • Green Bioplasma
  • Hexwraith Flame base coat
  • Urban Base
  • Mechanicus Standard Grey base coat
  • Nuln Oil shade
  • Dawnstone drybrush
  • Administratum Grey drybrush
  • White Scar drybrush

That’s all for this week, I hope you’ve enjoyed this trip down memory lane – or enjoyed seeing the ‘Screamer Killer’ for the first time if you joined the hobby more recently! Hopefully see you back here again soon. Don’t forget you can also follow my work on Twitter and Instagram.