
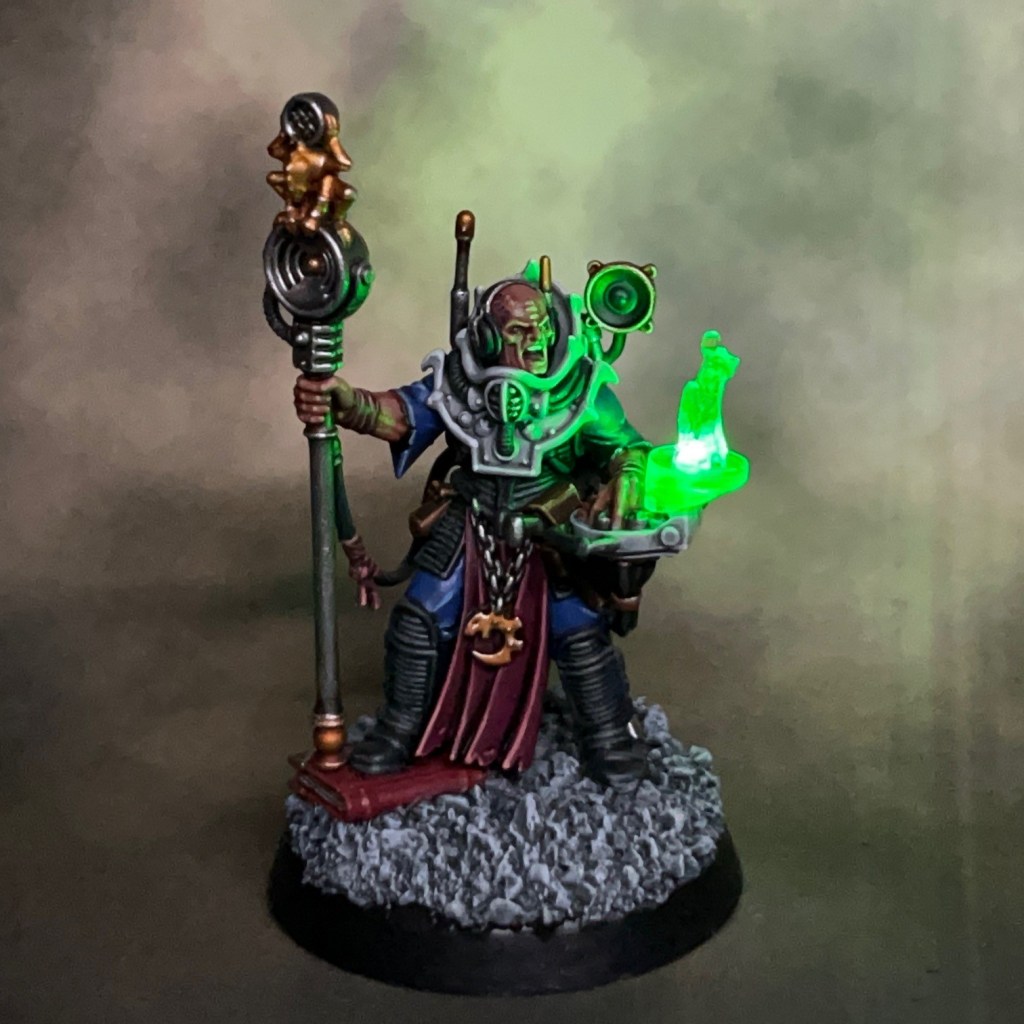
This week’s blog post I’ll be talking about Voval Kreen, my recent Genestealer Cults Clamavus project. This miniature and its LED effects have been specially commissioned by the team at Green Stuff World to show off some of their 3D printed accessories and LED kits. This is my third Green Stuff World commission after Sergeant Khons and Custodian Kalden that I posted earlier in the year.


Modelling
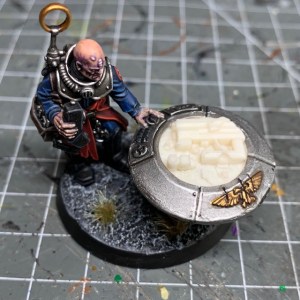
This miniature was intended to demonstrate the Green Stuff World 3D printed Hacker Screens set. When I was asked to incorporate these effects into a miniature, I spent a little time thinking about what would be the best choice. I knew I wanted to specifically use the 3D “hololith” effect, and in the end I settled on the Genestealer Cults Clamavus.


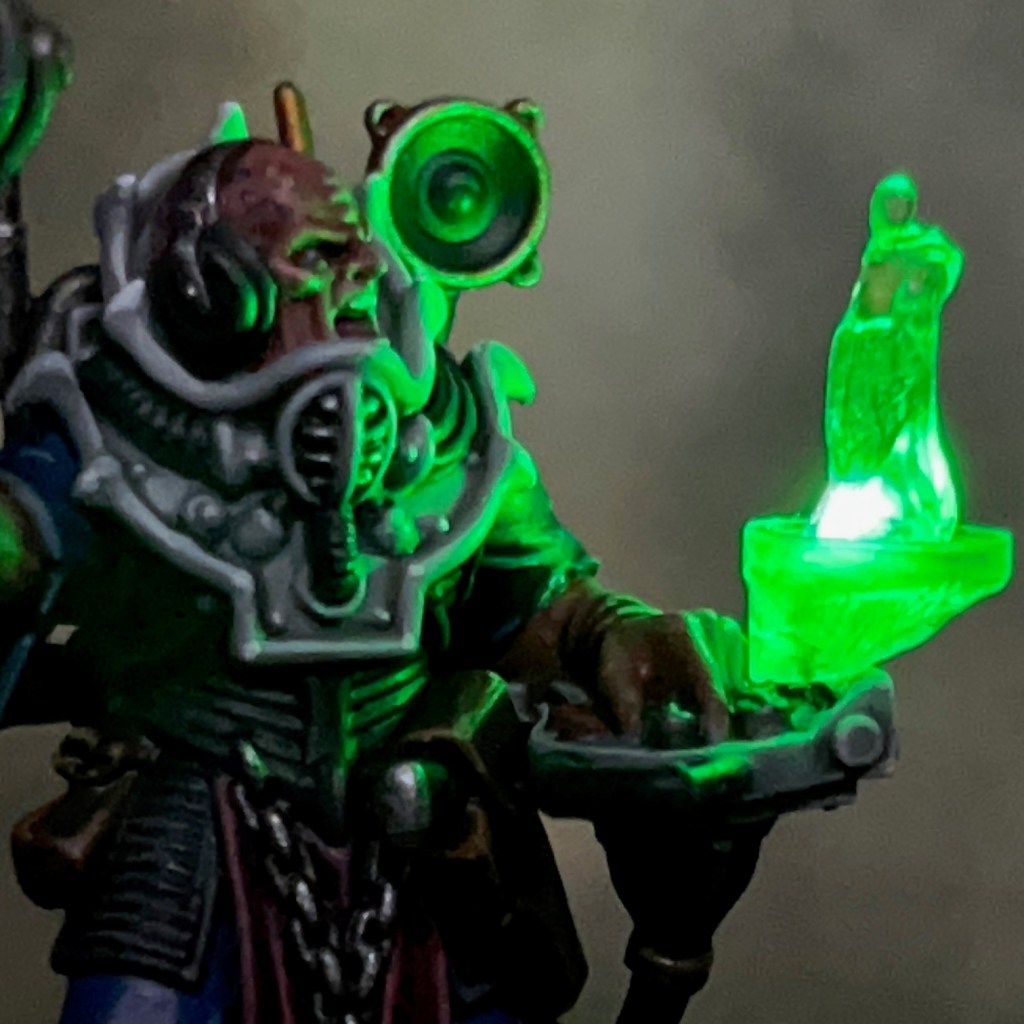
Although the base miniature doesn’t actually include a hololith, the Clamavus is a master of propaganda and the information war when the Genestealer Cults rise up. I thought it would be cool if the Clamavus was portrayed receiving orders from the Cult Magus via hololith – it really helps that one of the components looks like a Magus! Or perhaps the Clamavus is simply amplifying a pre-recorded propaganda speech from the Cult’s spiritual leader. Either way, I thought it would give some awesome battlefield presence to this cool specialist.
As part of the commission I filmed all the stages of the build process, which you can see in the video below.
A full PDF tutorial for this build will be released via Green Stuff World soon. When it is, I’ll add it here and link to it from my tutorial section. In the meantime to get you started here’s a list of all the components and consumables I used.
- 1 x 3D printed Hacker Screens
- 1 x Mini Lighting Set
- 1 x Green LEDs (1mm, pack of 10)
- 1 x Conductive Paint
- 1 x Milliput (standard yellow grey)
- 1 x N52 Neodymium Magnets (3x2mm, pack of 50)
- 1 x Ork Blood
You may also find my older LED Hololith Tutorial interesting, which shows a similar process applied to a Space Marine using slight different techniques and components.
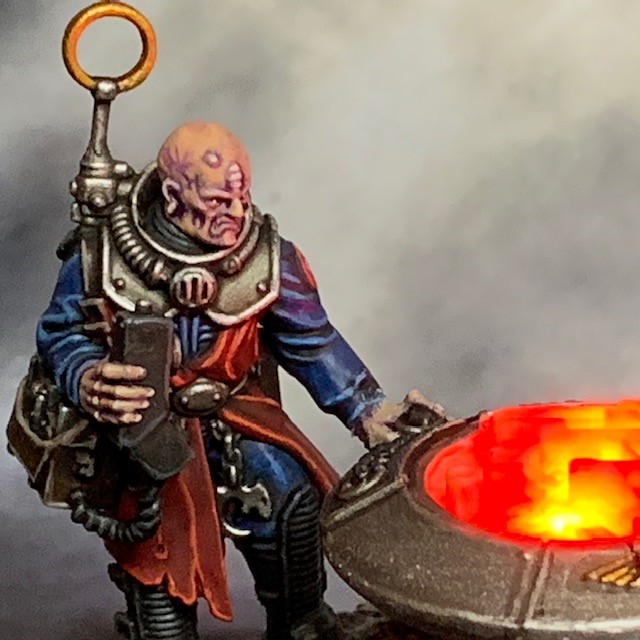
Painting

I’ve gone back and forward on my preferred Genestealer Cults colour scheme over the years. But after sitting down and looking through various pieces of artwork and ‘Eavy Metal models from back in the day, I think I’ve finally settled on a scheme I’m actually happy with. The key colours are listed below.
- Light Grey Armour
- Grey Seer base coat
- Apothecary White shade
- Nuln Oil Shade in deepest recesses
- Ulthuan Grey highlight
- White Scar dot highlight
- Blue Robes
- Macragge Blue base coat
- Nuln Oil shade
- Hoeth Blue highlight
- Fenrisian Blue fine highlight
- Purple Robes
- Screamer Pink base coat
- Nuln Oil shade
- Pink Horror highlight
- 50:50 Pink Horror:Cadian Flesh fine highlight
- Cadian Flesh dot highlight
- Gold Equipment
- Retributor Armour base coat
- Reikland Fleshshade
- Runefang Steel highlight
The skin was a slightly simplified version of my Pale Skin recipe. I skipped the three glazes in the recipe and instead glazed 25:25:50 Xereus Purple, Bugman’s Glow, Lahmian Medium from the eyes downwards. I also added some mottling using Naggaroth Night and Genestealer Purple. The base follows the ‘urban’ scheme used for my Tyranids and detailed in this post.
That’s all for today, I hope you enjoyed this miniature and the demonstration of the Green Stuff World kits! Thanks very much for reading, and please remember you can also find me sharing my work on Instagram, Threads, Twitter/X, Bluesky and Mastodon.


