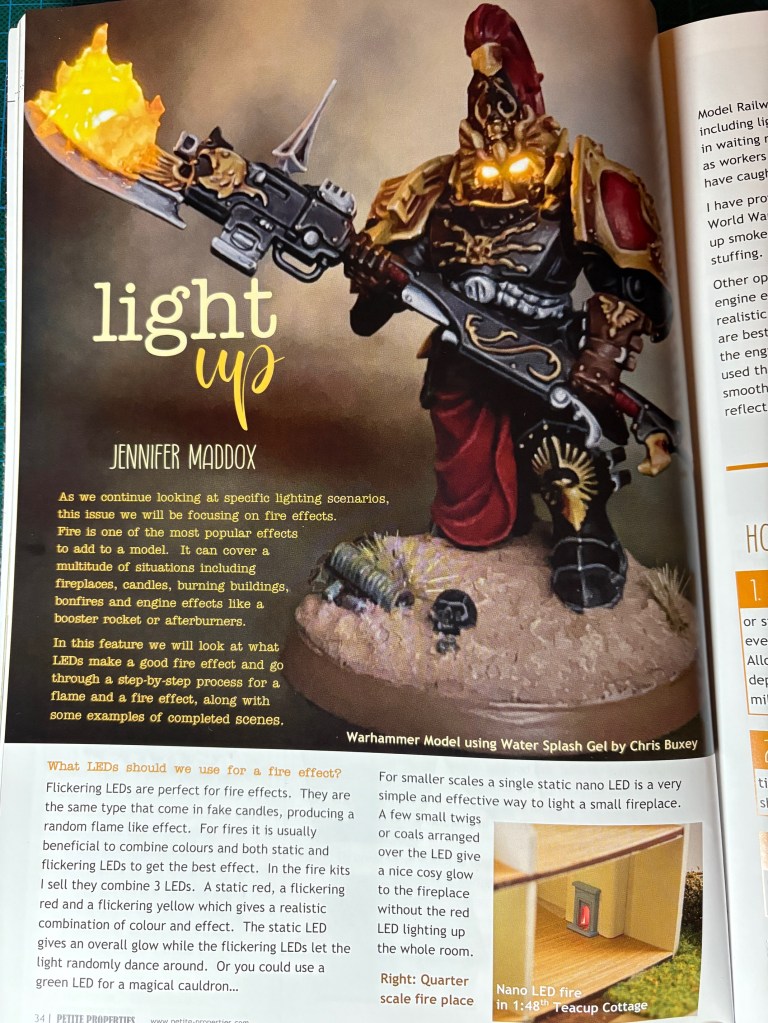
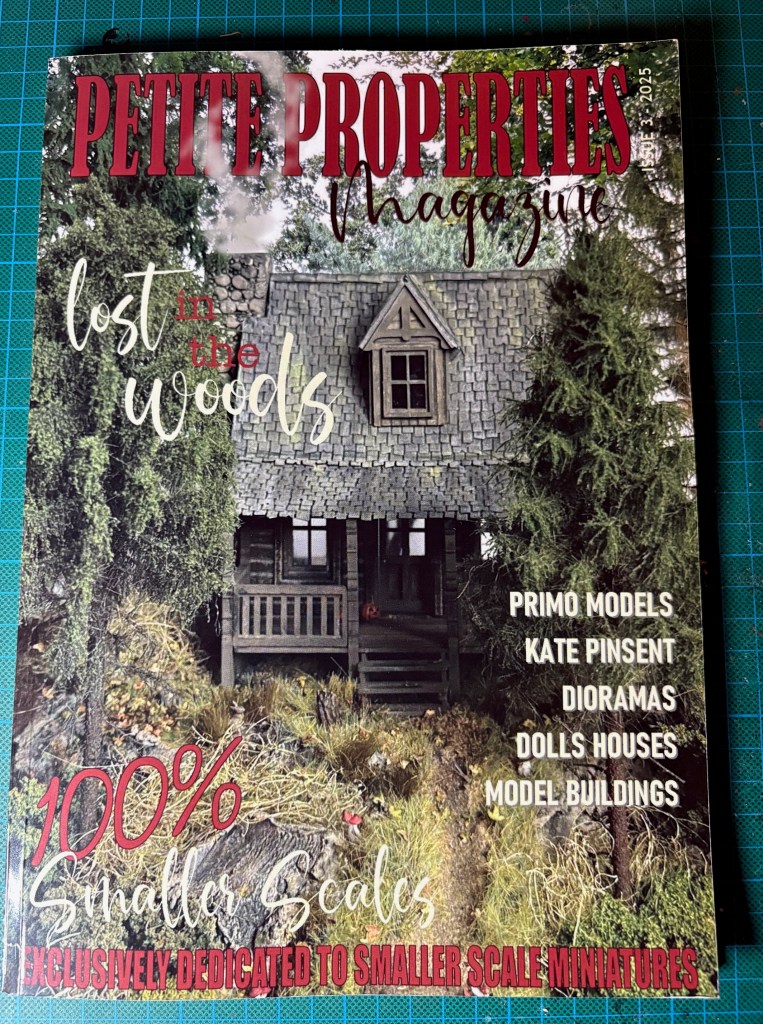
I have some fun news this week – you can find some of my LED miniatures appearing in Issue 3 of Petite Properties Magazine. Jennifer Maddox, owner of the Small Scale Lights webstore (where I purchase many of my specialist LEDs), has been writing a series of articles on miniature LED effects for this magazine. She approached me to ask if she could use images some of my miniatures in her article about LED flame effects, and I was happy to oblige! You can see pictures of Helios Pho, Custodian Shadowkeeper, and my Kruleboyz Gutrippaz illustrating the article.
Issue 3 is on sale now in print and digital formats. It was an interesting read, not just for Jennifer’s thoughts on LED fire effects, but much of the discussion on constructing miniature buildings is very applicable to wargaming terrain. I particularly enjoyed the article on the graveyard diorama by themirthfulminiaturist.
That’s all for today, thanks very much for reading, and please remember you can also find me sharing my work on Instagram, Threads, Bluesky and Mastodon. Or if you prefer you can subscribe to my website by entering your email in the box below to receive updates whenever I post a new blog article or tutorial.
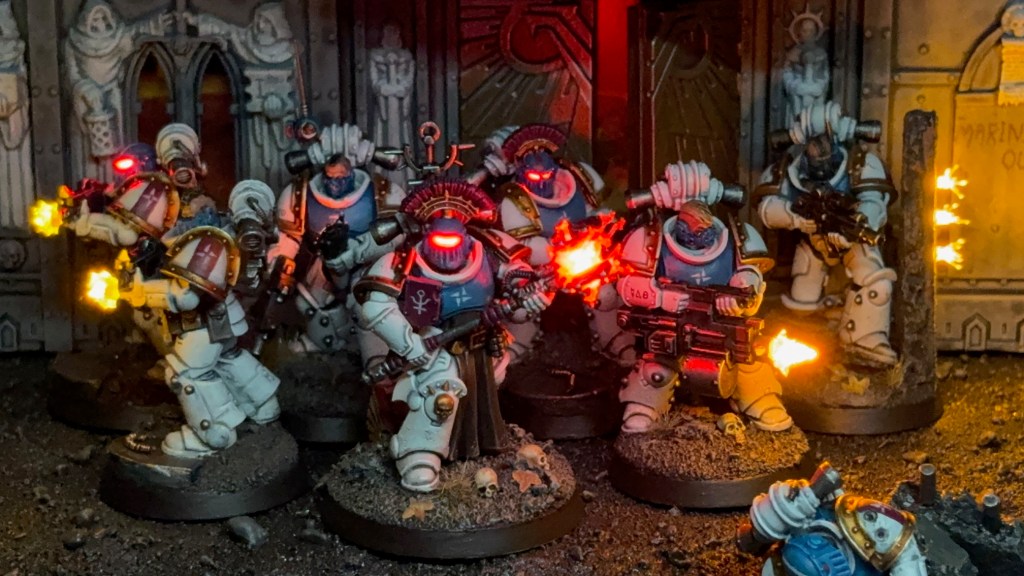
This week I’m finishing off my series of articles about the Silver Stars with some group photos of Kill Team Antimony. As regular readers may recall, the Silver Stars are the mysterious chapter leading the Partisan forces in the War of the False Primarch. This projects began as a few Silver Stars miniatures to decorate my Flesh Eaters2023 Armies on Parade board, before growing into a project in their own right.
Kill Team Antimony were first documented in Othodox records during the clandestine skirmishes of the Sorrowful Years that marked the midpoint of the war. Identified only by the alchemical symbol for Antimony displayed on their pauldrons, the actions of this squad were noted throughout the remainder of the conflict, most significantly during the Third War of Coldforge and the Siege of the Myrean League Shieldworlds. But one must wonder how many of their most successful actions were not recorded at all…
EXTRACT FROM ‘A TREATISE ON THE WAR OF THE FALSE PRIMARCH’ BY SCRIBE HOWTOPHER BUXCRAFT
Kill Team Antimony will follow the Angels of Death team rules. I will use Resolute as the primary chapter tactic to represent their determination and loyalty to the cause of their ‘Primarch’. Their secondary chapter tactic will be Sharpshooter to represent the use of older pattern Phobos bolters and disciplined bolter drills within their pseudolegion.
Below I’ve collected some close-up images of the individual squad members, as well as links to the original blog posts about how each miniature was built and painted, and how their LED effects were achieved. Normally I give my miniatures individual names to enhance the narrative, especially in small games like Kill Team. But I deliberately haven’t done that with the Silver Stars as they’re supposed to be of mysterious origins and I didn’t want to humanise them. This is also why there are no bare heads in the squad – you’ll notice everyone is either wearing a helmet or a mask.
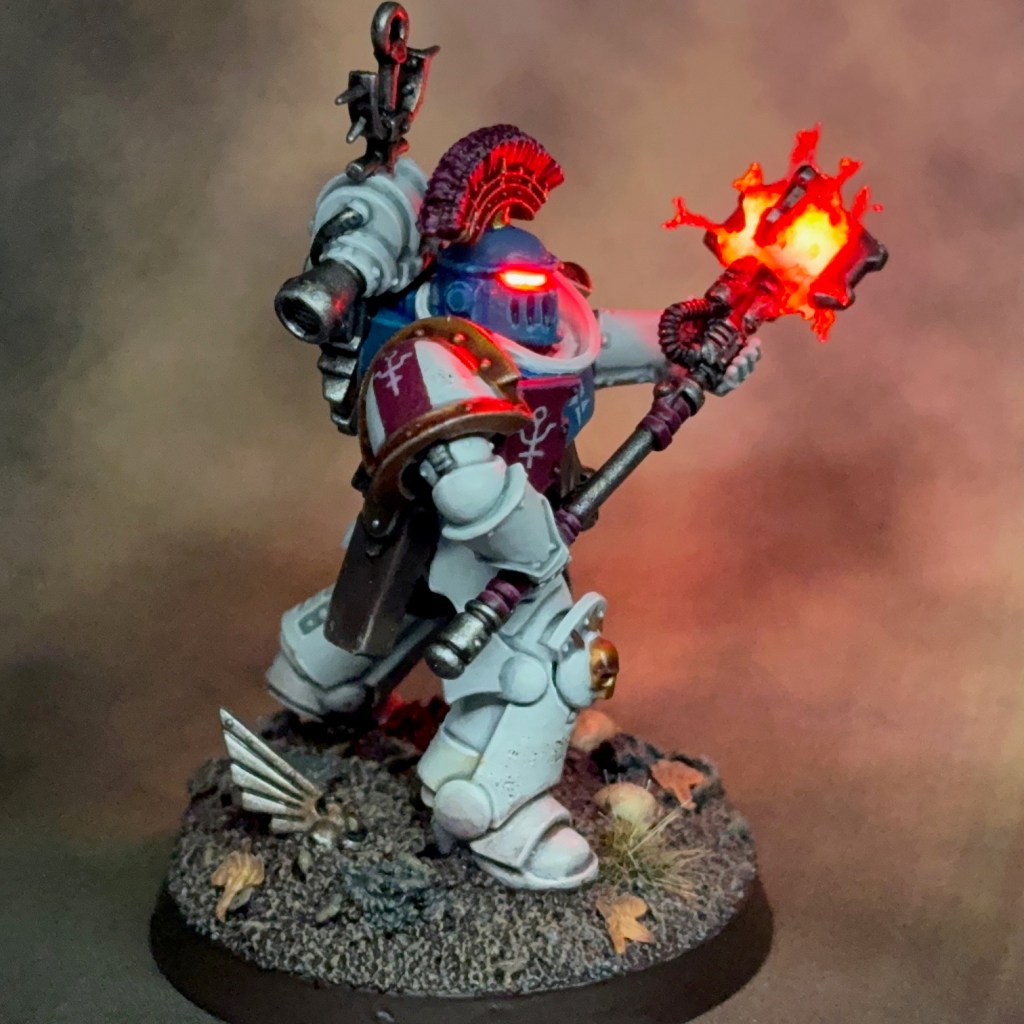
Line Captain Athimar
The Line Captain codenamed ‘Athimar’ was the leader of Kill Team Antimony. In game terms he will counts as a ‘Space Marine Captain’ with power fist and plasma pistol. The original post about this model can be found here.
Silver Stars Corporal
This unidentified Corporal was Athimar’s second in command and sometimes led the unit in his absence. This miniatures counts as an ‘Intercessor Sergeant’ with bolt rifle and chainsword. The original post about this model can be found here.
Silver Stars Tactical Legionary
This Tactical Legionary wears armour of mysterious provenance, seemingly incorporating elements of many different marks of power armour. He counts as an ‘Intercessor Warrior’ with bolt rifle. The original post about this model can be found here.
Silver Stars Tactical Legionary
This Tactical Legionary uses a Phobos-pattern bolter with unknown markings, possibly kill signifiers. He counts as an ‘Intercessor Warrior’ with bolt rifle. The original post about this model can be found here.
Silver Stars Tactical Legionary with Auspex
This Tactical Legionary carries a variety of equipment that seems to covers both the role of both vox and auspex operator, perhaps making him something of a signals specialist. He counts as an ‘Intercessor Warrior’ with bolt rifle and auspex equipment. The original post about this model can be found here.
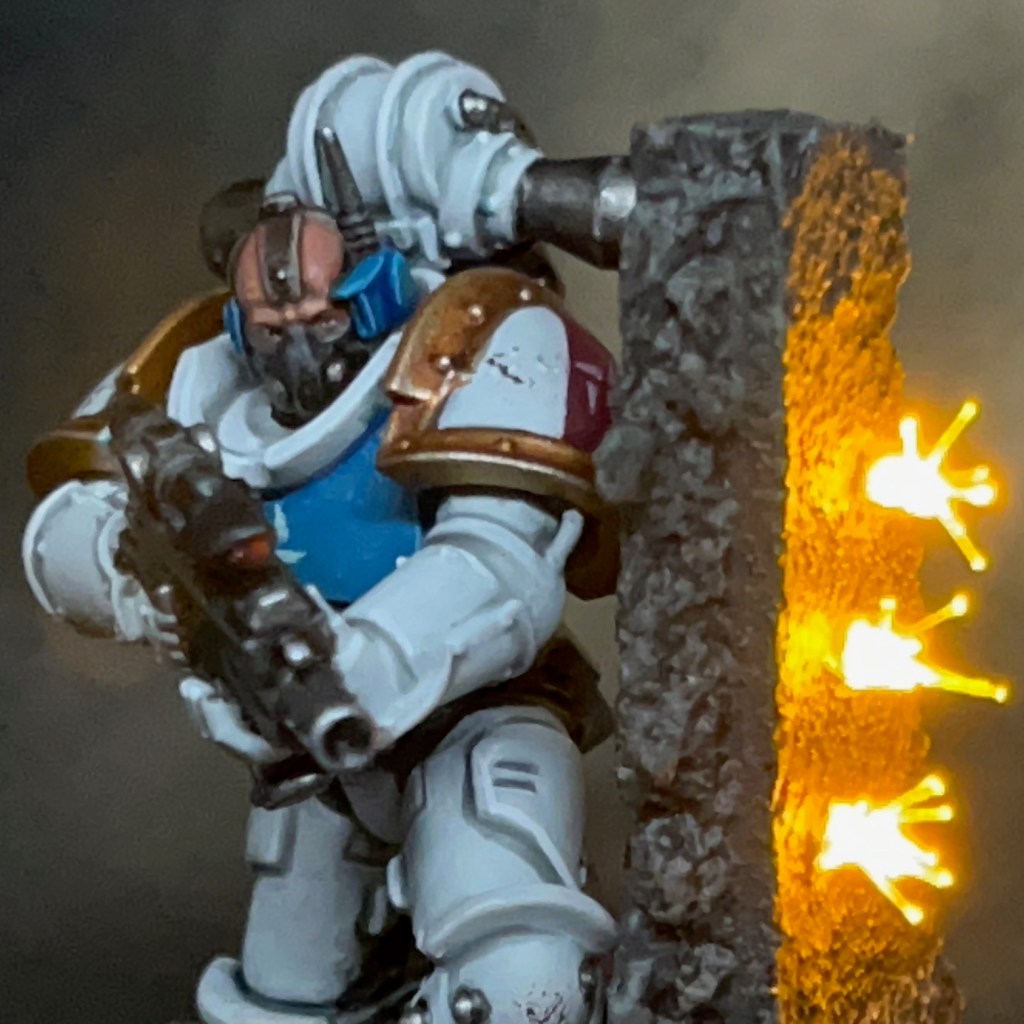
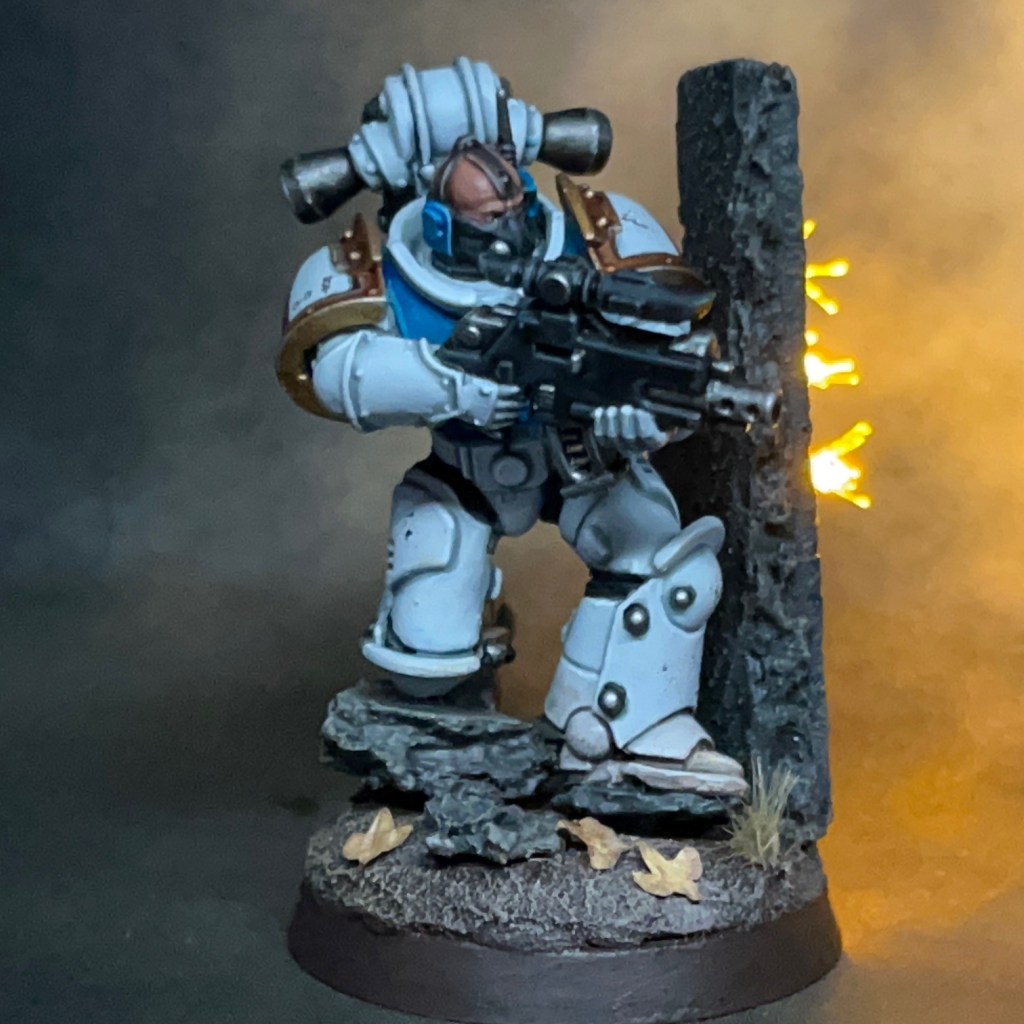
Silver Stars Tactical Legionary Marksman
This Tactical Legionary has an optical scope of a type far more advanced than would typically be seen mounted on this pattern of bolter. He counts as an ‘Intercessor Warrior’ with stalker bolt rifle. The original post about this model can be found here.
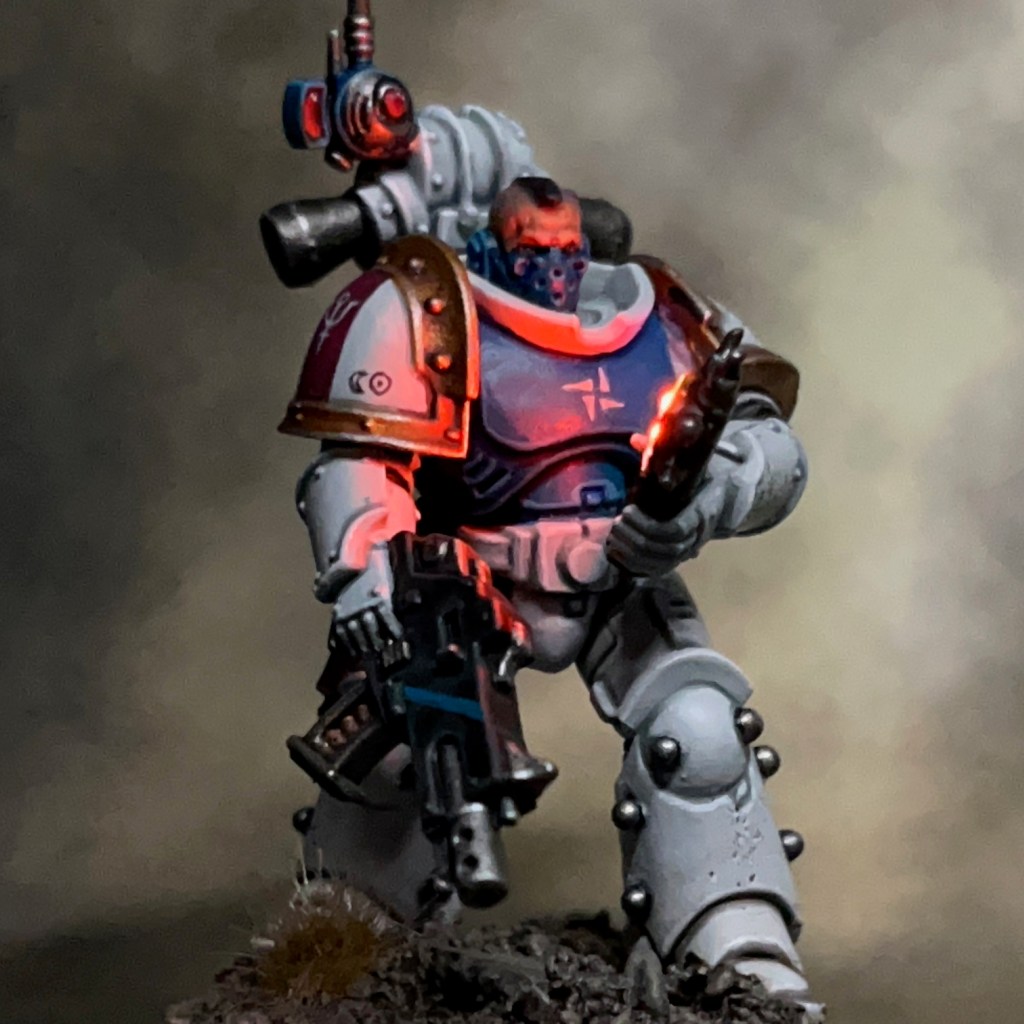
Silver Stars Heavy Gunner
This Tactical Legionary carries a Voss-Incarnadine pattern heavy bolter. The built-in suspensors make it comparatively easy for use in long duration deployments. This miniature counts as a ‘Heavy Intercessor Gunner’ with heavy bolter. The original post about this model can be found here.
It feels good to wrap up this project and complete ones of my hobby goals for 2025. I think I’ve thoroughly scratched the Silver Stars “creative itch”. Now it’s on to the next project! As always, thanks very much for reading, and please remember you can also find me sharing my work on Instagram, Threads, Bluesky and Mastodon. Or if you prefer you can subscribe to my website by entering your email in the box below to receive updates whenever I post a new blog article or tutorial.
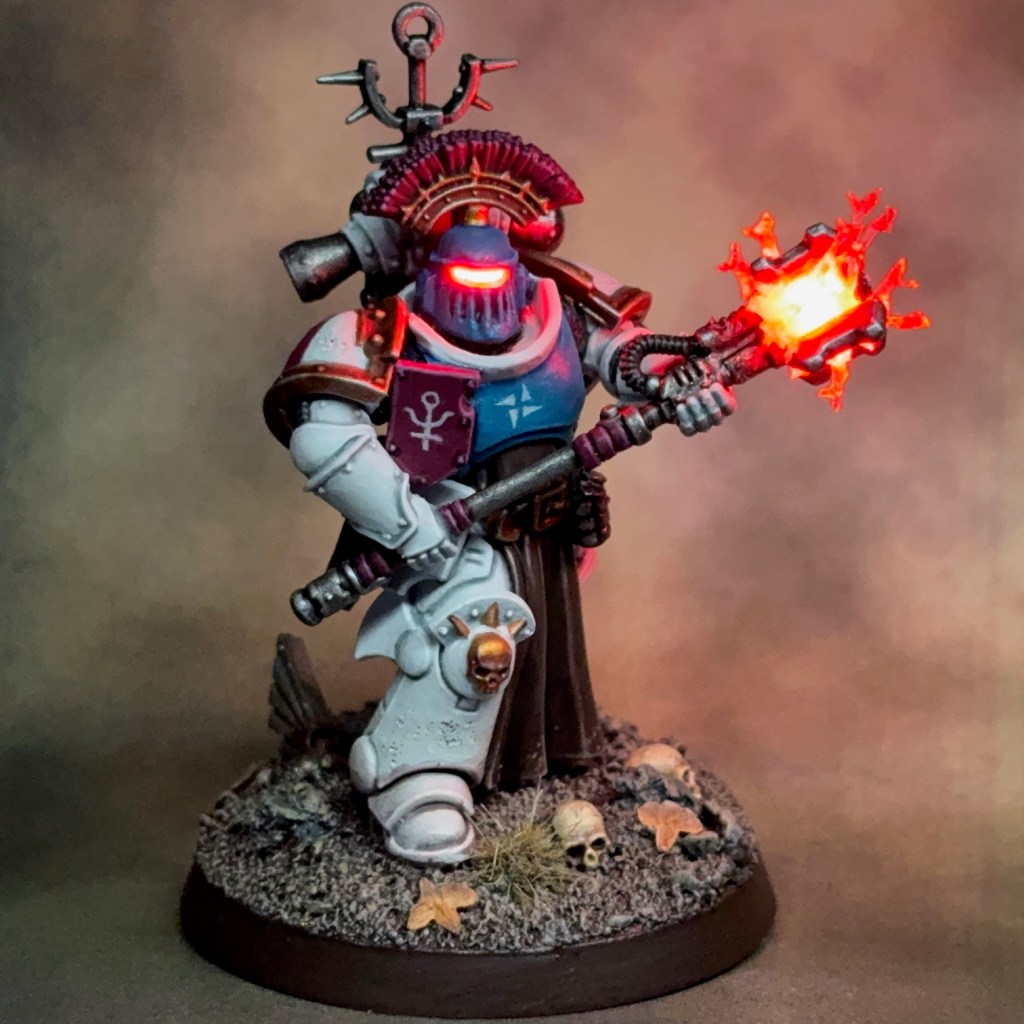
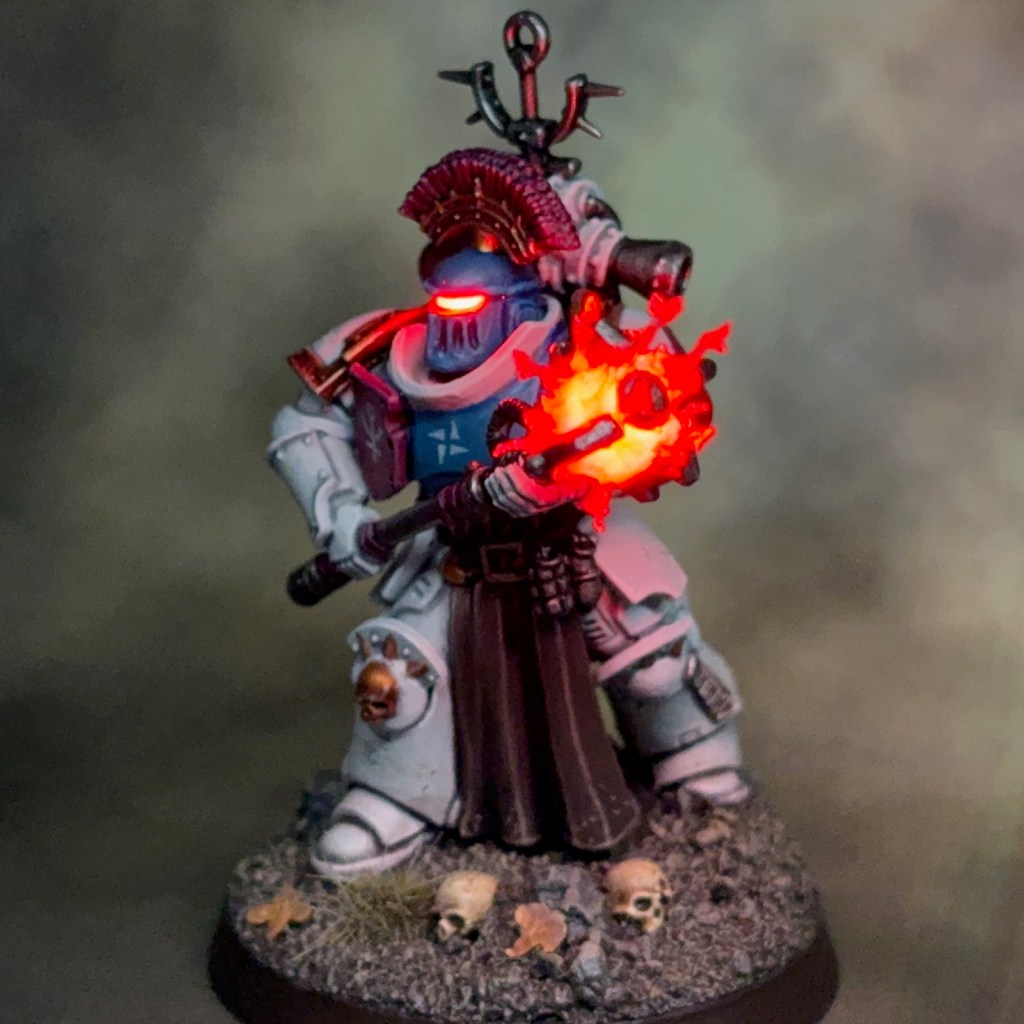
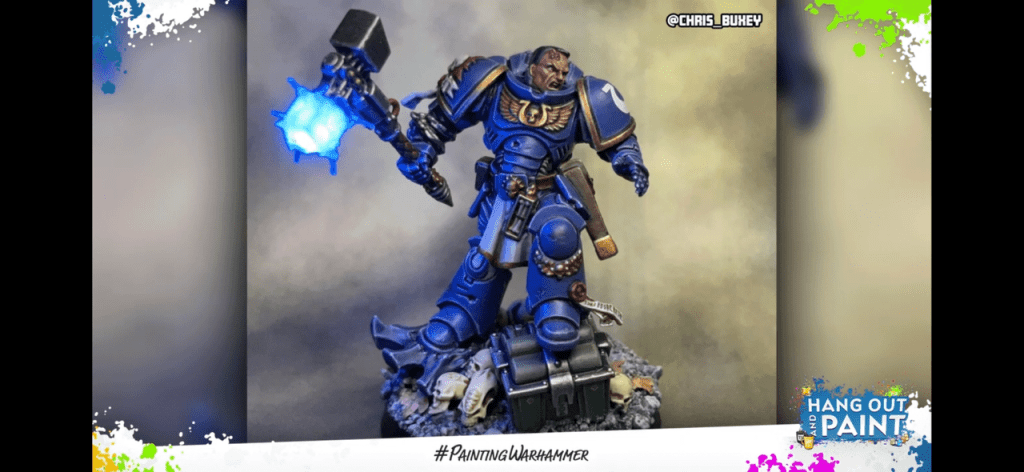
This week I’ve finally finished my Silver Stars Kill Team with the addition of a Captain to the roster. For those who are new to my blog, the Silver Stars are the mysterious chapter leading the Partisan forces in the War of the False Primarch. This miniature will take the role of a ‘Space Marine Captain’ in my Silver Stars Angels of Death Kill Team, known by the code name of ‘Squad Antimony’.
Modelling
As with all my previous Silver Stars, this marine is built using a Primaris marine body and legs, in this case from a Bladeguard miniature. The arms, pauldrons, backpack and heavy bolter are from the previous version of the plastic Legion MkIII Tactical Squad set.
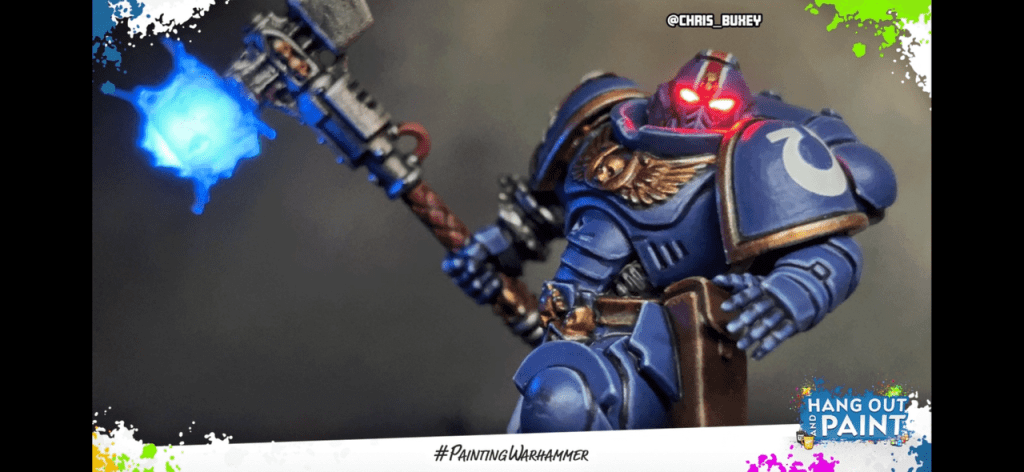
The Kill Team rules require the Space Marine Captain to be armed with a power fist and plasma pistol, but I decided to have a two-handed power mace to ‘count as’ a power fist. The mace comes from the Legion Melee Weapons Upgrade Set, with the haft extended to turn it from a one-handed weapon into a two-handed weapon. The LED effects in the mace were created using the same techniques I used for Lieutenant Titus’ thunder hammer as described in this post. The LED – also a TruOpto OSHR7331A-KL 1.8mm Red LED – is connected in parallel with the helmet LED to the same coin cell battery in the base.
As mentioned above, this miniature is also armed with a plasma pistol. I did consider adding an illuminated plasma pistol, but I decided that would steal focus from the power mace, so I settled on a holstered pistol at his waist.
Captain Athimar’s Iron Halo has been re-modelled into the shape of the alchemical symbol for Antimony, a design that you can also see echoed on his pauldron, tilt shield, and of course repeated on the other members of Squad Antimony.
Captain Athimar was the Line Captain of Squad Antimony during this terrible conflict. The rank is believed to be the equivalent of a captain of the lesser orders, as would have been found in the Legions of old, carrying more authority than a sergeant, but with no wider chapter responsibilities. All available pict-captures show him wielding a power mace, a popular weapon among the Silver Stars and often seen as an emulation of the crozius-like weapon carried by the False Primarch. Other than that, precious little is known about this individual – even the moniker “Athimar” is a code name assigned by Orthodox lexicographers.
EXTRACT FROM ‘A TREATISE ON THE WAR OF THE FALSE PRIMARCH’ BY SCRIBE HOWTOPHER BUXCRAFT
Painting
The paint recipes I used for Captain Athimar are the same as those used for the rest of the Kill Team. You can find my Silver Stars paint recipe in this post, plus this post which expands on techniques for painting Silver Stars insignia.
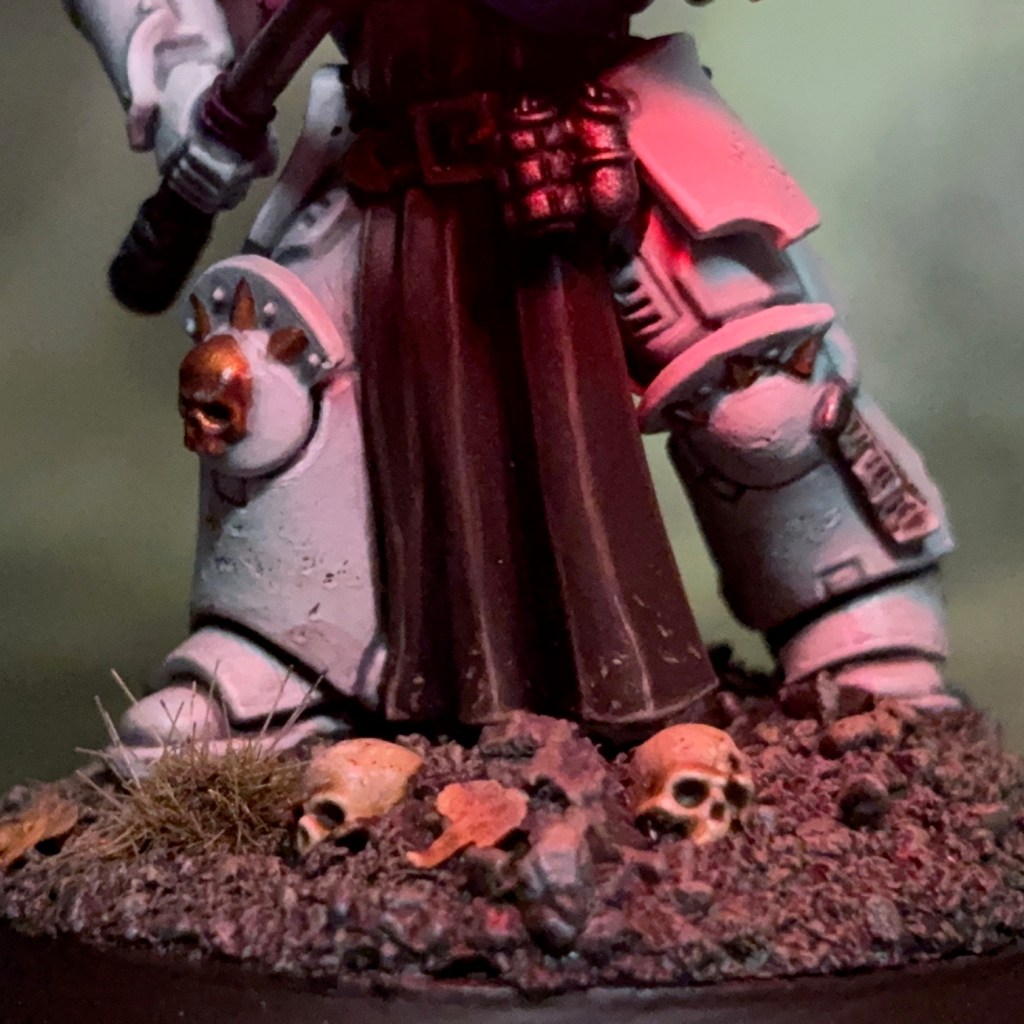
When it came to painting the tabard, my initial instinct was to paint it the same rose colour that is used for spot colours – like the helm crest and pauldron banding – elsewhere in the Silver Stars scheme. But I was concerned that such a large area of this vivid colour may have overwhelmed the rest of the paint scheme, particularly as it also features prominently on the tilt shield. I decided to look at some other Silver Stars painted by Apologist to see how he had approached tabards. I soon realised that none of Apologist’s Silver Stars had tabards or loincloths, but there were plenty of leather pteruges. So I settled on a dark leather for the tabard. This had the advantage of being a relatively neutral colour and therefore not too overpowering to the rest of the scheme. It also has the benefit of giving Athimar a workman-like appearance – he is a captain of the lesser orders, after all! – and plays with your expectations regarding what a space marine should look like, a common theme with the Silver Stars.
I hope that was an interesting insight into the making of Captain Athimar. I’ve had the concept for this miniature in my head since about this time last year, so it’s good to finally bring it to life. Back in January, I declared that one of my hobby goals for 2025 was to finish my Silver Stars kill team, and with this final member complete I can now tick that off the list!
I’ll be back again soon with some group photographs and and a blog post looking at the team as a whole. As ever, thanks very much for reading, and please remember you can also find me sharing my work on Instagram, Threads, Bluesky and Mastodon.
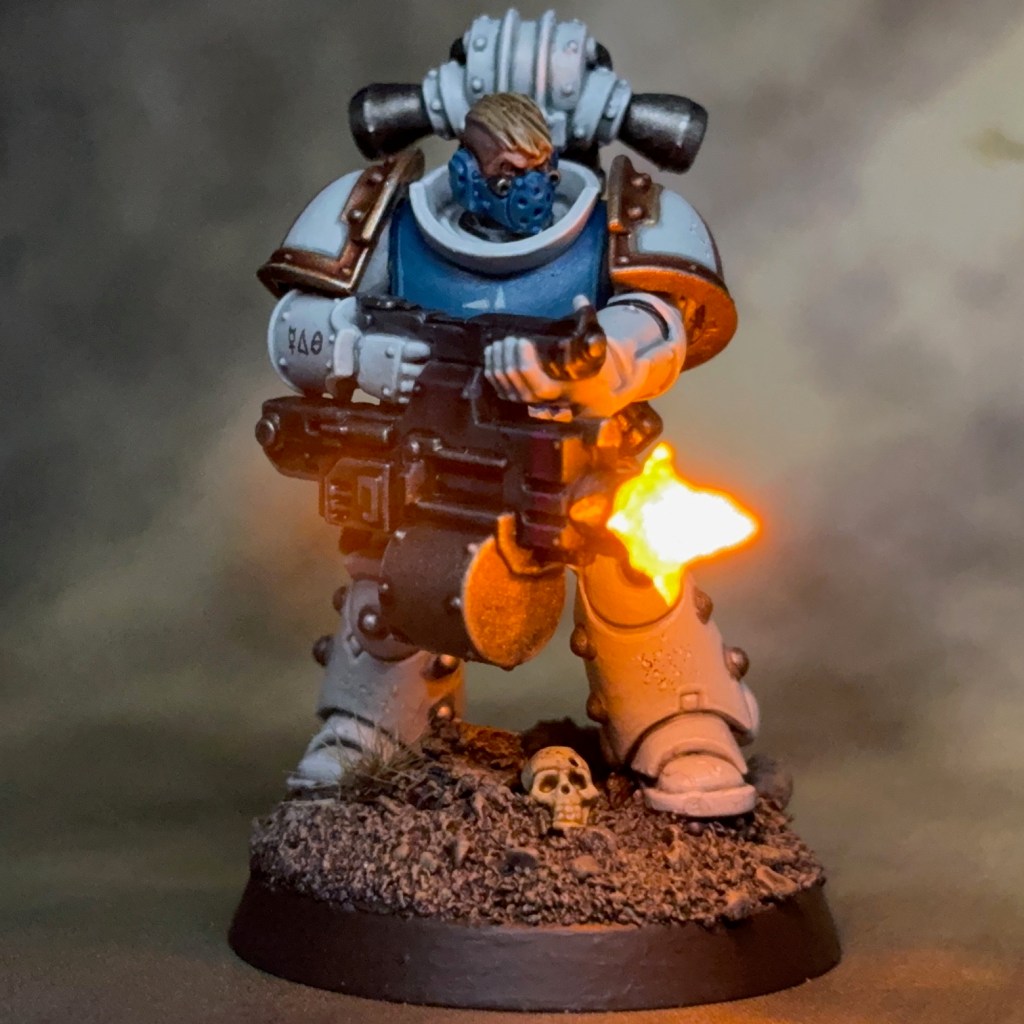
This week I’ve added to my growing Silver Stars Kill Team with a heavy bolter gunner. As regular readers may recall, the Silver Stars are the mysterious chapter leading the Partisan forces in the War of the False Primarch. This miniature will take the role of ‘Heavy Intercessor Gunner’ in my Silver Stars Angels of Death Kill Team.
Modelling
As with all my previous Silver Stars, this marine is built using a Primaris marine body and legs. The arms, pauldrons, backpack and heavy bolter are from the previous version of the plastic Legion MkIII Tactical Squad set. To give the legs a more “antiquated” look, I added Mixed Micro Glass Balls from Green Stuff World as armour studs on the legs.
The head is from the Horus Heresy Melee Weapons Upgrade Set. As I’ve mentioned previously, all of my Silver Stars are either wearing helmets or rebreather masks that cover the lower half of their face. I want the members of the Kill Team to be anonymous to add to the sense of mystery surrounding their chapter.
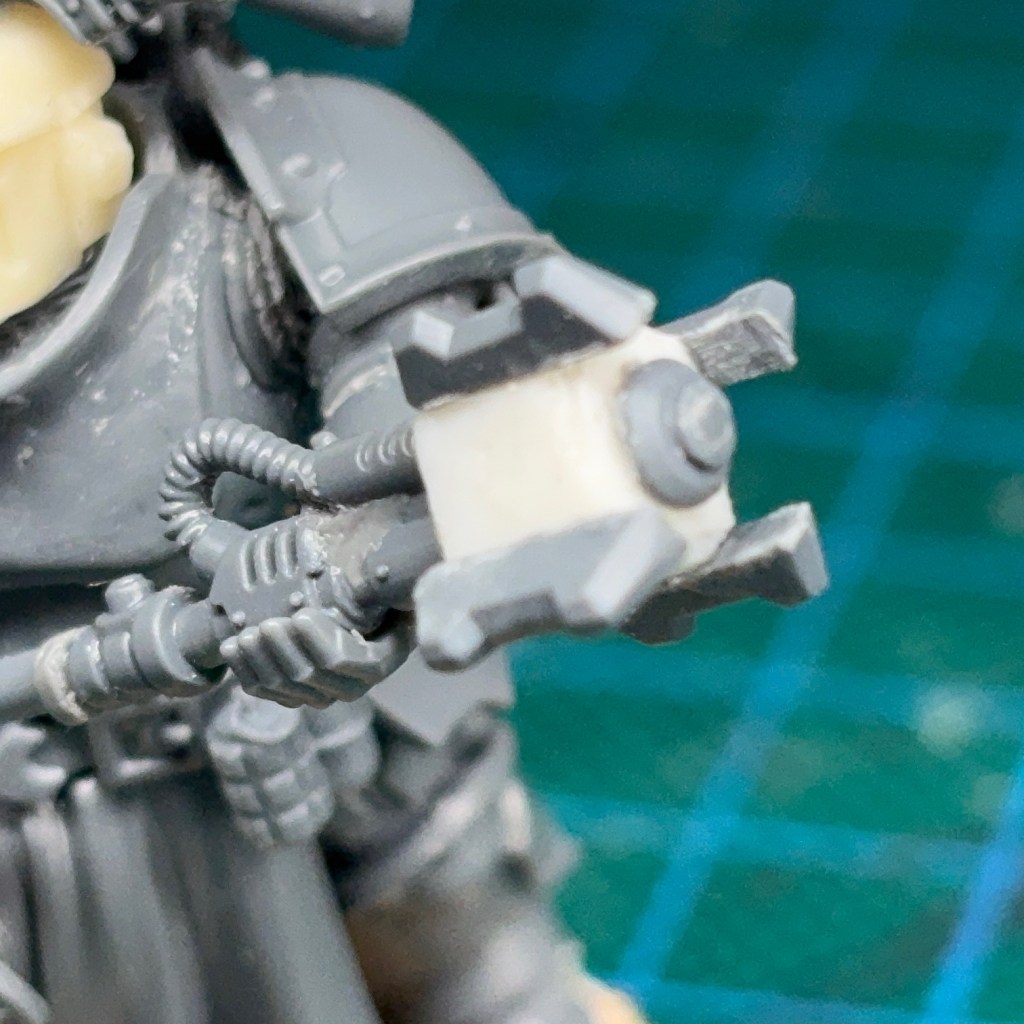
The LED techniques used here are based on my Simple Muzzle Flare tutorial, only using a TruOpto OSHR7331A-KL 1.8mm Yellow LED and a 20 ohm resistor instead of the smaller 0805 SMD chip LED specified in the tutorial. I used a larger LED so that the heavy bolter muzzle flare was larger than the bolt gun muzzle flares that already exist on other miniatures in the squad. You can see how the LED was integrated into the heavy bolter in the images above. A larger LED also requires a larger muzzle flare sculpted around it. As mentioned in Steps 14 – 16 of the tutorial, the Water Splash Effect Gel used to construct the muzzle flare should be built up in thin layers and allowed to dry between applications. This is especially true for this larger flare.
Painting
I don’t have anything new to discuss on the painting techniques used for the miniature, as I’m using a well establish recipe that I’ve used for the rest of the Kill Team. You can find my Silver Stars paint recipe in this post, plus this post which expands on techniques for painting Silver Stars insignia.
Back in January, I mentioned that one of my hobby goals for 2025 was to finish my Silver Stars kill team. While I now have six members of the team – which is technically enough – there is still one final member of the team on the way…
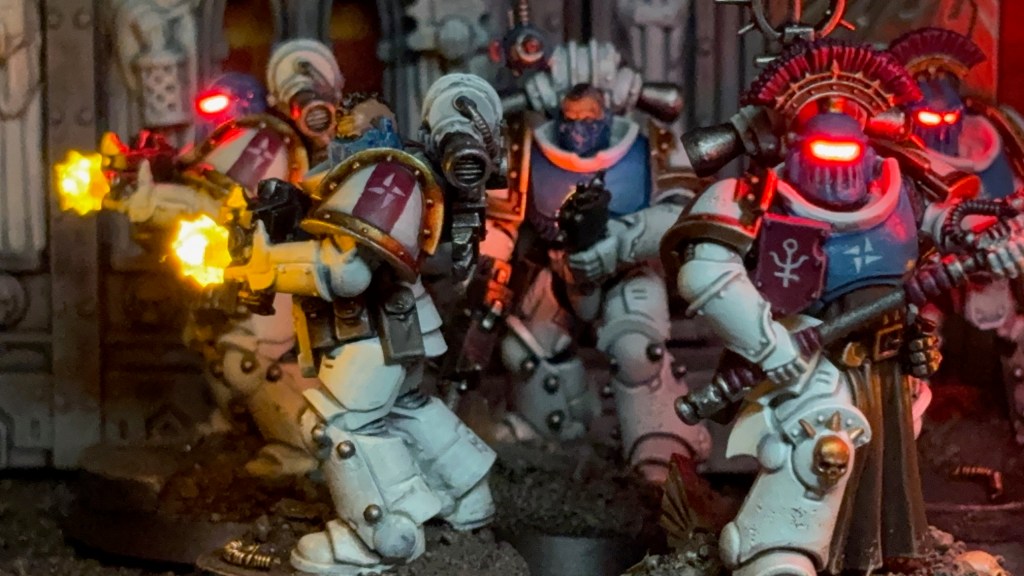
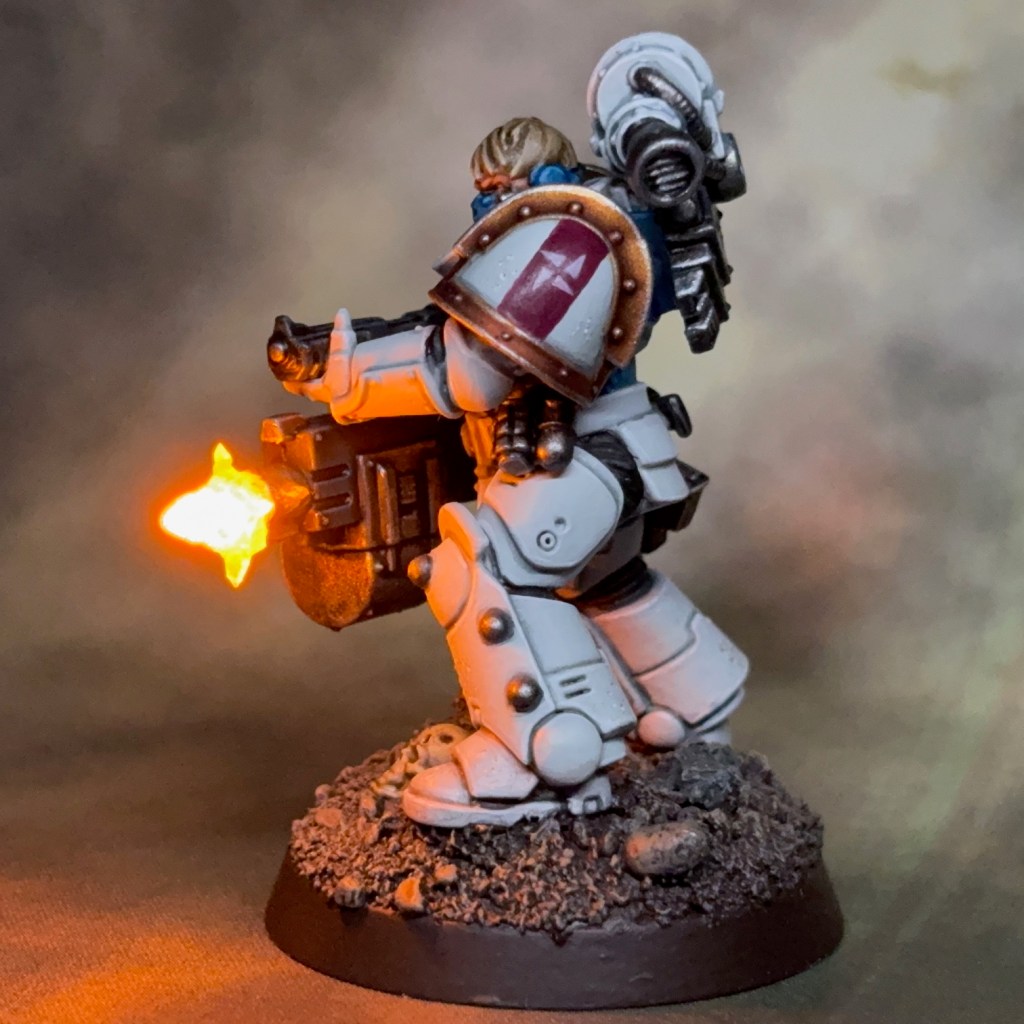
As always, thanks very much for reading, and please remember you can also find me sharing my work on Instagram, Threads, Bluesky and Mastodon. I will leave you with a shot of the Heavy Gunner and his Marksman battle brother engaging the enemy in a deadly firefight!
Yesterday evening I was lucky enough to have one of my models make it onto the Warhammer TV Twitch channel again!
Lieutenant Titus featured alongside the work of other hobbyists on yesterday’s ‘Hang Out and Hobby – March for Macragge 2025’ episode on Warhammer TV (the Friday 4th April episode, at around the 1 hour 36 minute and 20 seconds mark, if anyone would like to see it).
It’s always an honour to have had my work exhibited in this way, and a big thank you to Simon, Nick, and the rest of the Warhammer Community Team for their kind words about this miniature!