Flesh Eaters Terminator Squad ‘Naismith’

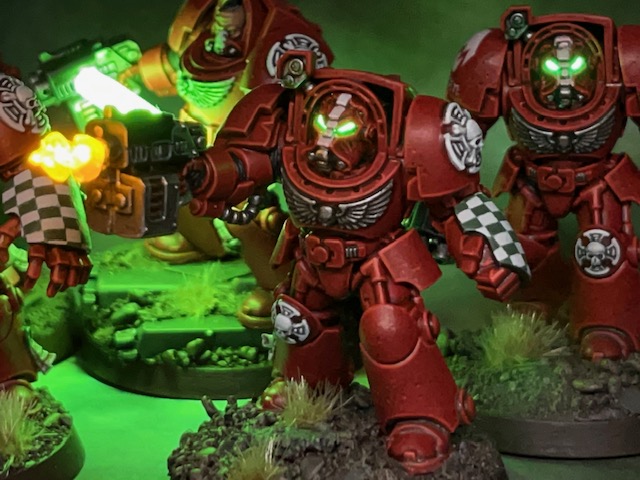
Terminator Squad ‘Naismith’ is complete, just in time for Armies on Parade 2023. So now is a good chance for some group pictures and a look back at the design and development of this unit.

Design Philosophy

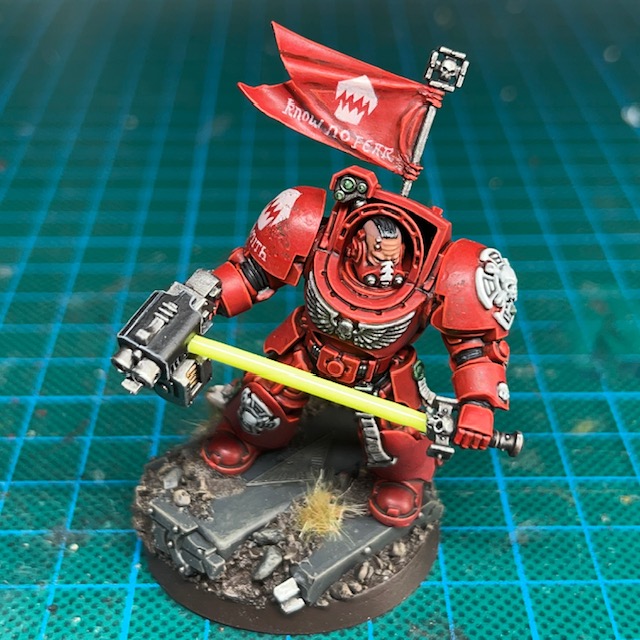
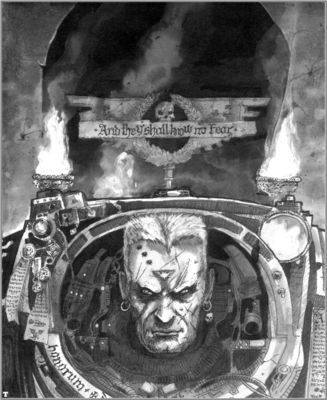
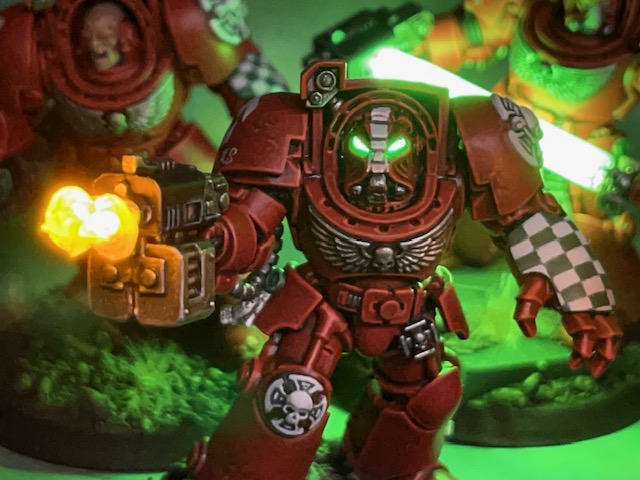
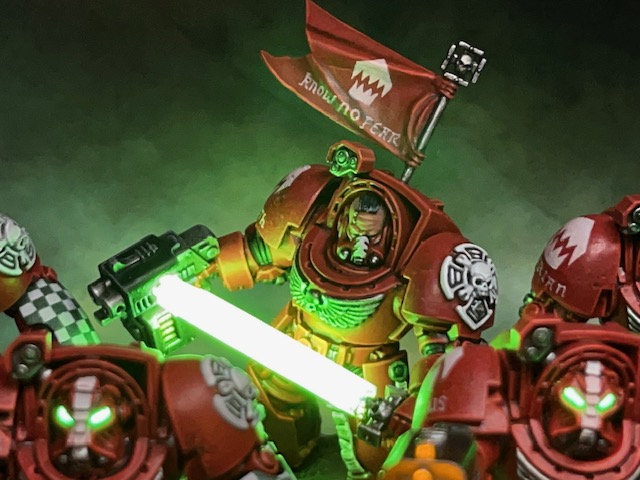
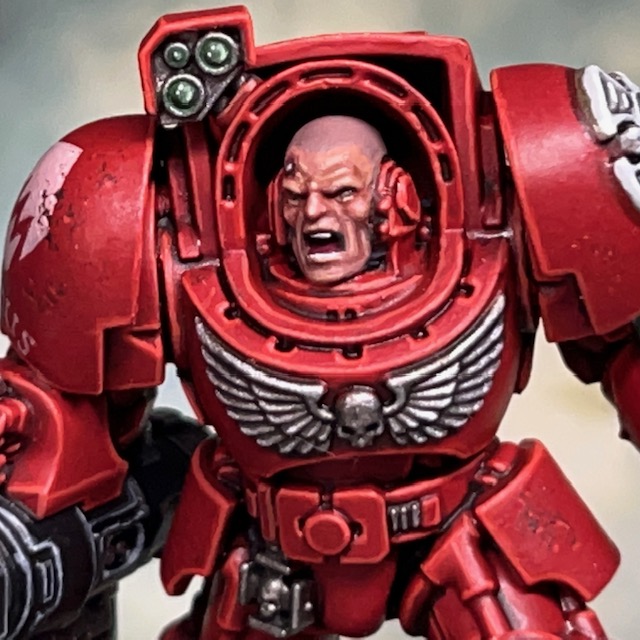
I’m very pleased with how this unit turned out, especially now I’ve seen all of the models together. I wanted to continue the ‘Rogue Trader’ era aesthetic and the ‘War of the False Primarch’ army theme of my Flesh Eaters with this unit. Thankfully the Leviathan Terminators are still very close in aesthetics to the original RT09 Terminator squad, so I didn’t feel the need to convert how they looked. With a little retro iconography, they fit right in with the look of the army.

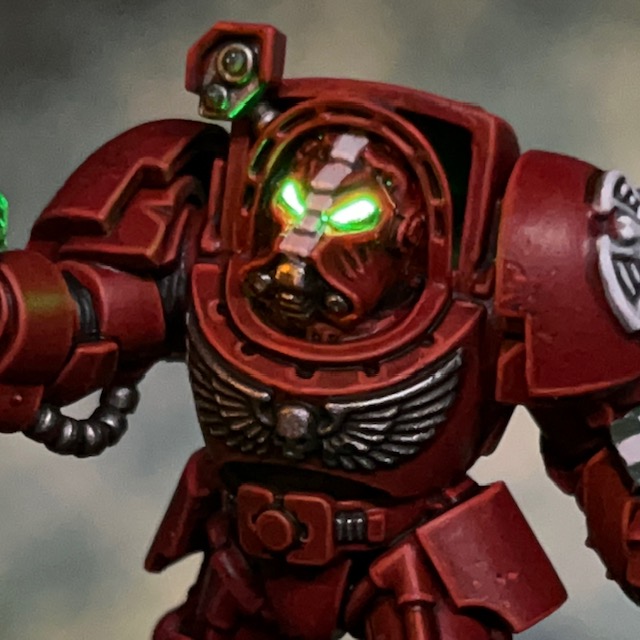
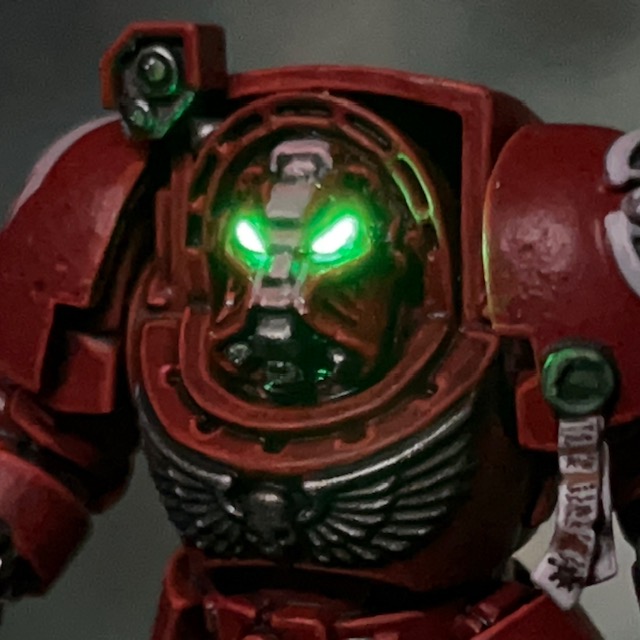
If you’re seeing my Flesh Eaters space marine project for the first time and you’re interested in how the LED effects are achieved, then you can find detailed explanations on my LED Miniature Tutorials page. My painting recipes for Flesh Eaters armour, freehand checks, and Terminator iconography can also be found in previous posts.

Squad Members

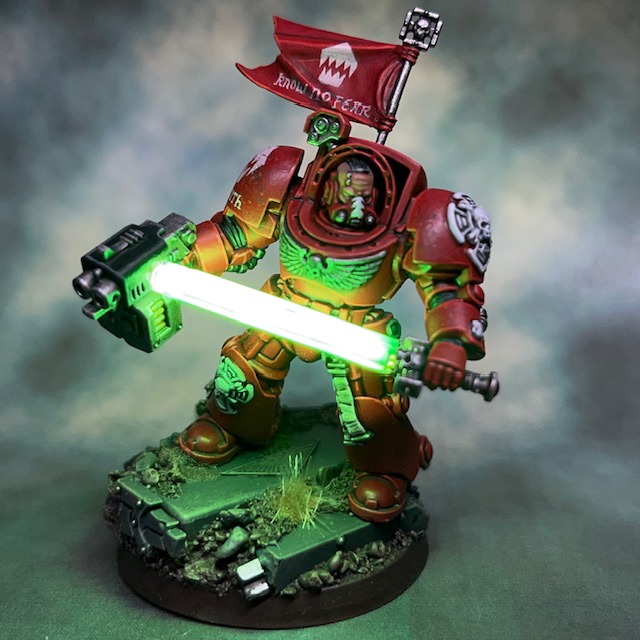
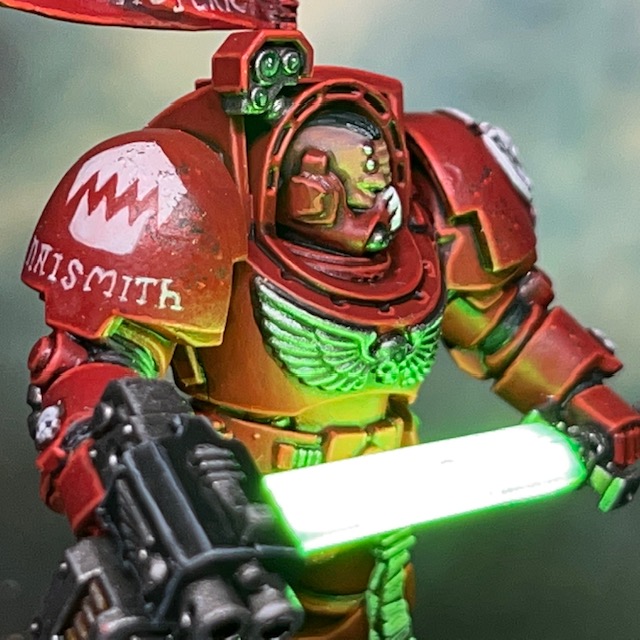
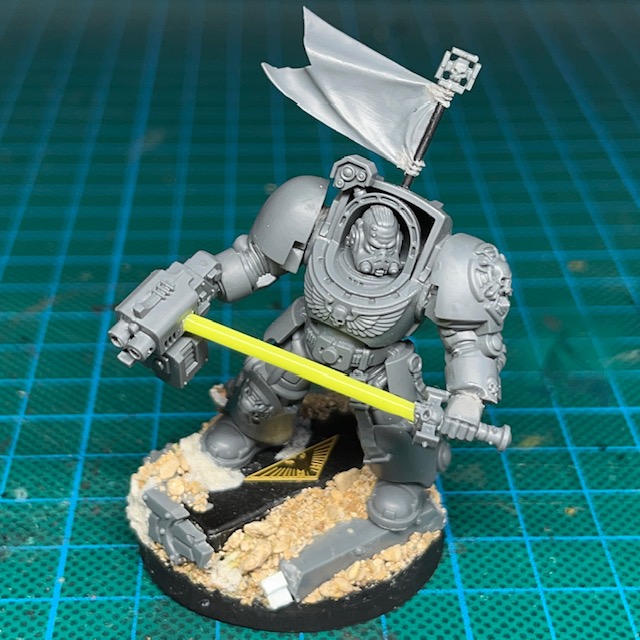
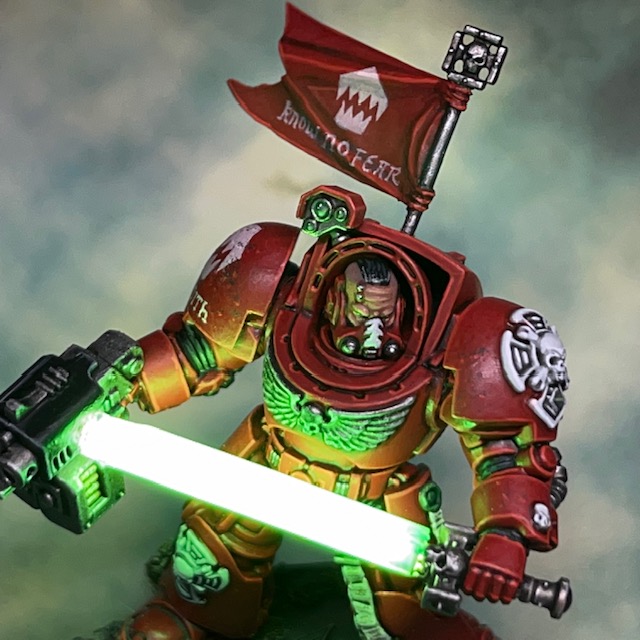
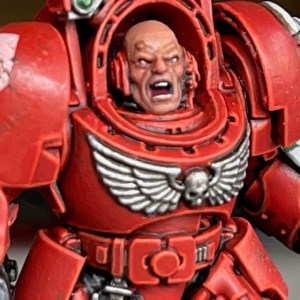
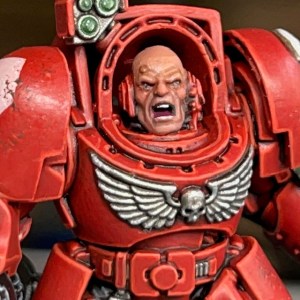
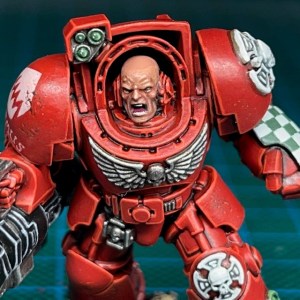
Brother-Sergeant Naismith is the leader of the terminator squad. He likes to look his enemies in the eye as he cuts them down with his power sword. You can read the full article about this model here.

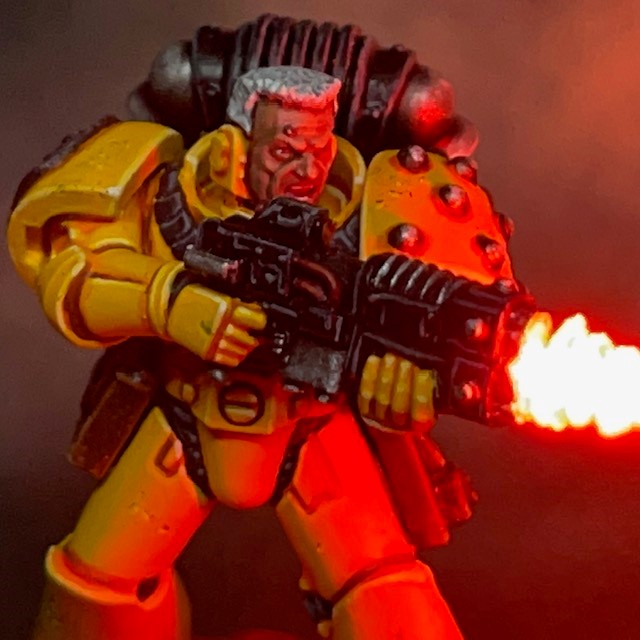
Brother Lazarus is widely believed to be one of the best shots in the 1st company. Whether serving in the sternguard or the terminators, his marksmanship is beyond reproach. You can read the full article about this model here.

Brother Furian has an unerring ability to identify the weak points of any obstacle, whether that is an armoured bulkhead, xenos vehicle or fleshy Partisan during the War of the False Primarch. You can read the full article about this model here.

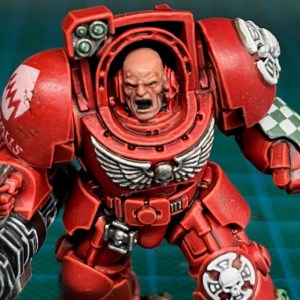
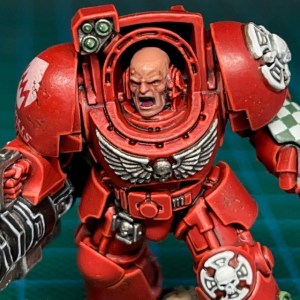
Brother Rephas is a zealot of the High Lords cause. He is equally happy blasting Partisans apart at range or pulling them to pieces in close combat. You can read the full article about this model here.

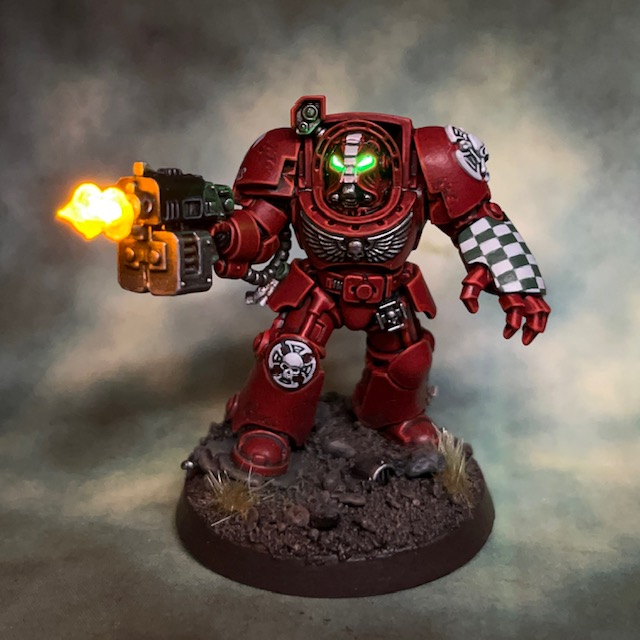
Brother Erasmus is known for lacking a sense of humour. The task of liaising with the machine spirit of his assault cannon to monitor ammunition levels and barrel wear takes his full concentration. You can read the full article about this model here.

Last, and probably least, is the squad teleport homer with flashing beacon! You can read the full article about this model here.

Now the squad is complete I have to ask myself, should I have done anything different? If I were to go back and make any changes, it would be to add small variable resistors under the bases of the sergeant to tweak the power sword brightness, and the assault cannon to tweak the motor rotation speed. I might also have made the assault cannon muzzle flare slightly larger. Other than that, I’m extremely satisfied with how this squad turned out!

I hope you’ve enjoyed following the progress of this unit over the last couple of months. That’s all for today, but I’ll be back again soon for more Flesh Eaters, plus a few side projects.  In the meantime, thanks very much for reading today’s post, and please don’t forget you can also follow my work on social media at InstagramThreadsTwitter/XBluesky and Mastodon.

Updated ‘Resin Casting for Special Effects’ Tutorial

I’ve updated my Resin Casting for Special Effects tutorial. It now includes a much more extensive list of materials, links and step-by-step photo instructions. The previous version was from August 2018, so an update was long overdue, especially as the correct type of resin components are vital to many of my LED tutorials.

So please take a look and let me know what you think!

Brother Naismith, Flesh Eaters Terminator Sergeant

Heresy is like a sword. If you don’t cut it then it will cut you.

Brother-Sergeant Naismith

I’m back with the final model in the Warhammer 40,000 ‘Leviathan’ Terminator squad – Brother-Sergeant Naismith, a Flesh Eaters Terminator with filament LED power sword! This model took quite a bit of work as it was my first attempt at a completely new power sword technique.

Modelling

The best way to make an LED power sword is something that has been troubling me since I first started putting LEDs into miniatures almost ten years ago. To my mind, the biggest issue is achieving an evenly illuminated blade. I know many of my fellow miniature LED enthusiasts like to put the LED in the hilt of the sword, facing upwards into a transparent blade to achieve power sword or lightsabre effects. I mean absolutely no disrespect to any of them as it’s a great technique that takes a lot of skill to achieve! But the drawback of this technique that I personally don’t like is that the sword blade appears brighter near the hilt and dimmer at the tip. This effect can often appear dim in bright ambient light.

So, for many years I’ve been trying to figure out a convincing and reliable way to evenly illuminate the entire blade. In the meantime, I did come up with the solution of using millimetre-sized chip LEDs embedded in the blade to simulate the power field generators, which you can read about in my LED Power Weapon Tutorial. However, I think I may have finally found a better solution with filament LEDs.

Filament LEDs are long and thin with a single connection at either end. I’ve used them before on other projects, most notably “Burn Traitor!”. These types of LEDs are often used in lightbulbs or similar applications and are available in a variety of colours and voltages. I get mine from a UK seller on eBay.  The type used here was a 38mm 12V ‘yellow-green’ LED. I went with 12V to ensure plenty of brightness, but this meant having to switch to a single 12V MN21 battery rather than trying to fit four of my normal 3V CR2032 batteries in the base, which wouldn’t have been physically possible.

As I’ve said before, if you are attempting this yourself then please remember filament LEDs are extremely fragile!  They are built around a thin strip of plastic that holds an array of sub-millimetre LEDs. This strip of plastic cannot take any real amount of bending or pressure and will snap at the least provocation. If you are using them in a project, I’d strongly recommend buying twice as many as you need, just in case of accidents.

The circuit is extremely simple. One end of the filament LED is hidden in the hilt, the other is concealed in the storm bolter. A wire runs down through each arm to connect to the battery holder and switch in the base. You can see the battery holder in the picture above – it’s the black rectangle in the base. Because this is a lot larger than my normal battery holders, it made the base quite tall. I decided to turn this problem into a feature and make it look like the sergeant was striding down some steps as he prepares to swing his sword. Hopefully this adds to the dynamism of his pose.

To conceal the filament and give it a sword shape, I covered it with thin strips of plastic. The filament is so bright that it shines through the plastic, which also diffuses the light in a pleasing way. I then gave the sword blade three or four thin glazes of Citadel Hexwraith Flame technical paint to make the blade look interesting if the LED was switched off. After the above pictures were taken, I decided I wasn’t happy with the tip of the blade and used a scalpel to carefully shave it into a more pointed end. Hopefully in the illuminated pictures it looks like the tip of the sword is just held near the storm bolter, rather than being driven into it!

This model was something of an experiment and making it was mostly about teaching myself the technique, so I haven’t put together a full tutorial yet. I do plan to use this method again for other models though, so next time I will take some step-by-step photos.

I chose to use the unhelmeted head for two reasons. Firstly, it meant I didn’t have to worry about illuminating the helmet eye lenses while working with a different battery type. Secondly, I knew a bare head would look more dramatic when underlit by the blade.

The other thing I should mention about this model is the banner. All the units in this army are carrying a flag, and I wanted the Terminators to have one too. But it seemed a waste to dedicate a Terminator to holding a flagpole in their power fist, so I decided to add the flag as a back banner to the sergeant. But rather than the traditional hanging back banner shape, I kept the flag design used by the other units, for consistency.

Painting

As with the rest of the Terminator squad, I painted Brother-Sergeant Naismith using my normal Flesh Eaters armour and Terminator iconography recipes. As mentioned above, the power sword blade was given three or four thin glazes of Citadel Hexwraith Flame technical paint. LEDs aside, thin glazes of Hexwraith Flame over a white basecoat is a great way to produce a quick, cheap and cheerful powered blade effect.

For the banner slogan, I decided to keep it simple and go with ‘Know No Fear’. This is a classic Space Marine motto, and echoes the classic John Blanche Terminator artwork shown above. The Brother-Sergeant’s name is a nod to veteran Citadel miniature scultpor Bob Naismith, who I believe had a hand in the original Terminator prototype designs. I decided that Sergeant Goodwin would be too on the nose!

Now that I’ve finished the sergeant, that’s the entire Terminator squad complete! I’m sure I’ll be back again soon with some group pictures of the unit. Then of course it’s getting everything ready for Armies on Parade. In the meantime, thanks very much for reading today’s post, and please don’t forget you can also follow my work on social media at InstagramThreadsTwitter/X, Bluesky and Mastodon.

Painting Space Marine Skin Tones (Pale)

Today I’m going to share my recipe for painting pale Space Marine skin tones. This is a technique I’ve honed over the years, taking in advice from different painters – like Darren Latham and Apologist – until I was consistently pleased with the results. Whenever I share a painting recipe, it’s partially for the benefit of those who are interested in reproducing it, and partially for my own benefit so I don’t forget how I did it!

Citadel Paint List (click to view)

Chaos Black Undercoat, Alaitoc Blue, Bugman’s Glow, Cadian Fleshtone, Corax White, Evil Sunz Scarlet, Kislev Flesh, Lahmian Medium, Reikland Fleshshade, Rhinox Hide, Screamer Pink, Yriel Yellow, Hoeth Blue (stage 14, optional), Runefang Steel (stage 15, optional), Carroberg Crimson (stage 16, optional)

1. Bugman’s Glow painted over the entire face, apart from the inside of the mouth.

2. Reikland Fleshshade applied as a wash over the areas painted with Bugman’s Glow.

3. Bugman’s Glow reapplied on all areas of the face except the deepest recesses.

4. A 50:50 Bugman’s Glow, Cadian Fleshtone mix on all raised areas, such as chin, cheekbones, nose, eyebrows and scalp.

5. Rhinox Hide painted over both eyes. This will provide a frame for the actual eye colour later.

6. A 25:25:50 Alaitoc Blue, Bugman’s Glow, Lahmian Medium glaze on the lower jaw, lower cheeks and around the mouth. This will give a blueish tint to the lower face and gives the impression of ‘five ‘o clock shadow’.

7. A 25:25:50 Evil Sunz Scarlet, Bugman’s Glow, Lahmian Medium glaze on the cheeks, nose, and around the eyes. This will give a reddish tint to the centre of the face, which is often the case in real faces due to the good blood supply to the cheeks and nose.

8. A 25:25:50 Yriel Yellow, Bugman’s Glow, Lahmian Medium glaze on the forehead, eyebrows, and scalp. This will give a yellowish tint to the top of the face, which is often the case in real faces due to the thin skin here.

9. Screamer Pink on the tongue and in mouth.

10. Corax White on the eyeballs and teeth. It is better to use Corax White, which is slightly off-white, rather than White Scar, as the latter is too bright and will tend to draw the eye, making the eyes and teeth appear very stark against the skin.

11. Rhinox Hide dots on the centre of the eyeballs for the iris and pupils. A dark brown like Rhinox Hide is better than Abaddon Black, as it’s less of a stark contrast against the skin.

12. Cadian Fleshtone highlights on all edges, such as nose, eyebrows, cheekbones, and expression lines.

13. A 50:50 Cadian Fleshtone, Kislev Flesh mix fine highlight on the edge of all the areas highlighted in the previous step. This helps to accentuate the expression.

14. A 66:33 Hoeth Blue, Bugman’s Glow mixture thinned to a glaze with Lahmian Medium and applied to the scalp. This is my preferred mixture for showing five o’ clock shadow, but this time on a shaved scalp. You can skip this step if your miniature has a full head of hair, but you may also find it useful for painting the area around partially shaved heads as well.

15. Runefang Steel on service studs, if your Marine has any. If you’ve accidently painted over these in any of the previous steps, then you may find it gives a better result to repaint these in black before painting the Runefang Steel.

16. Carroburg Crimson shade around the service stud to give the impression of scarred or damaged flesh.

So, there we have it, one finished face! I hope you found that useful. That’s it for today, but I’ll be back soon with some more LED miniatures. As always, thanks very much for reading, and remember you can also follow my work on social media at InstagramThreadsTwitter/X and Mastodon. That’s all for today, see you again soon!

LED Miniature Makers of Social Media 2023

About a year ago I published an article looking at other LED miniature makers in the online community. I thought it was about time to do the same thing again and celebrate the excellent LED miniature work posted by other hobbyists on social media. Embedded below are some of my recent favourites, presented in no particular order. Why not take a few minutes to check out their work, and if you like what you see then give them a follow!

grimdark_illuminations

Alex is an absolutely LED miniature making machine. His productivity puts me to shame! Check out his awesome Horus Heresy Iron Warriors army in the post below.

zebamunda

I’ve only discovered Zebamunda’s work recently, but it’s incredibly impressive. Take a look at the clever use of LED displays in Necromunda scenery.

warhamster_king_of_leds

Warhamster is incredibly prolific and has a huge range of LED projects on his Instagram. A particular favourite of mine is the recent Gravis Apothecary and it’s different LED colour modes. Also take a look at his recent work on Stormcast for Age of Sigmar.

Jaw Drop Prop Shop

Jaw Drop Prop Shop has been doing some wonderful work with LED effects on Space Marines. Check out his channel for some great videos, including LED tutorials.

Hobbyvices

Hobbyvices has been doing some very cool display board work recently. Check out the lights and smoke(!) in the Soulblight Gravelords display below!

doc.brown_miniatures

Doc Brown remains one of my favourite LED miniature makers. The work that went into the moving and rotating cannons on this Space Marine Stalker is phenomenal. The video below is definitely work a watch!

technicalrunnerd

Technicalrunnerd continues to impress and delight with his creative use of LEDs and other electronics in his Chaos army.

bobo’s hobbies

Bobo does excellent work on artfully illuminated Space Hulk scenery and accessories. Check out the atmospheric door below and more examples on his Instagram.

jjh_maestro

A slight detour from Warhammer, but if you like illuminated Gundams then jjh_maestro is a great person to follow!

jamcstarwarslegion

Again, not Warhammer, but take a look at the excellent work that Abraham has been doing lighting up Star Wars Legion models.

bjarnidali

Bjarnidali has been doing some very clever work with scenery. Check out the colour coded door indicators in the video below.

groundeffected

Groundeffected’s work has to be seen to be believed! Check out the awesome hovering grav tank in the video below! Also, note the excellent paint job in addition to the special effects.

That’s just a small sample of the great work that you can find out there. Many apologies if I follow your LED work on Instagram or Twitter and I’ve missed you out, it wasn’t intentional! If you have any suggestions for other great LED miniature artists that I’ve not mentioned above, please let me know in the comments.

If this has inspired you and you’d like to have a go at making some LED miniatures yourself then you can find my tutorials here and supplies here. As always, thanks very much for reading, and remember you can also follow my work on social media at Instagram, ThreadsTwitter/X and Mastodon. That’s all for today, see you again soon!