

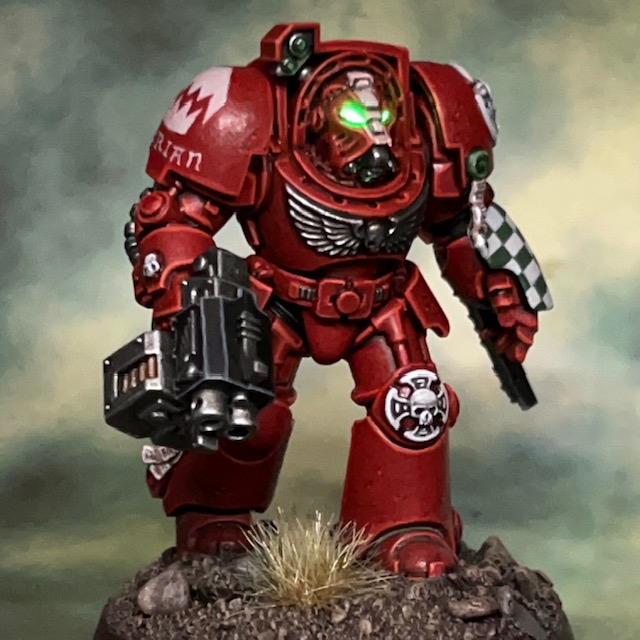
More Warhammer 40,000 ‘Leviathan’ Terminator action this week with Brother Furian, a Flesh Eaters Terminator with storm bolter and chainfist.


Modelling
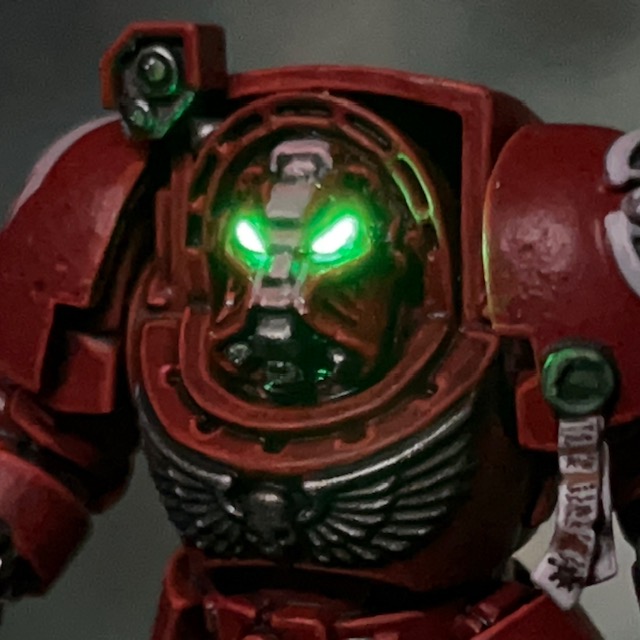
As this model wasn’t in a dynamic firing pose or carrying any special weapons, I decided to keep the LEDs simple and just illuminate the helmet eye lenses. I used the techniques detailed in my LED Eye Lens Tutorial, the only difference being that I used a TruOpto OSPG7331A-KL 1.8mm Green LED. As I mentioned in my post about Brother Lazarus, I found it easier to insert the helmet LED from the rear of the Terminator helmet, rather than underneath as I normally do.

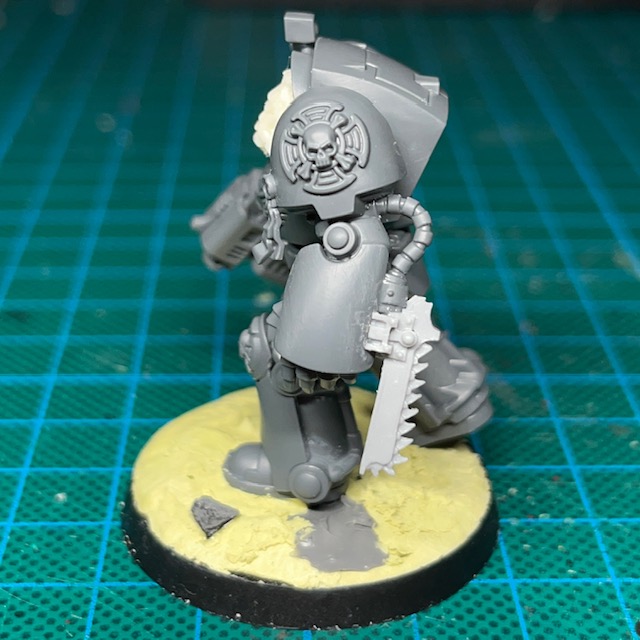
As a last minute addition, just to give this model a bit more interest, I decided to turn his power fist into a chainfist – a weapon option that is not in the Leviathan box. The chain blade component came from an old Forge World Tartaros Terminator upgrade kit, but there’s an equivalent on the modern plastic Legion Tartaros sprue. It fitted neatly over the bottom of the power fist with only some minor gap filling required.
Painting
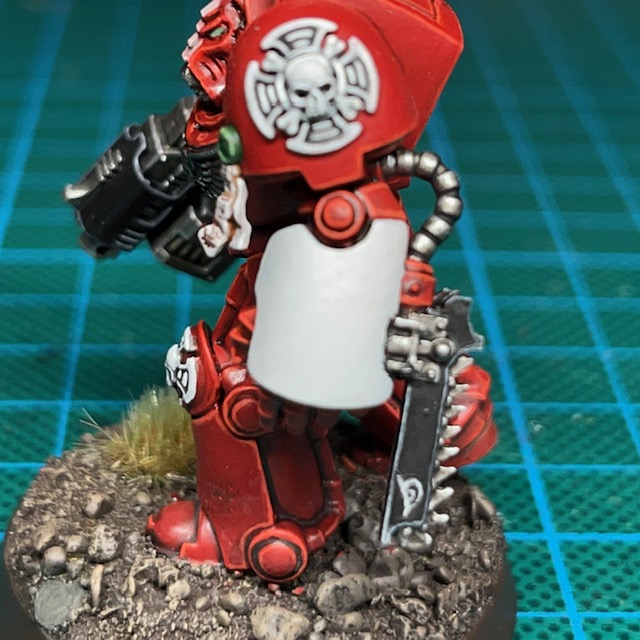
I don’t have many additional things to say about the paint scheme for this miniature. I’ve previously talked about painting Flesh Eaters armour in others posts, and described how I paint Terminator iconography here. However, after posting Brother Lazarus, I had a few positive comments and questions about the freehand checks, so I thought I’d share my method here.
‘Iterative’ Freehand Check Technique
I’ve decided to call this the ‘iterative’ technique, as it’s based on making small iterations to the neatness of the squares. The two Citadel paints I used for the checks on this Terminator were Corax White and Waaagh Flesh.
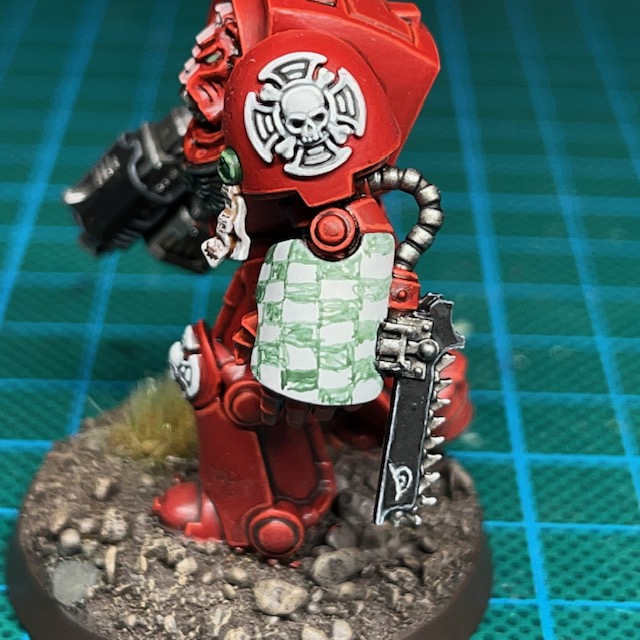
- Start with a solid background colour, using the lighter of the two colours. Apply this as several thin coats if necessary to ensure a smooth surface.
- Lightly “sketch” roughly where you think the squares should be. Use a thinned down version of the darker colour.


- Go back over the dark squares with an additional coat of the darker colour, making the squares more solid.
- Correct any mistakes by applying the lighter colour along the edges of the light squares to ensure they are straight. Remember that there should not be any overlaps – squares should only be touching other squares of the same colour at the very corners.
- Apply a final correction of the darker colour along the edges of the darkers squares, again to ensure they are straight. You can repeat steps 4 and 5 as many times are needed, making finer and finer corrections until you are happy with the result.
So there we have it, that’s the ‘iterative’ freehand technique. I prefer this over sketching a grid and then filling in the gaps. Drawing a grid tends to mean that the darker squares are larger than the lighter squares, since they incorporate the grid itself into their colour area, which leads to overlapping corners. If you’d like to see the iterative technique applied elsewhere, I also used it on my Lamenters.

When looking for ideas on how to paint the chain blade on the chain fist, I consulted the Rogue Trader-era Terminator heraldry shown above. I thought the whole thing would be quite confusing on the eye if I tried to reproduce exactly, but I quite liked the idea of a shark-like face, especially as I had used that imagery elsewhere with the Flesh Eaters. However, I wondered if painting teeth on the blade would look strange when it already has its own ‘teeth’. In the end I just settled for painting the eye as a nod to the original heraldry, which then hopefully gives the impression the whole chain blade is a shark-like head, with the chain teeth standing in for the teeth of the creature.

That’s it for today, but I’ll be back again very soon with more Terminators. I’m determined to power through the whole squad before moving on to other projects! As always, thanks very much for reading, and please don’t forget you can also follow my work on social media at Instagram, Threads, Twitter/X and Mastodon.

Pingback: Flesh Eaters Terminator Progress – Chris Buxey Paints
Pingback: Brother Erasmus, Flesh Eaters Assault Cannon Terminator – Chris Buxey Paints
Pingback: Flesh Eaters Terminator Squad ‘Naismith’ – Chris Buxey Paints
Pingback: Brother Minos, Hellfire Dreadnought – Chris Buxey Paints
Pingback: Brother Orpheus, Ultramarine Sternguard – Chris Buxey Paints
Pingback: Brother-Captain Caedes, Terminator Captain – Chris Buxey Paints
Pingback: Imperial Fists Saturnine Terminator Sergeant – Chris Buxey Paints