

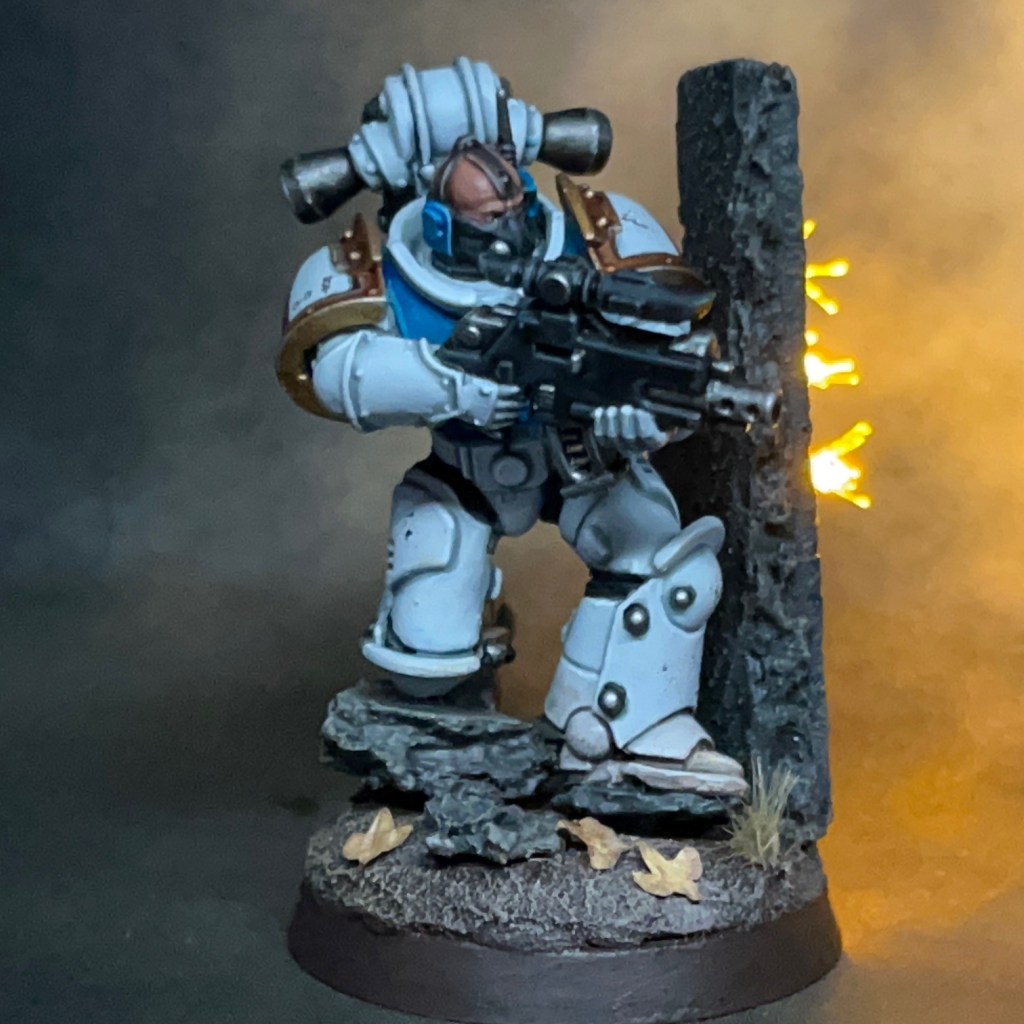
I’m still tidying up after Armies on Parade this week. Last week I was rebasing Brother Garrett, and this week I’m doing the same for the Silver Stars Marksman. This sniper was last seen taking aim at the Flesh Eaters on my 2024 Armies on Parade, but now he has been given a proper base to join my growing Silver Stars Angels of Death Kill Team. He will take the role of ‘Intercessor Warrior with Stalker Bolt rifle’. This miniature will also be my entry into Apologist’s #HiddenArmies challenge.

Modelling
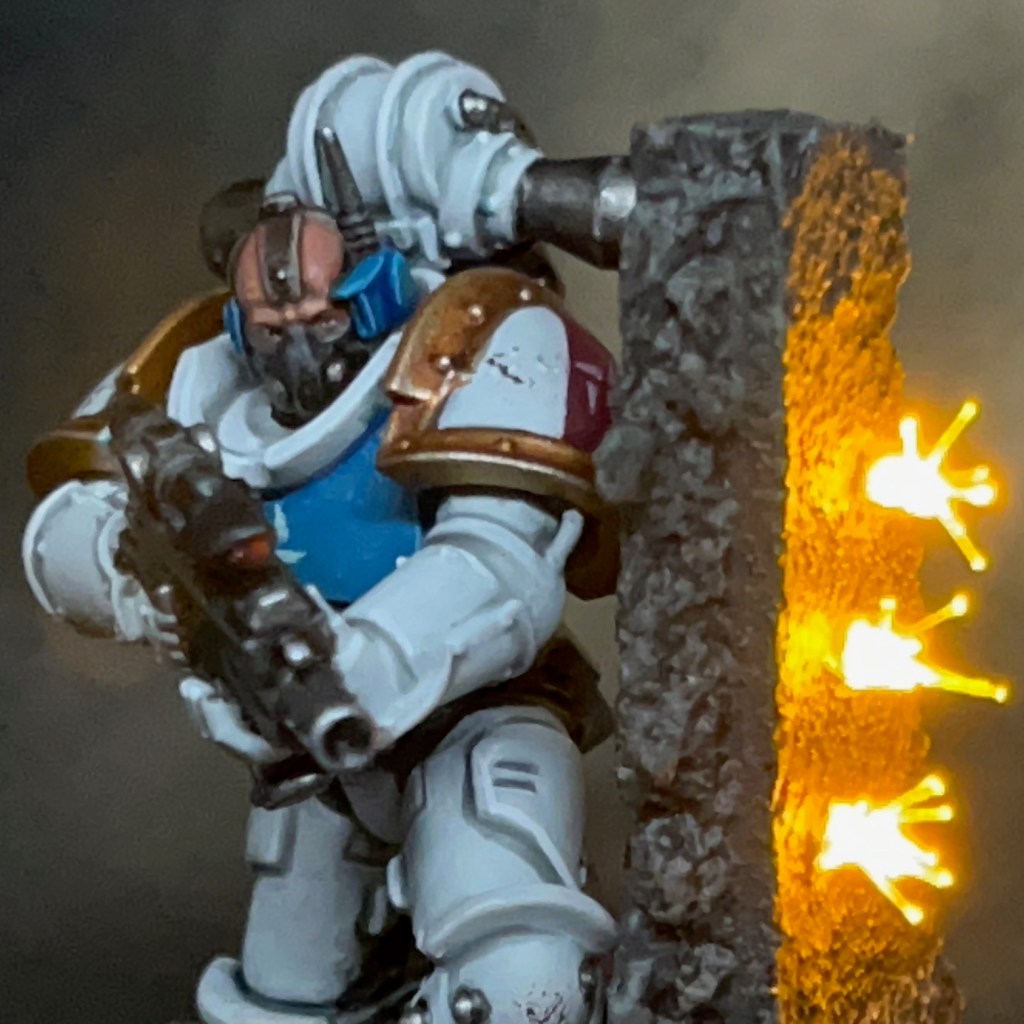
As with all my previous Silver Stars, this marine is built using a Primaris marine body and legs. The arms, pauldrons, backpack and bolter are from the previous version of the plastic Legion MkIII Tactical Squad set. To give the legs a more “antiquated” look, I added Mixed Micro Glass Balls from Green Stuff World as armour studs on the legs. To get the sniper pose, the legs required significant cutting an repositioning. You can see a work in progress image below, before I filled in the gaps with modelling putty.

The head is from the Legion MkVI Tactical Squad sprue. All of my Silver Stars are either wearing helmets or masks that cover their face. They are also all unnamed, unlike my Flesh Eaters. This is to help add to their sense of mystery.
When rebasing this miniature for game use, I thought it might be fun if he was seeking cover from incoming fire, just to help sell the pose. The LED techniques used here are based on my Simple Muzzle Flare tutorial, only with three LEDs connected in parallel instead of one.


I used a small section of cork tile to represent a broken concrete wall. Cork tile is great for this sort of thing as it is easy to work with and has a great texture when torn.


Normally I run the wires inside my miniatures, but because cork tile is quite soft, it’s difficult to drill through, especially for multiple wires. So in this case I simply concealed the wires under a layer of Milliput and then added some textured paste to help conceal it.
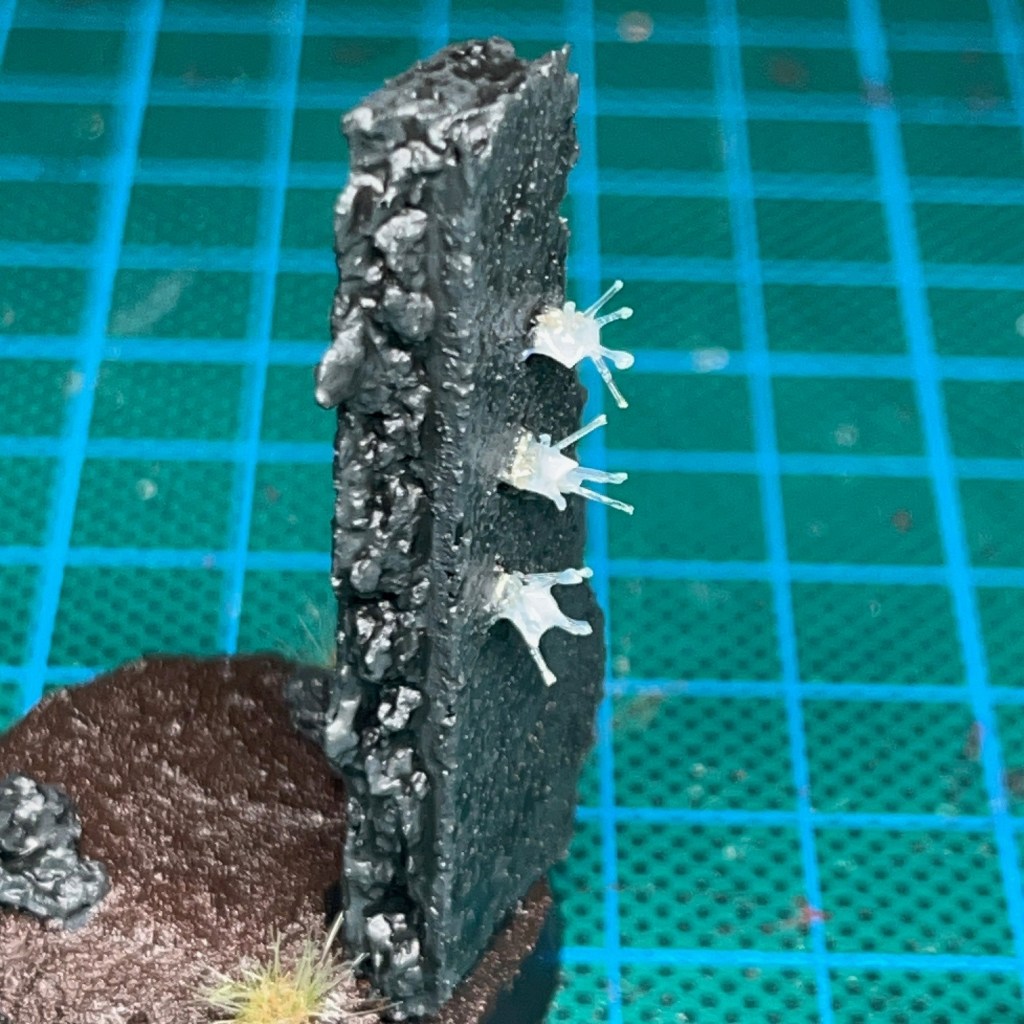
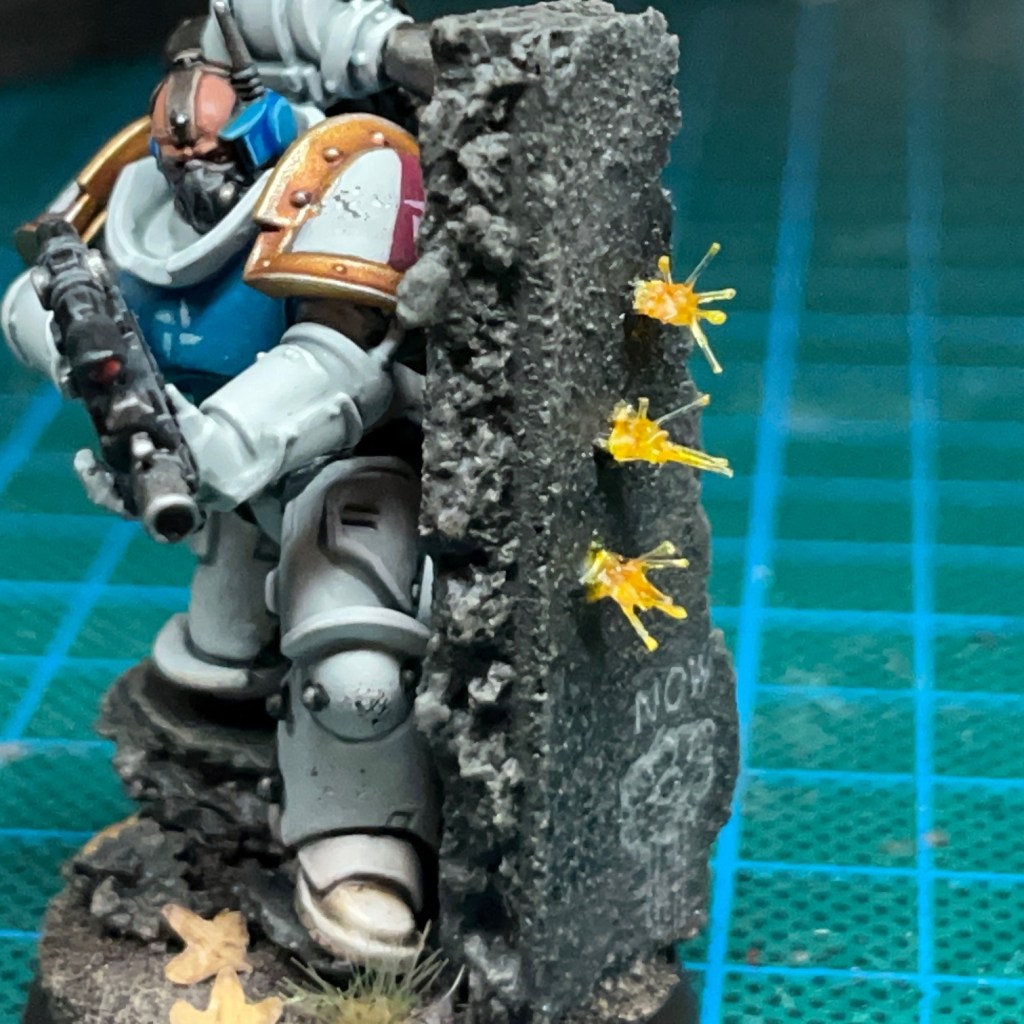
The final stage was to apply Green Stuff World acrylic gel to the LEDs, as per my Simple Muzzle Flare tutorial. To give the impression of additional debris, I also added some very small lengths of fibre optic cable to the gel before it hardened. If you don’t want to purchase a full reel of fibre optic cable for this, you can simple cut small sections from a child’s toy using a sharp hobby knife.
Painting
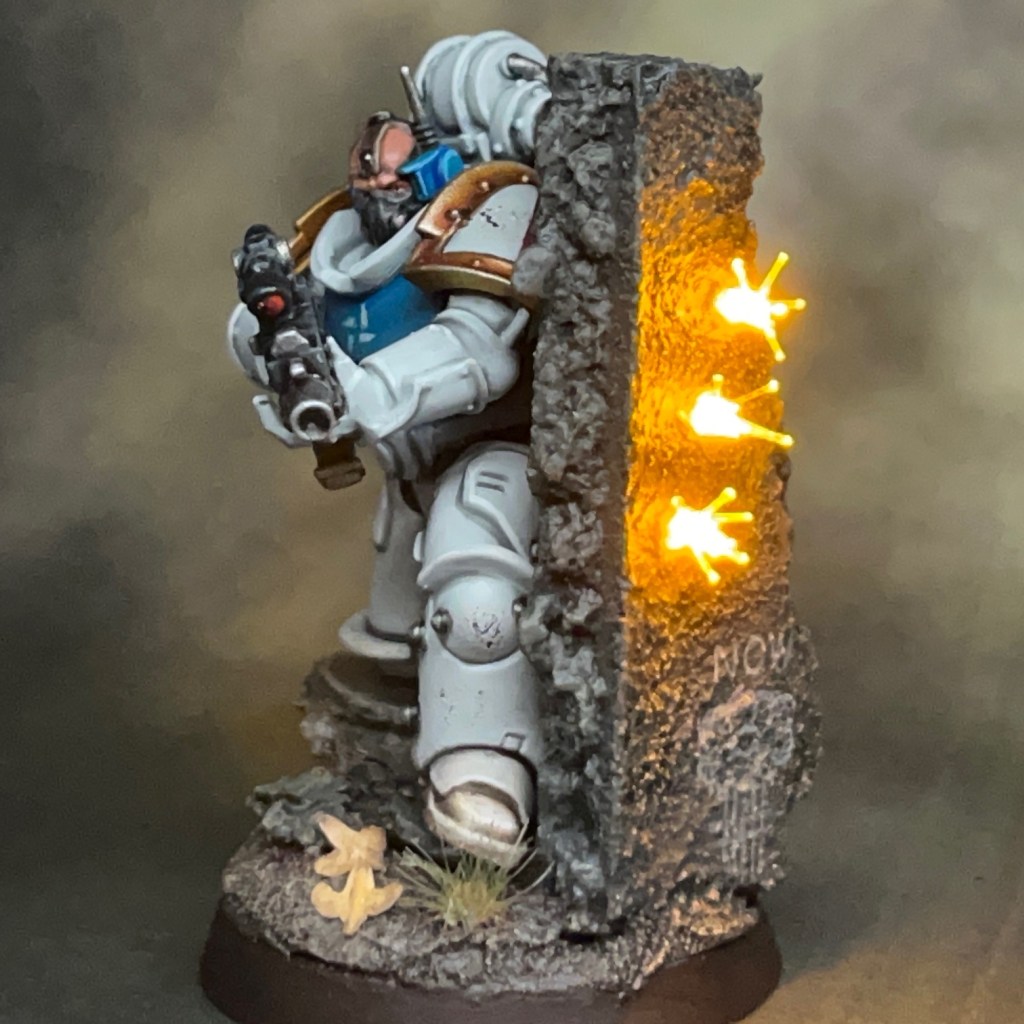

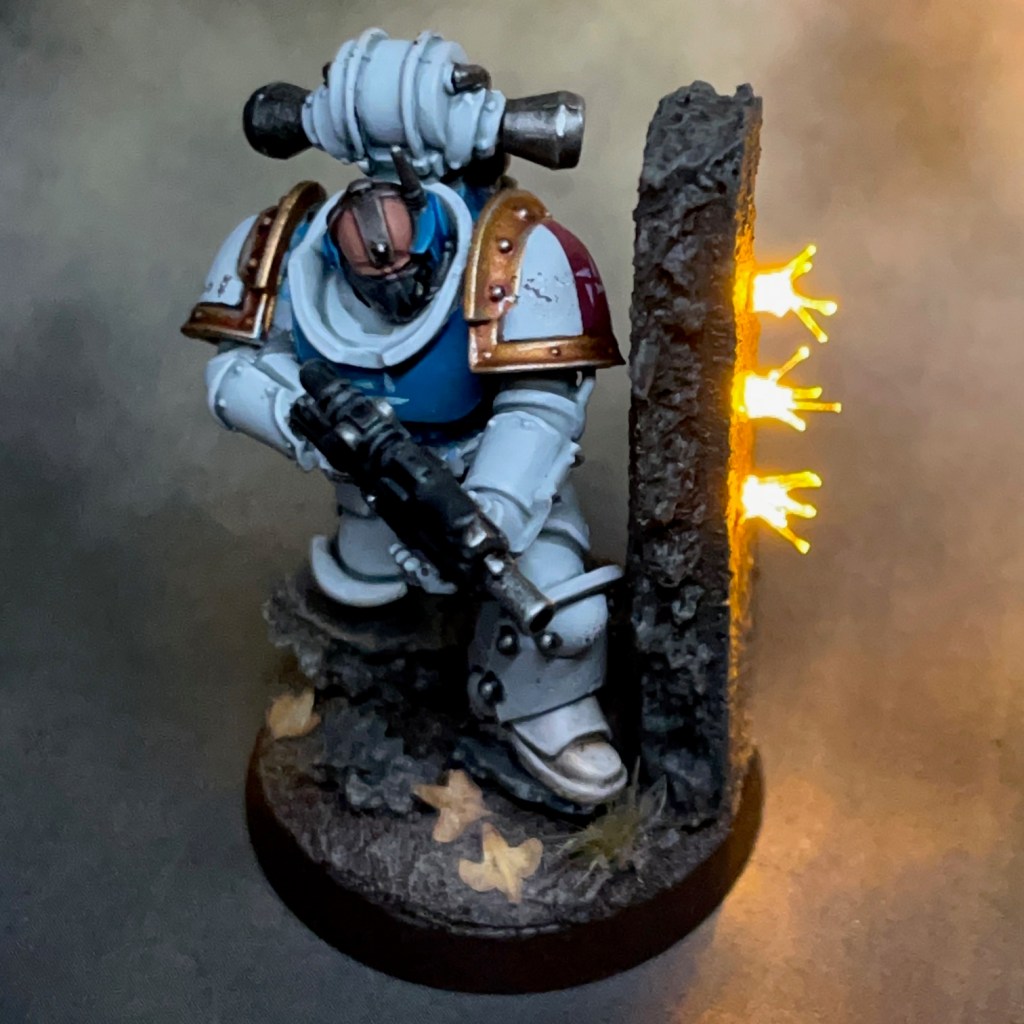
I used the same paint recipe for this Silver Star as detailed in this post, plus this post which expands on painting Silver Stars insignia. As you can see, this Marksman is another member of Squad Antimony.

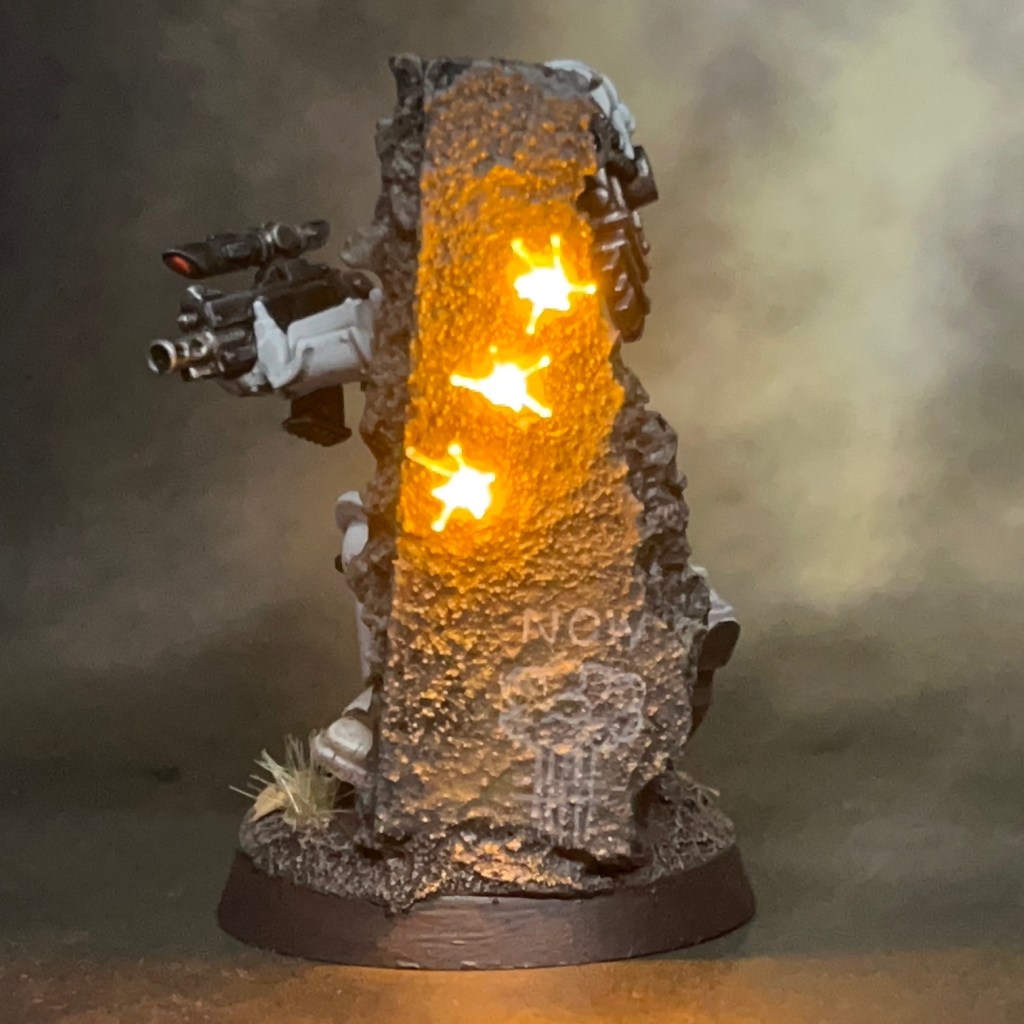
The graffiti on the broken wall was influenced by this classic 40K diorama shown in the Rogue Trader rulebook.
That’s all for today, I hope you’ve enjoyed this insight into the latest member of my Silver Stars Kill Team. As ever, thanks very much for reading, and please remember you can also find me sharing my work on Instagram, Threads, Bluesky, Mastodon, and Twitter/X.

Pingback: Silver Stars Heavy Gunner – Chris Buxey Paints
Pingback: Silver Stars Kill Team Antimony – Chris Buxey Paints