
If you go down to the swamp today: don’t!
Traditional Tallowlands children’s song
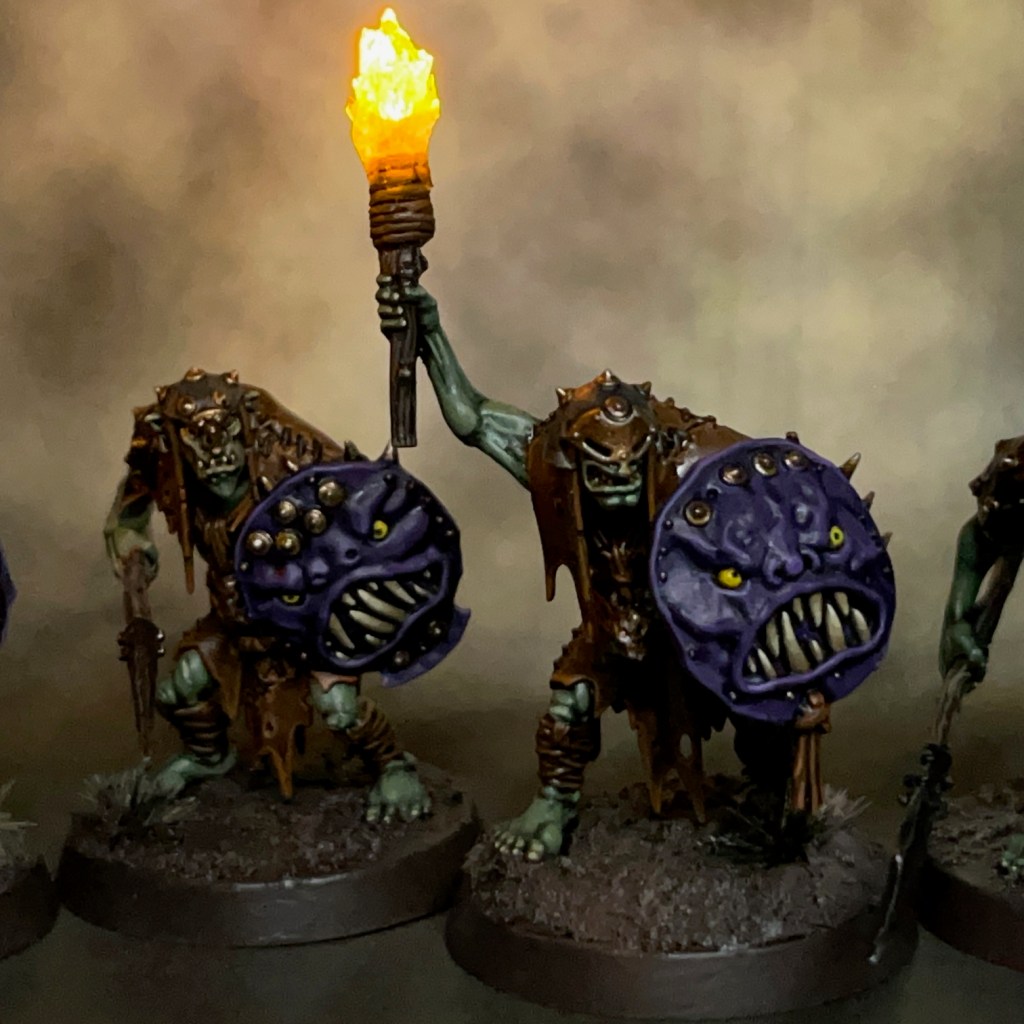
Today I’m looking at some Orruk Kruleboyz Gutrippaz for Warhammer Age of Sigmar. These are the next miniatures in my new Kruleboyz project, following on from the Swampcalla Shaman I posted earlier in the year.

The Kruleboyz Project
Earlier in the year my young son expressed an interest in having a go at the Warhammer hobby, particularly the painting, so we had a look at the starter sets. My son is more into fantasy than sci-fi at the moment, and the Stormcast leapt out at him as something he wanted to paint. I’m a fan of greenskins (as you may recall), so I thought painting some Kruleboyz might be fun. We bought an Age of Sigmar ‘Warrior Edition’ Starter Set to split. I couldn’t resist picking up a couple of other Kruleboyz bits too (like the Shaman)! Unfortunately the rule book in that set is now technically defunct, but I’m not too bothered about that as I knew a new edition was on the horizon and we were mainly interested in the models.
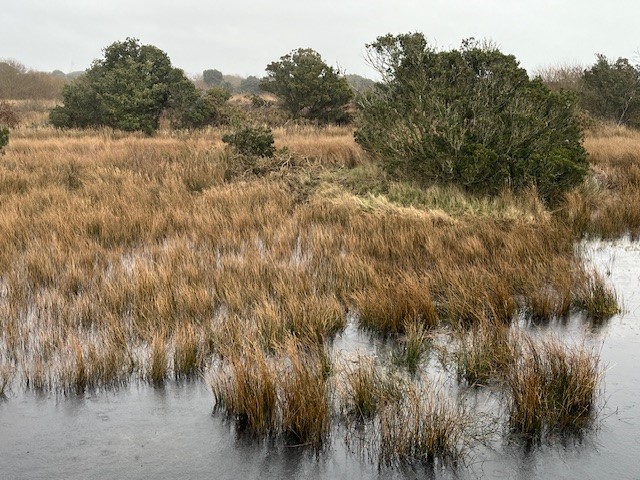
The concept of “swamp orcs” has really grown on me since they were introduced a few years ago. I used to play a lot of black decks in Magic the Gathering when I was younger, so that probably helped! There is also an area of marsh land on the edge of my childhood home town, so I took a few reference photos (see below) on a recent visit, just to give me some inspiration for basing.

Modelling
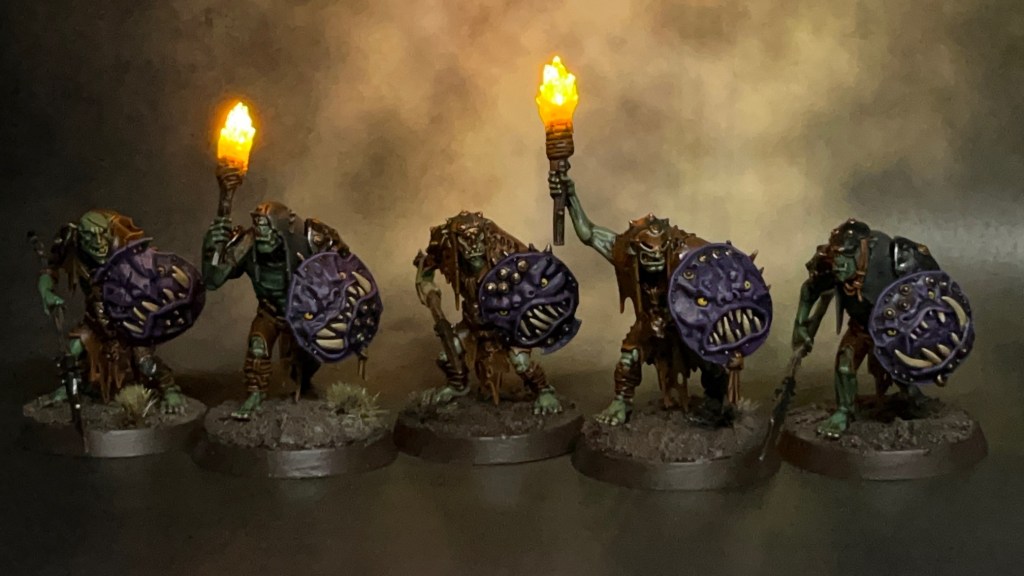
The main feature of these Gutrippaz is the LED flaming torches, so I’m going to provide a short-form tutorial below on how it was made. I don’t plan to have too many LEDs in this army – something that I always claim at the start of every project – but I’m thinking maybe around three or four flaming torches in every unit of ten.
I don’t really see the Kruleboyz using the torches to light their way through the mist. They prefer to remain concealed, after all! I imagine the Kruleboyz using them as a way to intimidate and confuse their victims; think the “Fire Dragon” in the film The 13th Warrior.
Flaming Torch Tutorial
Prepare the base, resistor (in this case a 47 ohm resistor), battery holder and switch for this miniature were prepared using the method described in Steps 1 – 6 of my LED Eye Lens Tutorial. The single LED in the torch will eventually be connected in series with the resistor, battery holder and switch, as described below.
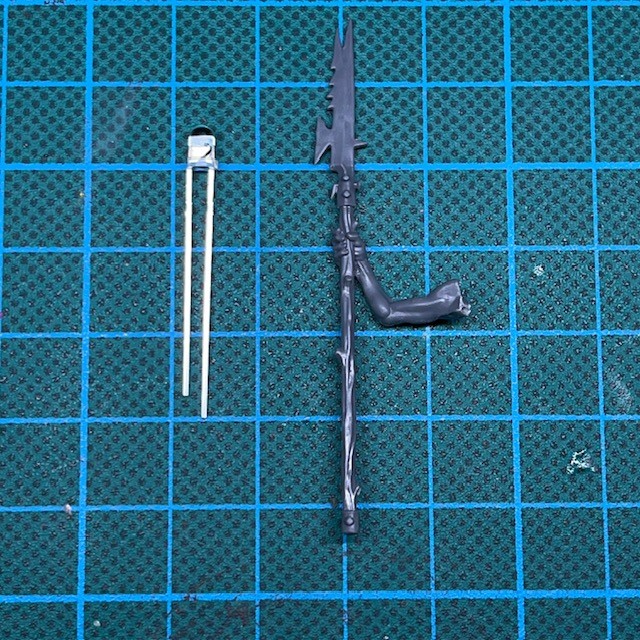
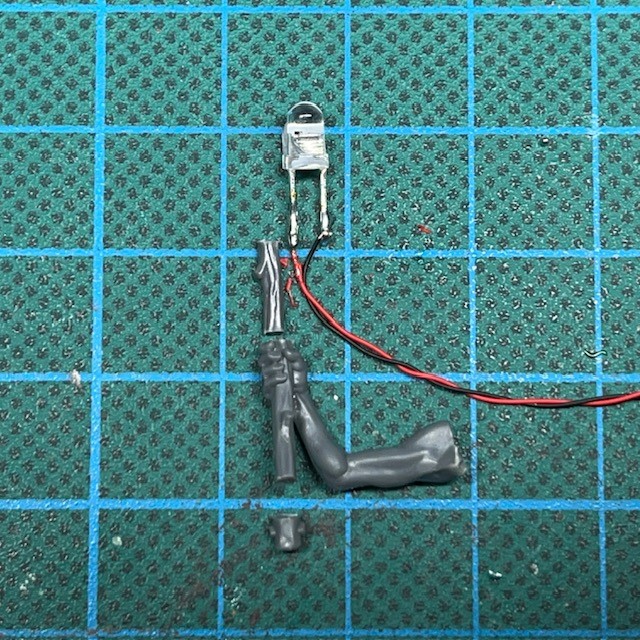
1. The LED used is a Switch Electronics 3mm Yellow Flickering 2.2V LED in series with a 47 ohm resistor (as mentioned above). Select a Gutrippa with a spear that is pointing upwards, as shown in the above left image.
2. Cut the legs of the LED as short as possible and solder on two connecting wires that will be long enough to reach the base when passed through the miniature. It’s useful to colour code the wires to remind yourself of the LED polarity (red is normally positive and black negative). Cut the spear down so it looks like the correct length for a flaming torch. as shown in the above right image.


3. Glue the LED to the the ‘wood’ of the torch, and then drill holes to feed the wires down through the arm, torso and one leg of the miniature so they can connect to the resistor, battery holder and switch on the base. If you need additional hints on how to do this, check out Steps 7 – 9 of my LED Eye Lens Tutorial.
4. While I was working on this miniature, the upper arm pinged off and disappeared into whatever dimension dropped miniature components vanish to, so I had to use wire and putty to replace the upper arm. However – if you don’t drop it – you can just use the upper arm. Repositioning the arm to hold the torch at a realistic raised angle may introduce gaps, but these can be dealt with at the next stage.


5. Fill in any gaps around the arm and shoulder with modelling putty. You will also need to use modelling putty to sculpt the ‘burning rags’ around the top of the flaming torch, which will help to hide the legs of the LED. Finally, use modelling putty to cover up any exposed components remaining on the base. The images above show what this looks like from the front and the back.


7. Start sculpting the basic shape of the flame over the LED using Water Splash Effect Gel from Green Stuff World. This is best applied with a metal sculpting tool, thin plastic rod or stiff length of wire. When you apply it, the gel will initially appear milky white – as shown in the above left image – but once it is fully dry it will be transparent.
8. Wait for the initial application of gel to dry (this can take several hours) and then continue to apply successive layers until you are happy with the shape. Building up thin layers over time will give the best results, as show in the above centre image.
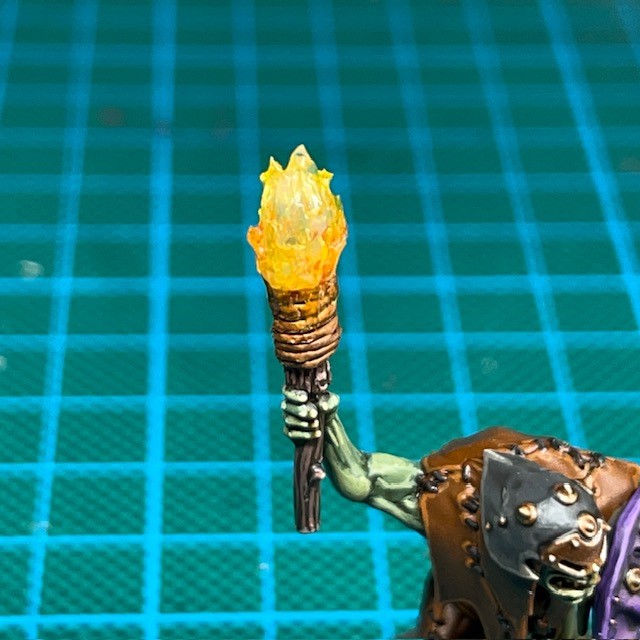
9. Once you are happy with the shape and the gel has completely dried, you can paint the flames. You only need to apply a light glaze – this will not inhibit the light of the LED and will also make the model look good when the LED is switched off. First apply a shade of Citadel Fuegan Orange to the lower third of the flames. Once this has dried apply a layer of Citadel Imperial Fist Contrast thinned down with water to a glaze consistency.
Painting

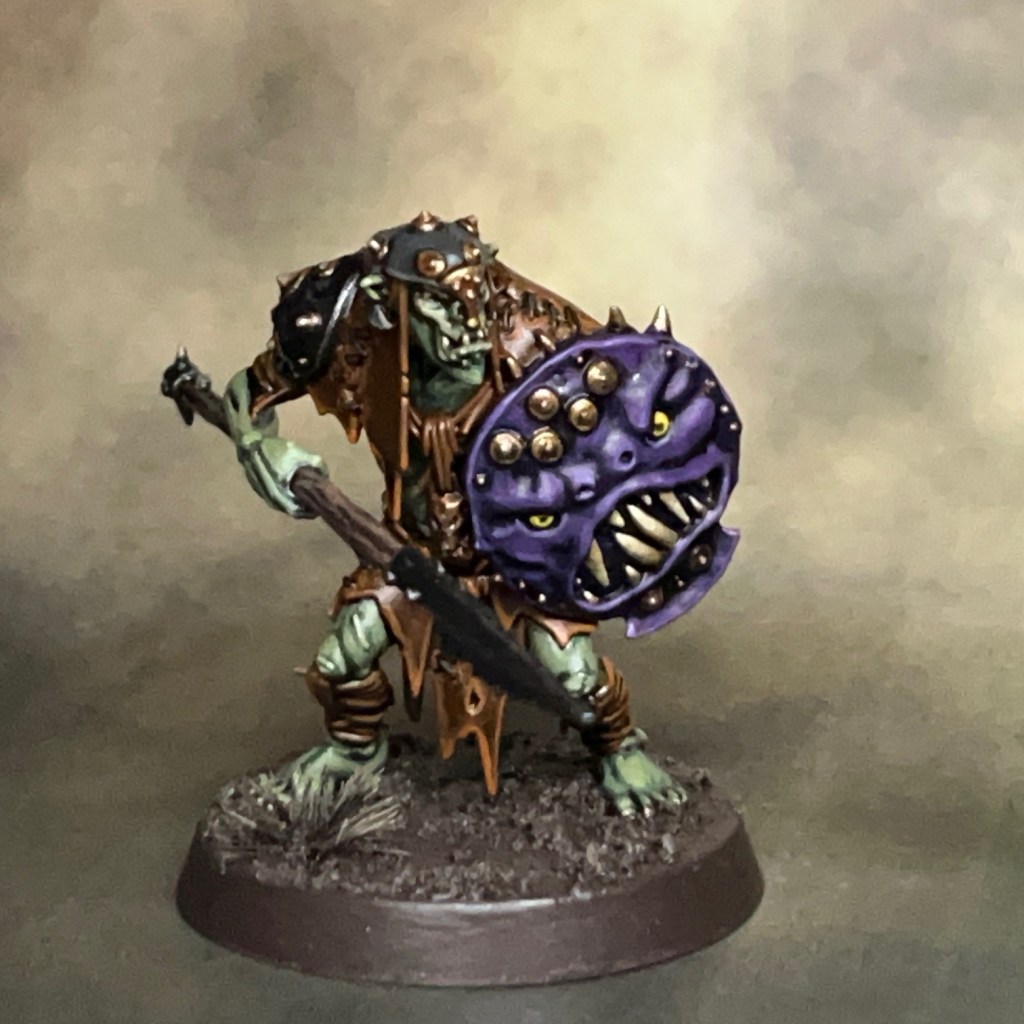

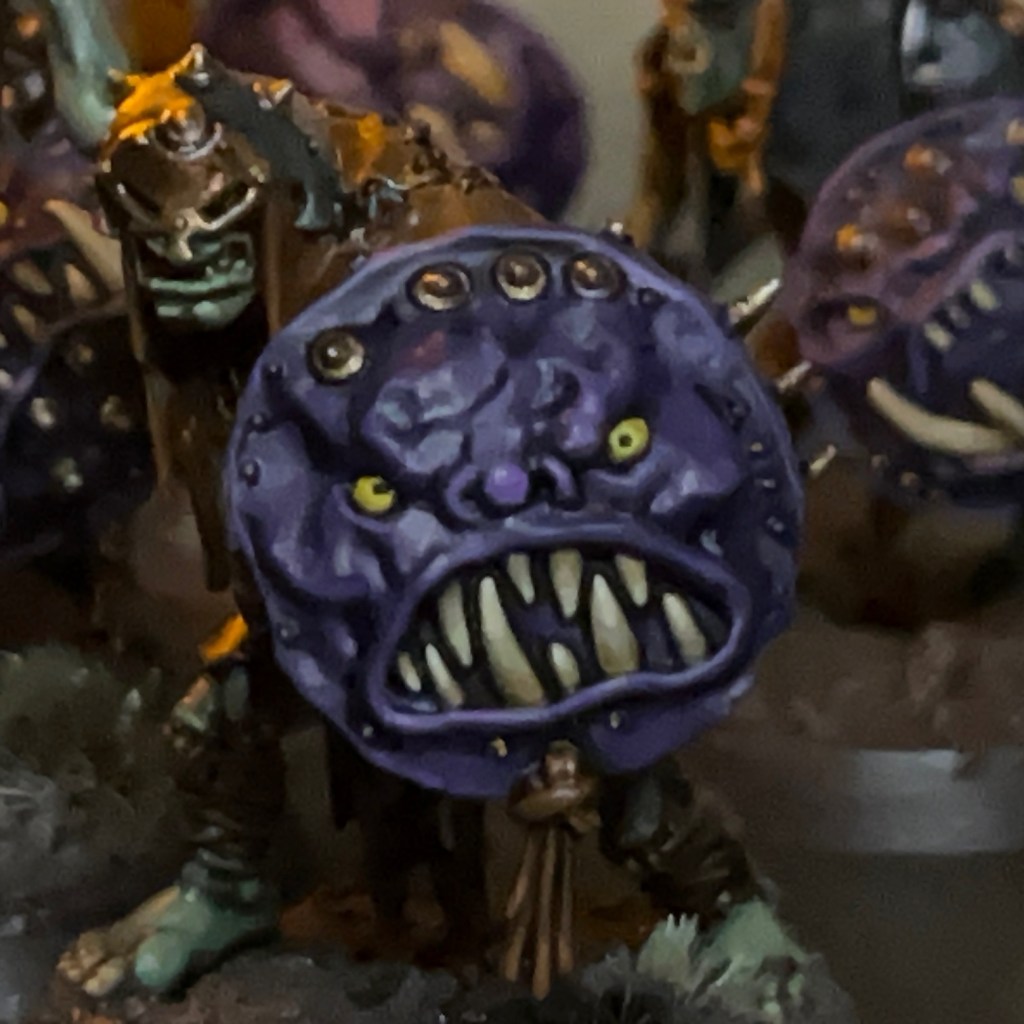
The troggoths that haunt the swamps of the Tallowlands are giant, purple-skinned brutes with great ivory tusks and beady yellow eyes. The Kruleboyz take great delight in terrifying the decent, hard working folk of the Tallowlands by fashioning their shields into leering purple faces and emerging shouting and yelling from the boggy mists to rampage through the villages built on the edge of the swamps.
Excerpt from ‘My Travels in the Tallowlands’ by renowned bard Jonathan Allen Bow.
I’ve opted for a primitive look with the Kruleboyz; leather armour, troggoth hide shields, black iron for weapons and armour, and bronze for other tools and trinkets. I was trying to give the impression of barbarian raiders emerging from their hidden villages in the swamps, rather than a well-equipped and well-supplied professional army.
I don’t normally paint in sub-assemblies, mostly because LED projects usually require the whole miniature to be assembled before painting begins. However, if I have one tip for painting the Gutrippaz, it’s to keep the shield arms separate, as this makes it a lot easier to get at all the detail.
Below are the paint recipes for my Kruleboyz project. All paints listed are from the Citadel range and are applied over an undercoat of Halfords Primer Grey (a Citadel alternative would be Grey Seer.)
- Kruleboy Flesh
- Waaagh Flesh base coat
- Agrax Earthshade shade
- 50:50 Waagh Flesh:Straken Green layer
- Straken Green layer
- 50:50 Straken Green:Nurgling Green highlight
- Nurgling Green fine highlight
- Leather Armour
- Mournfang Brown base coat
- Agrax Earthshade shade
- Skrag Brown highlight
- 50:50 Skrag Brown:Trollslayer Orange fine highlight
- Stitching
- Abaddon Black base coat
- Eshin Grey highlight
- Hoods & Cowls
- Skavenblight Dinge base coat
- Nuln Oil shade
- Stormvermin Fur highlight
- Karak Stone dot highlight
- Wood, Wooden Tools & Corks
- Dryad Bark base coat
- Agrax Earthshade shade
- Gorthor Brown highlight
- Baneblade Brown fine highlight
- Black Iron
- Abaddon Black base coat
- Nuln Oil shade
- Ironbreaker edge highlight
- Bronze Tools & Trinkets
- Balthasar Gold base coat
- Agrax Earthshade shade
- Liberator Gold highlight
- Runefang Steel fine highlight
- Purple Shields & Troll Skin
- Naggaroth Night base coat
- Druchii Violet shade
- 50:50 Naggaroth Night:Xereus Purple layer
- Xereus Purple layer
- 50:50 Xereus Purple:Genestealer Purple highlight
- Genestealer Purple fine highlight
- Yellow Eyes
- Averland Sunset base coat
- Agrax Earthshade shade
- Yriel Yellow layer
- Abaddon Black pupils
- Teeth & Claws
- Zandri Dust base coat
- Seraphim Sepia shade
- Ushabti Bone highlight
- Screaming Skull fine highlight
- Mossy Bone
- Zandri Dust base coat
- Athonian Camoshade shade
- Karak Stone layer
- 50:50 Karak Stone:Ushabti Bone highlight
- Ushabti Bone hightlight
- Muddy Base
- Rhinox Hide base coat
- Stirland Mud layer
- Agrax Earthshade Gloss shade
- Gothor Brown drybrush
- Karak Stone drybrush
- Rushes & Cattails
- Deepkin Flesh base coat on stem
- Rhinox Hide base coat on flower head
- Athonian Camoshade shade on stem
- Agrax Earthshade shade on flower head
- White Scar highlight on stem
- Doombull Brown hightlight on flower head
- Tuskgor Fur highlight on flower head
- Ancient Ruins
- Mechanicus Standard Grey base coat
- Nuln Oil Shade
- Dawnstone highlight
- Administratum Grey fine highlight
LED Palette
As I’ve mentioned before, I like to limit my LED colour palette for new projects. This is to ensure they don’t look like multi-coloured Christmas decorations when the army is fully assembled on the tabletop. My Kruleboyz will use the following very limited LED colour palette:
- Green for magic and potions.
- Yellow for fire and flaming torches.
As mentioned above, I don’t expect to use a lot of LEDs for this project. They will probably be limited to character models and flaming torches in units.

Future Army Plans
I’m trying not to get too carried away with this project. My first goal will be to finish the rest of the Gutrippaz and the Killaboss that came in the starter set. After that, I may look at the Kruleboyz Vanguard box and aim for my first 1000 points. I don’t want to get too carried away though, as I still have Tyranids and my Flesh Eaters space marines on the go!
That’s all for today. Thanks very much for reading, and please remember you can also find me sharing my work on Instagram, Threads, Twitter/X, Bluesky and Mastodon.
Also, if you have time, please consider voting for me as ‘Best Mini Painter’ in the CRIT Awards! Voting closes on 7th July, so this is your last chance to vote if you intend to but haven’t done so yet.

Pingback: New Year, New(ish) Armies 2025 – Chris Buxey Paints
Pingback: My Miniatures in ‘Petite Properities’ Magazine – Chris Buxey Paints