If a man dedicates his life to good deeds and the welfare of others, he will die unthanked and unremembered. If he exercises his genius bringing misery and death to billions, his name will echo down through the millennia for a hundred lifetimes. Infamy is always more preferable to ignominy.
Fabius Bile
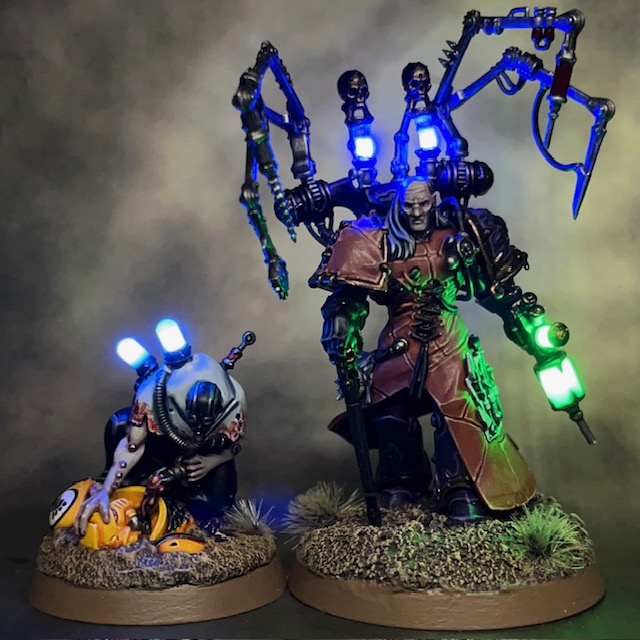
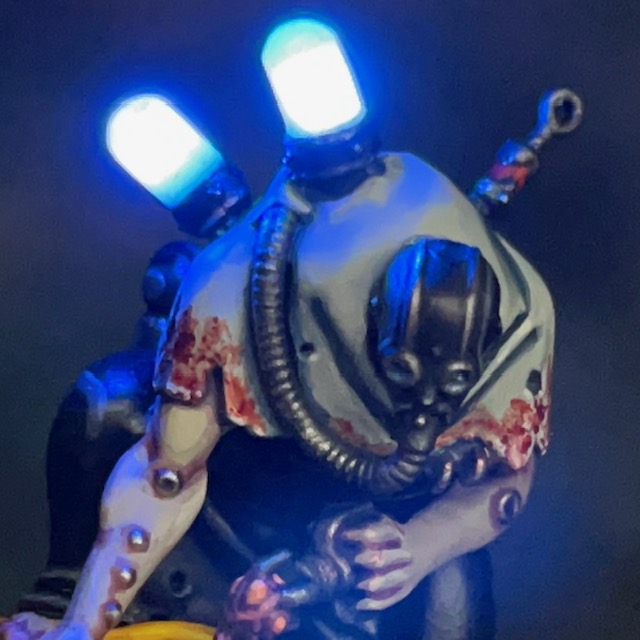
This week I’ve finally finished Fabius Bile, a project that I started in March this year! This is the second part of a (now very overdue) birthday gift ‘commission’ for a friend. The first part was the Surgeon Acolyte, that you can see in an earlier post. Rather than helmet eye lenses, or weapon muzzle flares, the LEDs in these miniatures are being used to represent ominous glowing vials of daemonic ichor and the potent poisons of the Xyclos Needler. My friend, who will shortly be the owner of this miniature, specifically chose the colours for the LEDs.
Modelling
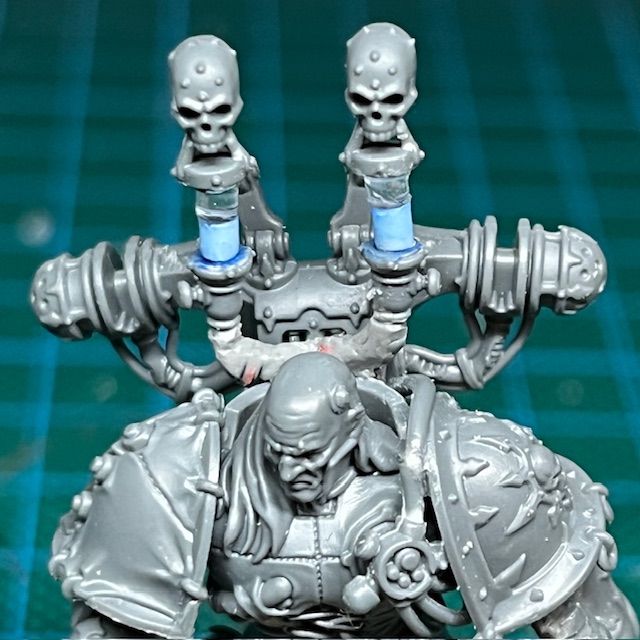
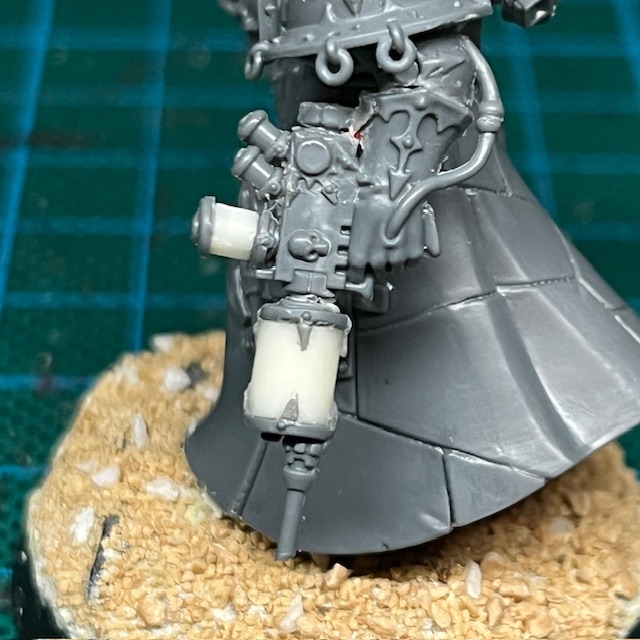
As with many of my LED techniques, I was looking for a uniform glow from the point of interest – in this case the various vials and cylinders. I’ve written a short-form tutorial for how I achieved the glowing vials in my previous post on the Surgeon Acolyte, and I used the same technique for the Needler. The only specific difference worth noting is the shoulder-mounted ichor vials on Bile. The lower halves are made of 2mm resin rod that I cast myself, which conceal the LEDs. The top halves are made from 2mm transparent acrylic rod, to give the effect that the vials are only half full. All the LEDs are 3V 0603 SMD chip LEDs powered by a single coin cell battery and switch in the base of the miniature, as described in my Simple LED Muzzle Flare tutorial.
Painting
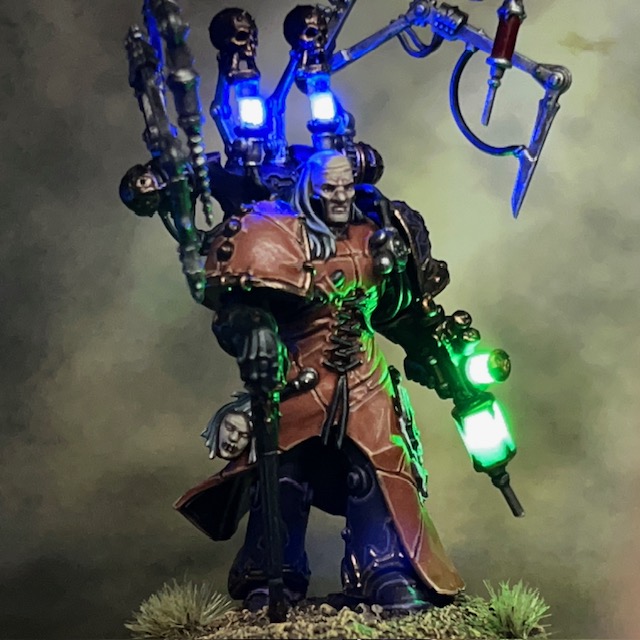
When it came to painting the miniature, I largely stuck to the official colour scheme and the specific paints recommended by the Citadel Colour app, as I didn’t have any good inspiration for an alternative. The only real difference was that I made Bile’s face look quite pale (using Flayed One Flesh and Pallid Wych Flesh), and then made his hair grey rather than white to better frame the face.
So there we go, Fabius Bile is complete and off to his new home. I hope you’ve enjoyed this slightly different project. Thanks very much for reading today’s post, and please remember if you’re on Instagram, Threads, Twitter/X, Bluesky or Mastodon you can also find me posting my work there.
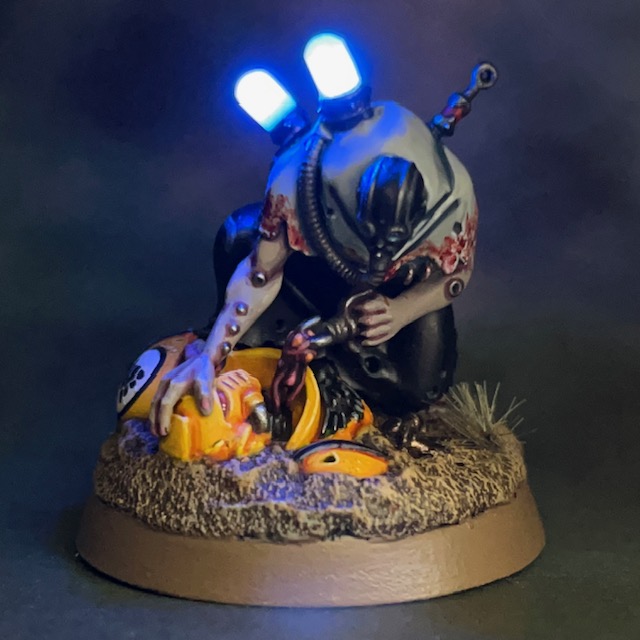
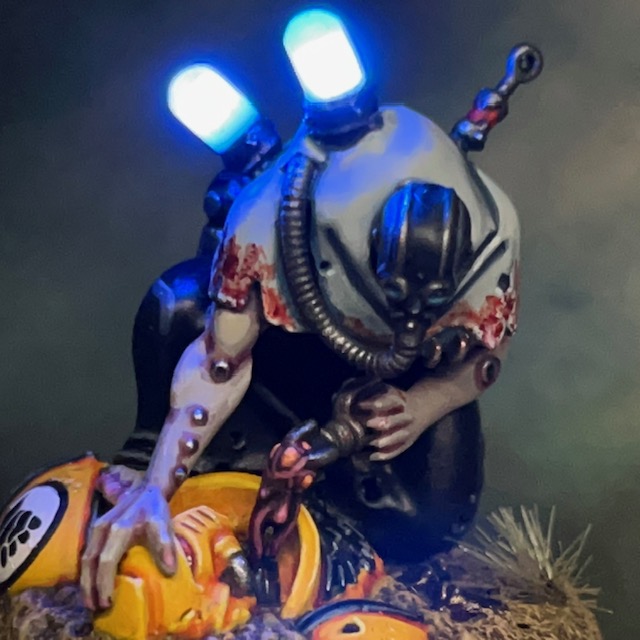
Today we’re looking at the Surgeon Acolyte, minion of Fabius Bile. This isn’t the start of a new army and my fall to Chaos (yet), but part of a birthday gift ‘commission’ for a friend. Fabius Bile himself will be following soon, but I wanted to test the LED technique on the acolyte first. Rather than helmet eye lenses, or weapon muzzle flares, LEDs in this miniature are being used to represent ominous glowing vials of daemonic ichor, super soldier serum, or whatever it is you think are in the glass containers on the acolytes’ back. My friend, who will eventually be the owner of this miniature, specifically chose the blue colour for the LEDs.
Modelling & Painting
As with many of my LED techniques, I was looking for a uniform glow from the point of interest – in this case the ‘vials’. After all, it’s not supposed to be a single point light source that is glowing inside them, but rather every part of the liquid they contain that is emitting a sinister glow. This is why I didn’t simply stick two 3mm round LEDs on the model and call it a day, as in that case all the light would have been coming from one visible point (the p-n junction) in the centre of the LED. I’ve written a short-form tutorial for how I achieved the glowing vials below.
I began by cutting off the plastic vials from the back of the model and inserting two 3V blue SMD chip LEDs in their place. These are connected to a battery in the base following the principles set out in my Simple LED Muzzle Flare tutorial.
Next I coiled the excess LED wire on top of the battery holder and filled in the gaps between the dead space marine and the base with modelling putty. It’s good practice to test the LEDs repeatedly at this stage, just to check you haven’t created an accidental short circuit while hiding the wire.
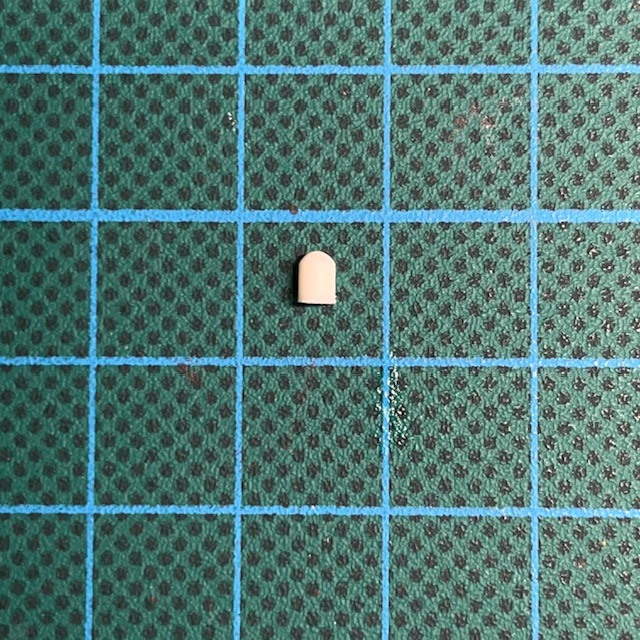
I then cut the rod to the same length as the plastic vials that were originally on the miniature. I used a combination of needle file and sand paper to round off one end, to more closely match the shape of the original vial. The other end was left flat.
The next step was to drill a 1.5mm hole in the centre of the resin rod starting at the flat end, being very careful not to drill all the way through to the rounded end.
I made sure the miniature was base coated at this point, especially around the areas where the resin vials would be attached. I knew it would be easier to glue them to a painted area rather than trying to paint the area after they were stuck down.
Next I applied a thin ring of PVA glue to the flat end of the rod, and stuck it in place over the chip LED. I used PVA rather than super glue to help avoid any accidental frosting effects.
Once the PVA glue had dried, I applied a thin blue glaze to the bare resin to give a pleasing tint to the resin when the LED is switched off.
When it came to painting the miniature, I largely stuck to the official colour scheme as I didn’t have any good inspiration for an alternative. I’ve noted a few of the colour recipes below, in case anyone is interested in replicating them, and as a reminder to myself. The model was undercoated with Chaos Black spray, and all colours mentioned are Citadel, unless otherwise noted.
Sickly Flesh
Rakarth Flesh basecoat
Carroburg Crimson shade
Rakarth Flesh thin layer
50:50 Pallid Wych Flesh:Rakarth Flesh highlight
Pallid Wych Flesh fine highlight
Emperor’s Children Pink dots on finger and toe nails
Bloodstained Surgical Gown
Russ Grey basecoat
Drakenhof Nightshade shade
50:50 Russ Grey:Ulthuan Grey layer
Ulthuan Grey layer
50:50 Contrast Apothecary White:water shade
Skull White highlight
Khorne Red applied with sponge as ‘blood splatter’
Blood for the Blood God technical paint layered over Khorne Red areas
Black Rubber
Abaddon Black basecoat
Eshin Grey highlight
Dawnstone fine highlight
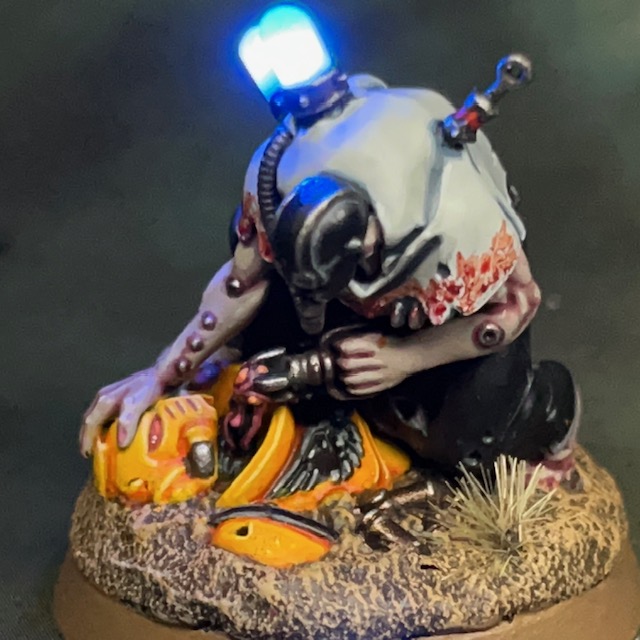
I gave my friend the choice of chapter for the space marine casualty, and he chose Imperial Fists. I think this was a good call as it’s a visually striking choice, plus I have a lot of experience painting yellow power armour. I used my Yellow Armour recipe found in this blog post. I may have actually spent more time painting the space marine than I did the rest of the model!
So there we have it, the Surgeon Acolyte is finished and ready to assist the big man himself! I’ll be back again soon with Fabius Bile, as well as plenty of other LED miniatures. As always, thanks very much for reading, and please don’t forget you can also follow my work on social media at Twitter, Mastodon and Instagram.