
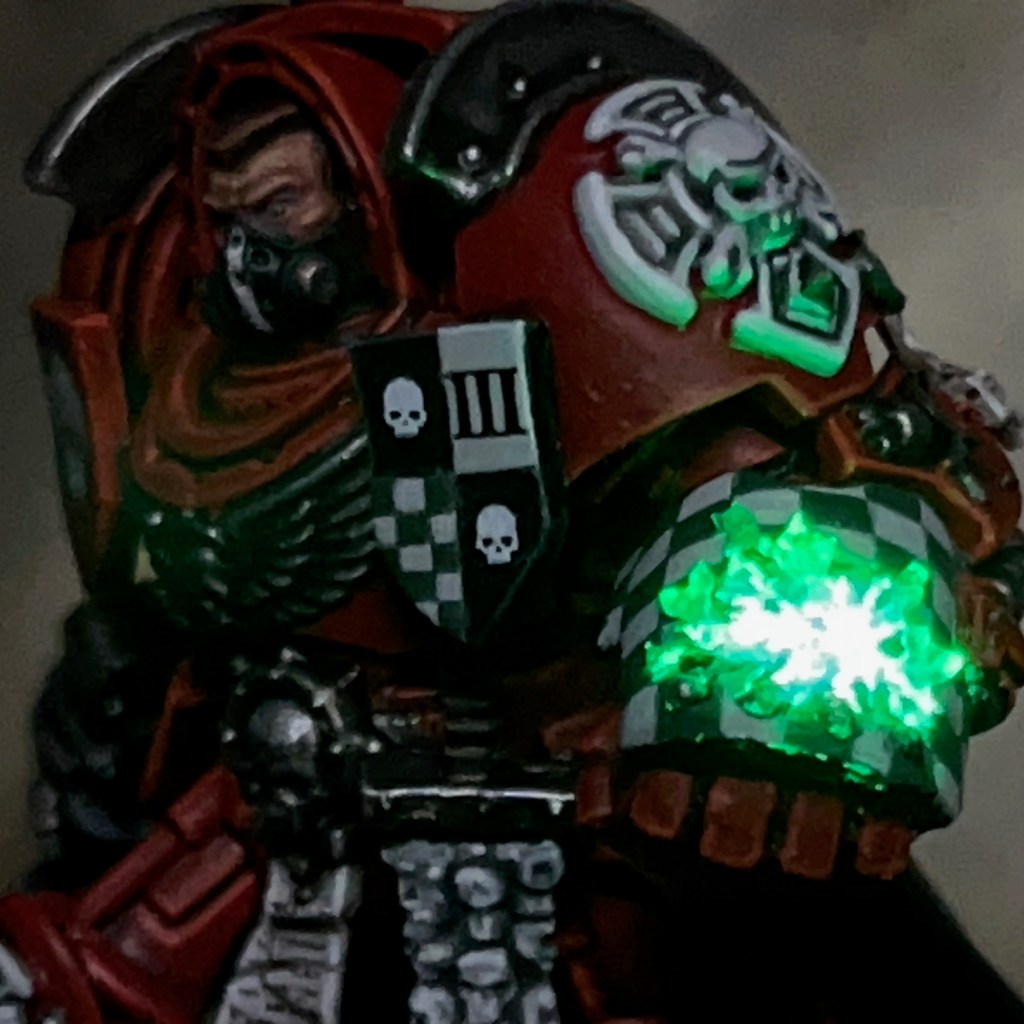
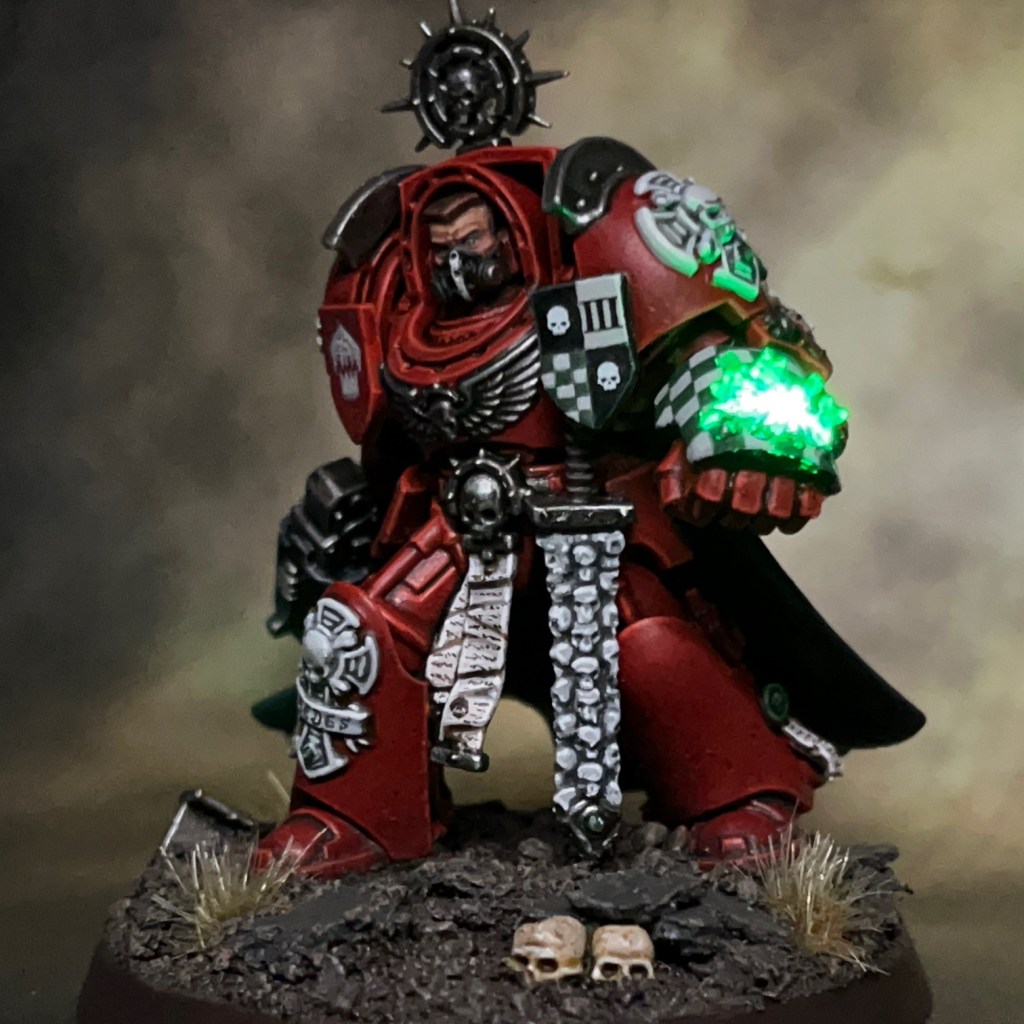
This is my tutorial for LED effect power fists, using light to create a ‘disruption field’ effect. The photos show this technique applied to a Space Marine Terminator, but it can equally be applied to any other miniatures equipped with power fists, power mauls, thunder hammers, or other similar weapons. This tutorial is new for August 2024.
I strongly recommend reading through the entire tutorial before starting work, just to make sure you have the necessary skills and tools required and that you’re not going to run into an unexpected barrier halfway through. If you need to know where to buy tools and consumables for this type of project, I have recommendations here.
I have separate tutorials about designing LED circuits, basic LED soldering, resin casting and LED eye lenses. This tutorial assumes you’ve either read these, or are familiar with the techniques discussed, especially the eye lens tutorial, which is a starting point this tutorial builds from.
1. Prepare Miniature and Base
First, complete steps 1 – 4 of my LED eye lens tutorial to assemble the base and battery holder of the miniature. Also complete step 5 of the LED eye lens tutorial, but instead of using a resistor to connect the switch to the positive battery holder terminal, use a short length of wire.
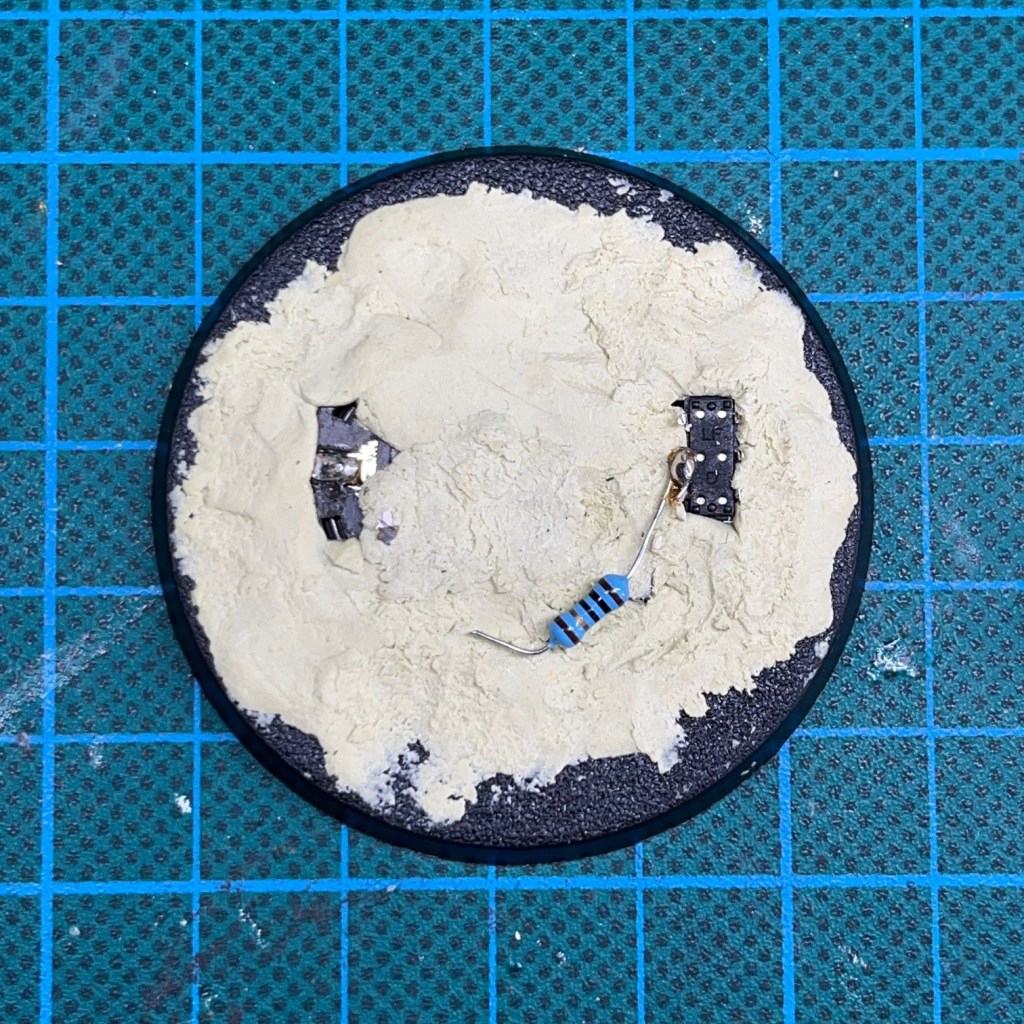
Once you have done that, use modelling putty to fix the battery holder to the base, as this is easier than gluing. Milliput is ideal, and cheaper than Green Stuff or Procreate for this application. Don’t cover the battery holder negative terminal or the connections on the switch at this point. Also remember we are not covering the bottom of the base with putty, as you want to leave the battery accessible from underneath so you can change it when it runs out. Once the putty is in place, it’s worth gently pushing the base down onto a flat surface to ensure the battery and switch are still flush with the bottom of the base. If you don’t check this, then the base may be wonky when the putty dries.

Once the Milliput has hardened (this may take several hours), you will need to add a resistor. The resistor is an important part of the LED circuit as it protects the LED from excessive currents and increases its working lifetime. The resistor I am using for this miniature is a 10 ohm (¼W) as that is what the LED I’m using will need (resistors can be purchased here). As you can see in the image below, I’ve soldered it to one of the central legs of the switch. The other end of the resistor remains unconnected for the moment.
2. Select And Prepare LED
If you are duplicating my model exactly, then the green LED that I’m using in this tutorial is the TruOpto OSPG7331A-KL 1.8mm Green LED, but blue, red, yellow, pink and white are also available. Whichever type of LED you are using, make sure they are compatible with the the voltage of your battery – 3V in the case of the coin cells used here – and that you are using the correct value of resistor. If in doubt, consulting my circuit design tutorial.
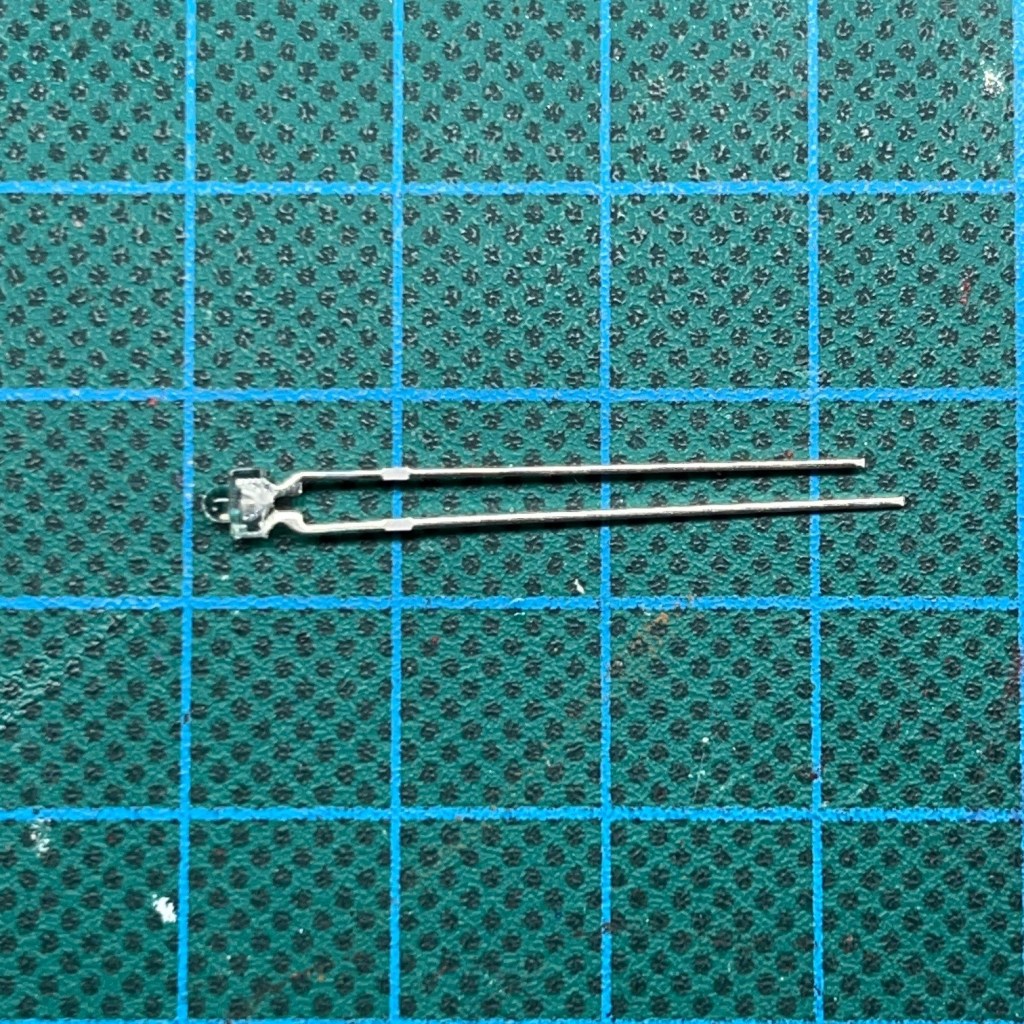
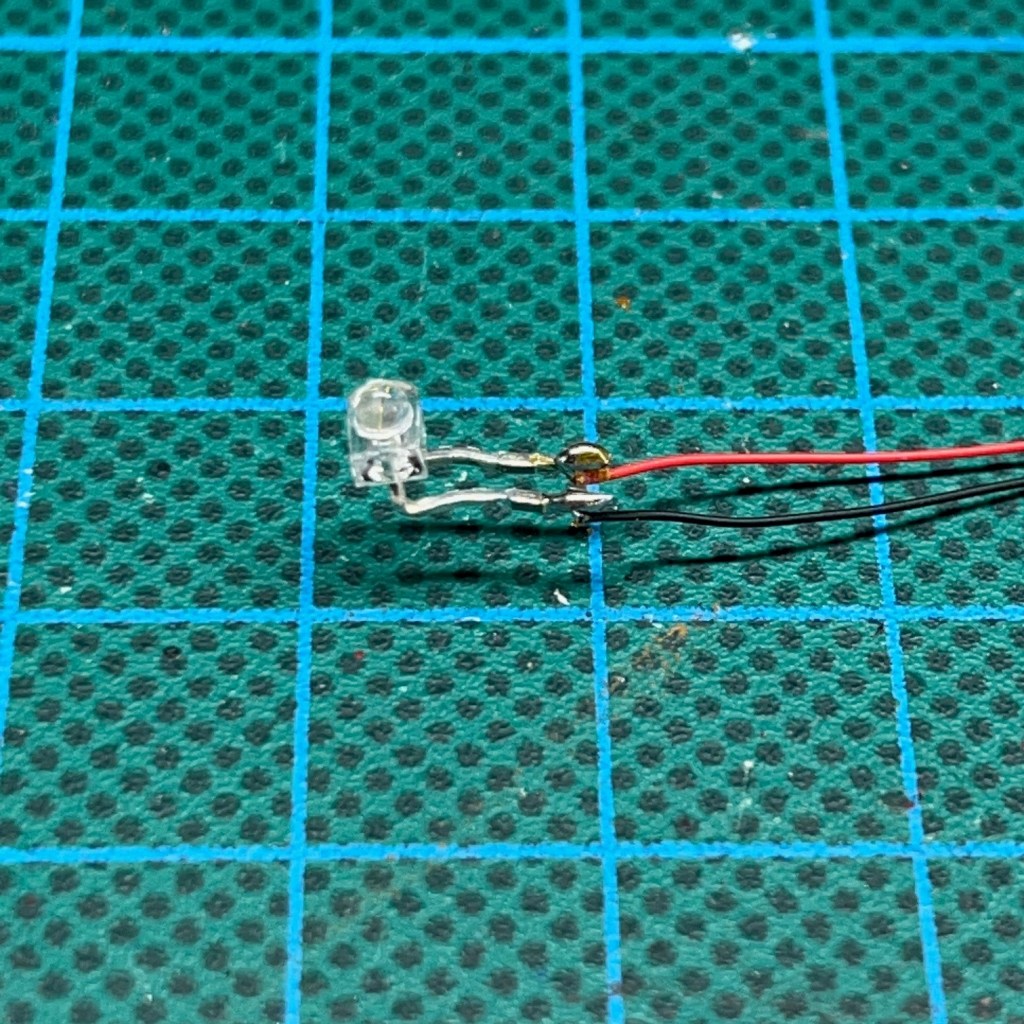
Trim the legs of the LED so they are a approximately 10mm long. Before you do, double check you know which leg of the LED is positive and which is negative. Remember, the longer LED leg is always the positive (a.k.a the anode). Now solder an insulated wire to each leg. You will need approximately 100mm of wire for each leg. It’s good practice to use red wire for the positive connection and black wire for the negative connection on the LED (insulated wire can be purchased here).
Once you have soldered the wires, use a pair of tweezers to bend the head of the LED to a 90° right angle with the legs, as shown in the image below.
3. Drill Through Power Fist And Arm
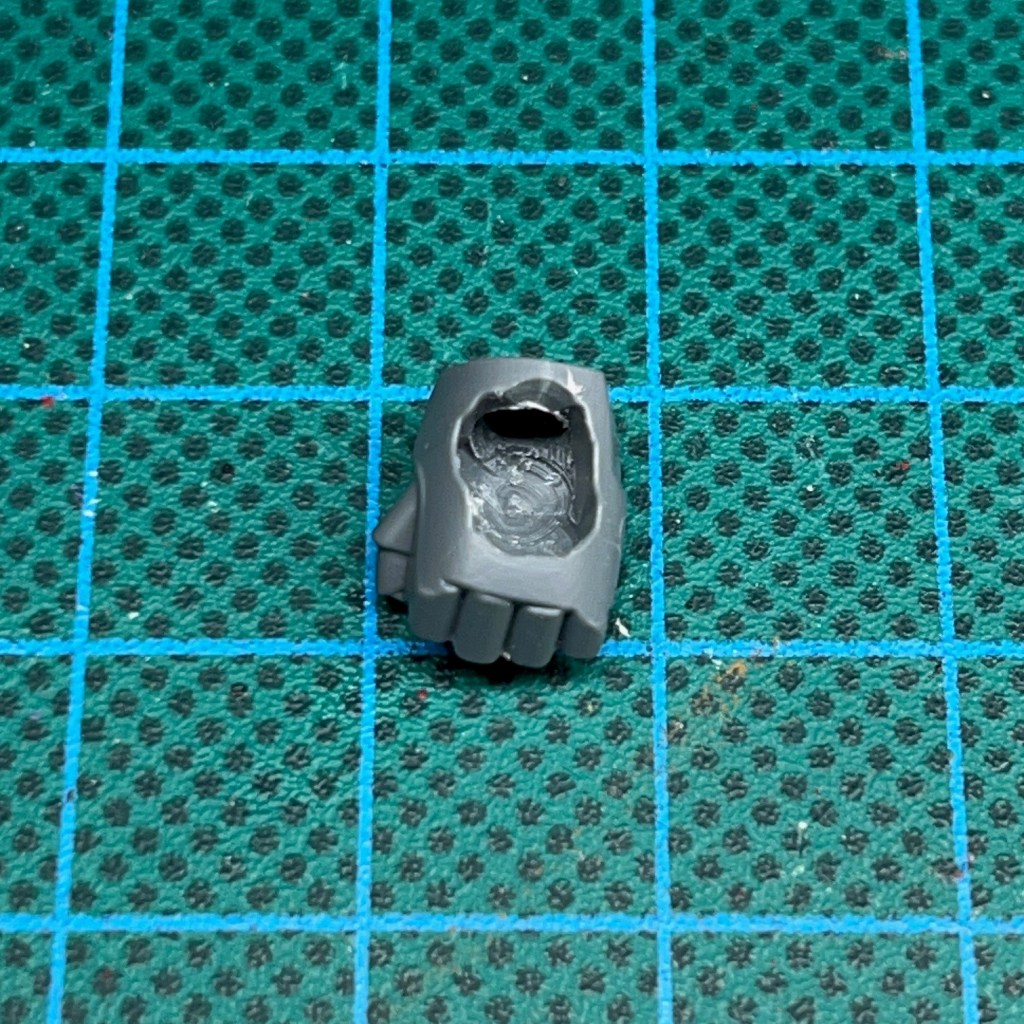
Now you need to drill a hole through the wrist of the power fist and through the arm. You’ll need a fine drill bit for this. A 2mm drill was used to drill the holes show below. This is to allow the wires of the LED to pass from the power fist and into the arm of the model, and then ultimately into the torso and the base.
At the time of writing, the latest Space Marine Terminator power fists are hollow and can accommodate LEDs without too much modification. You may find you need to use a drill or craft knife to make the hole very slightly larger.
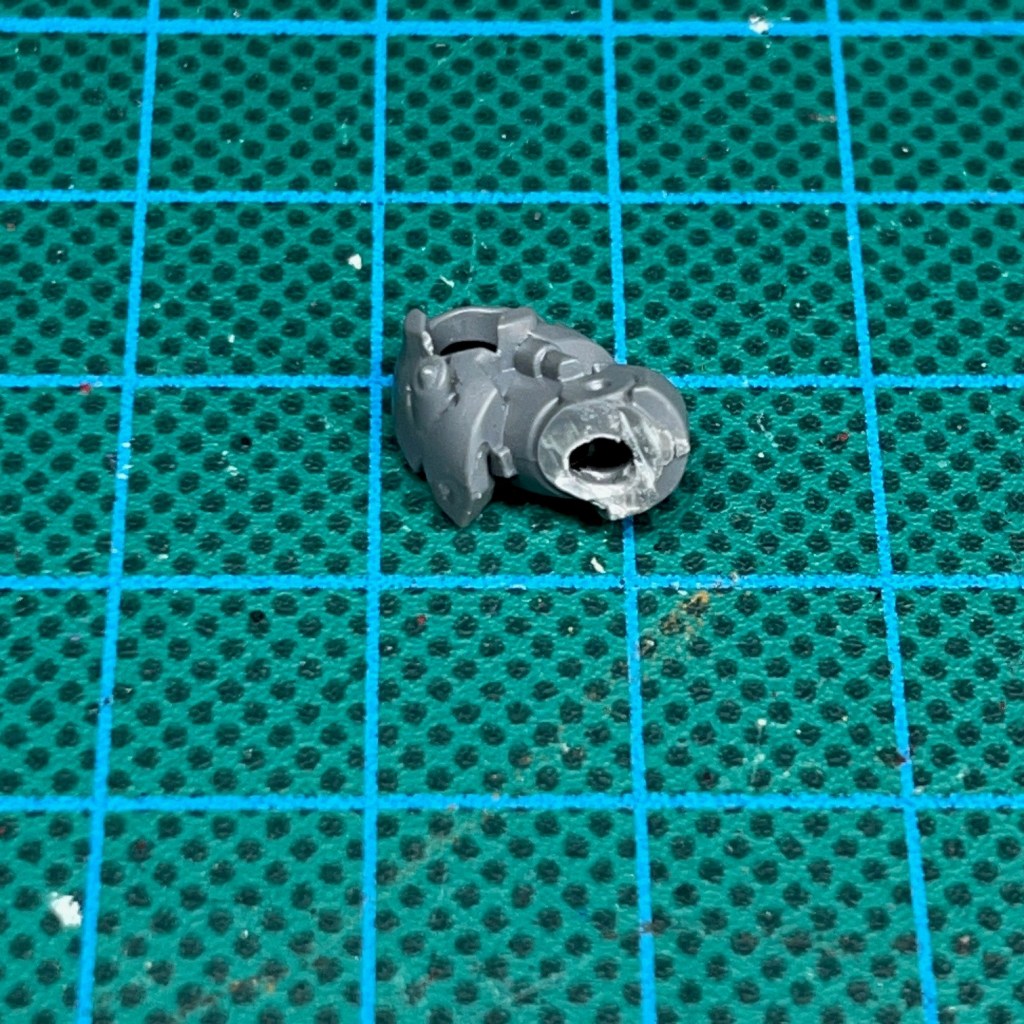
4. Drill Through Torso And Leg
Now drill a hole through the torso and leg of the model and feed the wire through, as shown below. If you are drilling through an arm or leg that is bent, I find the best technique is to drill two separate holes, one from each end, and meet in the middle.

5. Connect LED And Test
The next stage is to solder the LED wires into the circuit. Solder the negative (black) wire to the negative terminal, seen on the top of the image below. Solder the positive (red) wire to the unconnected end of resistor, as seen in the bottom of the image below.
Once you have made the connections, test the circuit by turning on the switch. If the LED illuminates, excellent work, you may now proceed to the next step. If it doesn’t work, this is the point to back-track and start fault finding. Check all connections that you have soldered so far. A digital multi-meter with probes is helpful for this.

6. Assemble Miniature
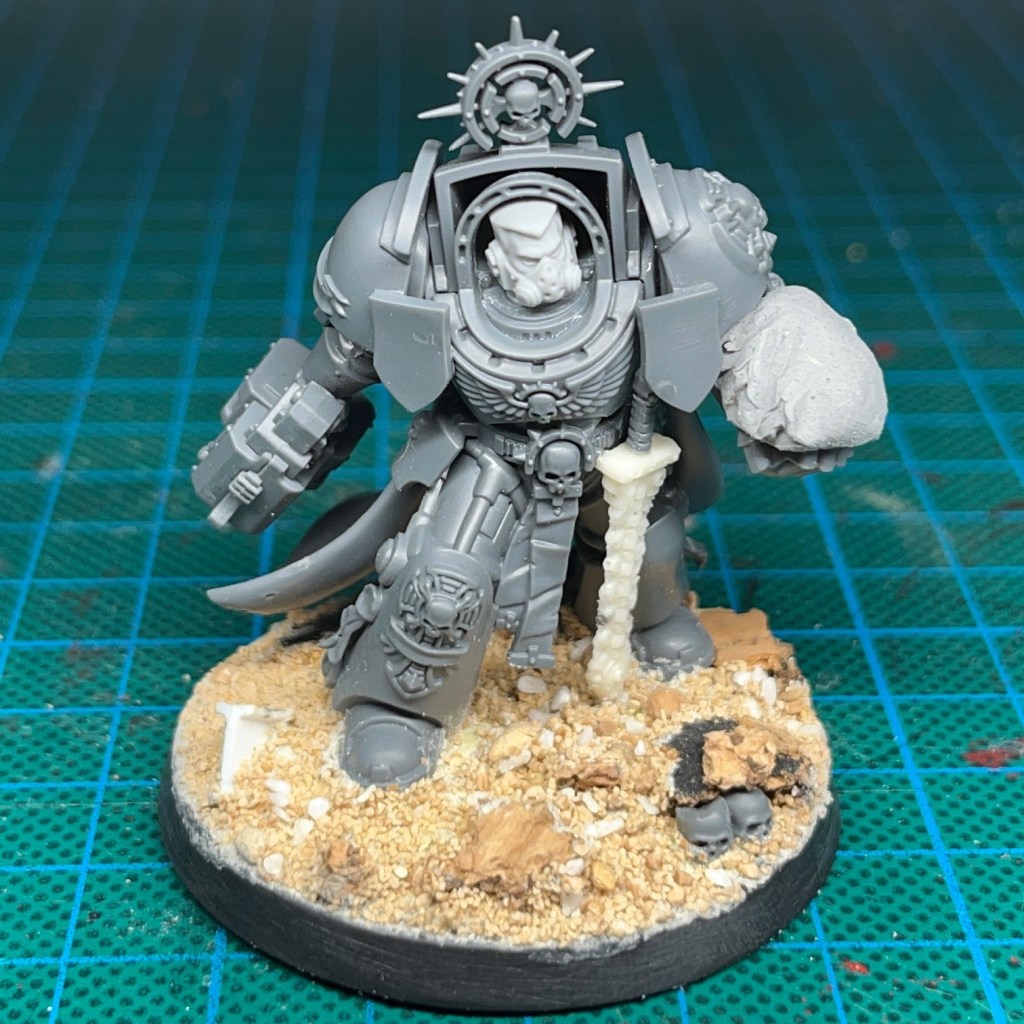
Assemble the rest of the miniature, gluing all the remaining components together. The only item that should not be glued in place is the plastic upper surface of the power fist, keep that to one side for the moment as we will use it later. At this stage the LED should remain exposed, as shown in the image below.
Now attach the finished model to the base. I find the best way to do this is to put two small balls of modelling putty under the model’s feet, press it into the putty so it’s standing up, then wait for the putty to cure and harden before proceeding further. This helps to make sure the model is attached to the base in the correct pose and position before going on to hide the rest of the wires and connections. Any slack in the connecting wire should be curled up under the model on the base.
Test the circuit again at this stage, just to make sure you haven’t accidentally damaged any of the connections.

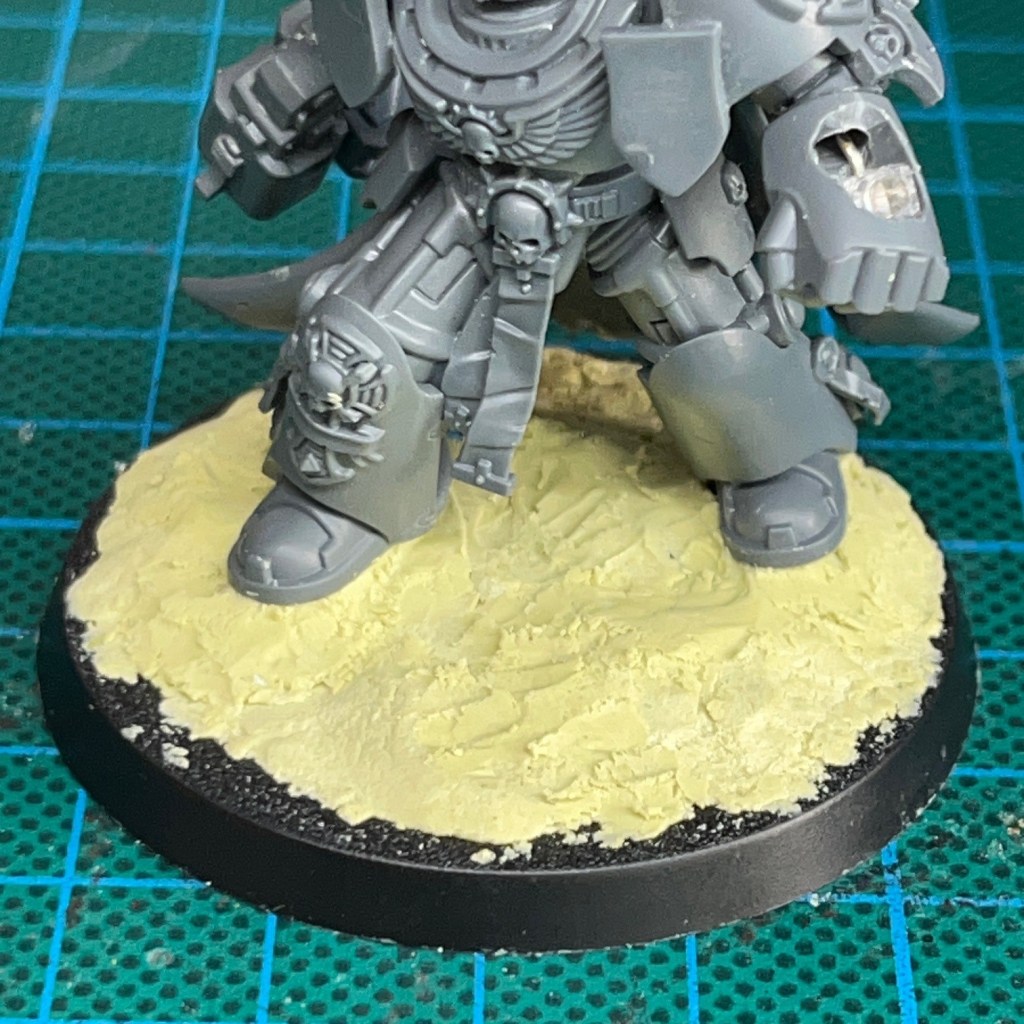
7. Conceal Wires In Base
Once the putty and/or glue applied in the previous stage has dried, you can now hide the battery holder and any spare slack wire under another thin layer of putty or filler. Be sure to not get Milliput on the battery itself, and to leave the sliding part of the switch exposed so you can still operate it. Once the putty covering the battery holder is dry, you can add texture to the base if you wish (e.g. PVA and sand).
8. Resin Cast Power Fist Surface
You will now need to make a polyurethane resin cast of the upper surface of the power fist that you set aside in step 6. If you are uncertain how to do this, please consult my resin casting tutorial. Suggested configurations for the casting ‘sprue’ are shown in the images below.


9. Clean Up Resin Cast
Once you have made the polyurethane resin cast, remove it from the sprue and clean up any rough edges with a file or sandpaper.

10. Attach Resin Cast to Power Fist
Use super glue (cyanoacrylate) to fix the resin cast of the power fist upper surface in place on the top of the power fist covering the LED, as shown in the image below. It’s best to use a small amount of glue around the edge so you don’t get any on the LED.
This is also a good point to fill in any gaps on the miniature with modelling putty, as well as any repairing any casting defects in the resin or accidental damage to the legs and torso that may have occurred during drilling. It can also be handy to turn the LED on at this point and check for any light escaping any gaps around the edge of the power fist. Any large gaps can be filled with putty.

11. Prepare Miniature For Undercoating
The next step is to prepare the miniature for spray undercoating.
During spray undercoating, make sure you cover the resin power fist surface with blu tack (or similar) so that they don’t get spray paint on it! If you are spraying from underneath then you will also want to cover the battery and switch during the spraying process.
You can see the model prepared for spraying in the image below.
12. Undercoat Miniature
Spray undercoat the miniature. Once the undercoat spray has dried, the blu tack can be removed. You may find this easier with a pair of tweezers.

13. Paint Power Fist
Paint the resin surface of the power fist black, excluding any areas where you want the power fist ‘disruption field’ effect to appear, as shown below. These areas that you leave unpainted will be illuminated by the LED. On this miniature, I opted for a lightning-style pattern radiating out from the centre of the LED.

14. Paint Detail On Power Fist
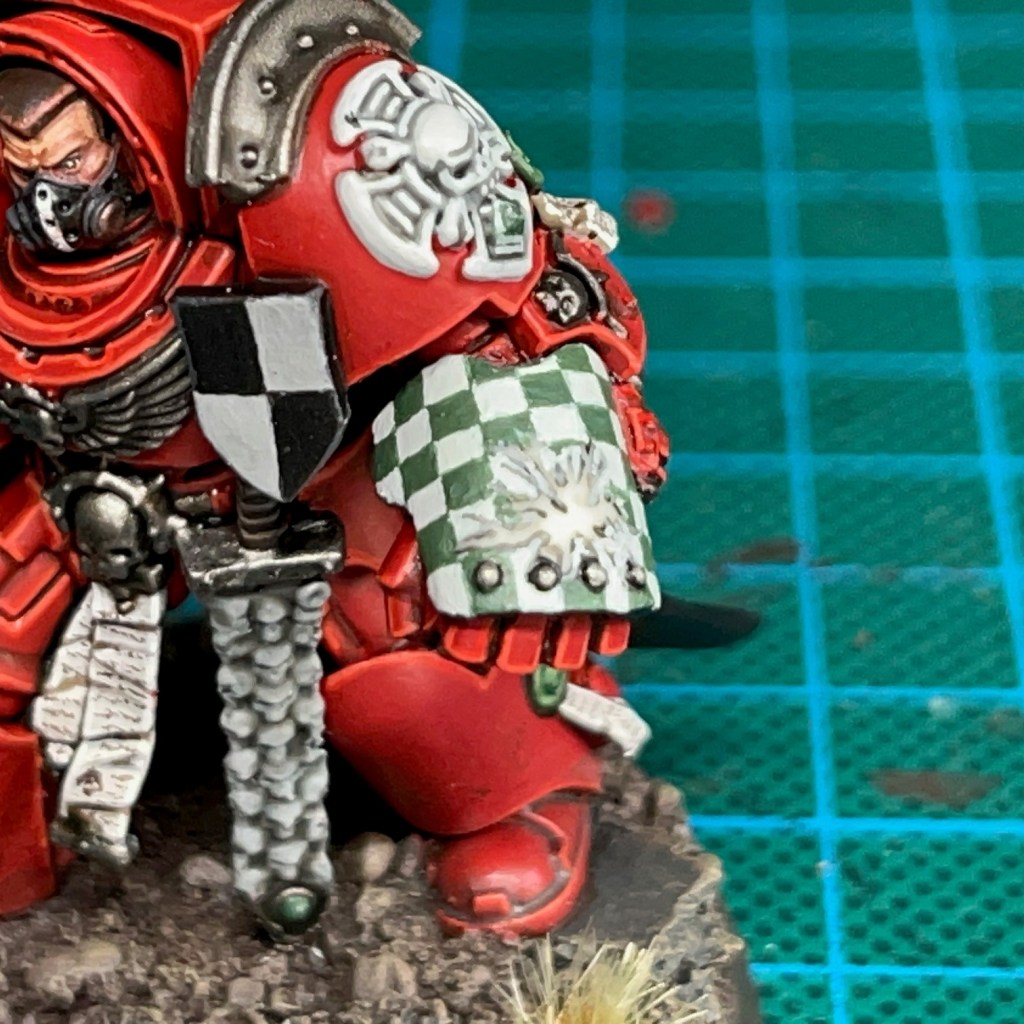
Paint over the black areas with whatever pattern or colour you would like to appear on the areas of the power fist that are not illuminated. For this miniature, I’ve opted for a check pattern.
15. Apply Acrylic Gel
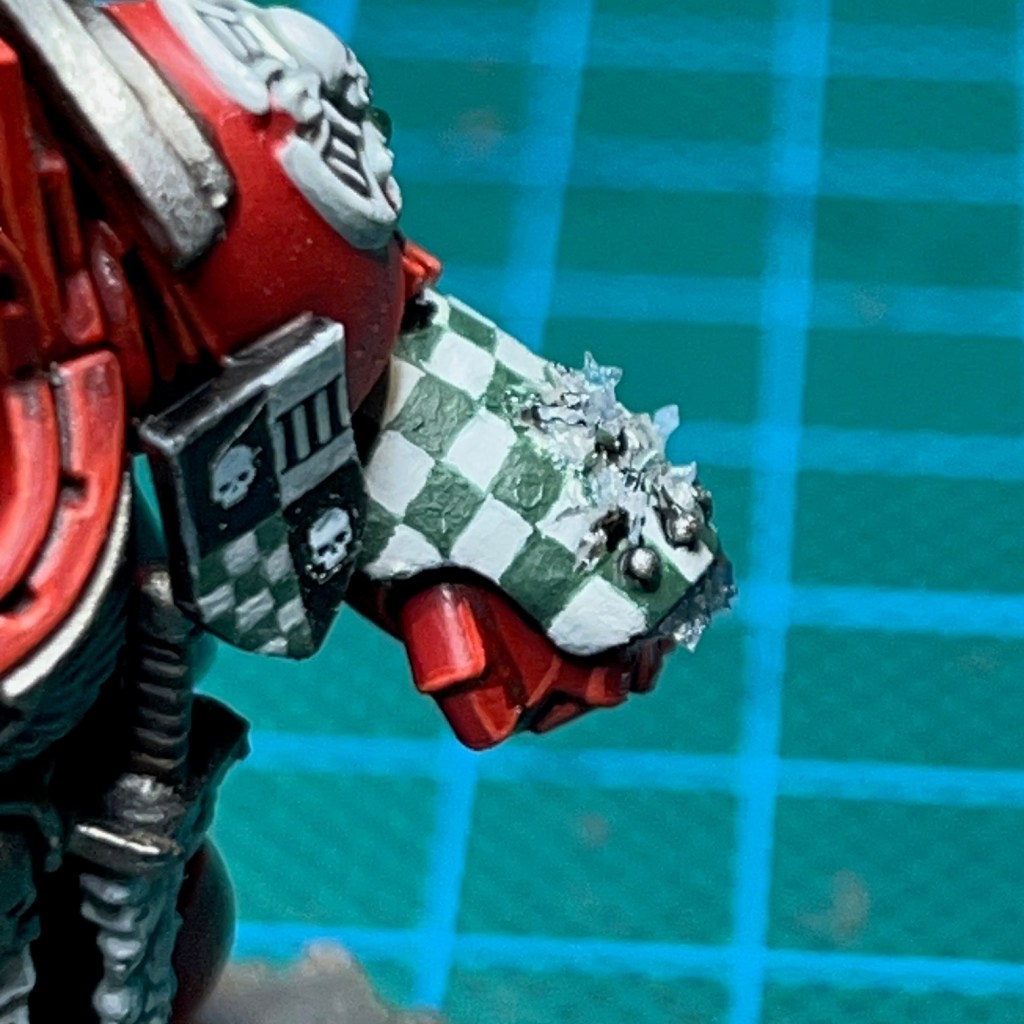
Now begin sculpting the basic shape of the ‘disruption field’ using an acrylic gel. I like to use the Water Splash Effect Gel from Green Stuff World. This is best applied with a metal sculpting tool, thin plastic rod or stiff length of wire. Apply this directly over the bare resin areas on the power fist. When you apply it, the gel will initially appear milky white, but once it is fully dry it will be transparent.
Wait for the initial application of gel to dry (this can take several hours) and then continue to apply successive layers until you are happy with the shape.
16. Paint Acrylic Gel
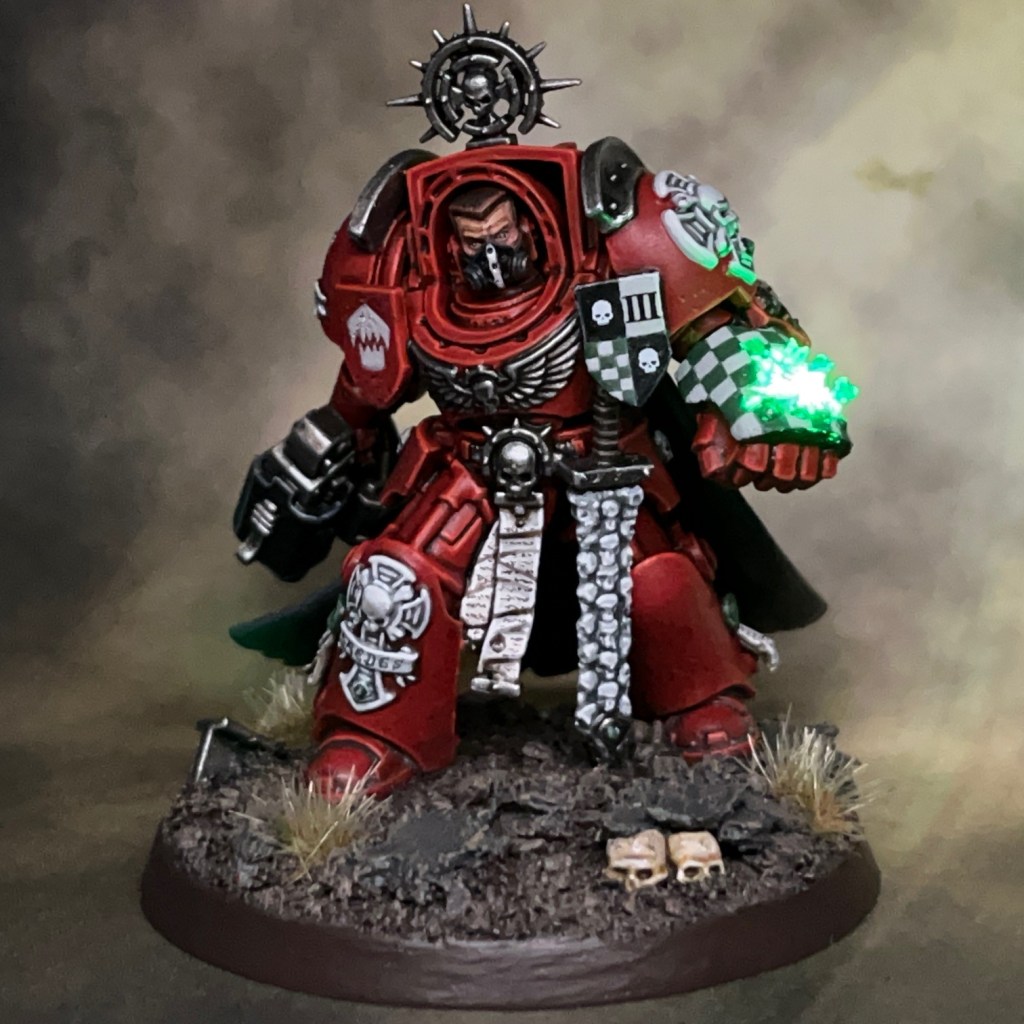
Once you are happy with the final shape and the gel has completely dried, you can paint the ‘disruption field’. You only need to apply a light glaze – this will not inhibit the light of the LED and will also make the model look more visually interesting when the LED is switched off. For this miniature I used a thin glaze of Citadel Biel-Tan Green.

17. Paint The Miniature
Now paint the rest of the miniature to your tastes, taking care to avoid the power fist. And that’s it! If you find the light is leaking through in any area it shouldn’t around the power fist, then an extra coat of paint will normally cover that up. I hope this tutorial was useful! Please do tag me on social media so I can see you finished LED miniatures, or buy me a coffee below!
Enjoyed this tutorial? Buy me a coffee!

All these tutorials are entirely free; the only payment I really need is seeing everyone’s awesome LED armies on the battlefield! Having said that, if you found these tutorials useful and you’d like to buy me a coffee to say thank you (or donate towards the website fees so I can continue to post tutorials on this ad-free website) then please click the button above. Thanks very much in advance!
