
A gentle tapping downstairs in the wee small hours,
A whisper in the empty room that’s never used,
A snapping twig behind you on the lonely road,
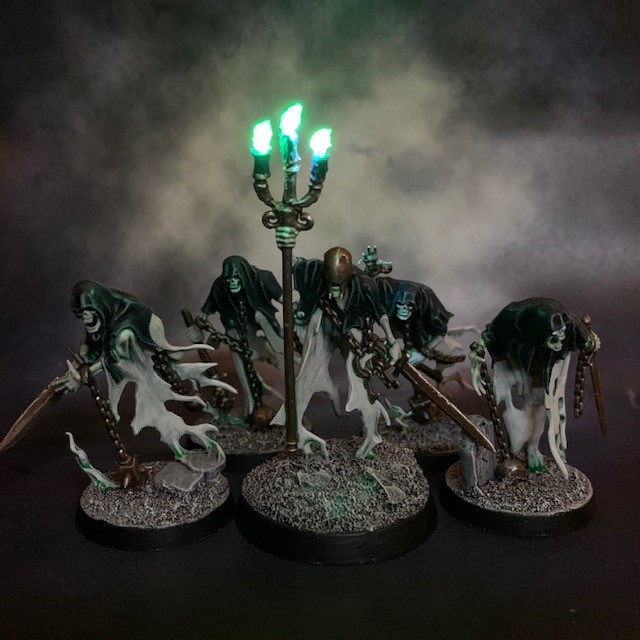
You are never truly alone in the Tallowlands.
These are the first finished models (unless you count Darrakar) for the small Age of Sigmar Nighthaunt force I’m putting together called “The Uncharnel”.
Who are The Uncharnel you ask? Legend tells they were a band of mercenaries who betrayed the Duardin of old. They paid a kin-traitor for knowledge of the secret tunnels and vaults deep below Hollow Mountain and sought to steal the heirloom treasure right out from under the Mountain Folk.
But a traitor’s tongue can be bought twice, and the mercenaries were betrayed. In their wrath, the Duardin collapsed the secret tunnels, burying the avaricious humans alive.
And there they remained for untold ages, as unquiet spirits consumed by greed and a hatred of the living, until the fateful day they were released by the Ghoul King of Hollow Mountain. But that’s a tale for another time…
LED Candles
When it came to LEDs in my Nighthaunt, I knew I didn’t want to have them in every model as I do with my Crimson Fists, mainly because it would be so time consuming! But that doesn’t mean I can’t have a few here and there; in lanterns and candles for example.
So how were the LED candles achieved? I’m not going to do a full tutorial, as most of the process is very similar to existing tutorials. For example, my LED Psykers tutorial covers the essentials of inserting a battery into a bases and running wires up miniature arms, so if you’re new to LEDs and want to give this a try then that is your best starting point. As for the candle flames themselves:
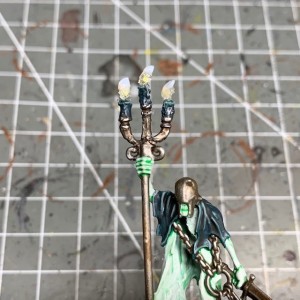
1. I used three 3V White Ultra Nano SMD Chip LEDs (note: ‘white’, not ‘warm white’) available from Small Scale Lights. All three LEDs are connected in parallel to the same battery. The wires are wrapped around the candle holder. The arm was too thin to drill easily so I cut it out and replaced it with the wires, as shown in the picture below. The wires run down to the base along the back of the robes.
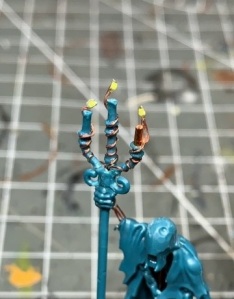
2. Next I built up the candles with modelling putty to hide the wires. I also rebuilt the arm around the wires using modelling putty, and re-sculpted part of the robes to hide the wires running down to the base.

3. Next I applied Water Splash Effect Gel, available from Green Stuff World, to build up a “flame” around the LEDs. You’ll need to apply it in several layers to build up a flame shape. The gel instructions recommend leaving it for 24 hours between applications to allow the previous layer to dry, but for this small amount I found 12 hours was sufficient.
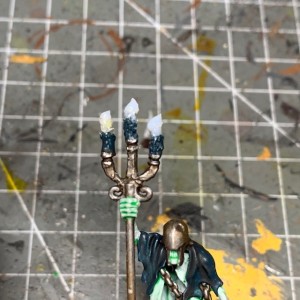
4. Continue to build-up layers of splash effect gel until you are happy with the flame shape.
5. Once the final layer of splash gel has dried, coat each “flame” with Lahmian Medium as a basecoat, then apply two thick coats of Hexwraith Flame technical paint, waiting for each layer of paint to dry. The Hexwraith Flame acts as a filter, making the white light appear green. And yes I do mean thick coats, otherwise it won’t have any effect!
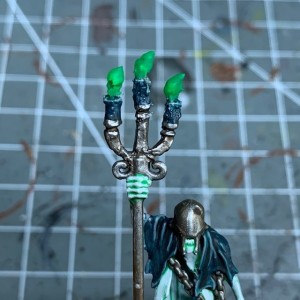
6. That’s all there is to it really. Just make sure you’re happy that the flames look green enough for your tastes when the LED is on. If not, apply as much Hexwraith Flame as required. Just make sure you don’t obscure the LED completely!

Painting
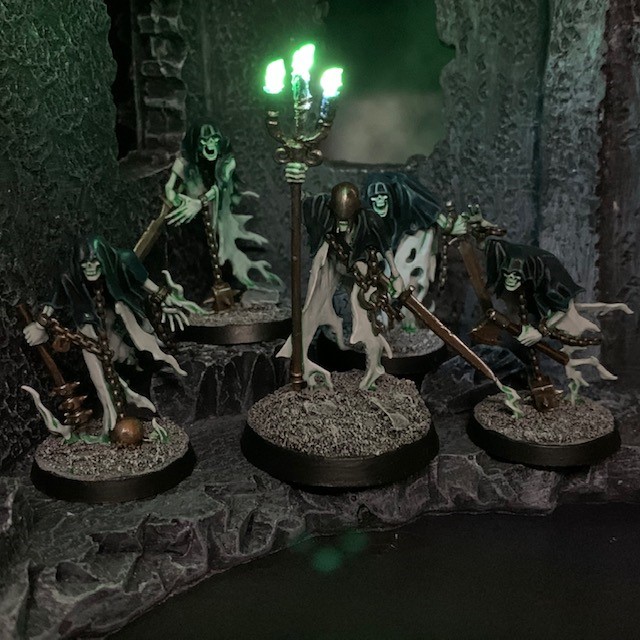
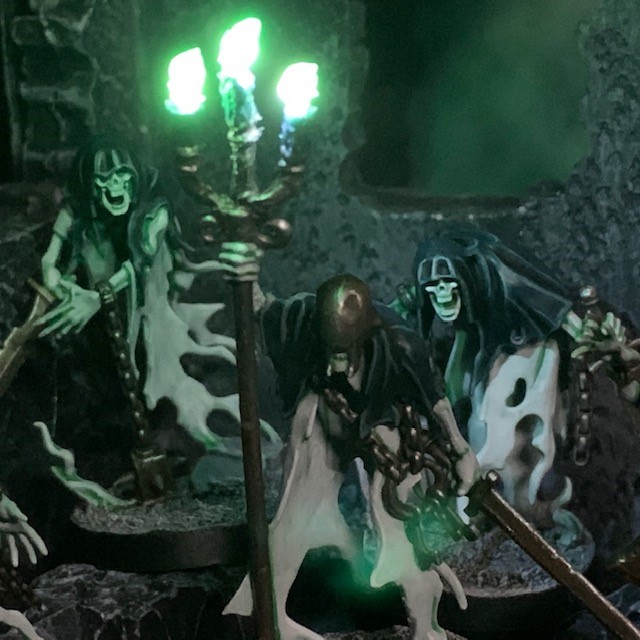
Just in case anyone is interested in the paint scheme I used, it’s closely based on the ‘Classic Style’ paint scheme shared for the Emerald Host in the December 2019 issue of White Dwarf. The ghostly ectoplasm is Grey Seer undercoat > 50:50 Hexwraith Flame:Lahmian Medium > thinned Ulthuan Grey > White Scar highlight.
With the bases, I wanted to give the impression of the ghosts being deep underground, perhaps in a crypt far below the Hollow Mountain (more on that another time). The recipe was Grey Seer undercoat > Basilicanum Grey contrast > Administratum Grey drybrush > White Scar drybrush.
I quite like the effect this creates, almost a ‘static’ or low light ‘night vision’ effect, like the only think you can see clearly is the glowing spectre as it drifts towards you, slowly reaching out a withered hand…
More from the Tallowlands
The Tallowlands is a joint project by my gaming group, the Plastic Crack Rehab Clinic (PCRC) to create our own little narrative corner of the Mortal Realms. If you’d like to read more about the Tallowlands or see some of the other forces being created to inhabit it, you can check out the Tallowlands blog here.

Nicely done with the LED’s.
LikeLiked by 1 person
Pingback: Itchibitz, Skink Starpriest – Chris Buxey Paints
Pingback: Primaris Librarian Geokinetic – Chris Buxey Paints
Pingback: Captain Grimstone, Crimson Fists Primaris Captain – Chris Buxey Paints
Pingback: Terradon Rider Alpha – Chris Buxey Paints
Pingback: Lamenter Heavy with LED Motorised Assault Cannon – Chris Buxey Paints
Pingback: Gron’s Kommando Kill Team – Part 1 – Chris Buxey Paints
Reblogged this on Woehammer.
LikeLiked by 1 person
Pingback: Playing with LEDs | Woehammer
Pingback: Da Red Gobbo’s Surprise – Chris Buxey Paints